

Managing thousands of SKUs shouldn’t mean making thousands of individual manual changes. Product Groups are built for convenience and speed. Whether you’re syncing prices across thirty flavors of yogurt or grouping different barcodes for the same pint of raspberries, Product Groups ensure that when you change one item, you change them all.
What are Product Groups?
Product Groups allow you to link specific attributes of products so they always stay the same. Think of it as a “change once, update everywhere” tool. Common use cases include:- Line Pricing: Ensure all 5.3oz Chobani yogurts are always the same price. If the retail changes for one flavor, Vori updates the entire line.
- Alt Barcodes: You might have multiple barcodes for the exact same product (like different pints of raspberries). Grouping them allows you to treat them as one single entity for pricing, inventory, and reporting.
- Narrower Margins: Create specific target margins for a small group of items that are more granular than your broader Department or Sub-department Templates.
Create a New Product Group
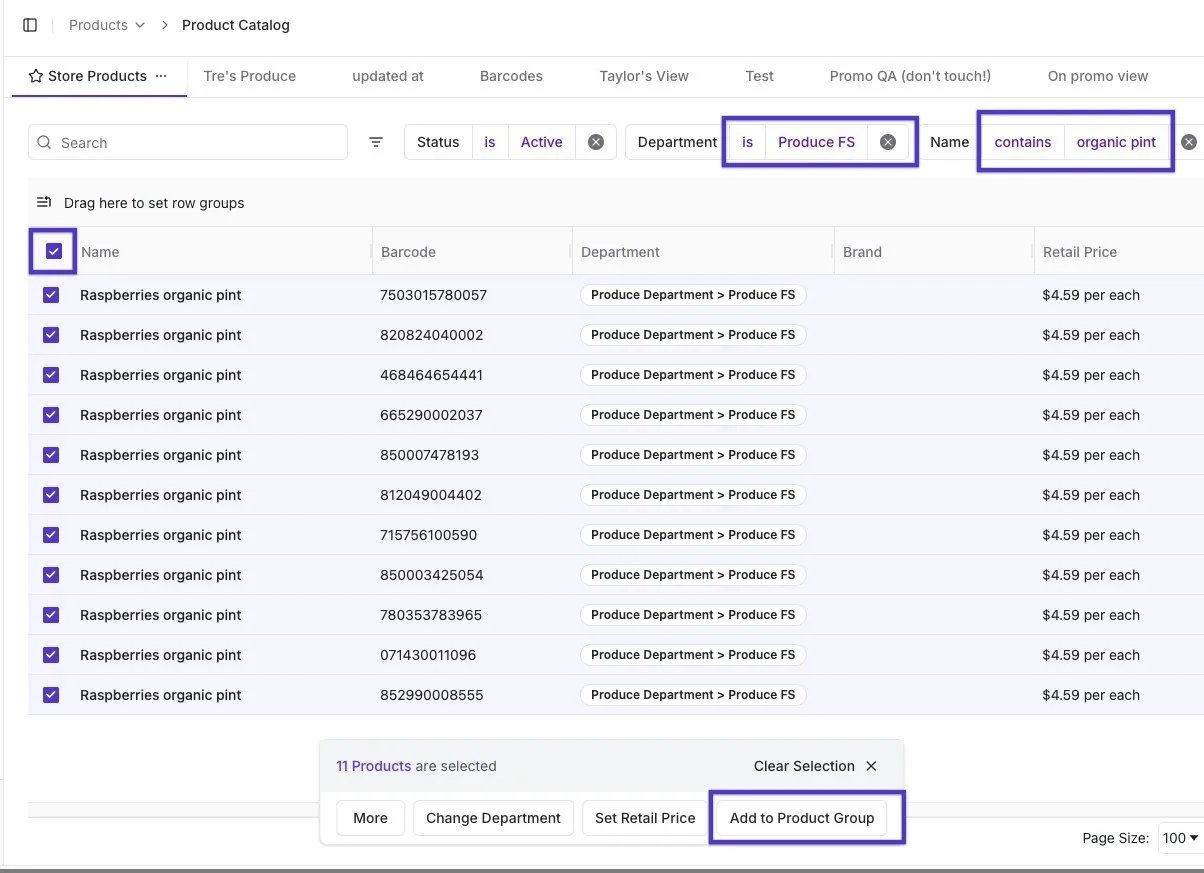
You can build a group straight from the Product Catalog — gathering your “like” items before locking them in — or start one from scratch on the Product Groups page with New Product Group. To build one from the catalog:- Open the Product Catalog from the side navigation.
- Filter your set: Use the search bar or filters to find the products you want (e.g., filter by Brand: Quaker or Department/Sub-department: Produce).
- Select Items: Check the boxes for all items you want to include.
- Click Add to Product Group in the actions bar at the bottom of the screen.
- Name your group (e.g., “Raspberry Pints”), select Create, and click Next to choose what the group keeps in sync.
Linking Properties & Attributes
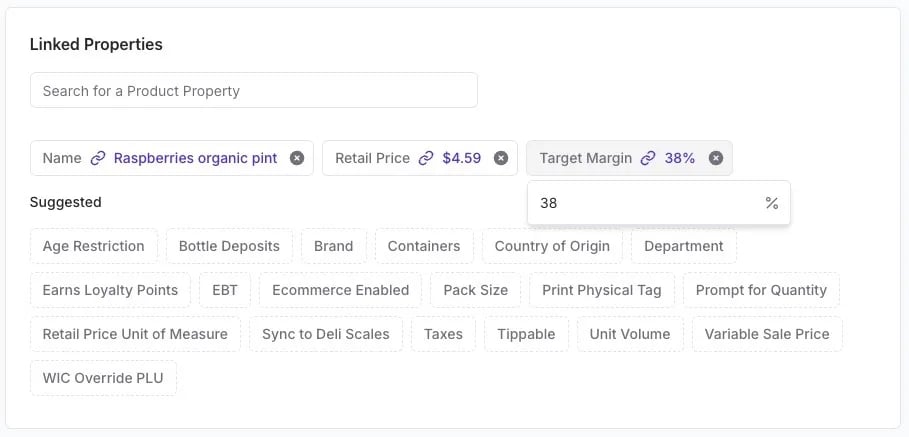
Once the group is created, you decide what information should be shared across the items.- Navigate to the Linked Properties section of the group form.
- Add the attributes you want to stay in sync — pick from the Suggested chips or search for a property (e.g., Retail Price, Target Margin, Brand, Pack Size, or EBT).
- Set the Value: Each linked value fills in automatically from the products already in the group, or you can enter a specific value (like 35% margin) to update all items immediately.
- Click Create Product Group.
Manage Sales & Inventory Reporting
During the Product Group setup, you can choose how Vori tracks these items to make your data more “findable and discoverable.” When creating the product group, you can choose if you’d like the reporting to show as Individual or Individual + Sum for sales reporting or inventory counts.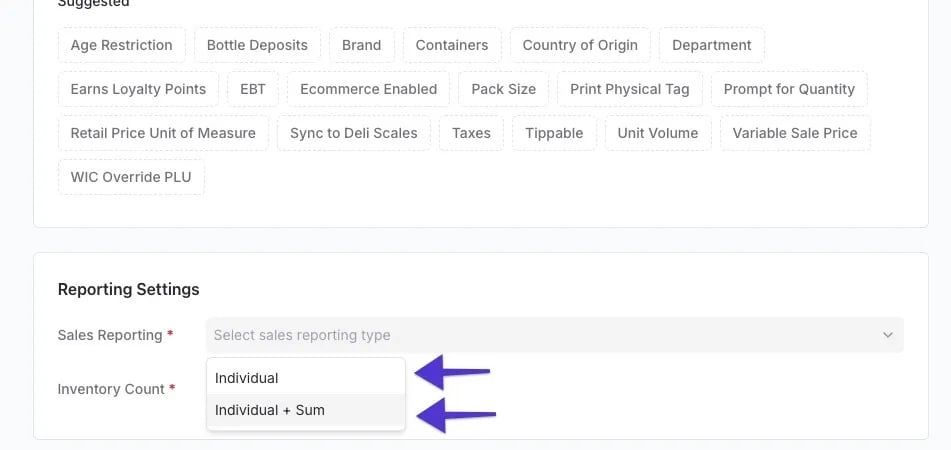
- Sales Reporting: Choose Individual to see flavor-by-flavor data, or Individual + Sum to see the total sales for the entire group. This is ideal for pre-packed fruit where the specific SKU matters less than the total volume sold.
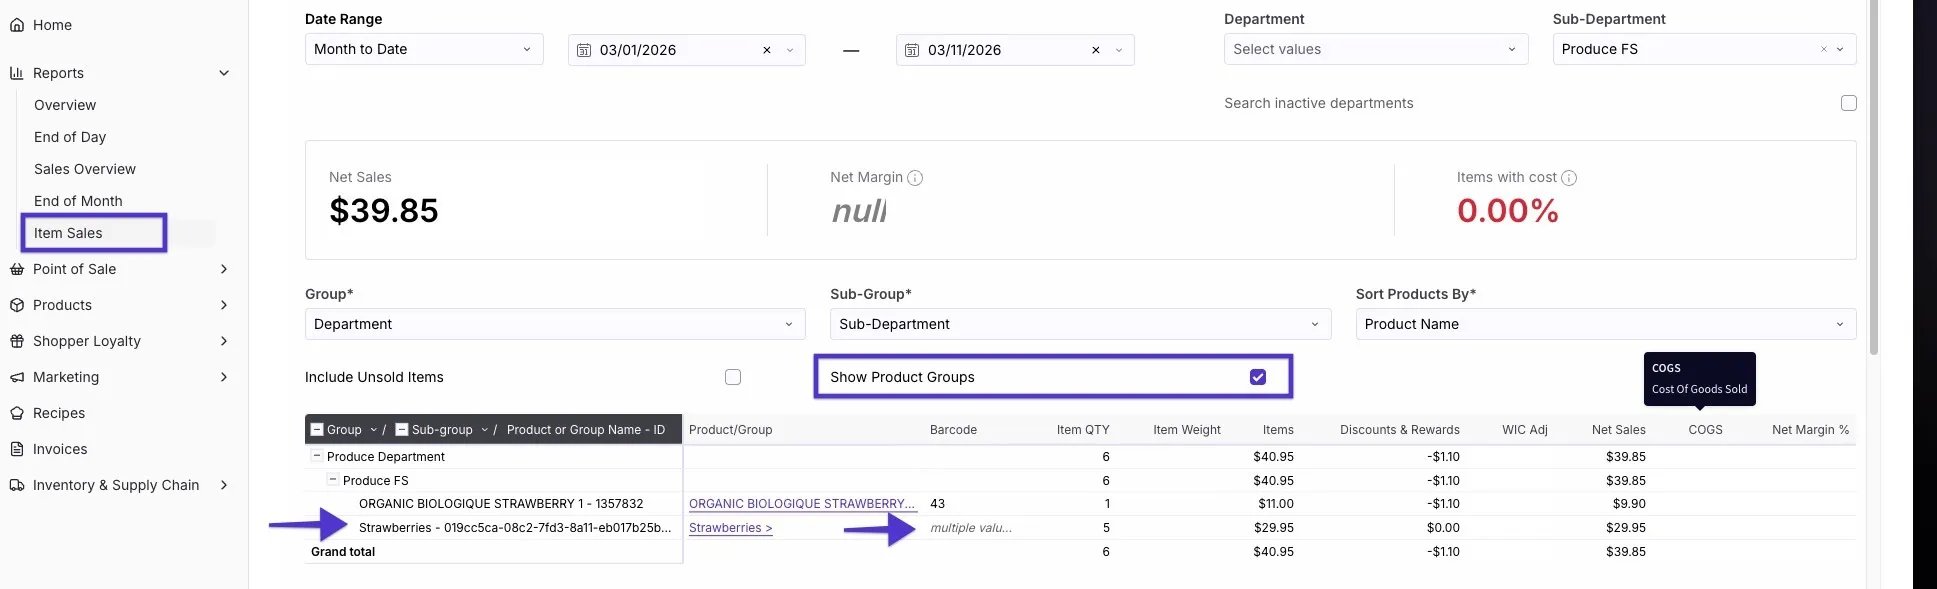
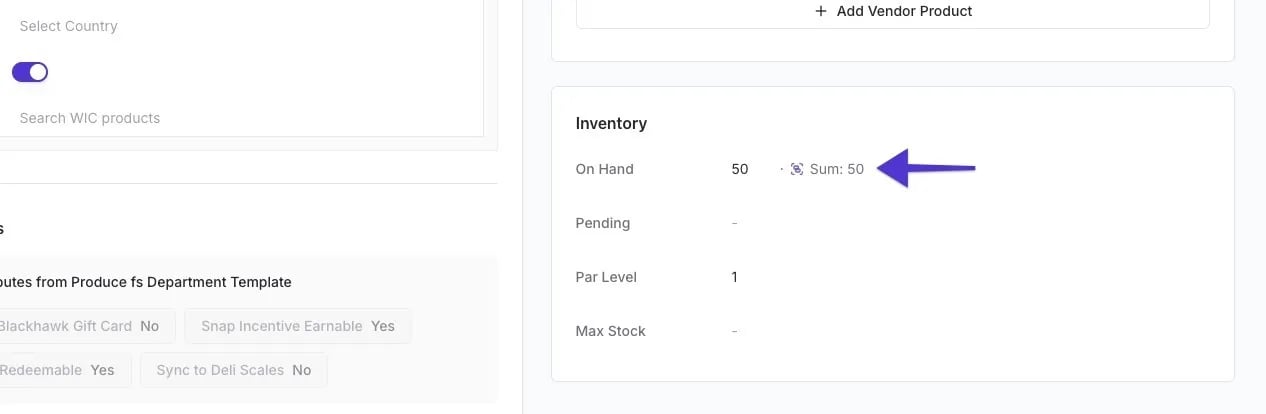
- Inventory Count: Toggle this to see the total on-hand count for the whole group. This provides a much better view of your actual inventory (e.g., how many total pints of raspberries you have across all barcodes) to help you make faster, more accurate ordering decisions. You can view this under the Inventory section of the product details page for one item in the group.
Resolve Conflicts (Multi-Group Linking)
Vori allows a single product to live in multiple groups (e.g., a “Raspberry Pints Org” group and a “Berries” group). The “Super Group” Effect: If Group A links Brand and Group B links Price, but both groups link Target Margin, they effectively become a “Super Group.” A change to the target margin in Group A will propagate through the product and update every item in Group B as well.- If you add an item to a second group that links a property already in use, a Resolver pop-up will appear.
- Select which value you want to “win,” or enter a net-new value.
- Vori treats this as a union link—a change to that attribute in either group will now update all products across both groups.
Remove Products from a Group
If an item no longer fits the line, you can pull it out without affecting the rest of the group.- Go to the Product Catalog table or the specific Product Detail page.
- Find the attribute with the Link Icon 🔗.
- Hover over the icon to see which group is managing the attribute and what other properties are linked.
-
Select Exclude product from this group.
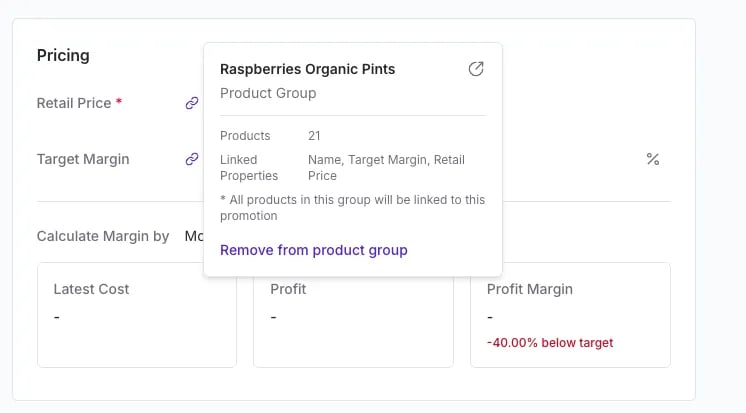
- Confirm the change. The item will keep its current values but will no longer be updated when the group changes.