How it works
- You choose which products go to the scales with Sync to Deli Scales.
- Vori builds a file for your scale system with current prices, including live promotions.
- The Vori sync agent, a small program on a Windows PC in your store, downloads the file when something changes and loads it into your scale software.
- Your scales print labels with a price barcode, and your Point of Sale (POS) reads the price from it.
What you need
- Deli Scale Sync turned on for your store. It is a Premium integration. Until it is on, its card on Integrations shows Unlock. Contact Vori Support to turn it on.
- An always-on Windows 10 or Windows 11 desktop PC in the store, on the same network as your scales. Use a desktop, not a laptop: the PC must stay on 24/7.
- Your scale software on that PC:
- Your price barcode size. Scale labels carry the price inside the barcode, as a 4-digit price (up to $99.99) or a 5-digit price (up to $999.99). If your scales can print a label over $99.99, your store uses 5 digits.
Step 1: Choose which products go to the scales
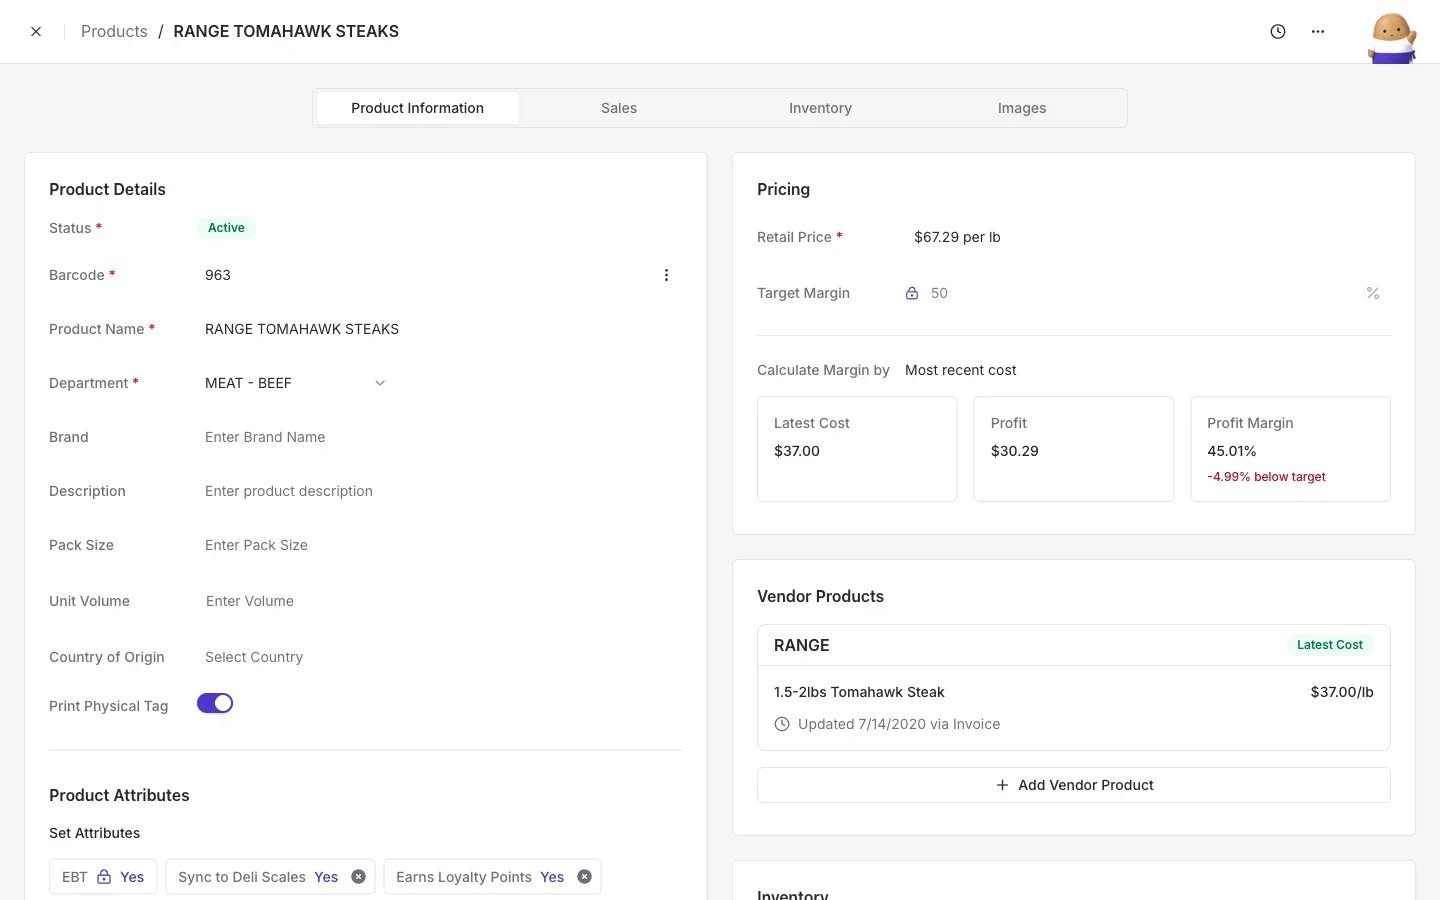
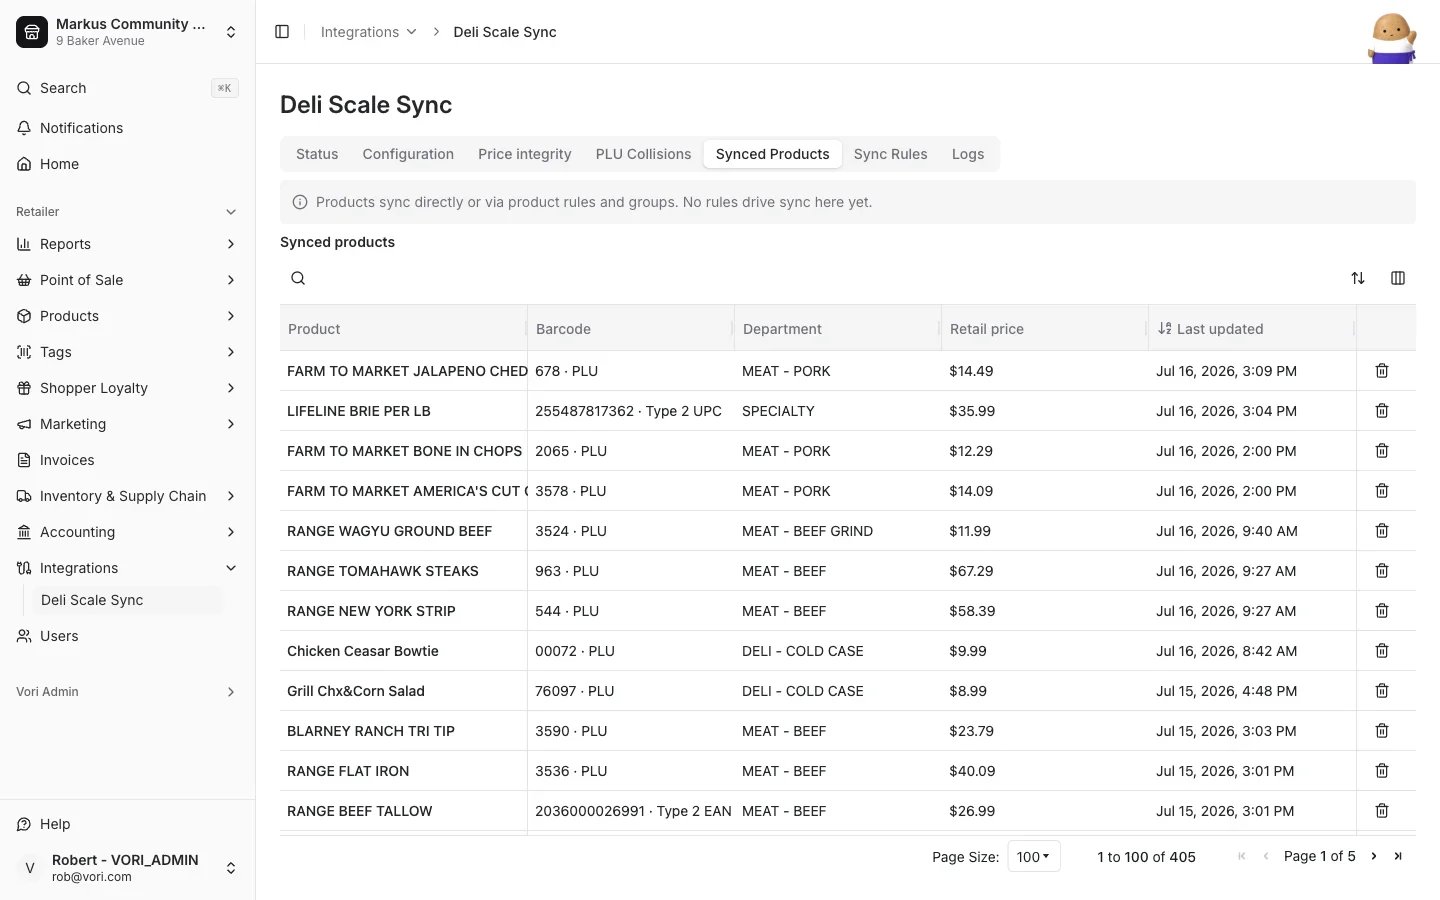
Only products with Sync to Deli Scales turned on reach the scales. You can turn it on:- for a whole department, with a Product Rule or a Product Group;
- for many products at once, with a bulk edit on the Product Catalog;
- for one product, in the Product Attributes section of the product form.
When a product rule or group turns on Sync to Deli Scales, change the rule or the group. A change on the product itself does not stay, because the rule applies again.
Step 2: Clear PLU collisions
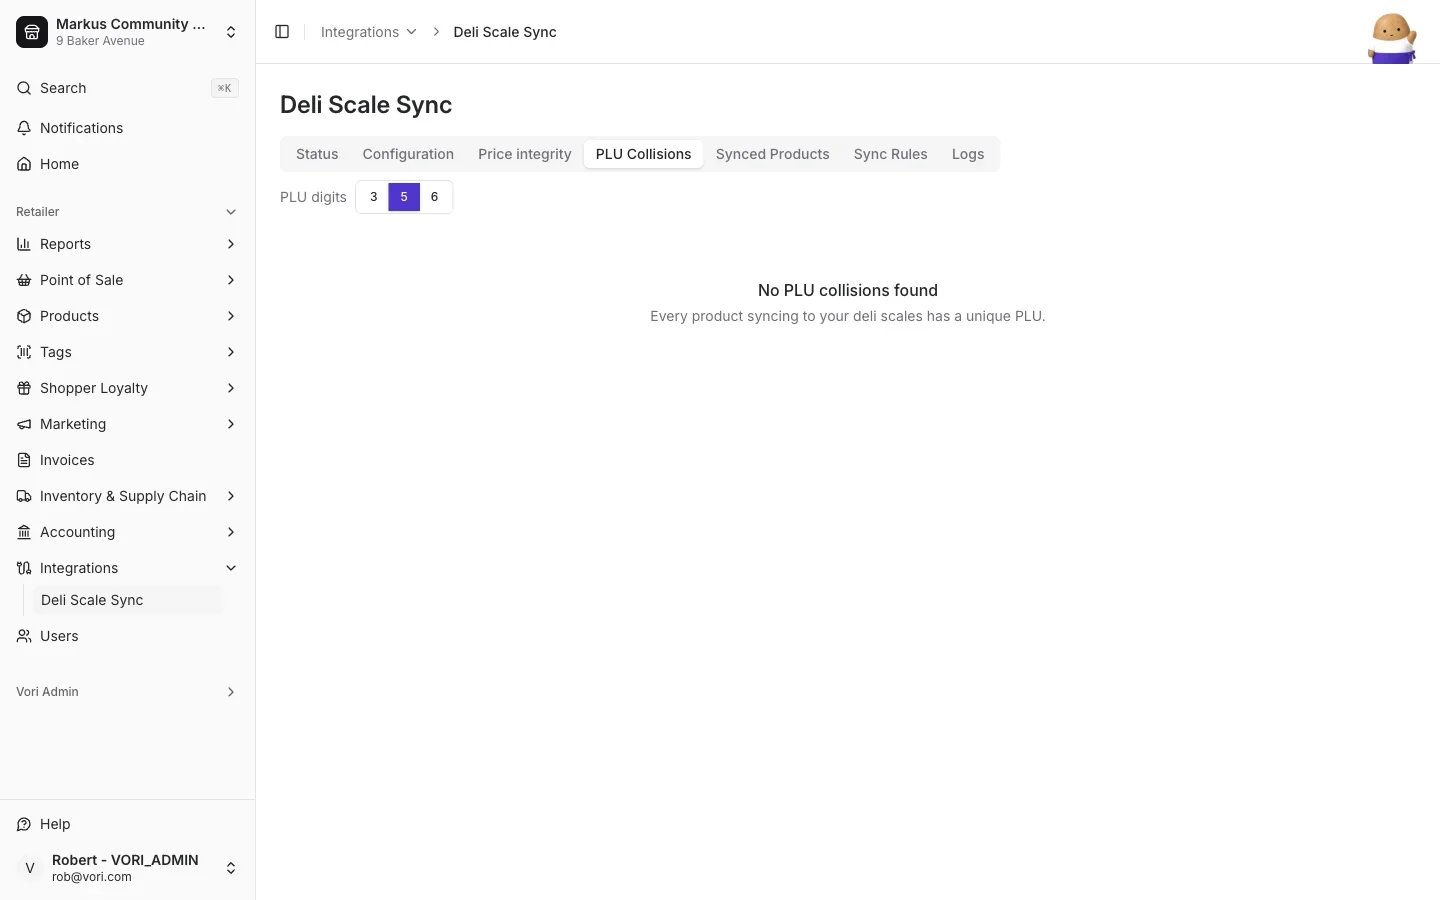
A PLU collision is two or more products with the same scale PLU. A scale holds one record per PLU, so only one of those products prints correctly. Clear collisions before your first sync.- Go to Integrations > Deli Scale Integration and open the PLU Collisions tab.
- Set PLU digits to match your store. Most stores use 5.
- For each collision, do one of these:
- Click Reassign PLU to give one product a different barcode. Suggest free PLU picks a number no other product uses.
- Click Remove from scale sync. The product stays in your catalog but no longer goes to the scales. Its old record can stay on the scale, so remove that record in your scale software or at the scale.
Step 3: Install the sync agent
Install the agent on the PC that runs your scale software.- Go to Integrations > Deli Scale Integration and open the Status tab. A store with no agent shows a 3-step setup guide.
- Click Download installer. If the download does not start, click open the installer link. The link stops working after a short time, so click Download installer again if it expires.
- On the store PC, run the installer as an administrator.
- Click Get setup code, then enter the code in the installer. A code works 1 time. Getting a new code stops the previous code from working.
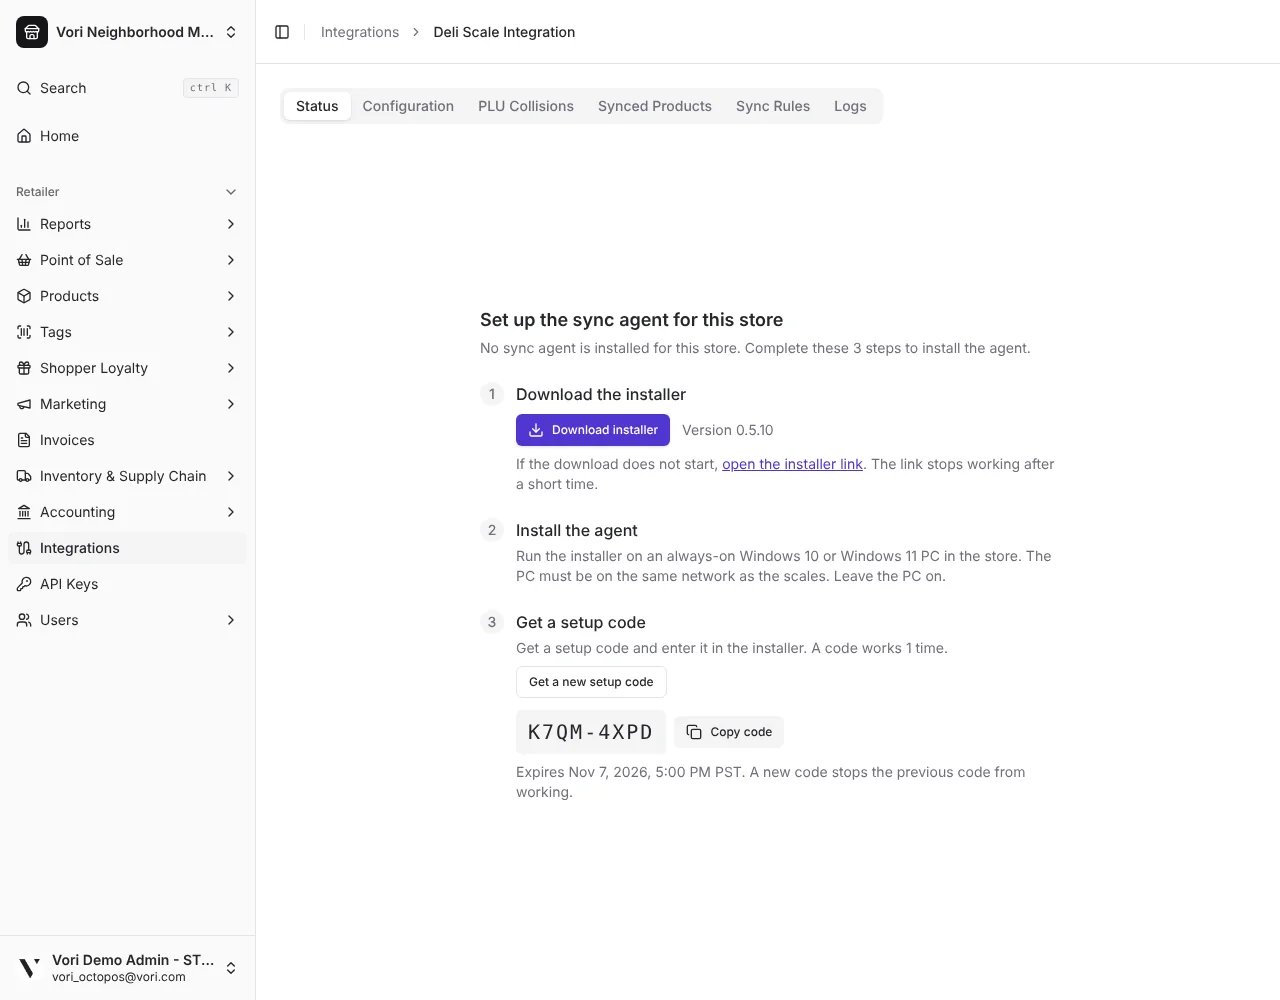
The setup guide shows for users who can manage the store’s sync agent. Other users see Contact Vori Support instead.
Step 4: Add your scale driver
- On the Deli Scale Integration page, open the Configuration tab.
- Set Sync interval (seconds): how often the agent checks for new data. 60 is standard.
- Click Add driver and choose your scale system.
- Fill in the driver settings for your scale system, below.
- Click Save. The agent picks up the new settings within about 5 minutes.
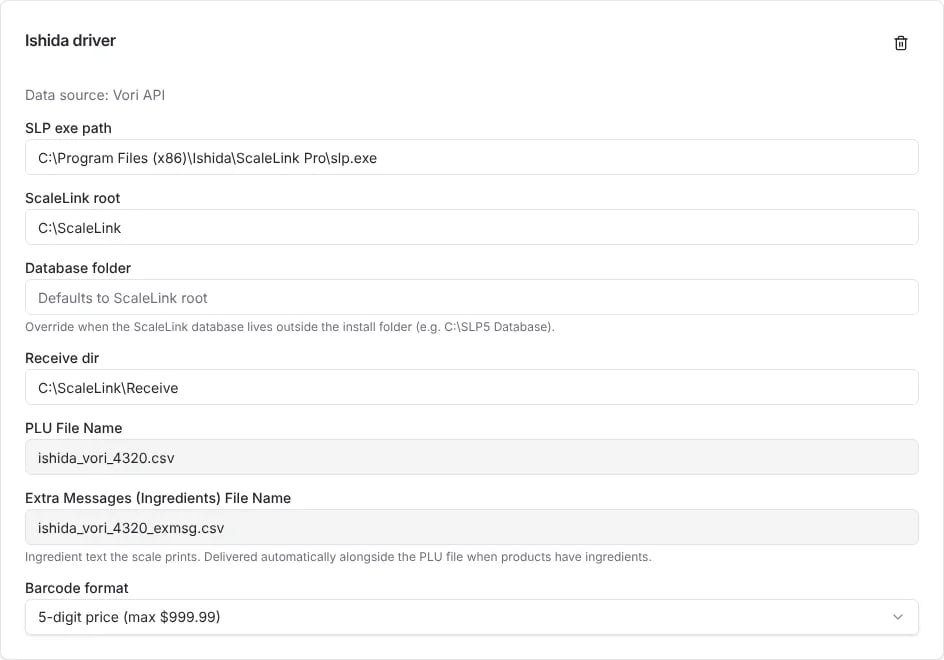
Ishida
New ScaleLink Pro 5 install? Finish setting up ScaleLink before you add the driver. Enter your ScaleLink license key, and connect each of your scales to ScaleLink. Vori sends your products to ScaleLink, and ScaleLink sends them to your scales. For help with the license or with connecting scales, contact your Ishida dealer, usually Rice Lake.
Vori sets the PLU File Name and Extra Messages (Ingredients) File Name. The agent imports both files into ScaleLink.
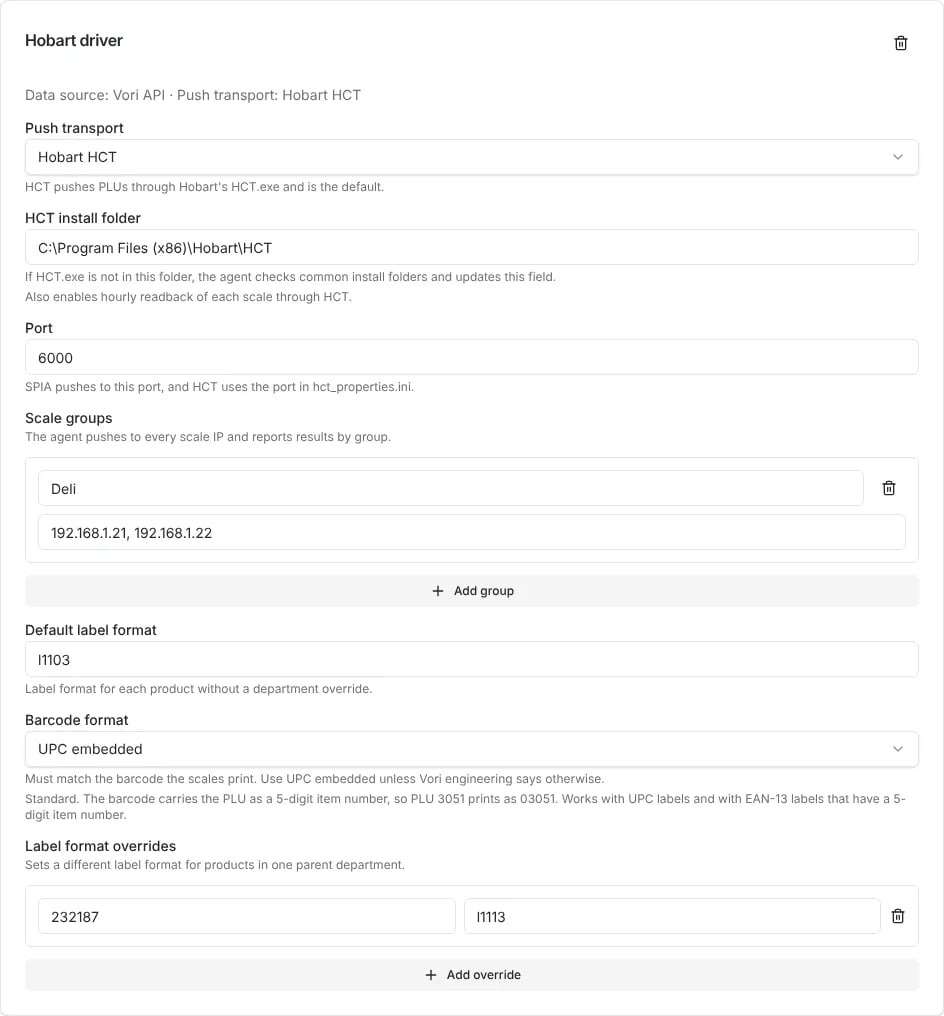
Hobart
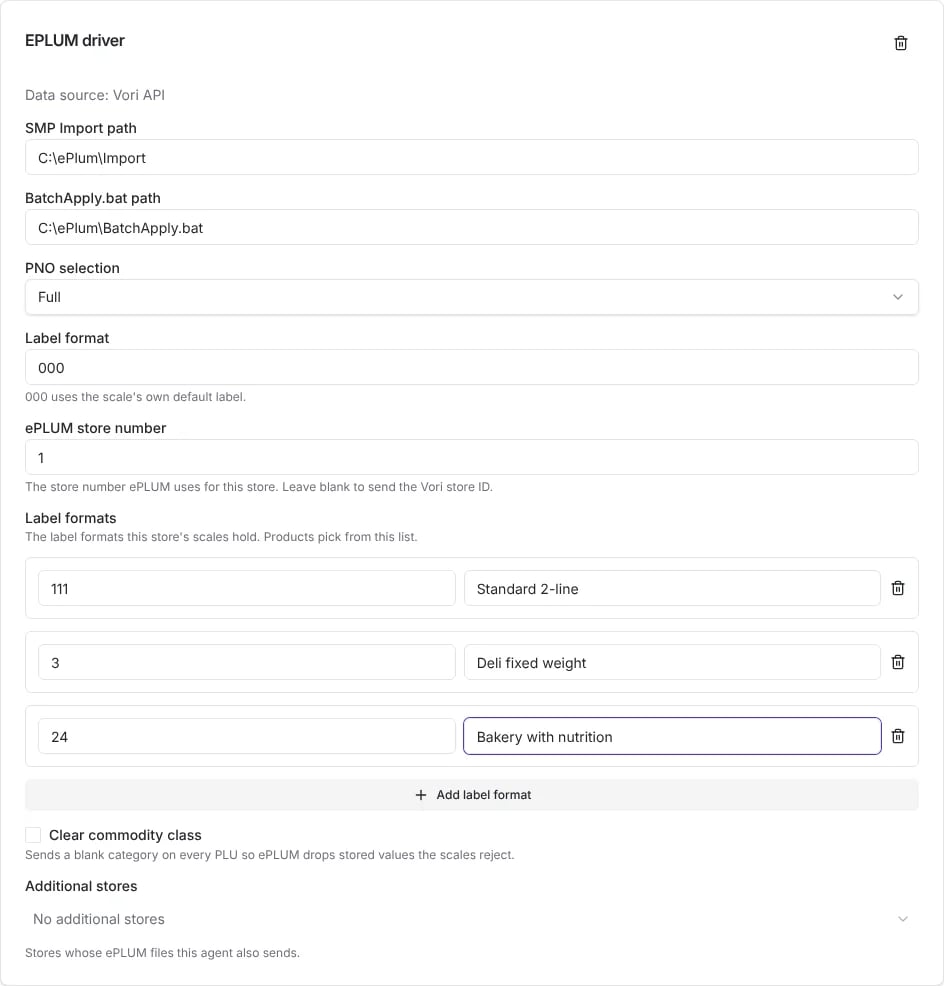
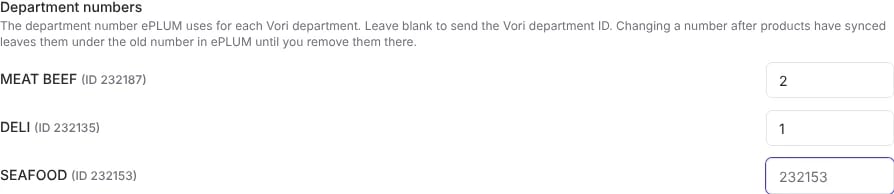
ePLUM
Leave Clear commodity class off unless Vori Support asks you to turn it on.
Step 5: Set up your POS to read scale barcodes
Your POS reads the price from the barcode on each scale label. It must know whether your labels carry a 4-digit or a 5-digit price. Tell Vori Support which one your store uses, and we set your POS to match. If this setting is wrong, deli items scan at the wrong price.Step 6: Test from price change to register
-
Change the price of one synced product. Within a couple of minutes, the Status tab shows the agent as Healthy, with a new file under Recent files.
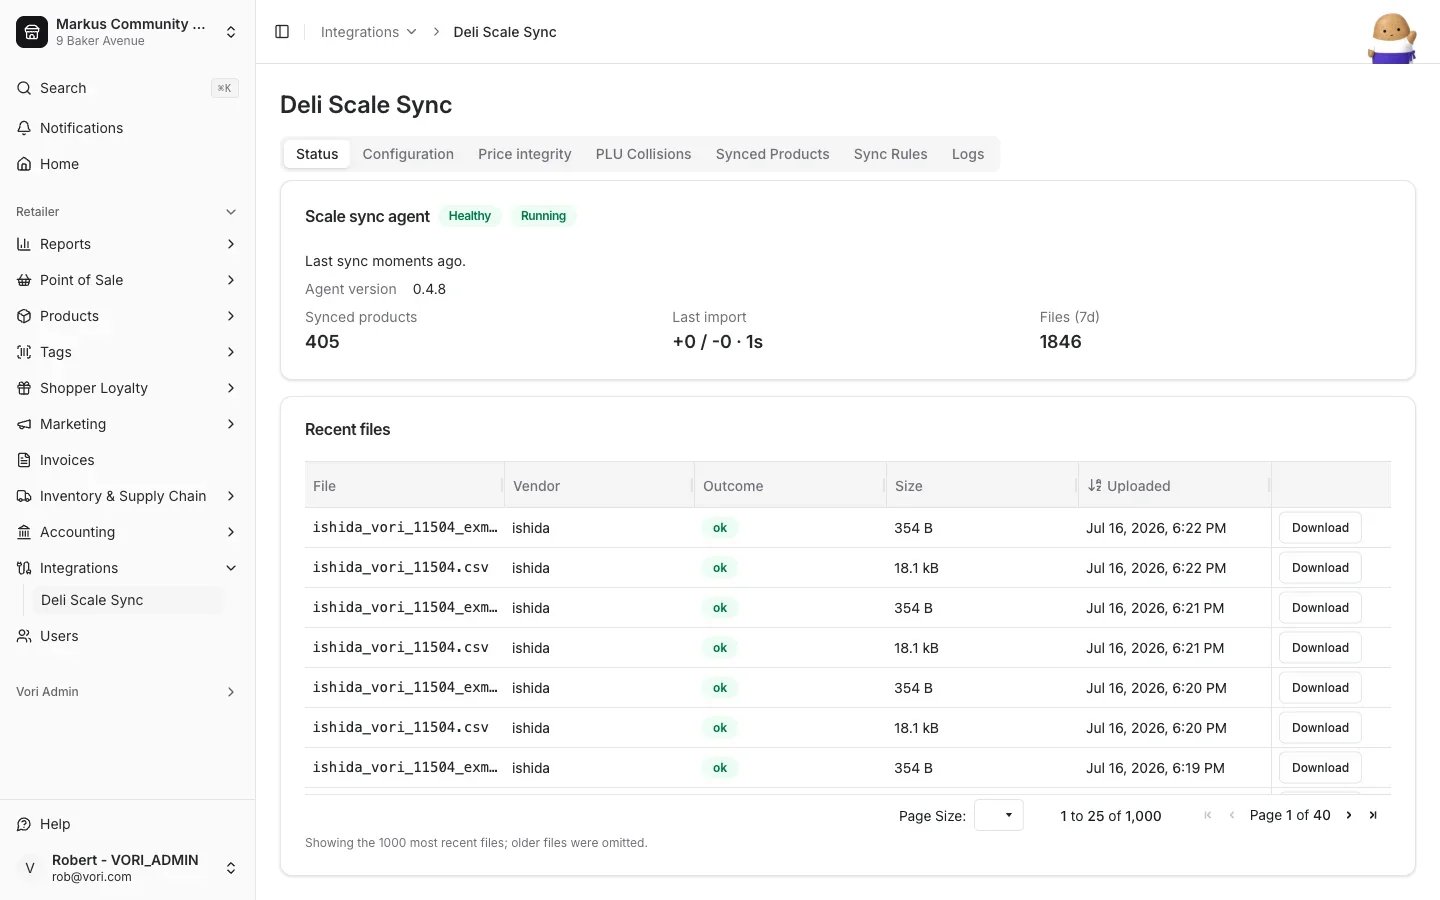
- Open the Logs tab. It lists only warnings and errors, so a clean sync adds nothing there.
-
At a deli scale, print a label for:
- the product whose price you changed, and check that the label shows the new price;
- an item sold by weight;
- an item sold by each;
- a high-priced item (over $100 if your store uses 5 digits) and a low-priced item.
- Scan each label at a register. Check that the name and price match the label.
Set what a product prints on the scale
The Deli Scale card on the product form, below Ingredients, sets what the scale prints for that product. It shows when any store in your banner has an Ishida, Hobart or ePLUM driver. Each field shows only when one of your scale systems uses it. On a saved product, each change saves as you make it.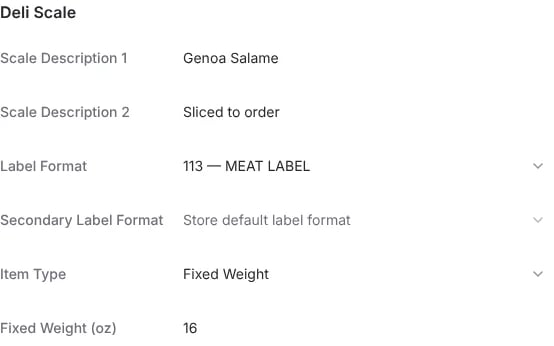
What each scale system does with these fields:
- ePLUM: Label Format lists the label formats from your ePLUM driver. Store default label format uses the driver’s Label format, and
0uses the scale’s own default. - Hobart: enter the 3-digit label number. For example,
103prints with label formatl1103. A product’s label format comes before the department override and the default label format. Hobart prints Fixed Weight items the same way as a blank Item Type. - Ishida: Random Weight sells by weight. By Count and Fixed Weight sell at a fixed price.
Set label formats for a whole department
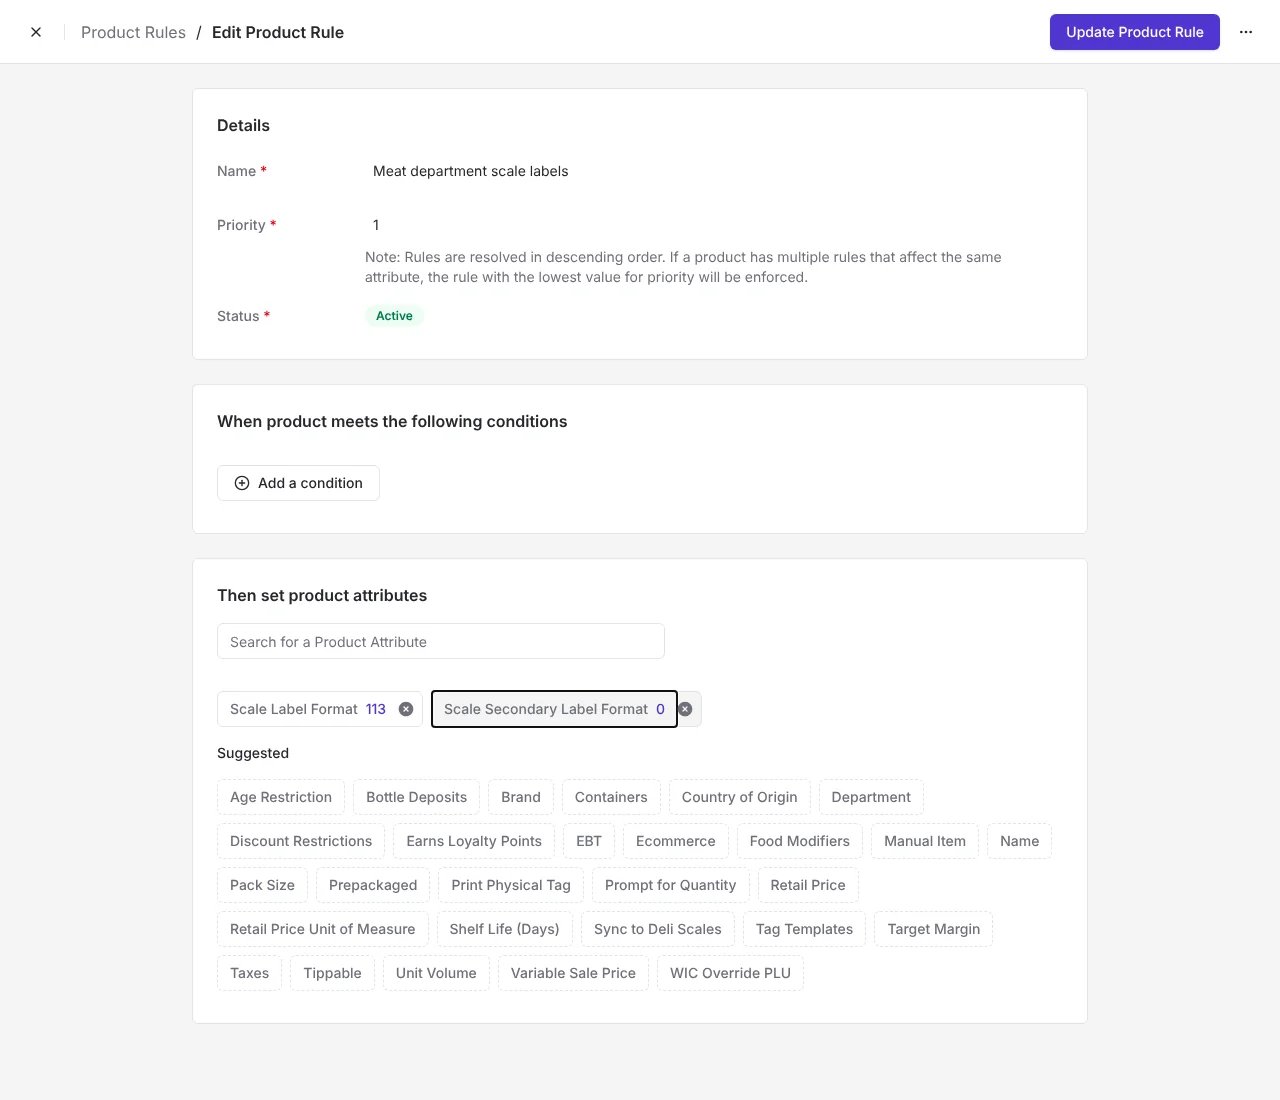
A department often prints with one label format, for example MEAT LABEL 113 for the meat department. A product rule or group can set it for every product in the department, including new ones.- Go to Products > Product Rules or Product Groups, and open or create a rule or group.
- Under Then set product attributes, add Scale Label Format or Scale Secondary Label Format and enter the label format number.
- Save the rule or group.