What is an APL?
An Approved Product List (APL) is a list of every product your store will carry, including key details that power your POS, reporting, and inventory workflows. Setting up your APL is one of the first steps to getting started with Vori. 👉 Important: Be sure to make a copy of the template before editing. When you finish editing it, download or export the sheet as a CSV file before uploading it to Vori Back Office. Open the Store Product Uploader TemplateRequired Fields in APL
You need four required fields to build your APL:
⚠️ Caution — Don’t include dollar signs in the Retail Price column. Enter prices as plain decimal numbers (e.g.,
2.49, not $2.49). Adding a $ symbol will cause an error during import and the row will fail to load.
Additional Fields
Once your required fields are in place, you can include additional product attributes to support ordering, inventory, and checkout operations. These fields are optional, but they streamline Vori workflows as your store grows. ✏️ Note: If you already have this data on hand, it’s better to include it now rather than waiting to add it later.Product Categories
Vendor & Cost Details
⚠️ Important for Smart Pricing (Cost Changes): Including vendor, cost, and case size info now will significantly improve your ability to manage invoices and track margins.
Pricing & Sales Settings
Packaging & Size
Compliance & Tax
⚠️ Caution: Compliance Reminder: Certain fields, such as Country of Origin and Other Tax, may be required by city, state, or federal regulations (e.g., California law requires Country of Origin labeling on certain products).
It is the responsibility of each store to ensure compliance with all applicable labeling and regulatory requirements.
📤 Upload your APL to Vori Back Office
Once your CSV is ready, you can upload it directly from the Product Catalog. 🚨 Warning — The uploader overwrites existing product data. If a barcode in your CSV matches a product already in your catalog, the uploader will replace the existing values — including Retail Price — with whatever is in your file. Before you upload against a live catalog, double-check every column and use the Review Linked Data step to confirm what will change. If you’re a new store with an empty catalog, this doesn’t apply to you — new rows will appear under the Create tab.Step 1: Open the product uploader
In Vori Back Office, go to Products > Product Catalog, then click Upload in the top-right corner.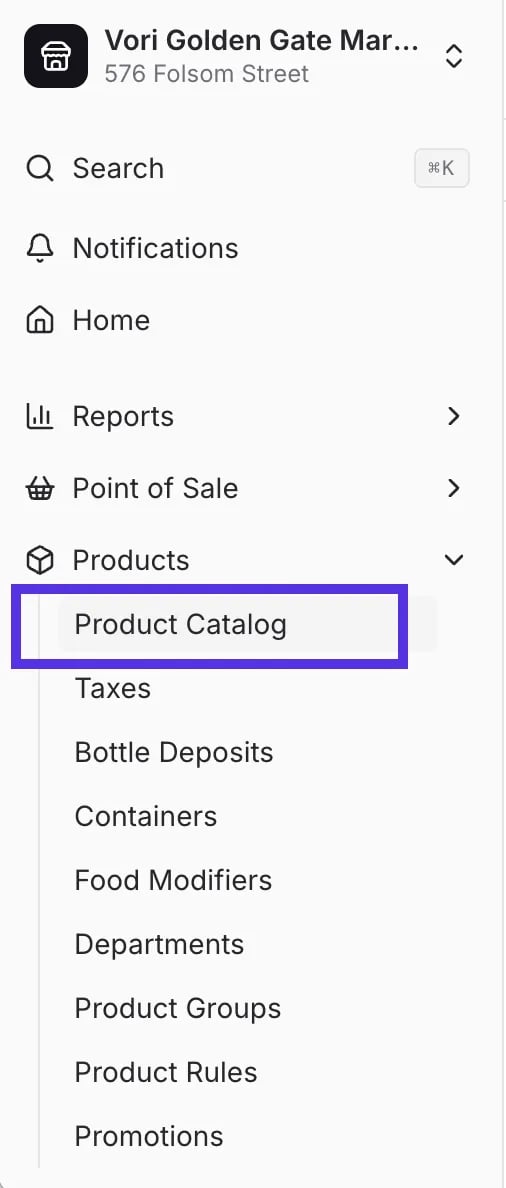

Step 2: Upload your CSV
Drag and drop your file into the upload area, or click Select File to browse. Only CSV files are accepted. If you’re starting from the Google Sheets template, export it as a CSV first so you have a file the uploader can accept. 💡 Tip: If you don’t have a file ready yet, click Download CSV template at the bottom of the screen to grab a blank template directly from Vori. Once your file appears in the upload area, click Upload in the top-right to continue.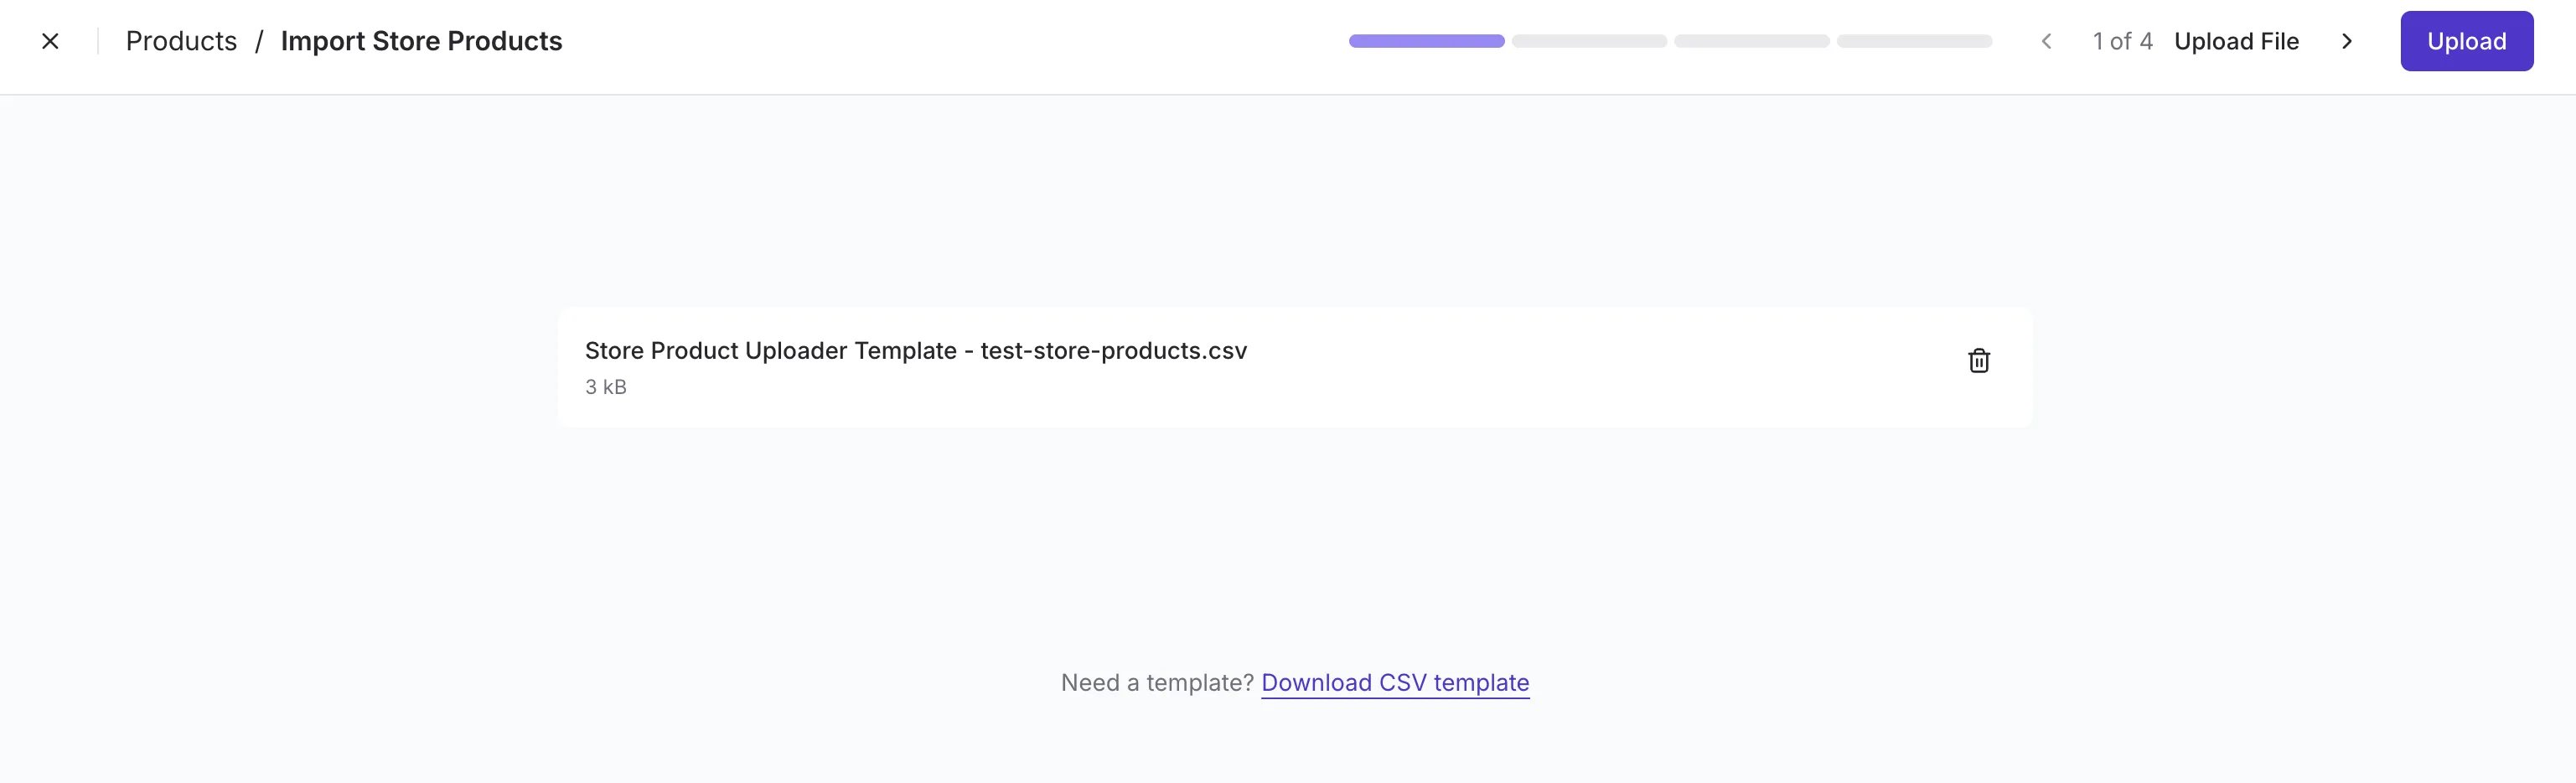
Step 3: Map your fields
Vori automatically matches your CSV columns to the right fields in Back Office. Required fields — Barcode, Product Name, Department, and Retail Price — are flagged so you can confirm they’re mapped before moving on. The right-hand Preview panel shows sample values from your file so you can spot mapping issues before committing. If a column isn’t relevant, leave it set to Skip this column. When everything looks right, click Next.
Step 4: Review linked data
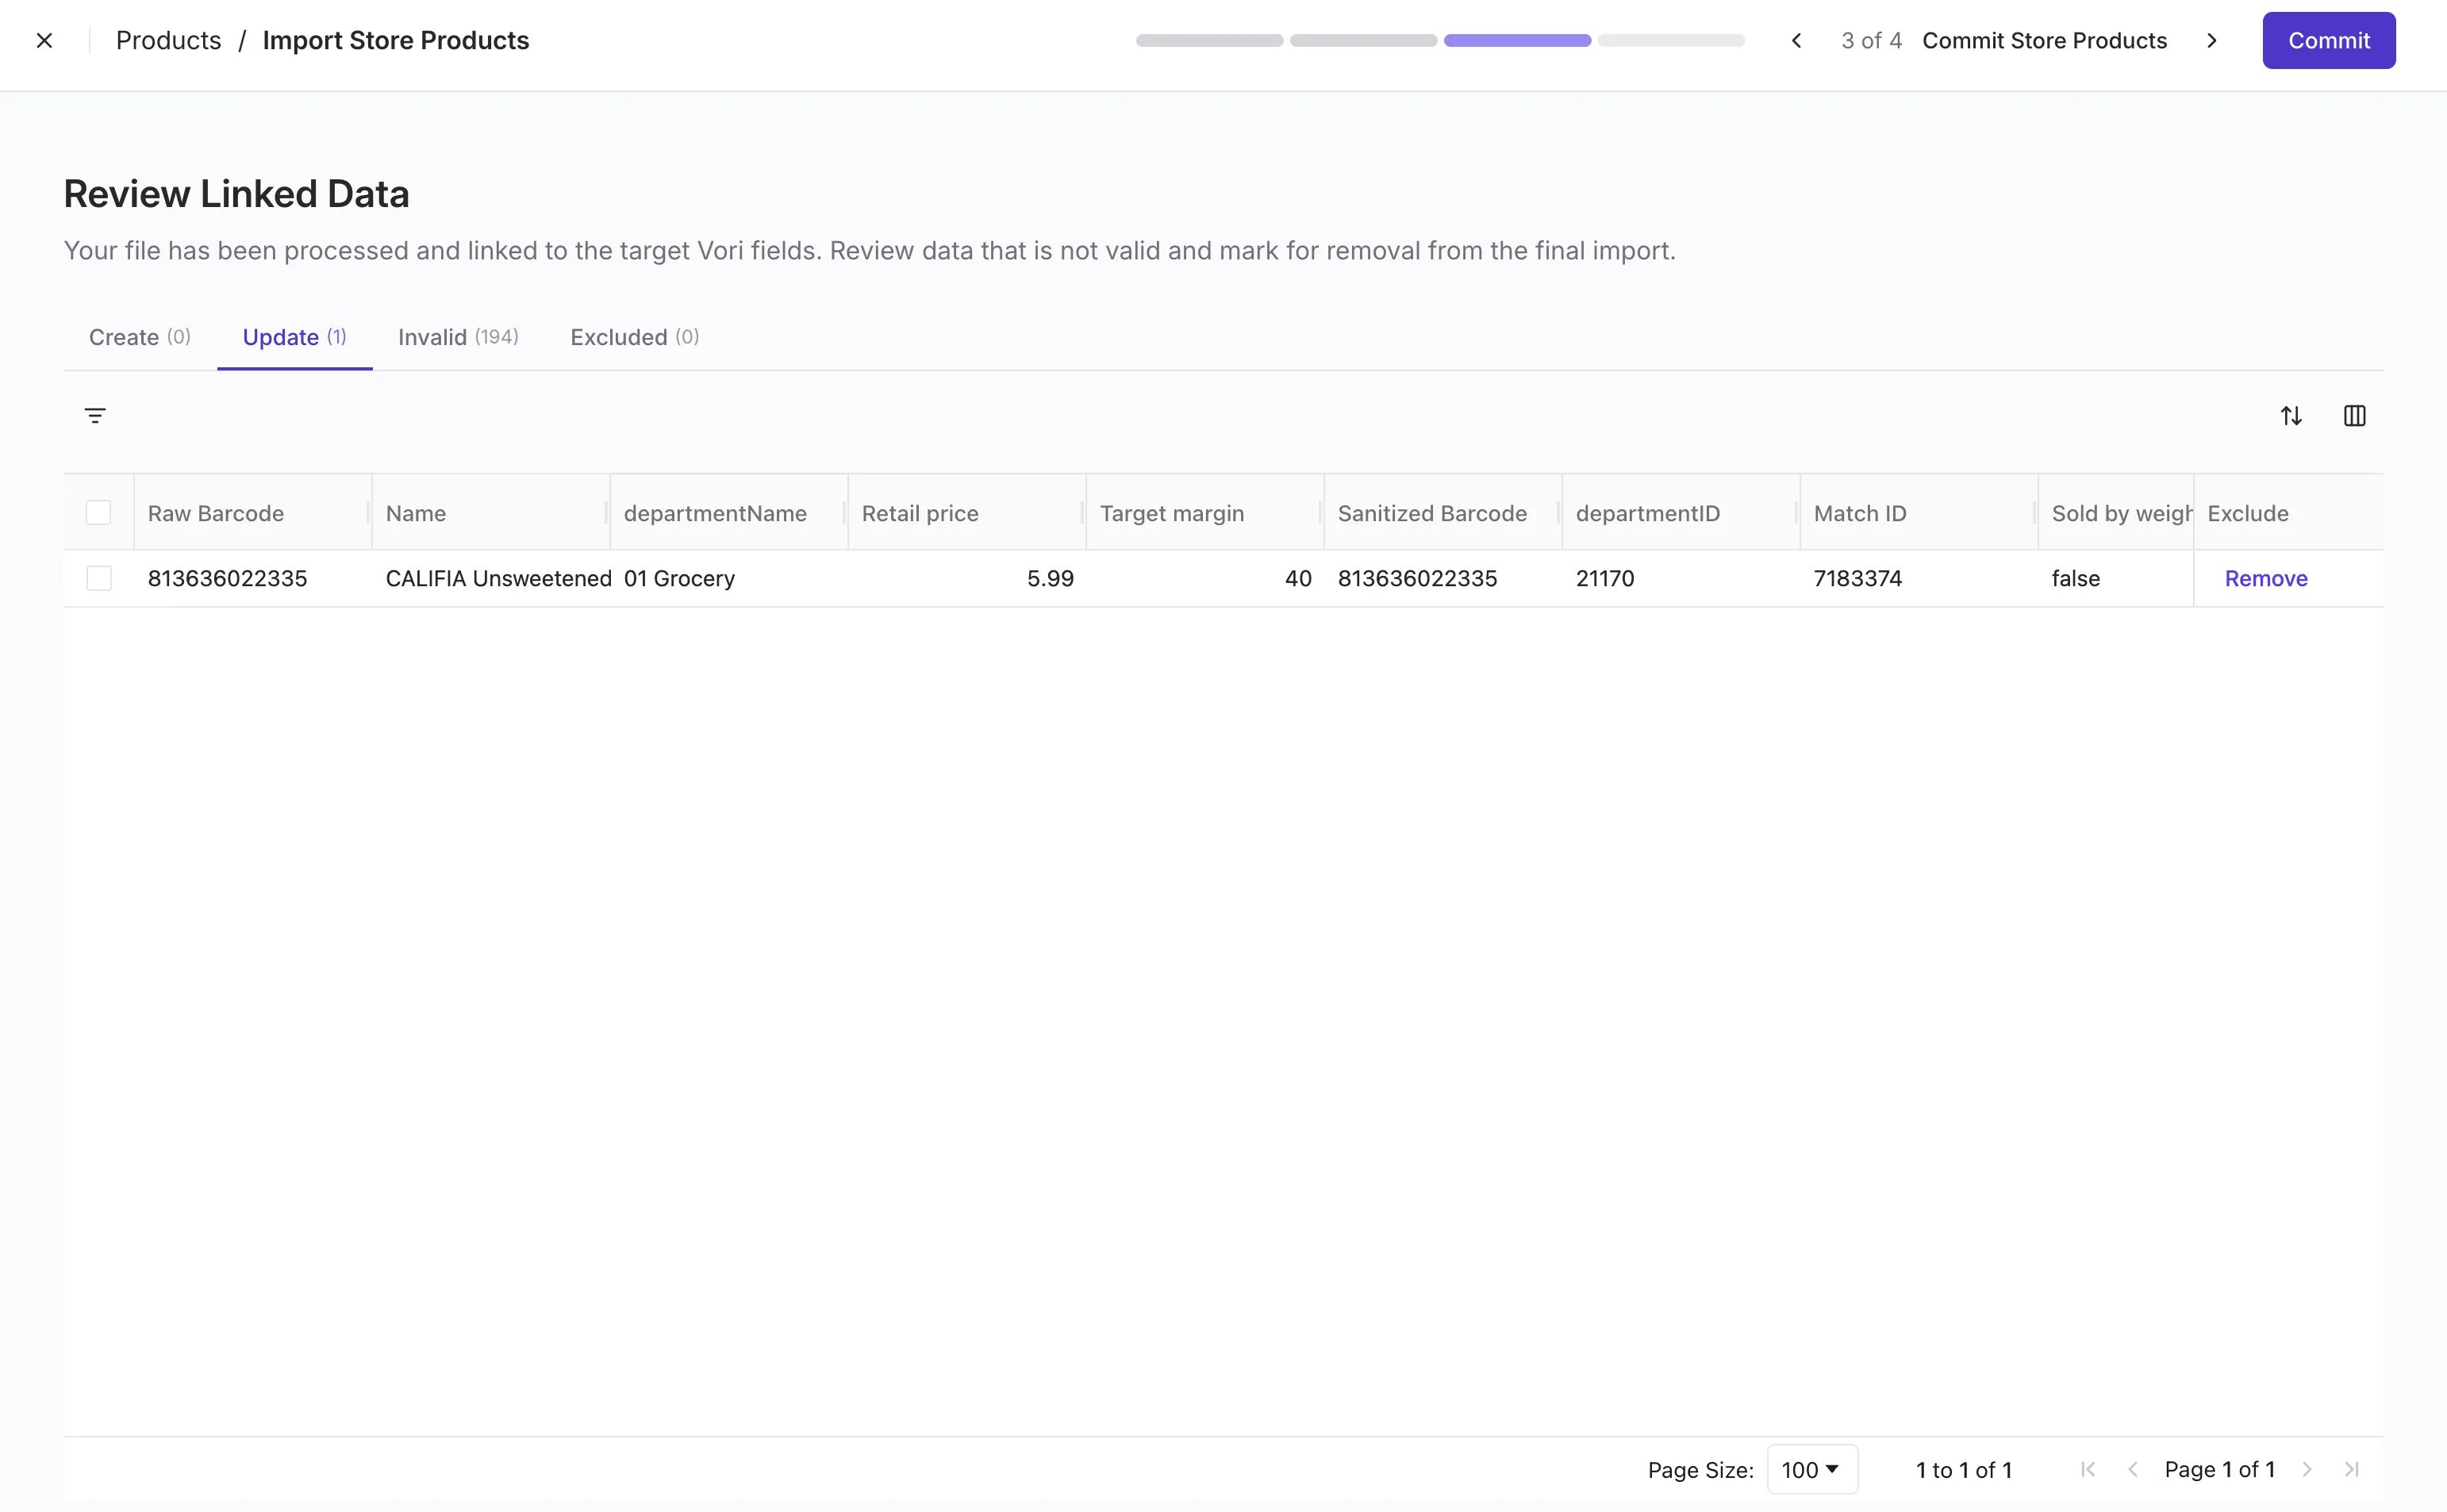
Vori processes your file and sorts every row into one of four tabs. This is the most important step — it shows you exactly what’s about to happen before any changes are made.- Create: New products that will be added to your catalog.
- Update: Existing products that will be overwritten with values from your file. Open this tab and review every row carefully — especially Retail Price.
- Invalid: Rows with errors (e.g., missing required fields, malformed barcodes). These will not import.
- Excluded: Rows you’ve manually excluded from the import.
Step 5: Confirm your products are live
Once committed, your products appear in the Product Catalog with all mapped fields populated.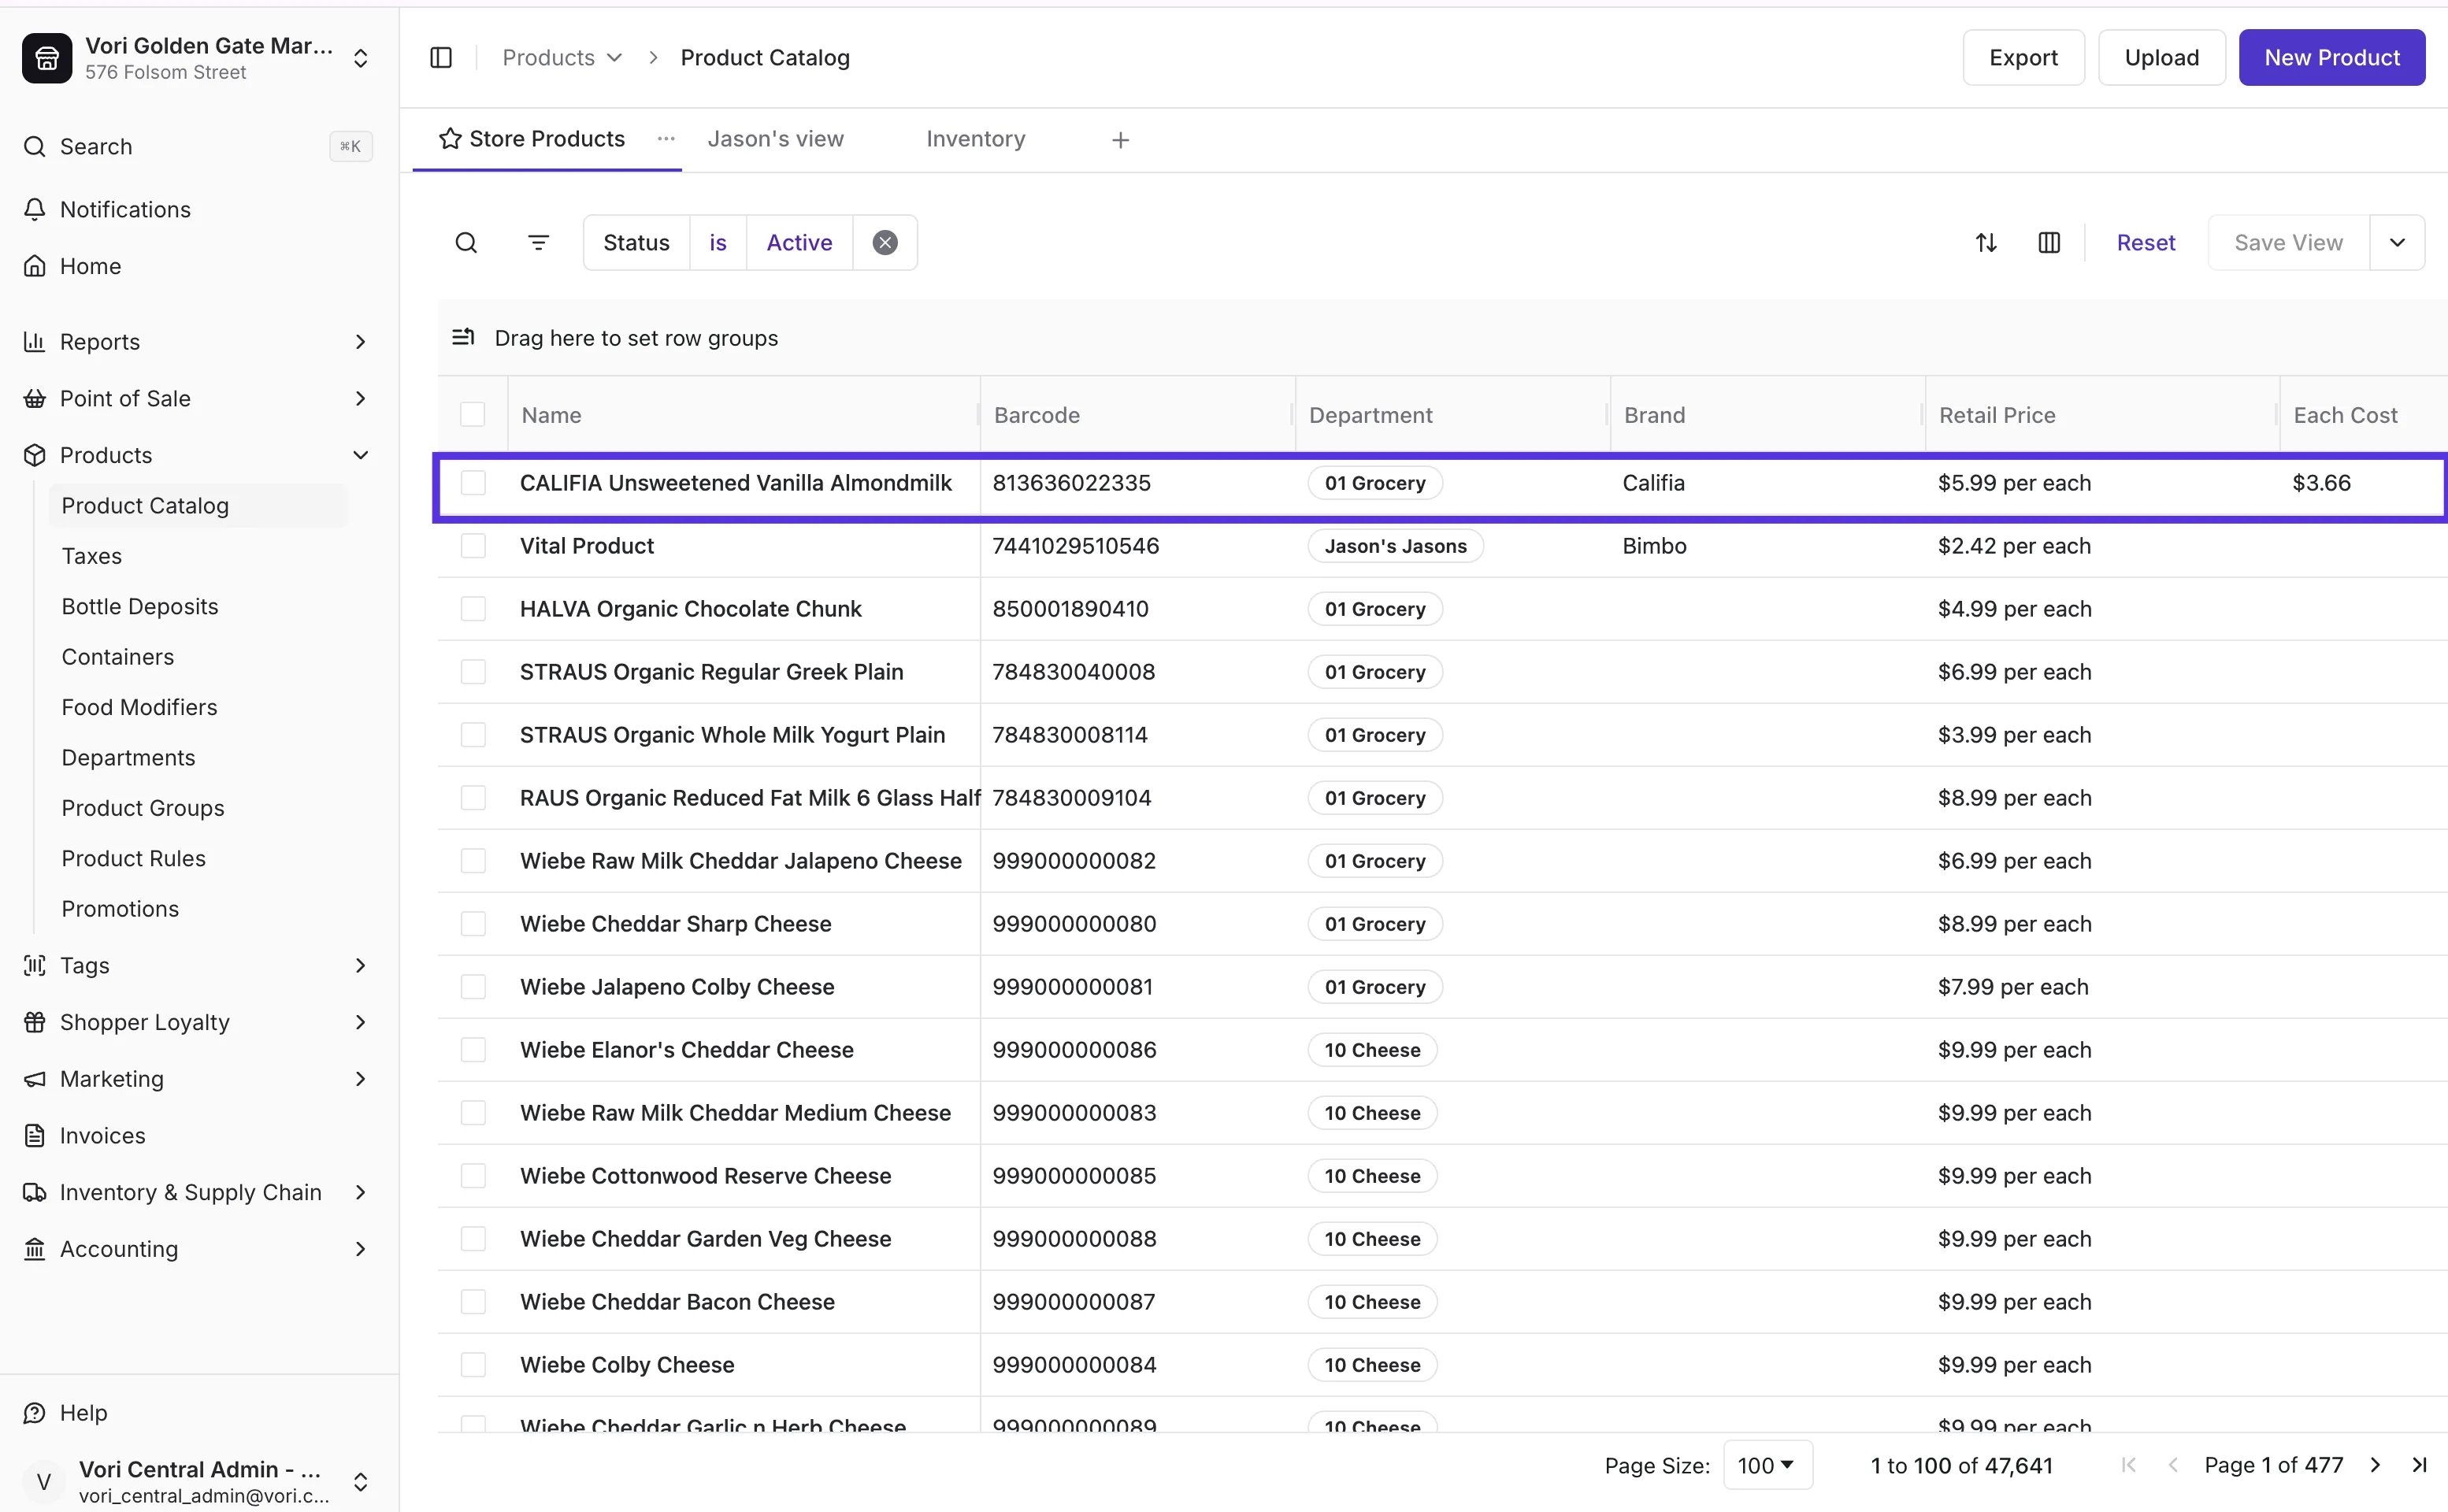
How the uploader handles existing products
If you’re uploading to a catalog that already has products in it — whether you’re adding a new vendor’s items or refreshing pricing across the store — here’s how Vori matches and updates rows:- Matching is by barcode. Vori looks at the Barcode column in your CSV and checks whether that barcode already exists in your catalog.
- New barcodes create new products. Anything not already in the catalog lands in the Create tab.
- Matching barcodes overwrite existing products. Anything that matches lands in the Update tab. Values in your CSV — including Retail Price — will replace the values currently on file.
- Invalid rows are skipped. Rows missing required fields or with malformed data won’t import.
Enhancing Your Product List Further
After your initial upload, you can continue improving your product list using tools in Vori Back Office:- Bulk update tools to apply changes to multiple products at once.
- Department inheritance to apply shared logic (e.g., age restriction, EBT, tax).
- Invoice uploads that automatically apply details like vendor cost, case size, or brand