

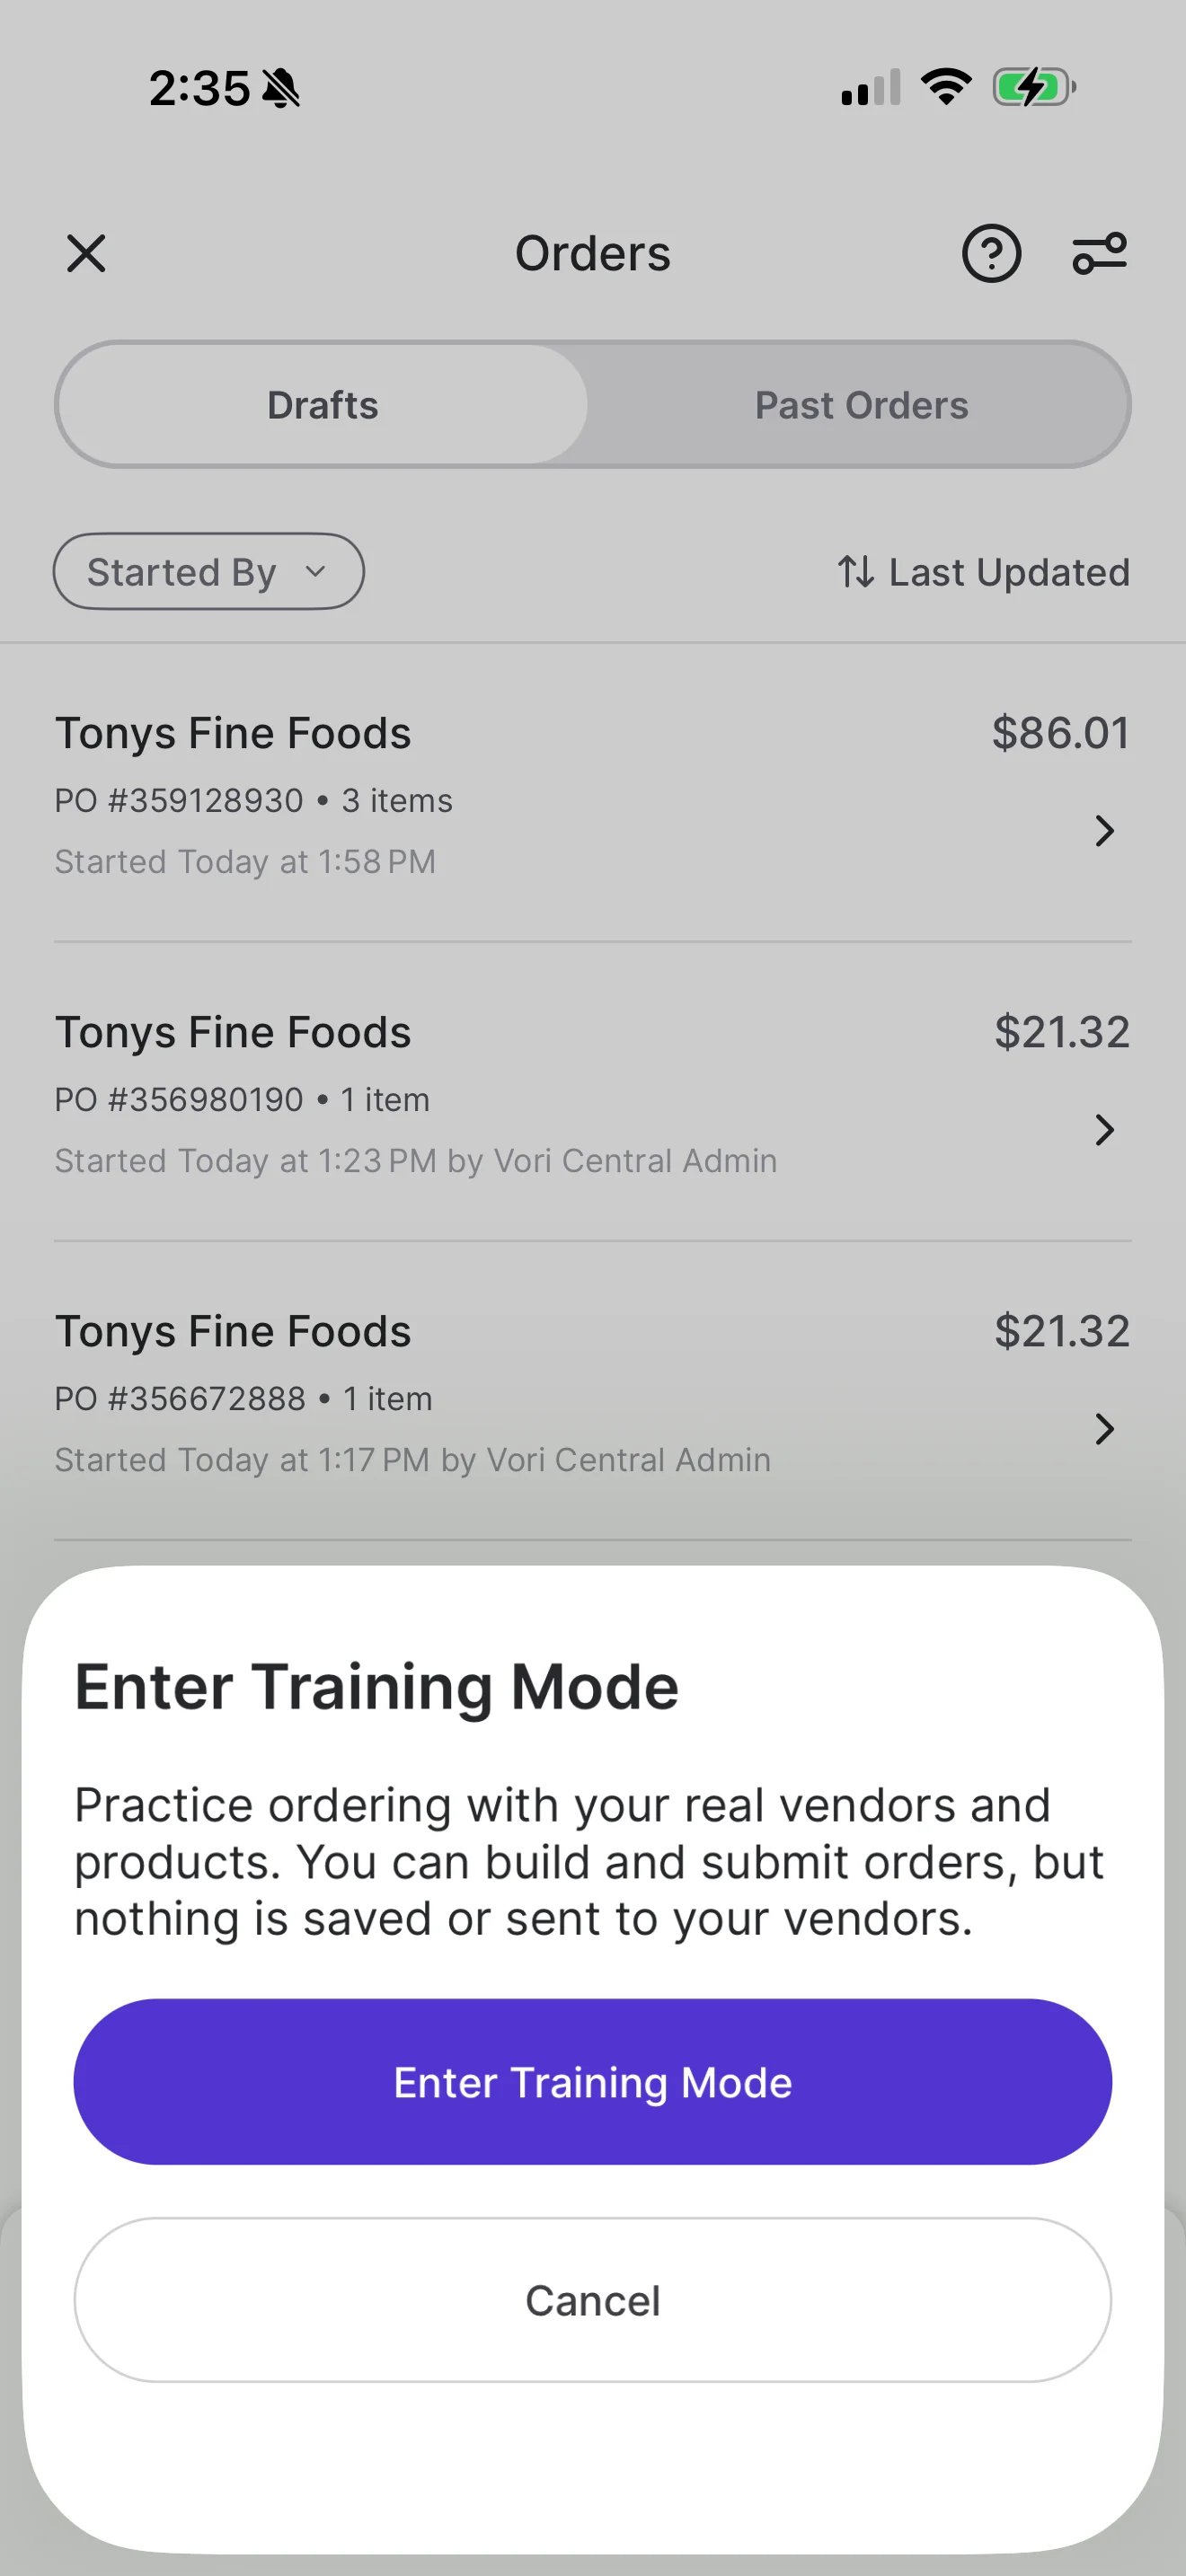
Training Mode uses your real vendors and products. Trainees can build and submit orders, but nothing is saved or sent to your vendors.
Walk through a session together
-
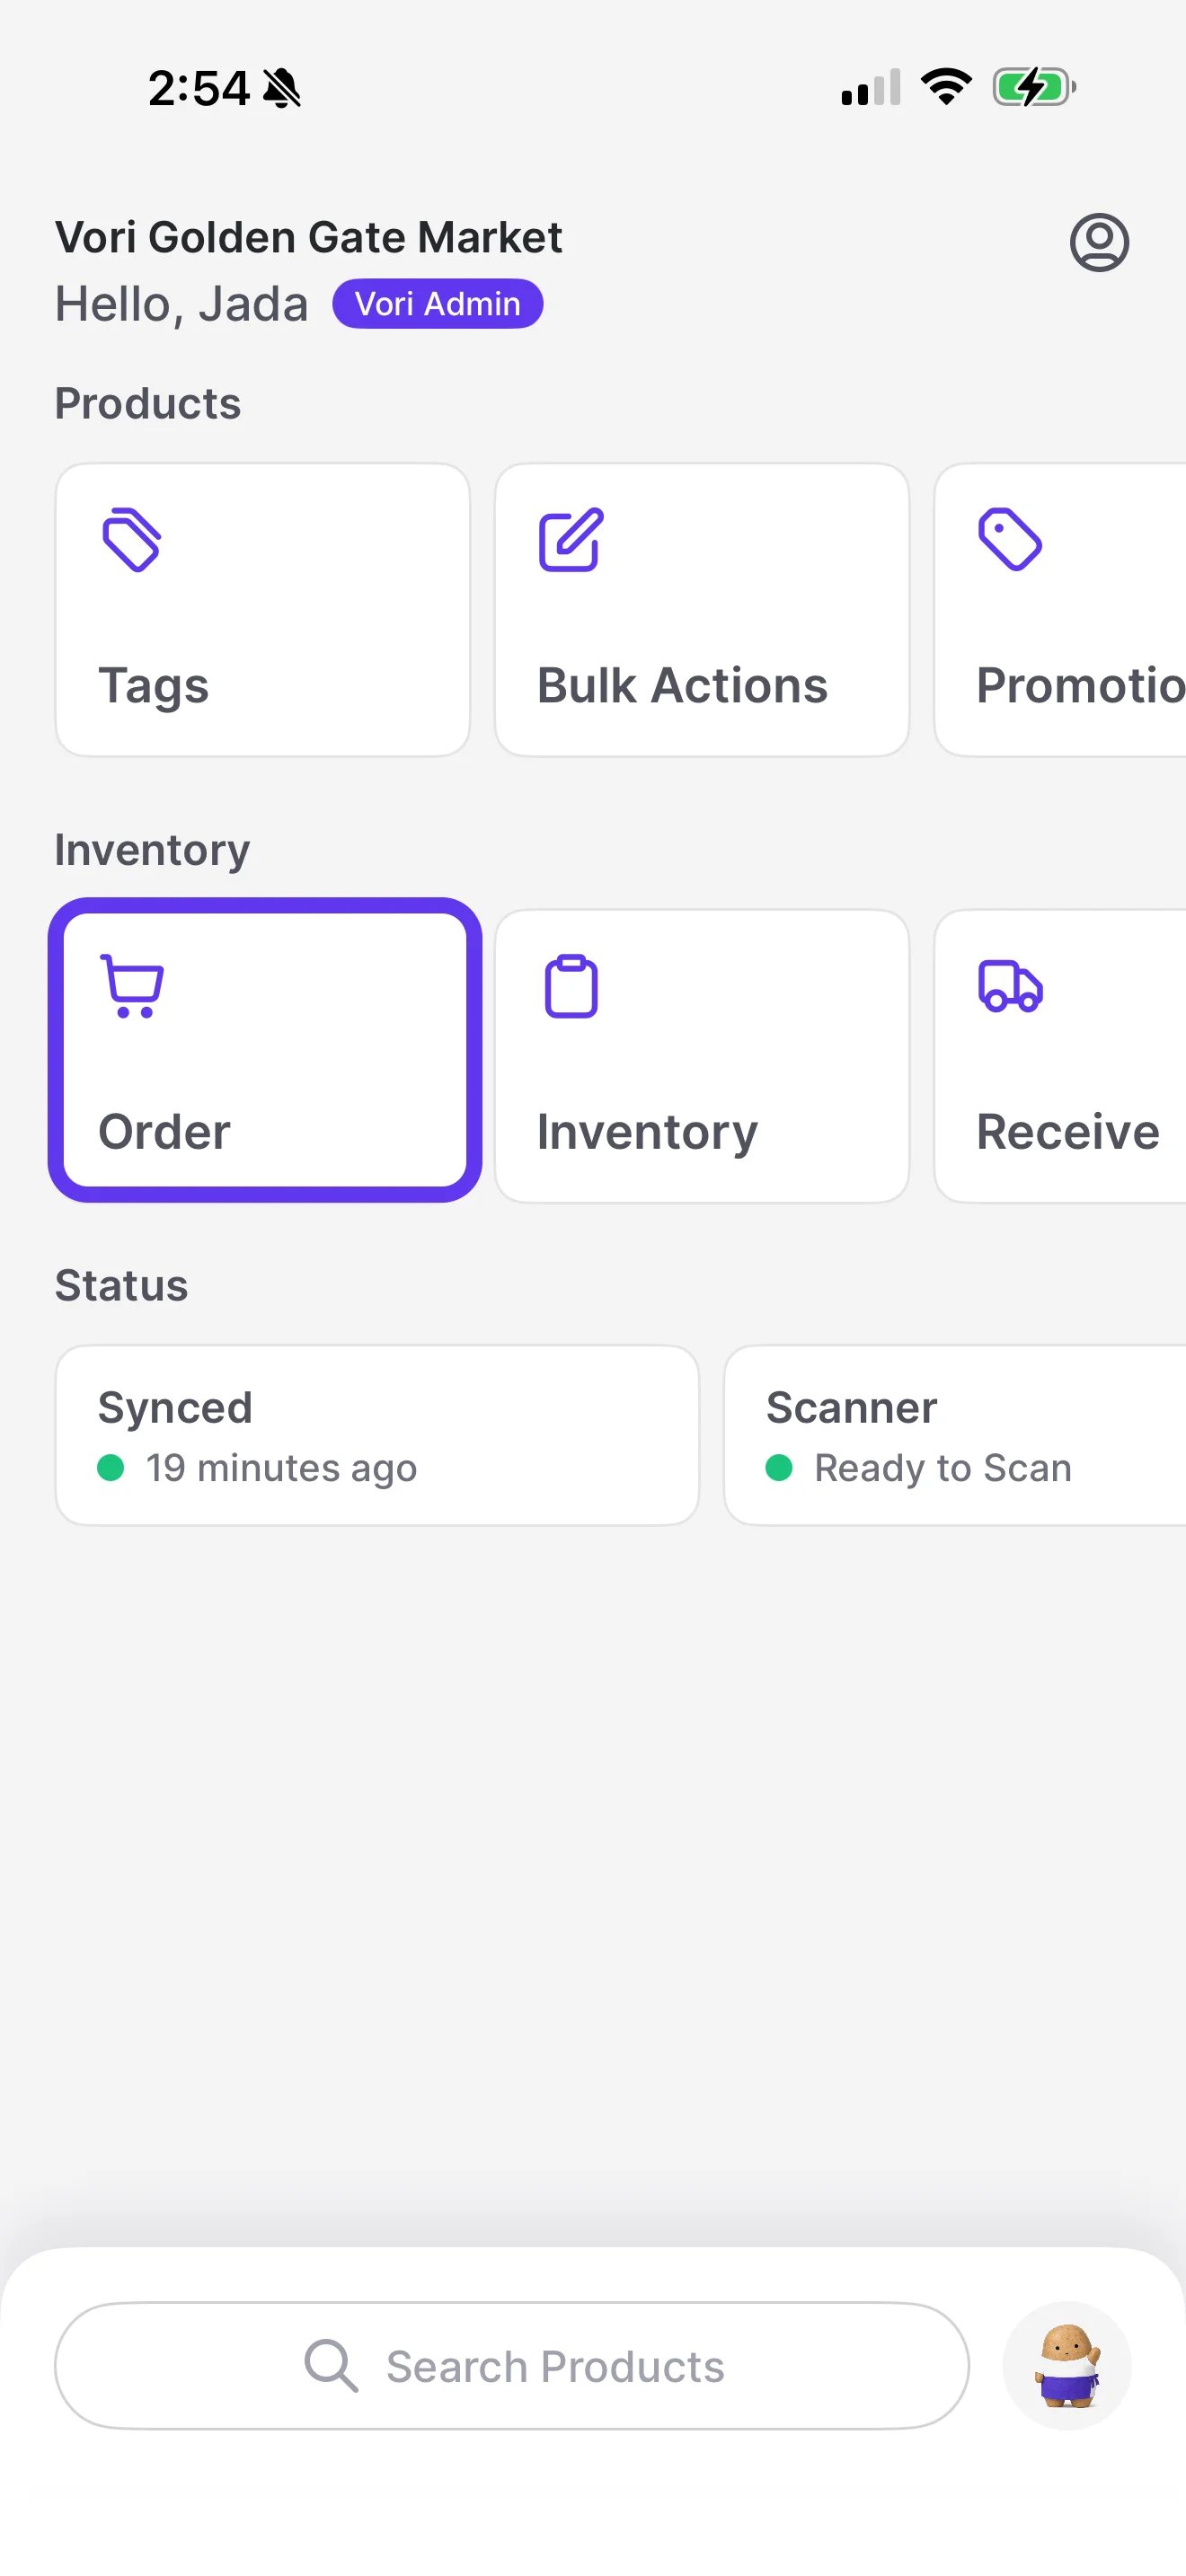
From the VoriOS home screen, tap Order.
-
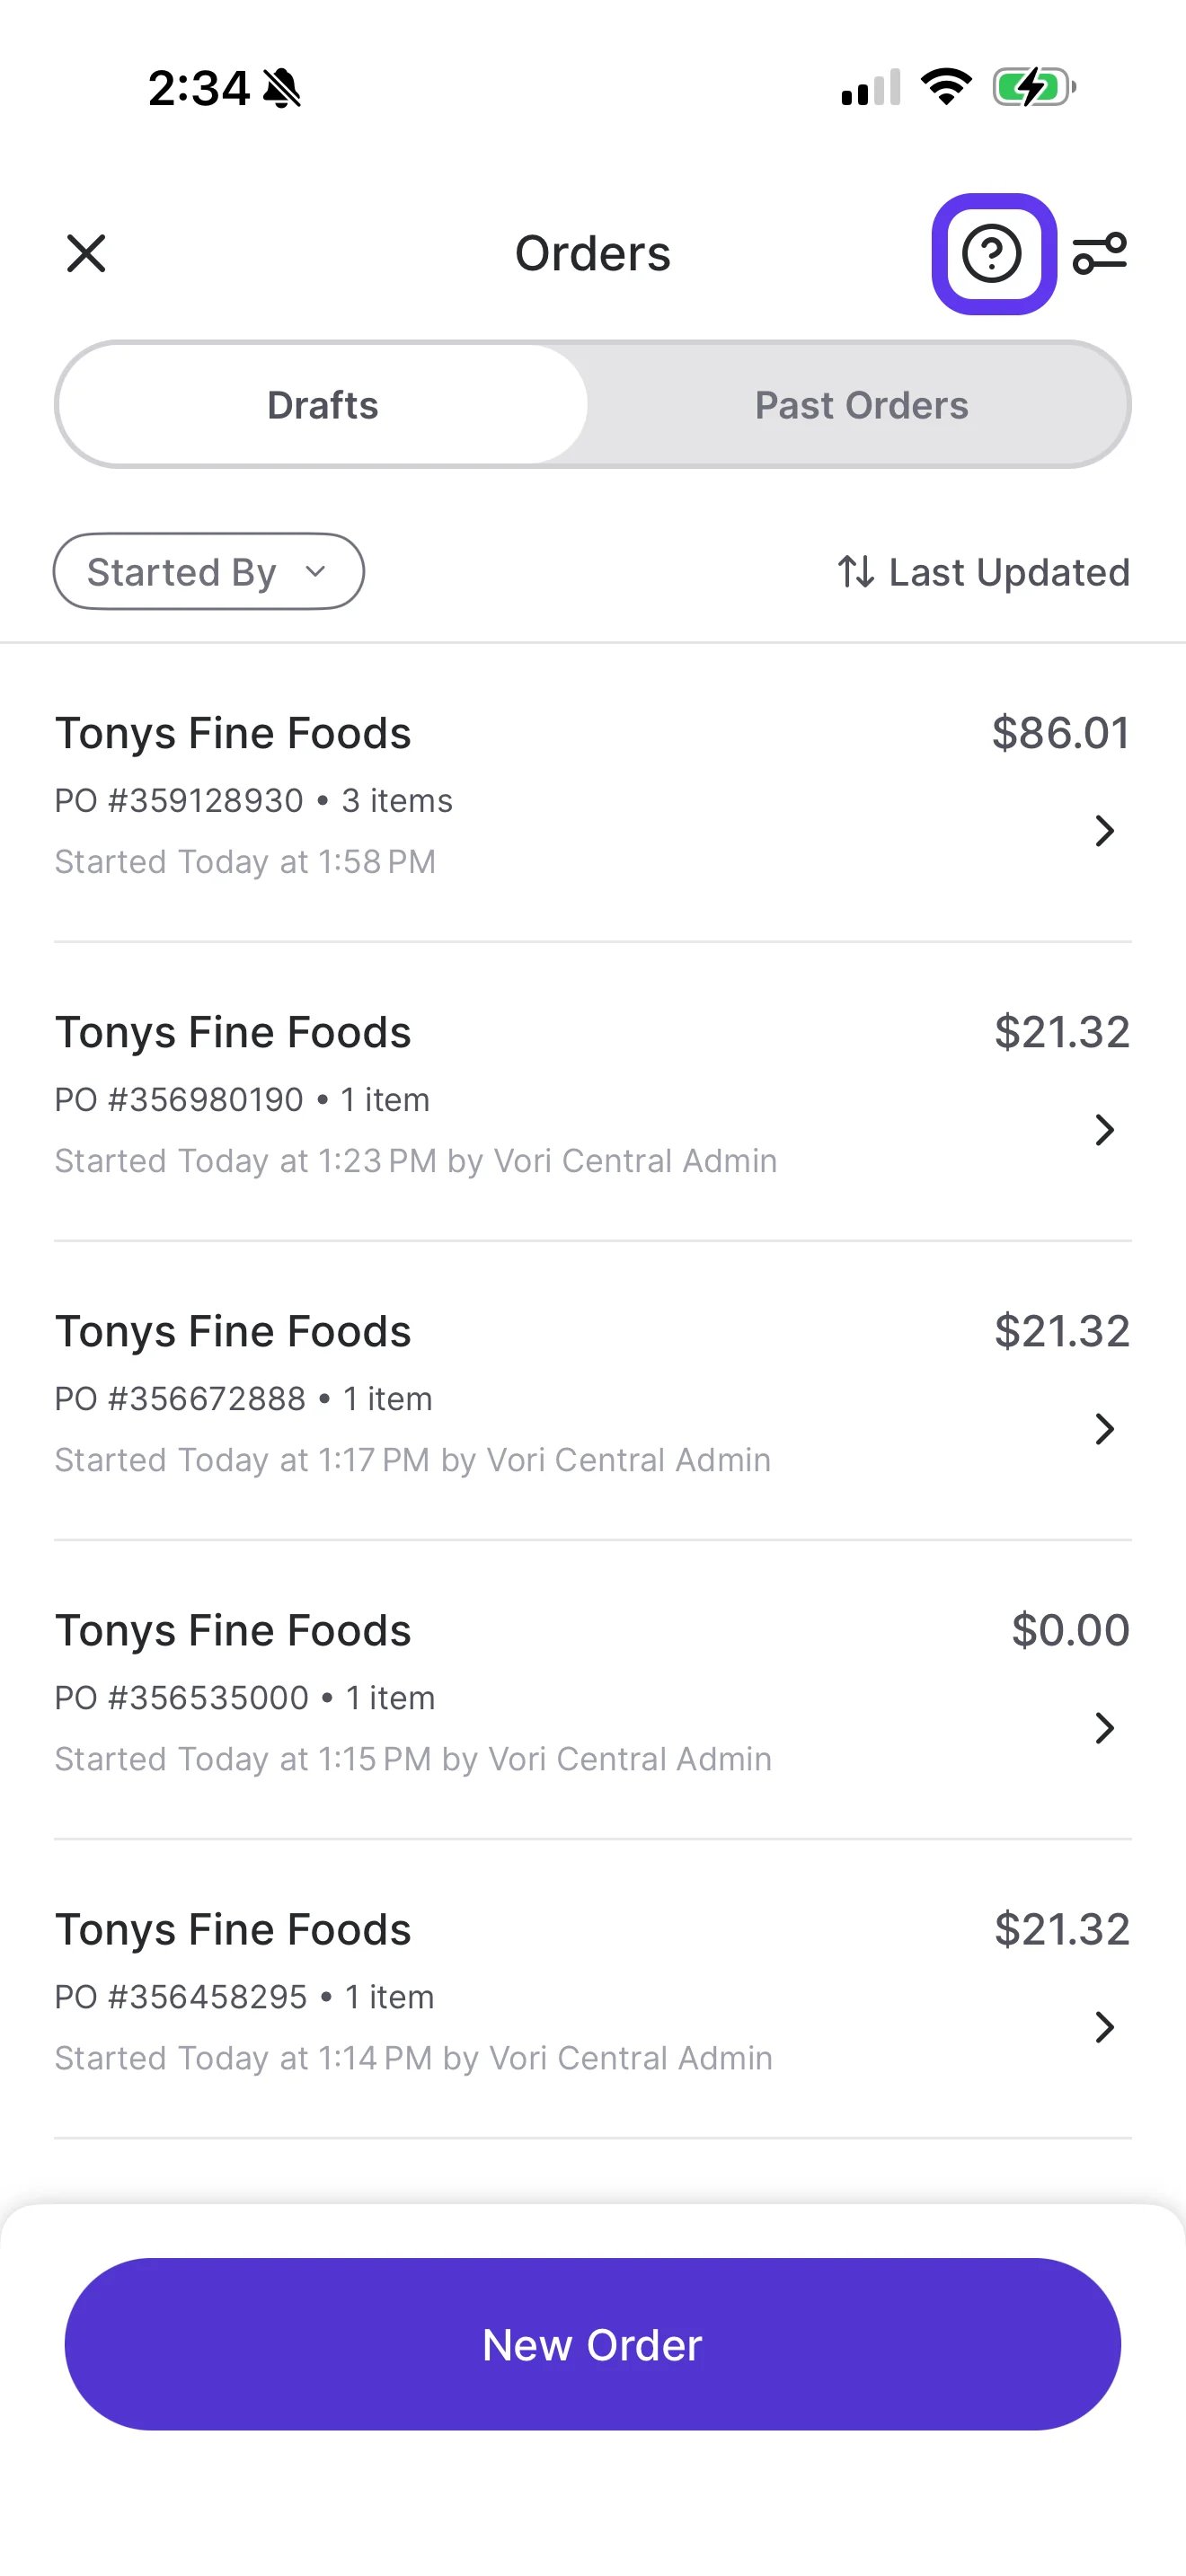
On the Orders screen, tap the ? mark, then tap Enter Training Mode.
-
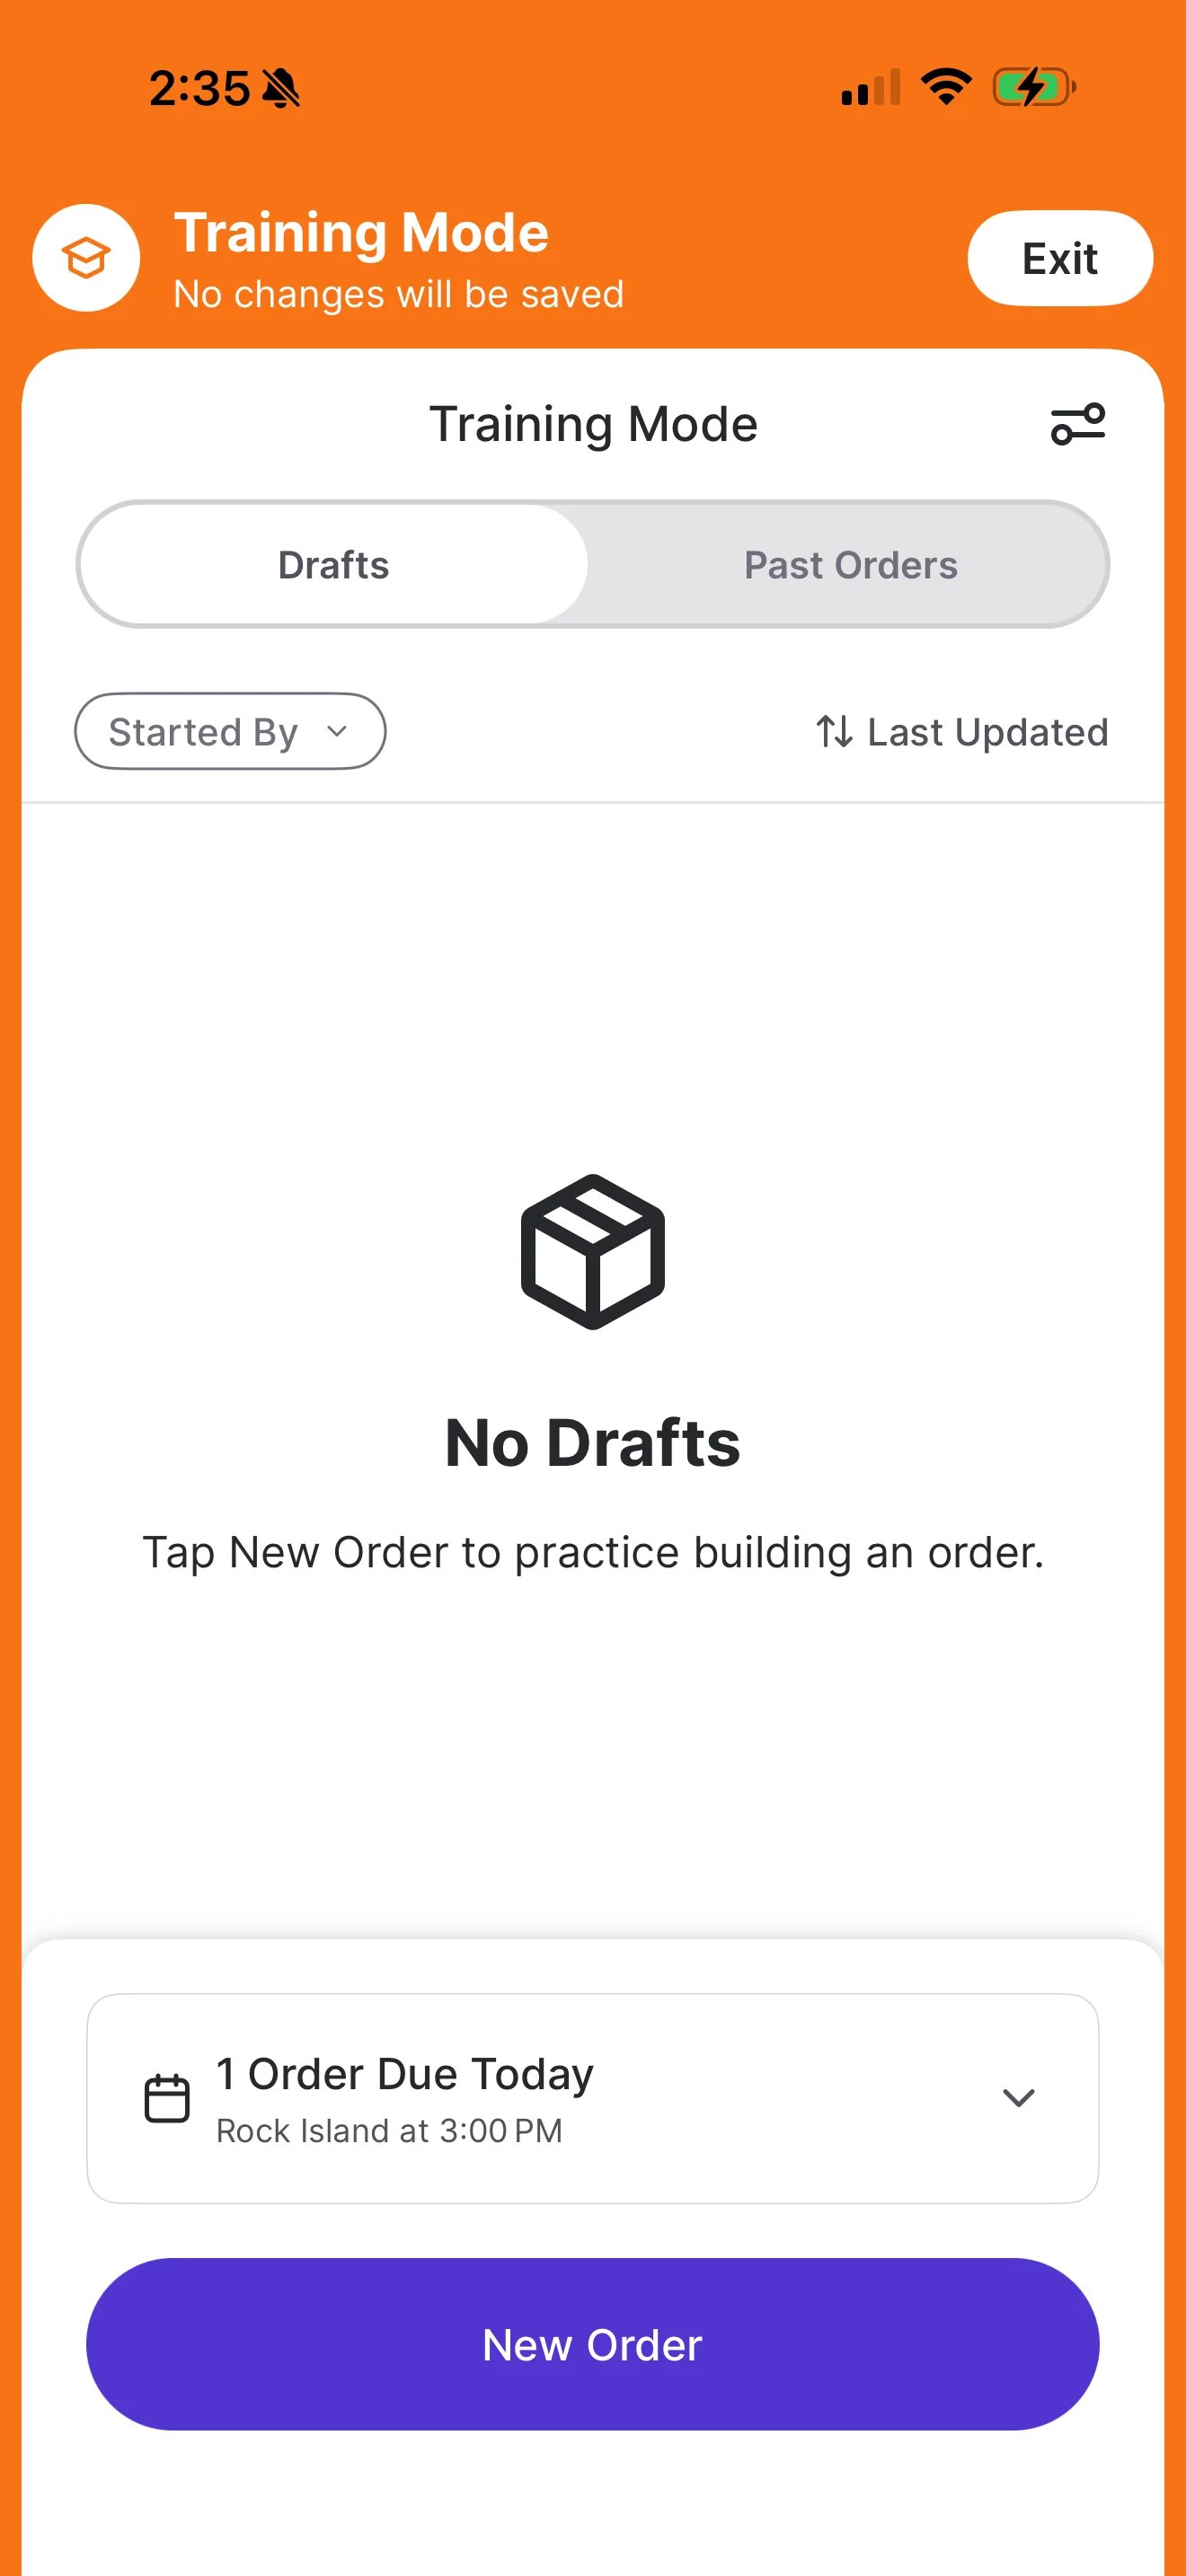
An orange Training Mode banner appears at the top of the screen. Tap New Order to start a practice order.
-
Choose an order type:
- Single Vendor Order: Pick one vendor from your Vendor List.
- Multi Vendor Order: Scan products from any vendor. Vori sorts them by vendor at checkout.
-
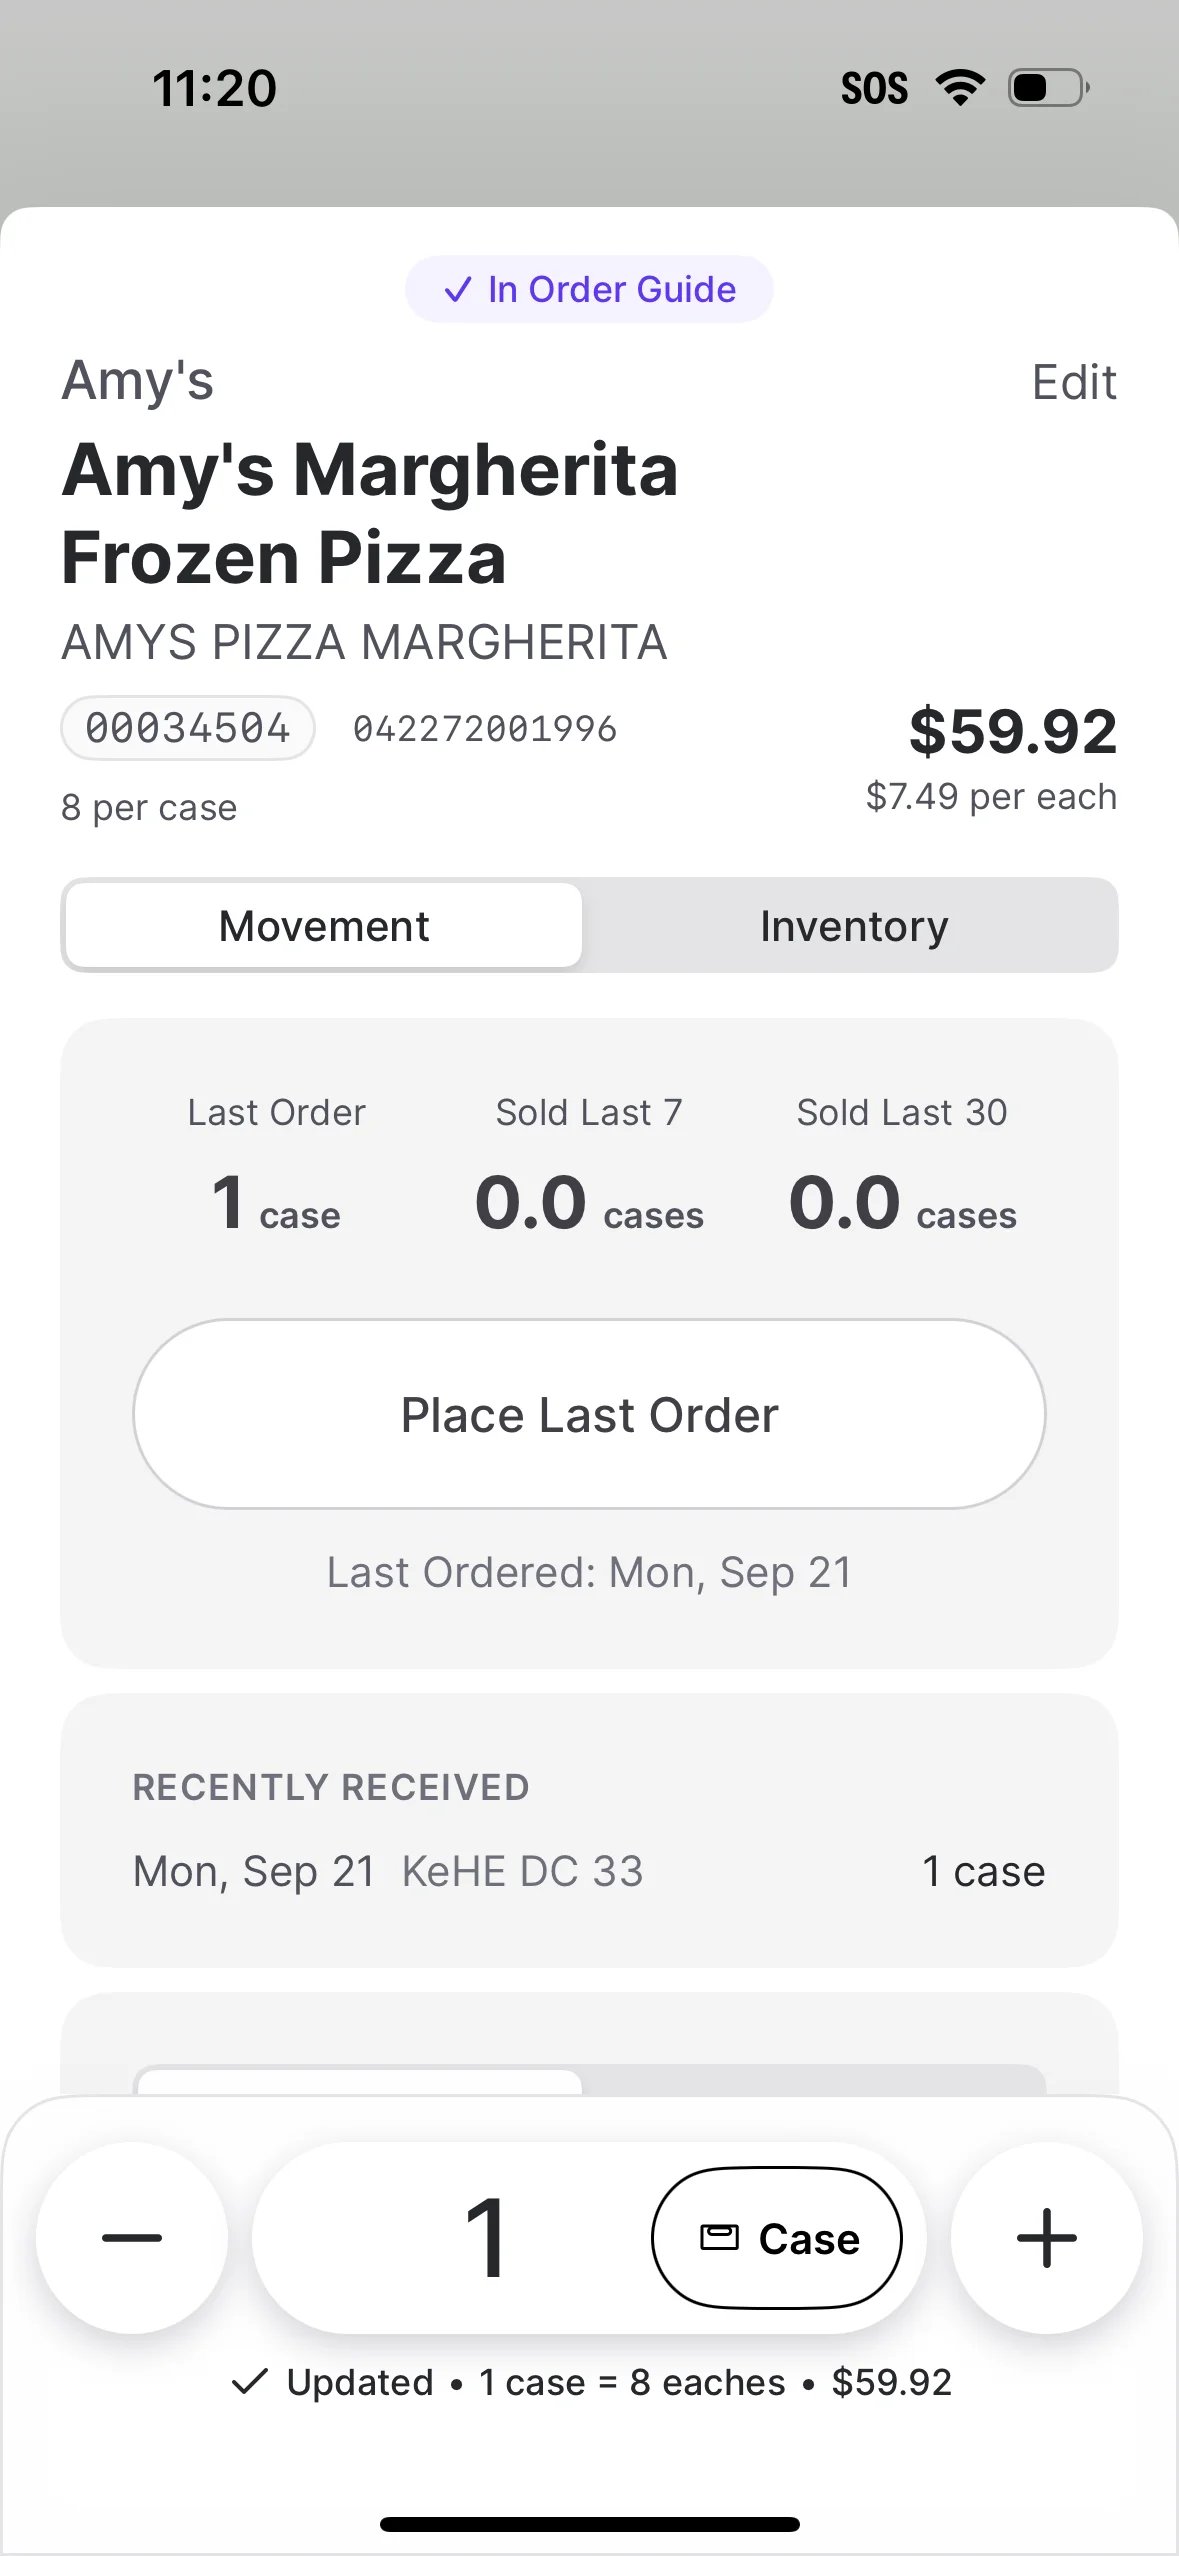
Scan a product or search by name, item code, or barcode. On Product Order Details, review the movement data and on-hand inventory, then set the quantity with the + / – buttons and toggle between Case and Each.
- If a product shows a No Vendor Found, Missing Item Code, or Mismatched Code alert, walk the trainee through what it means. The product cannot be added until the missing vendor or item code is filled in.
-
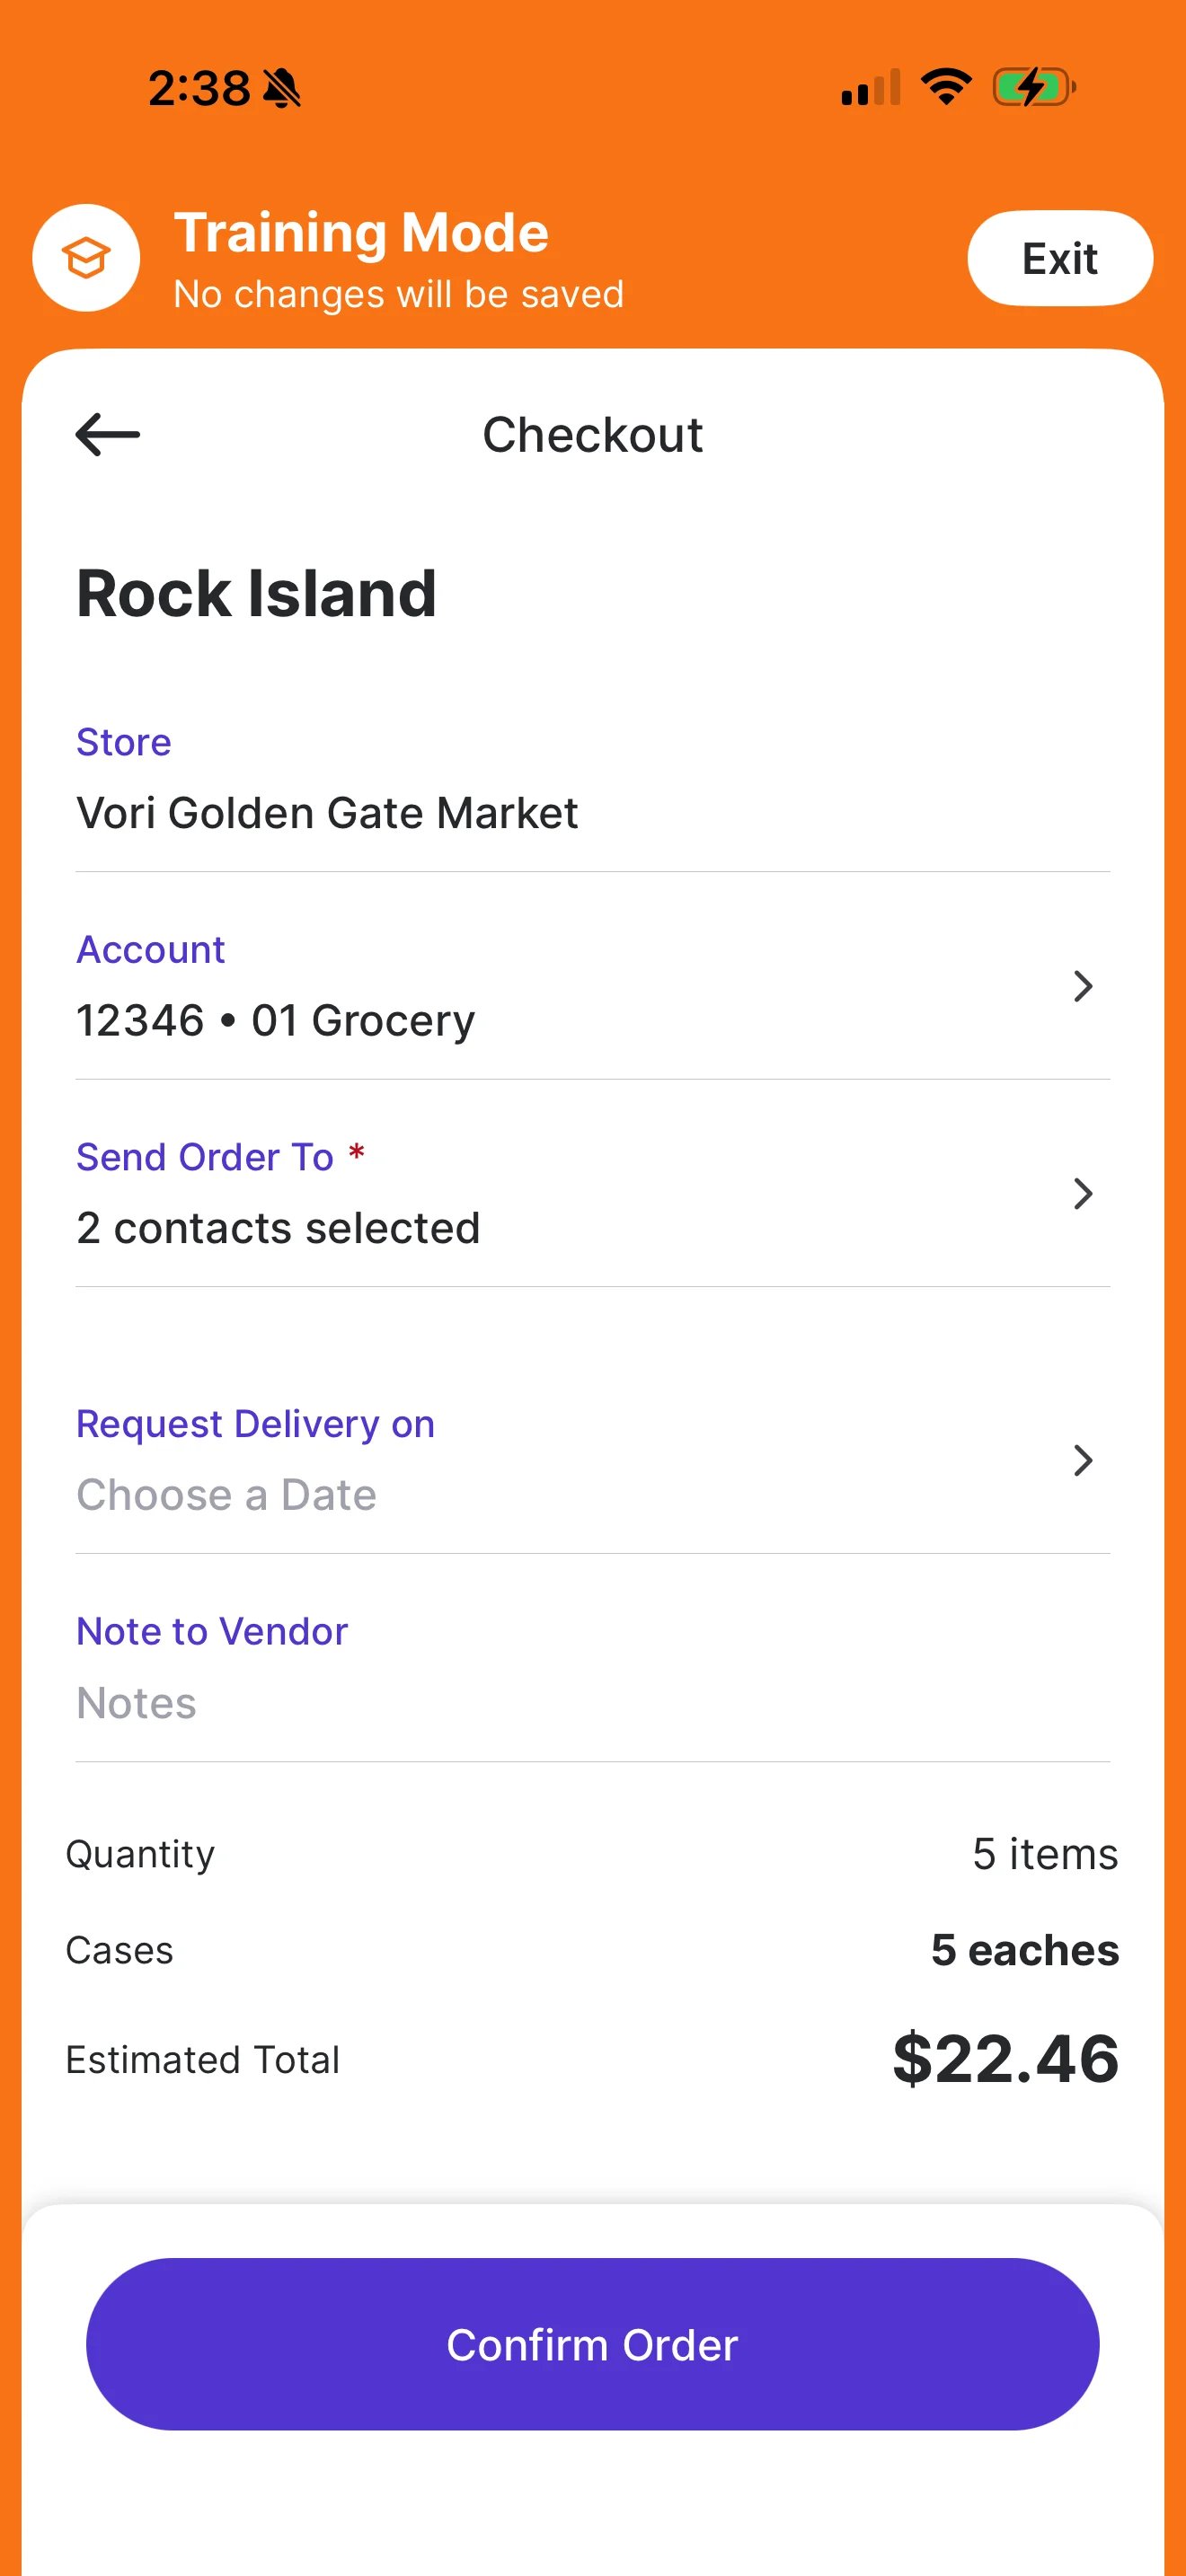
Tap Finish & Checkout. Review the Account, Send Order To contacts, delivery date, and order totals, then tap Confirm Order.
-
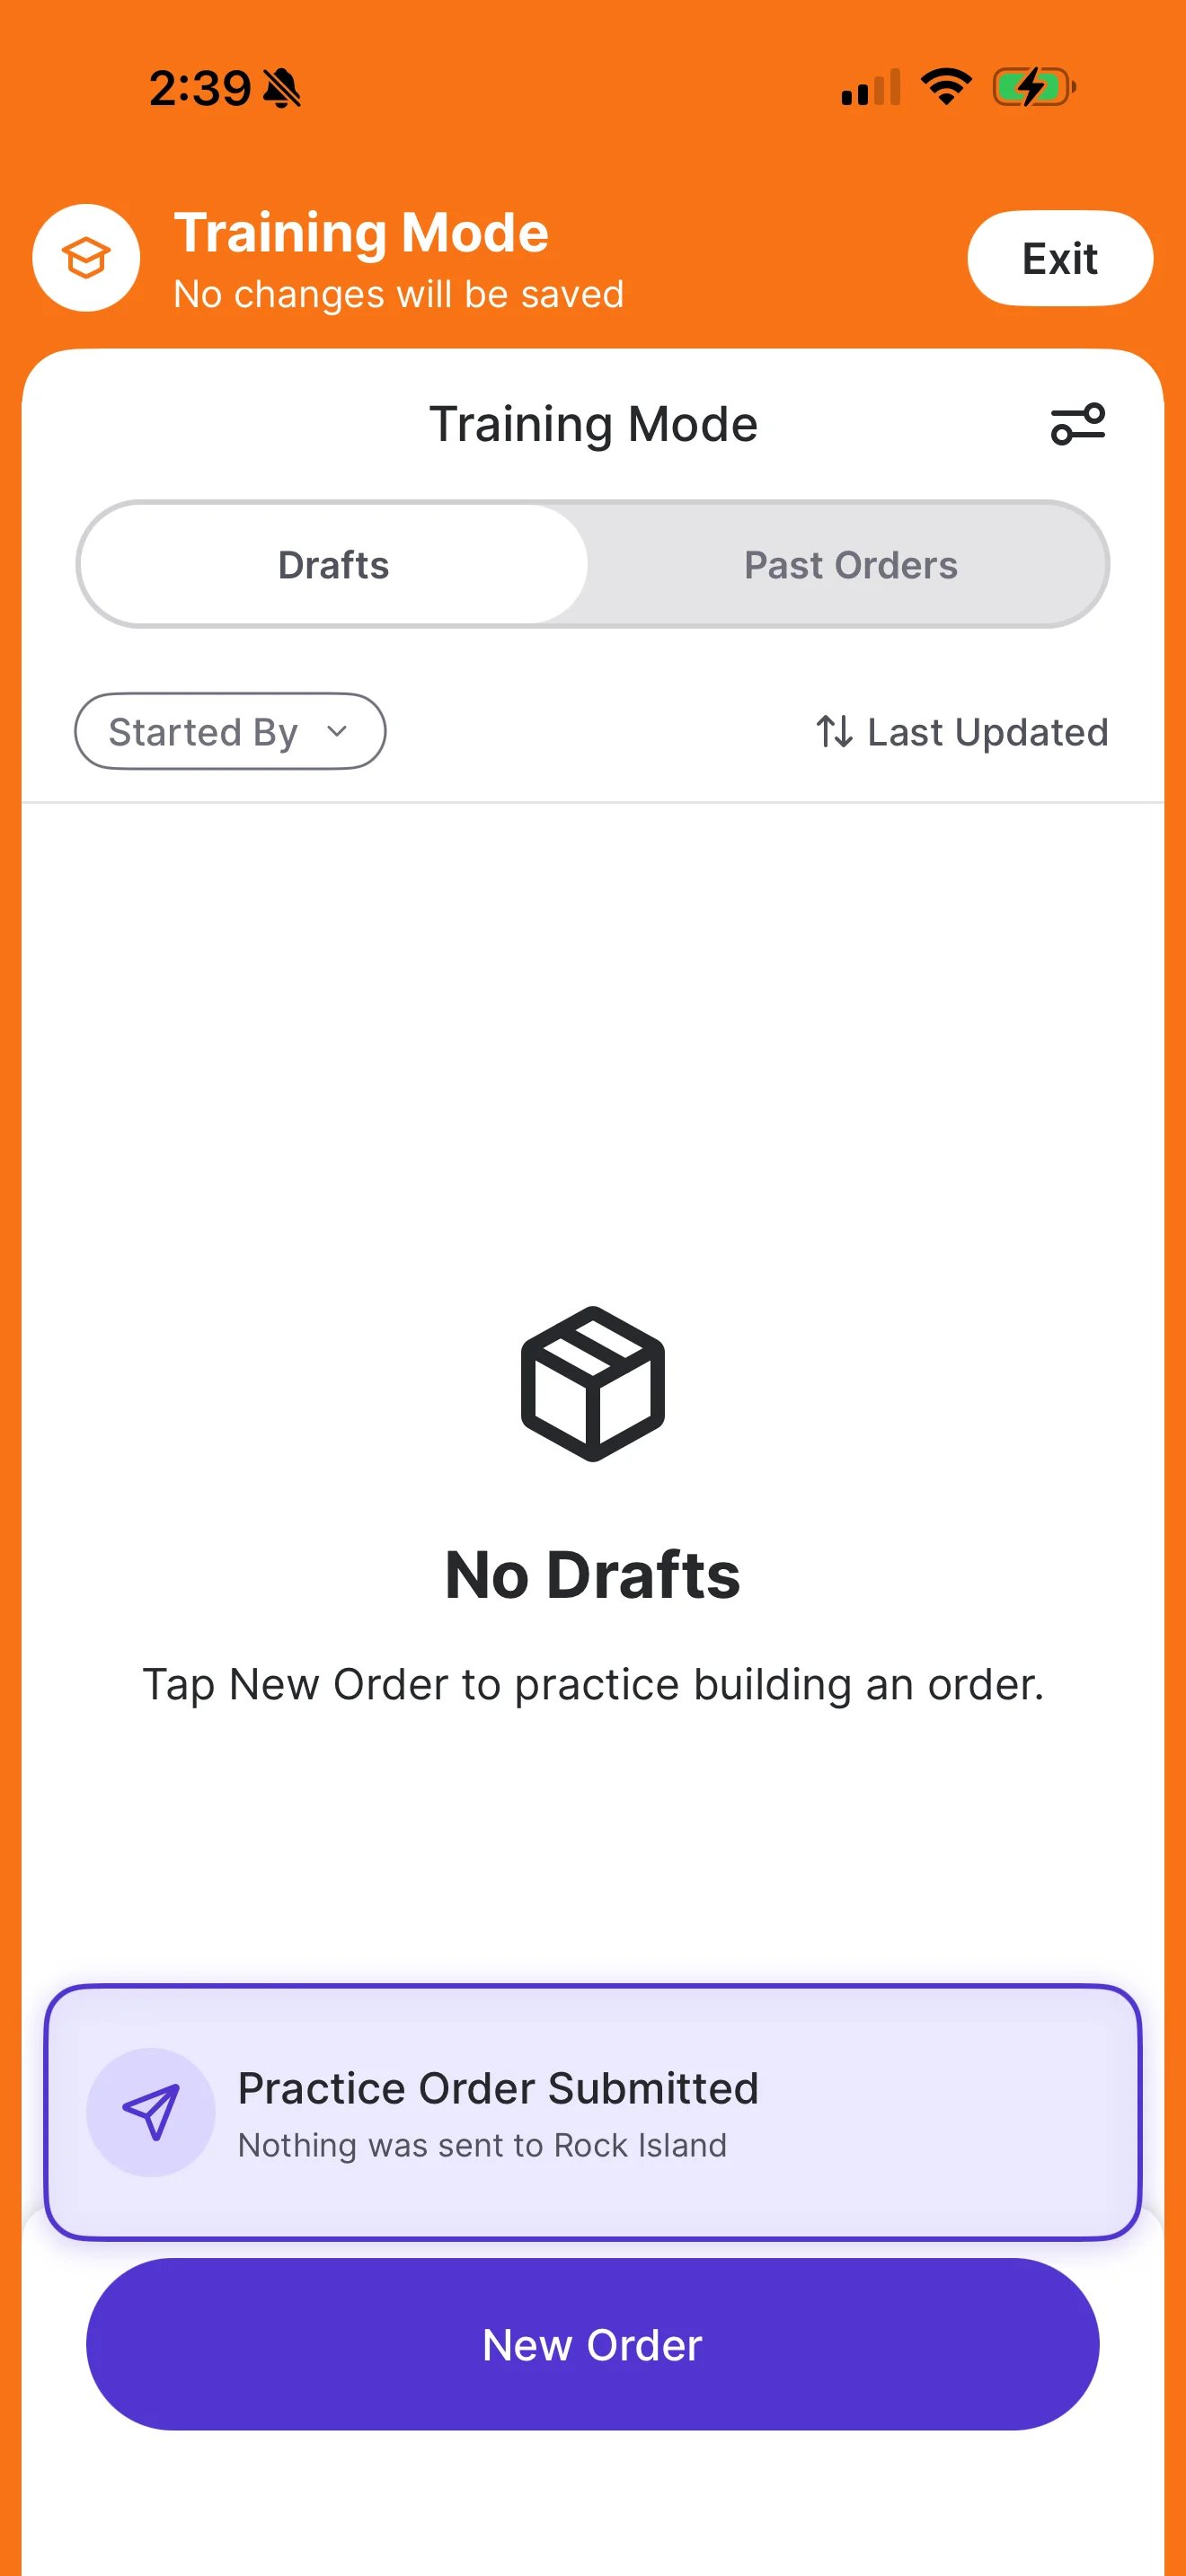
A Practice Order Submitted message confirms that nothing was sent to the vendor. Tap Exit in the orange banner to leave Training Mode.
Check their understanding
Before signing off on a trainee, confirm they can:- Start a Single Vendor Order and a Multi Vendor Order.
- Use movement data and on-hand inventory to choose a quantity, and switch between Case and Each.
- Explain what to do when a product shows No Vendor Found, Missing Item Code, or Mismatched Code.
- Check the account, contacts, and delivery date before tapping Confirm Order.