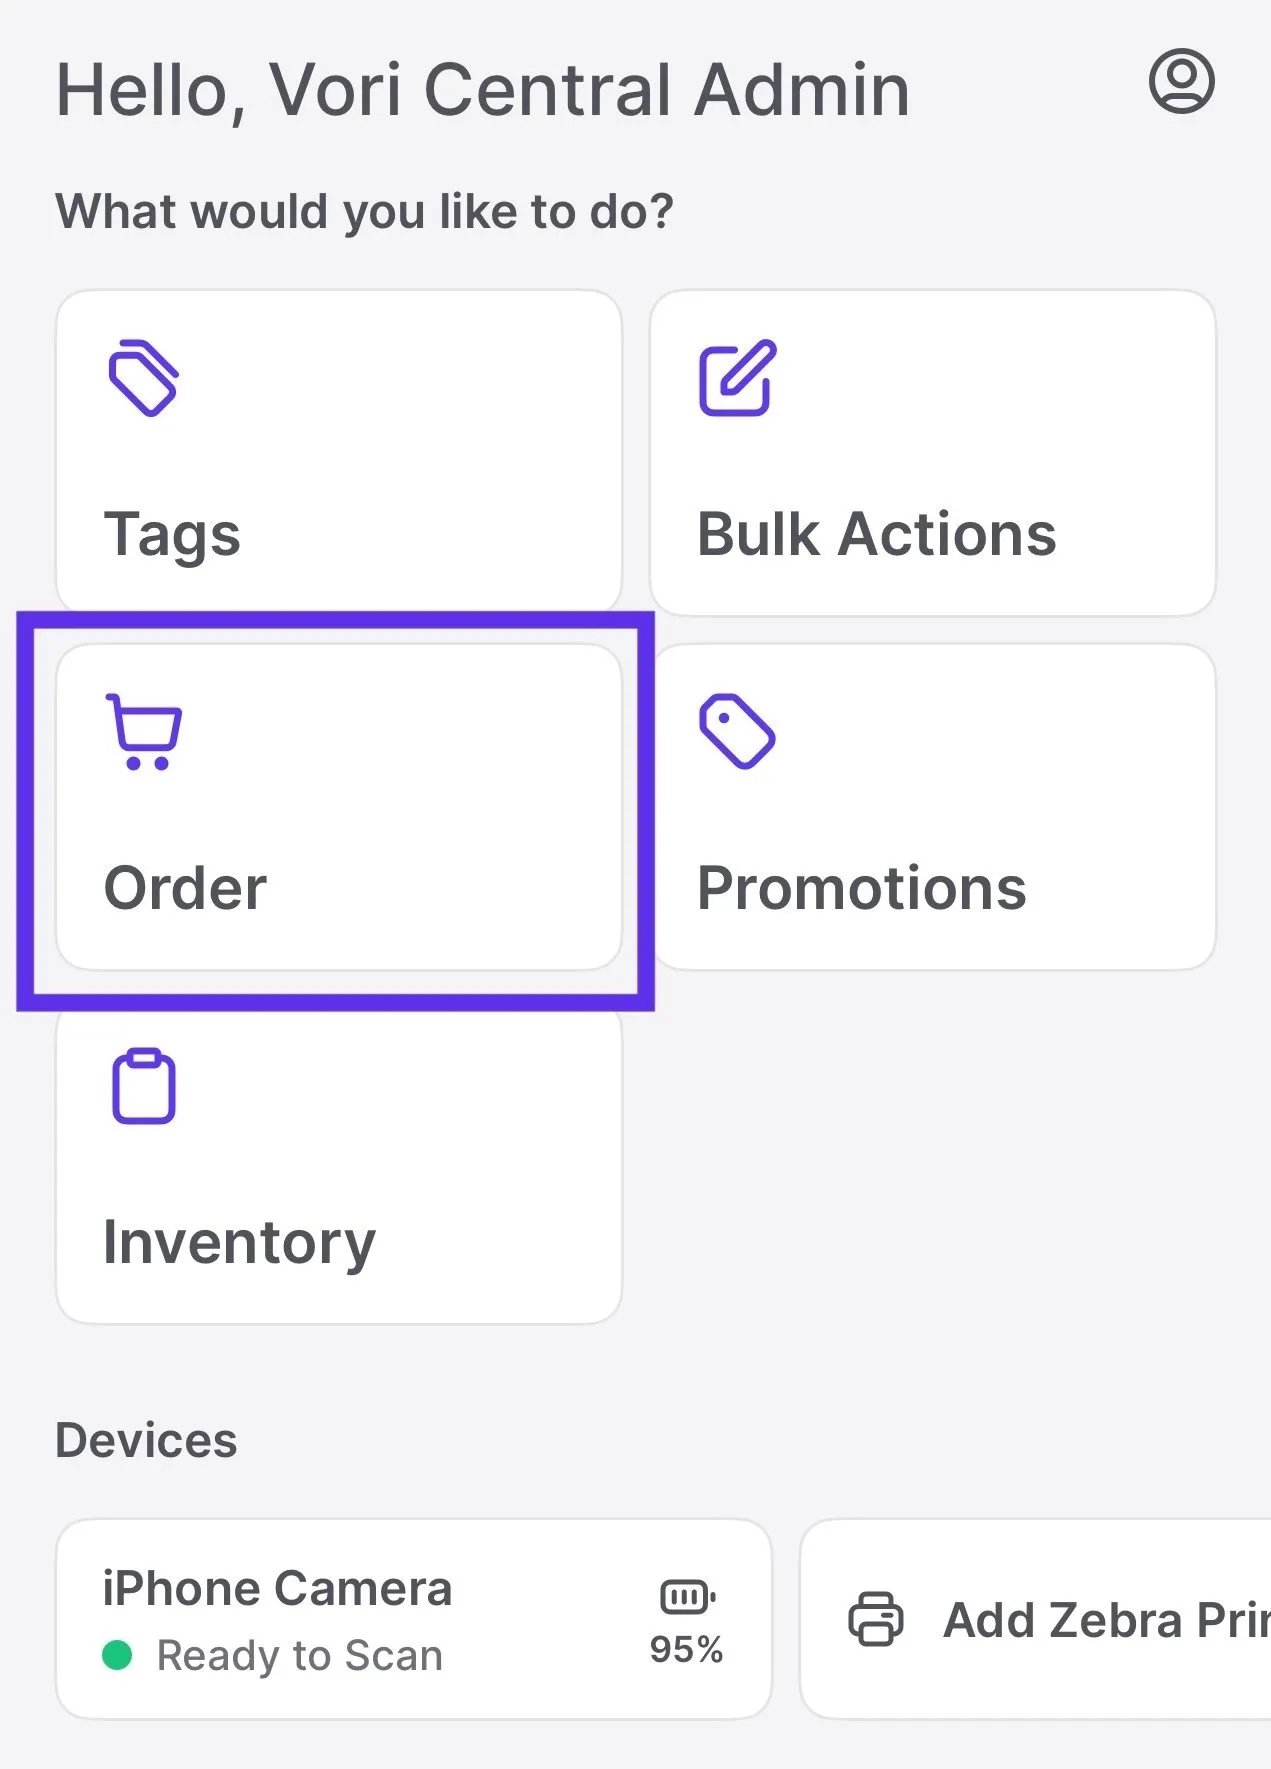
Access Ordering on VoriOS
- Log in to your store account on the VoriOS app.
- Tap Order from the menu.
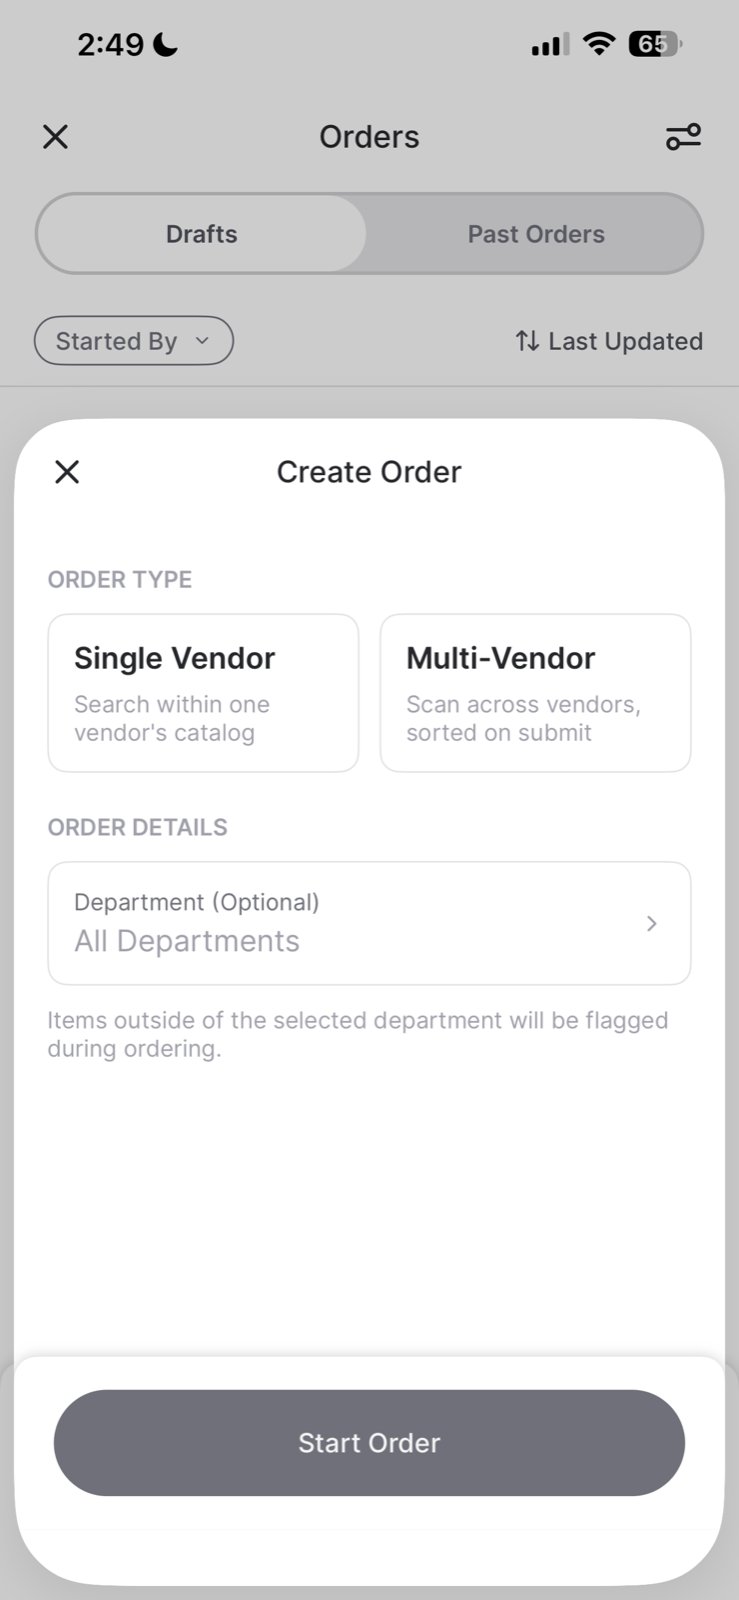
Start a New Order
Ready to place an order? Tap New Order to get started. You’ll be prompted to choose:- Single Vendor Order: Order directly from one vendor.
- Multi Vendor Order: Build a cart across multiple vendors by scanning or searching.
Order by department
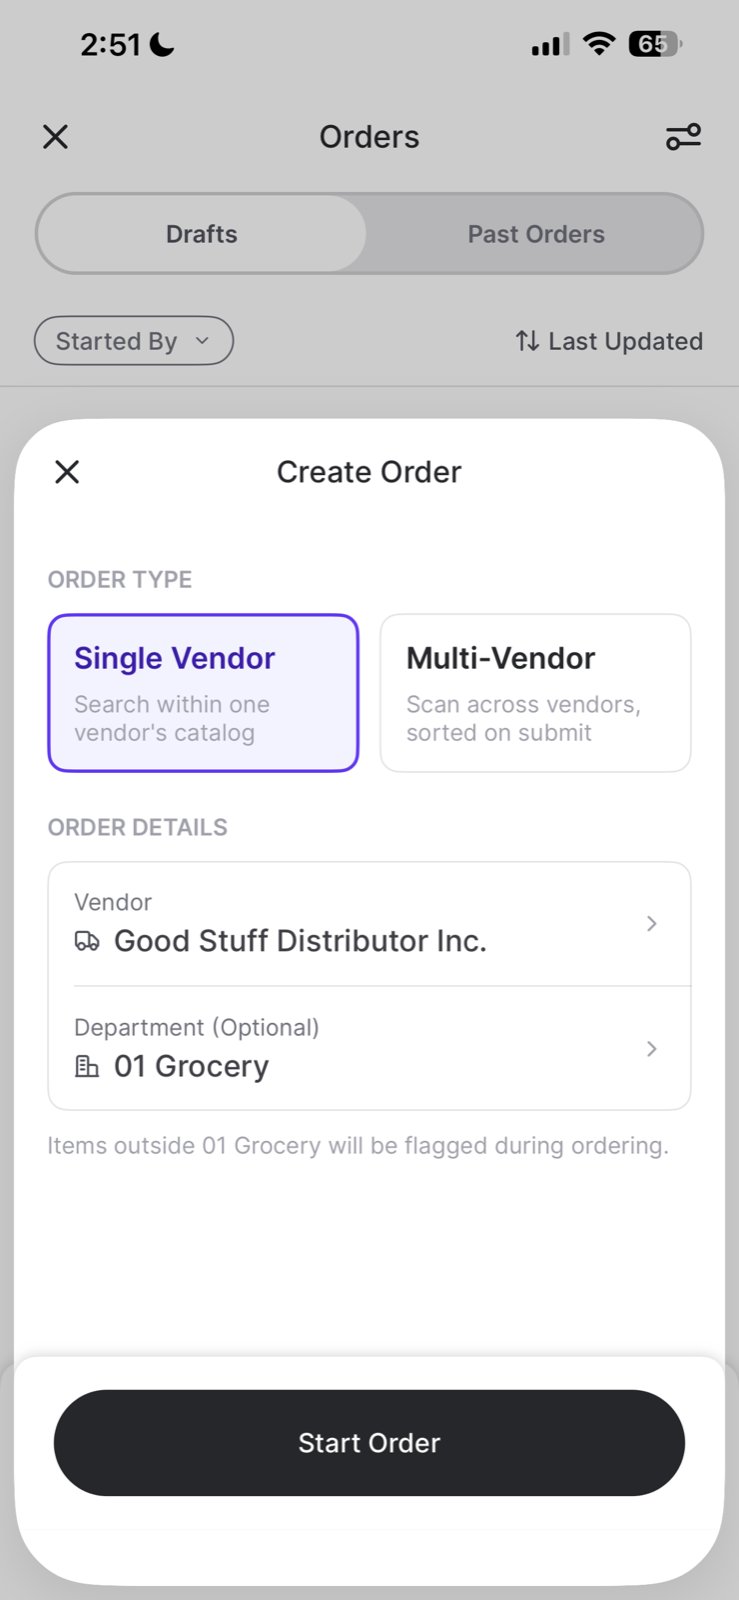
Assign a department when you start an order to keep your team focused on the right products and catch anything that doesn’t belong. Why order by department Assigning a department, like Grocery, Produce, or Deli, helps your team stay focused on ordering for that area of the store. It’s especially useful when different people are responsible for ordering different departments. How to order by department- Tap New Order.
- Under Order Details, tap Department (Optional).
- Choose the department for this order.
Create a Single Vendor Order
Single Vendor Orders help streamline your ordering process when working with just one supplier. Once you’ve selected this option, follow these steps to start building your order:
- Tap Single Vendor Order.
- Select a vendor from your Vendor List.
- Scan a product or use the search bar to find a product by:
- Product name
- Item code
- Barcode
- Search within your store catalog (products you already carry).
- Search a vendor catalog (to discover new products).
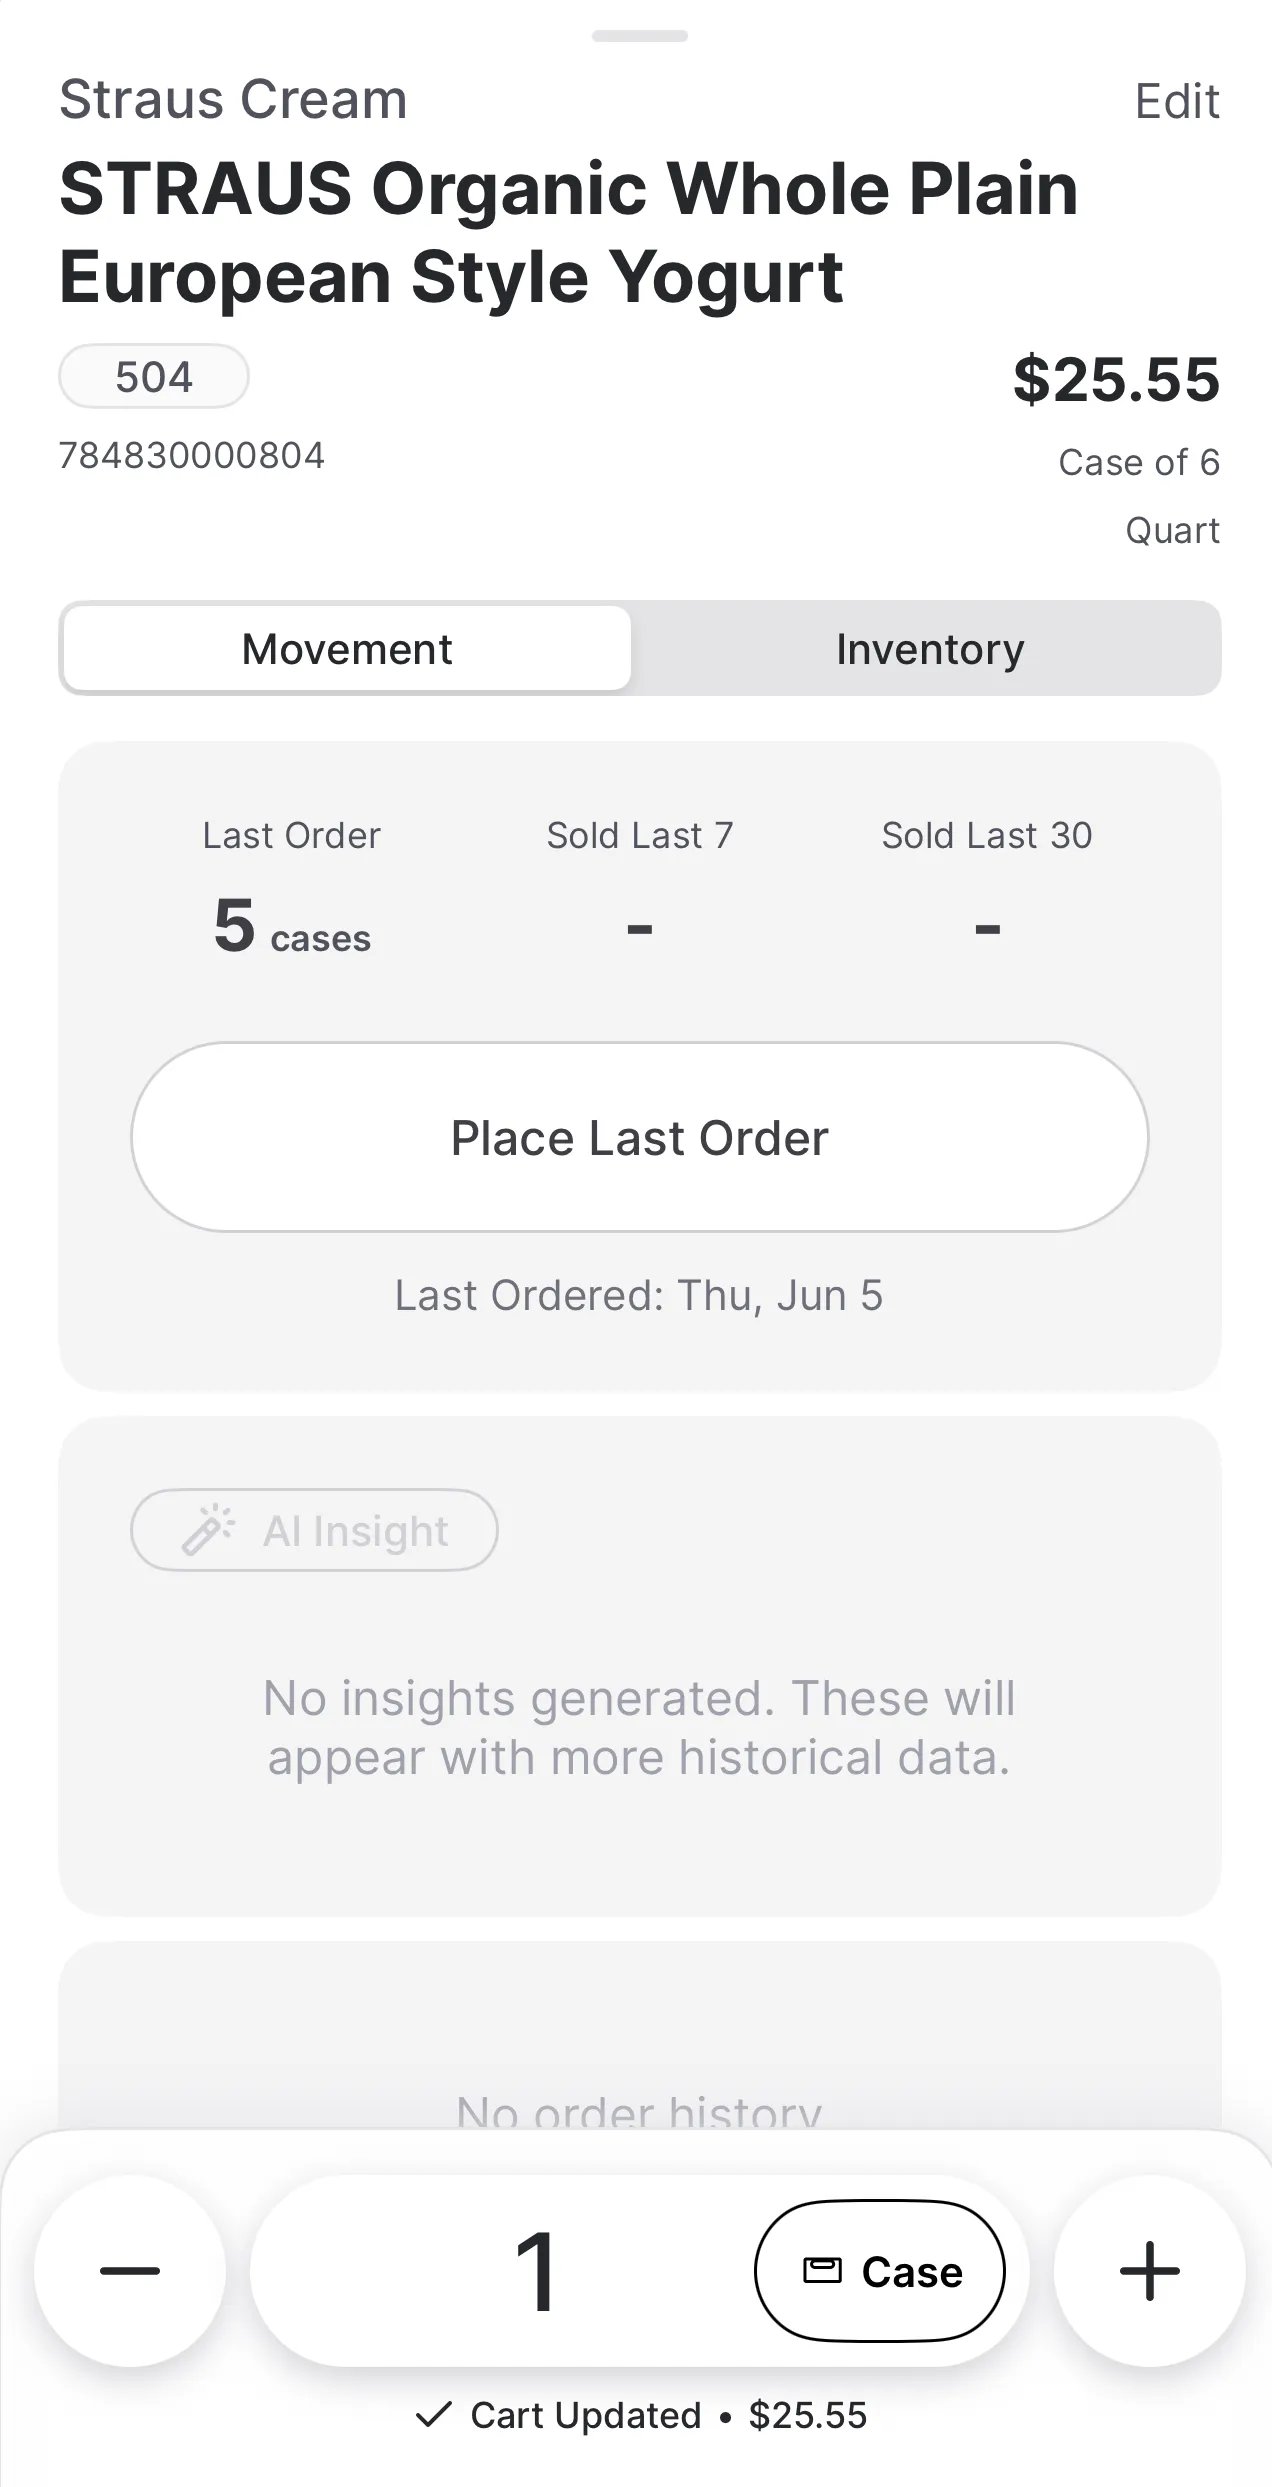
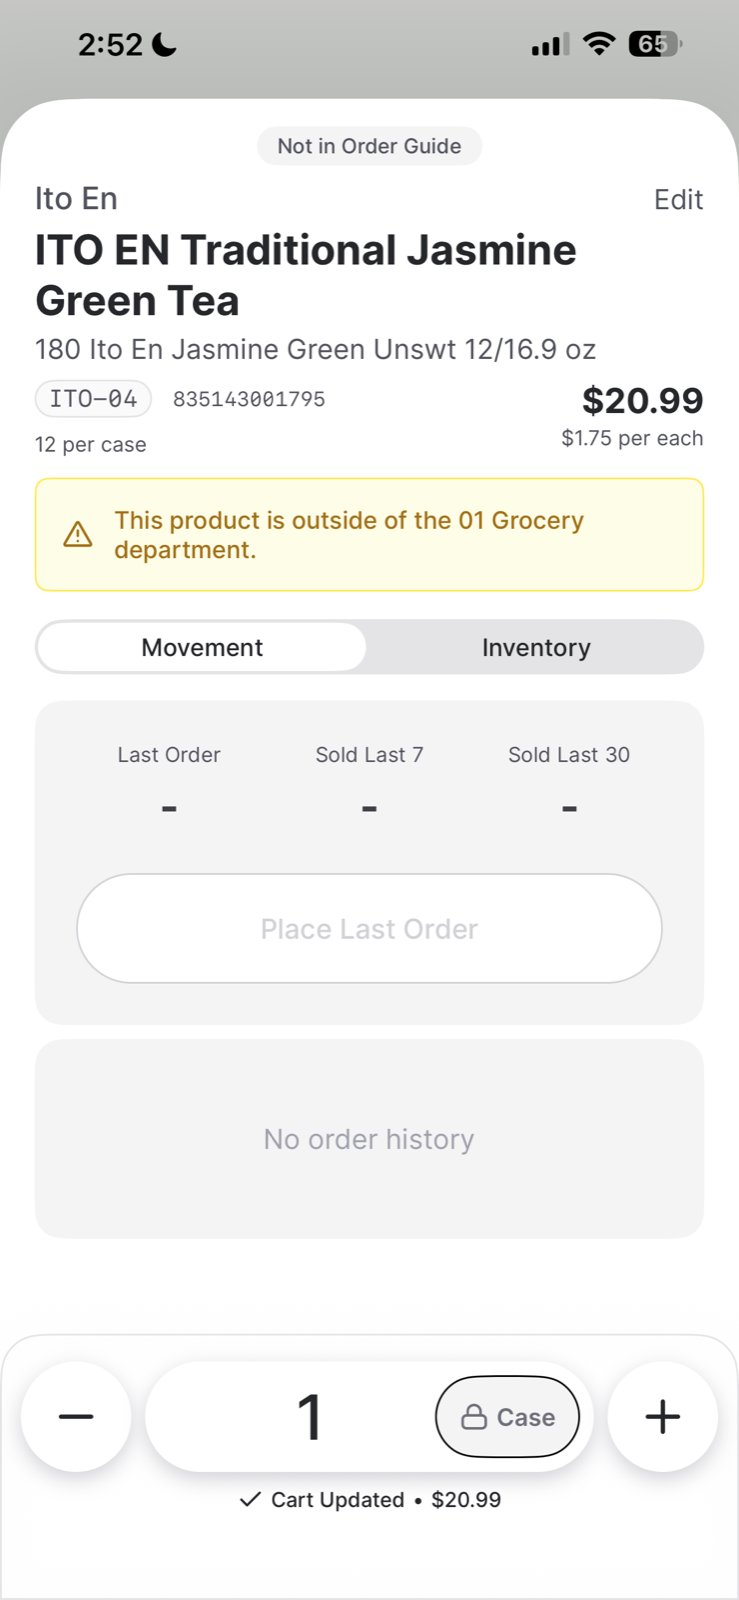
Product Order Details
Once you select a product, the Product Order Details will appear with key details to help you make informed purchasing decisions.- Item Info: Brand, name, barcode.
- Cost & Case Details: Vendor cost, case size, unit type.
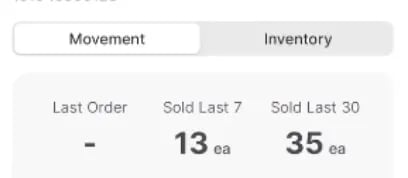
- Movement Data: Shows how many units of a product you’ve sold at the register.
- Movement helps you order what you need, based on sales, not habits.
- Inventory: Need to make a quick correction to your inventory? Sometimes you spot a mistake mid-order, like realizing your shelf count is 12, not 10. No problem, just tap Update Inventory to update the number.
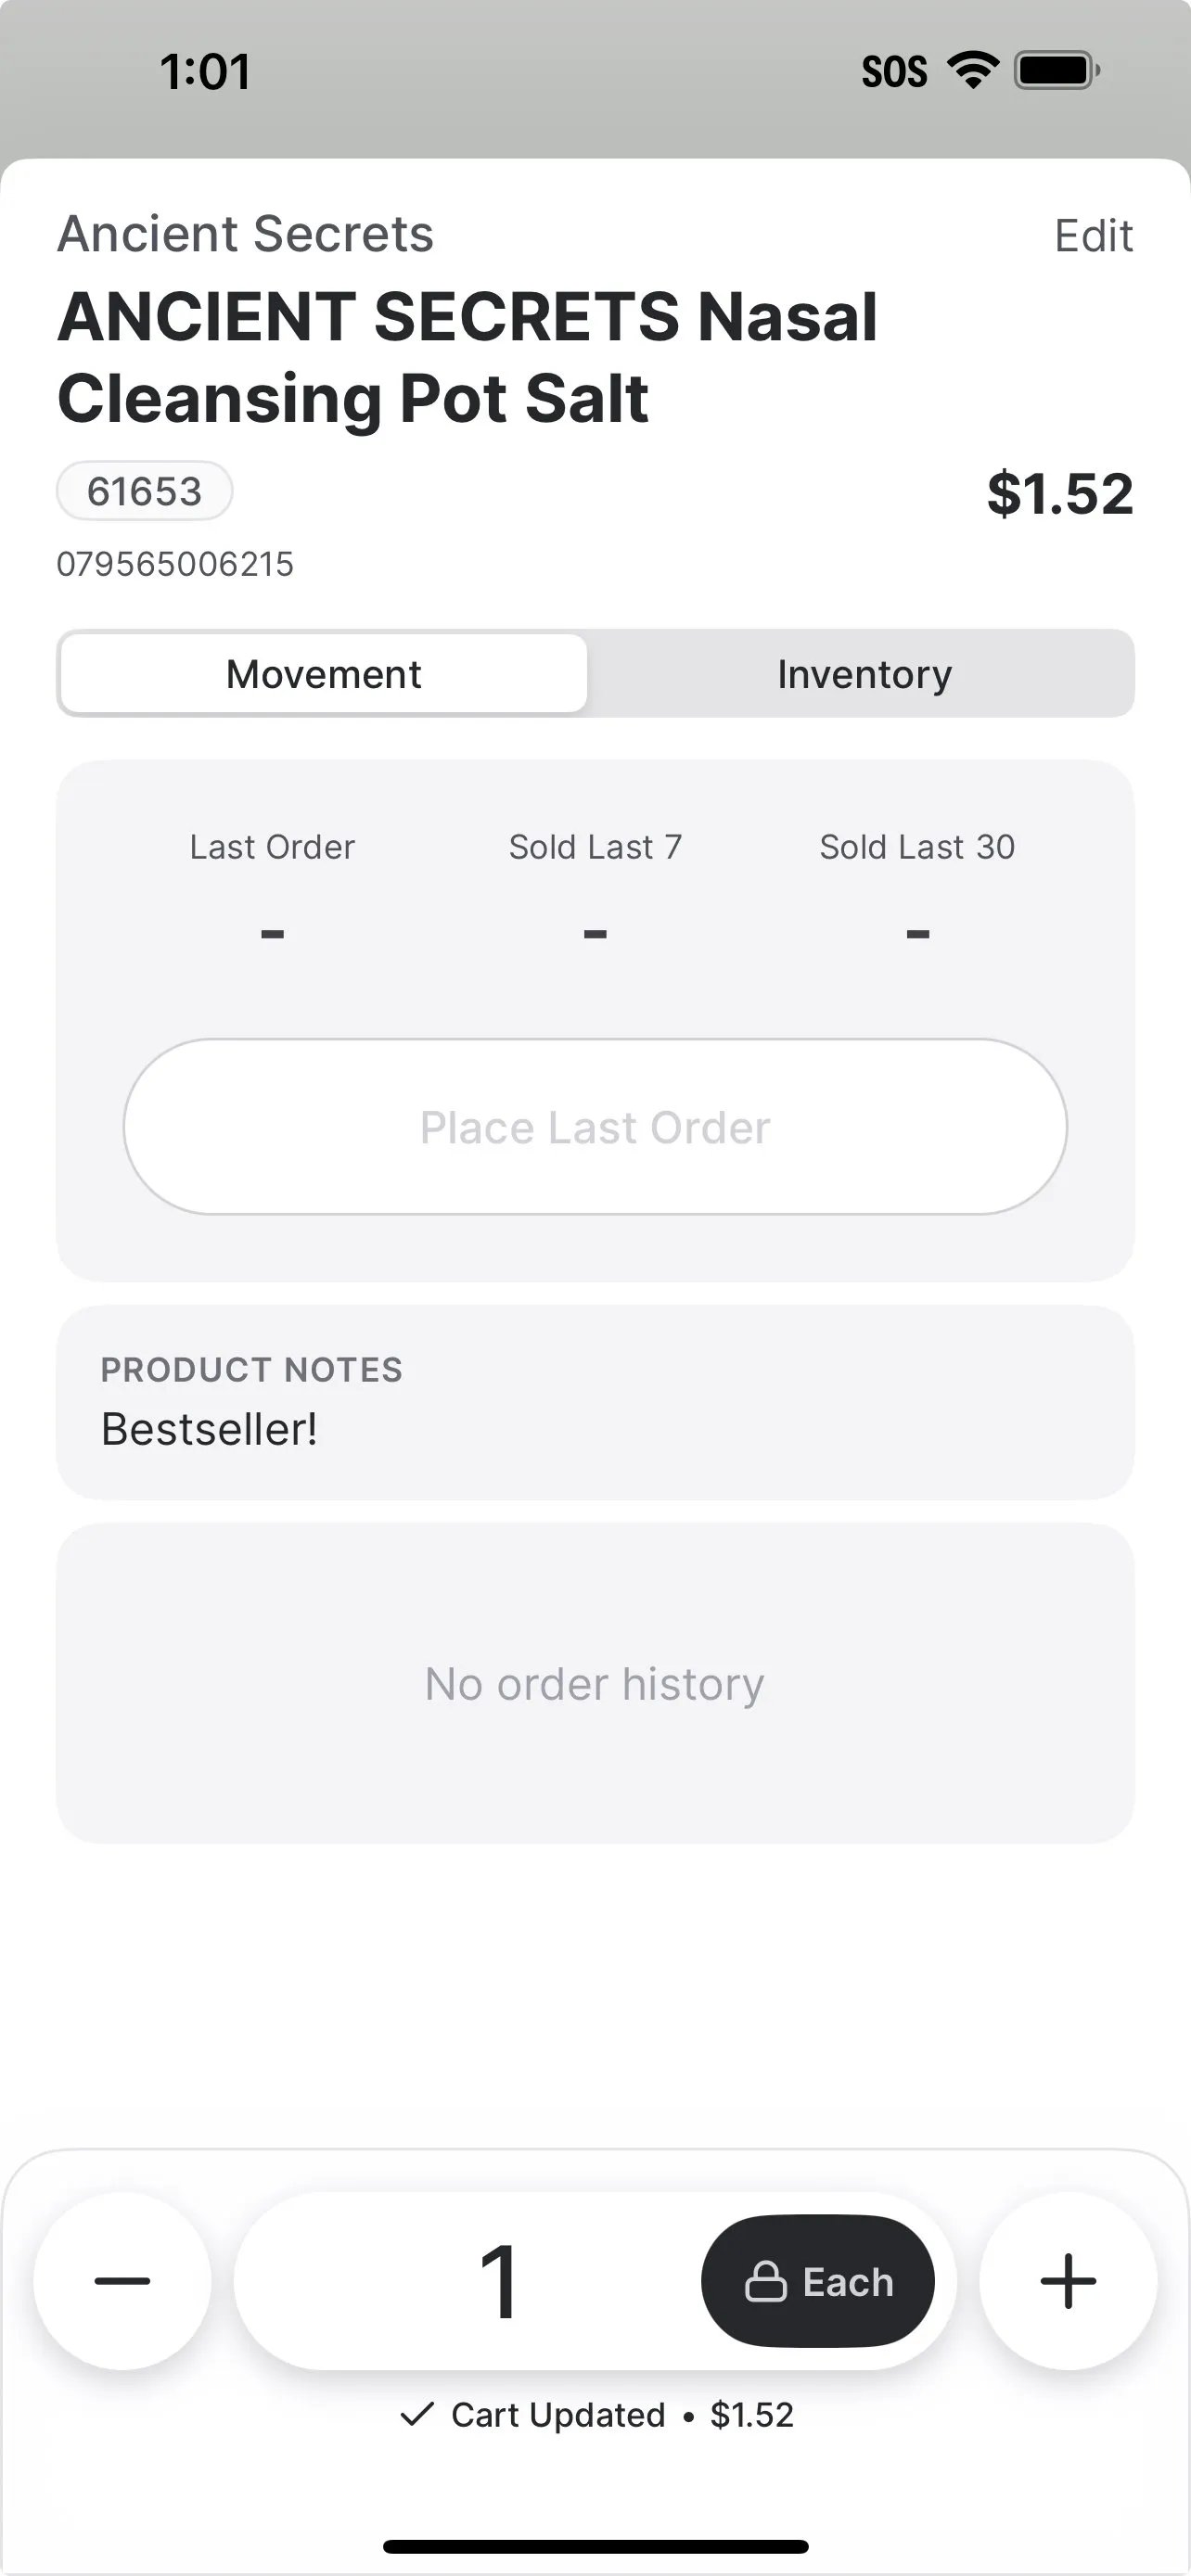
-
Product Notes: These notes help your team track internal details about a product. While you can view these notes from the Product Order Details page during ordering, they can only be added or edited from the Product Details page. Learn how to add or edit notes, see: In Beta: New Product Details Page
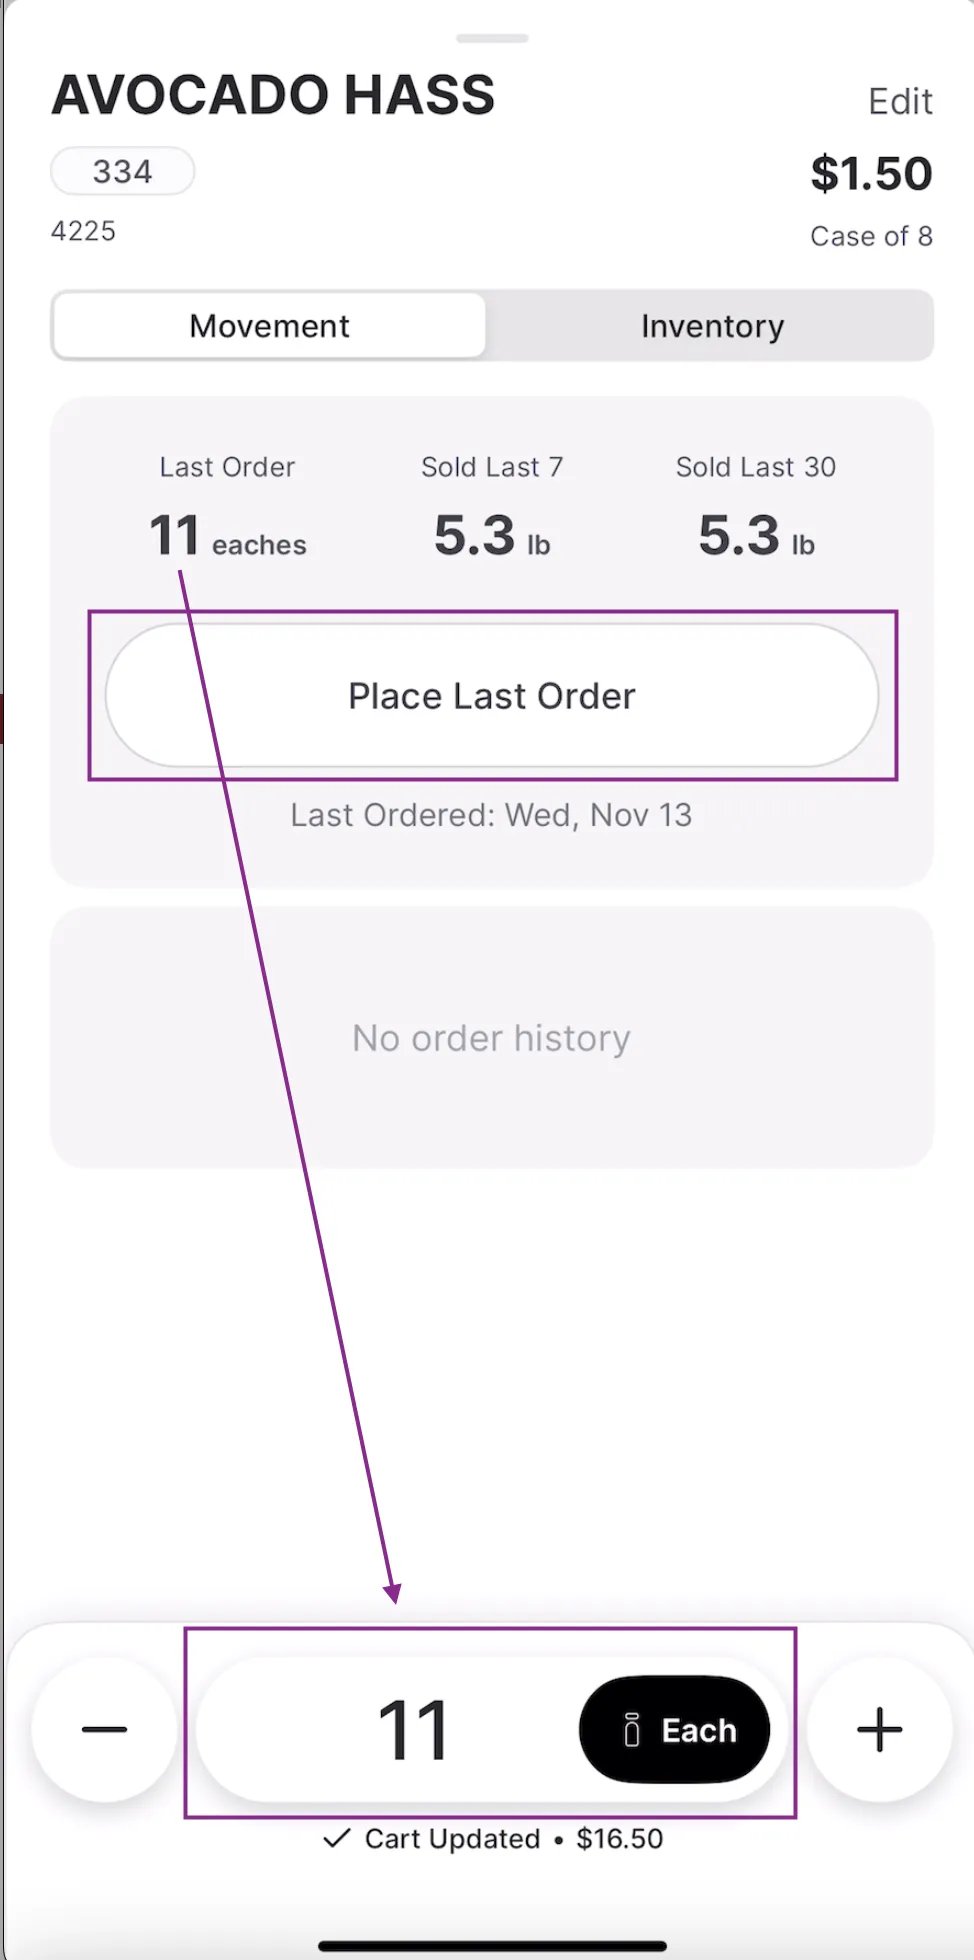
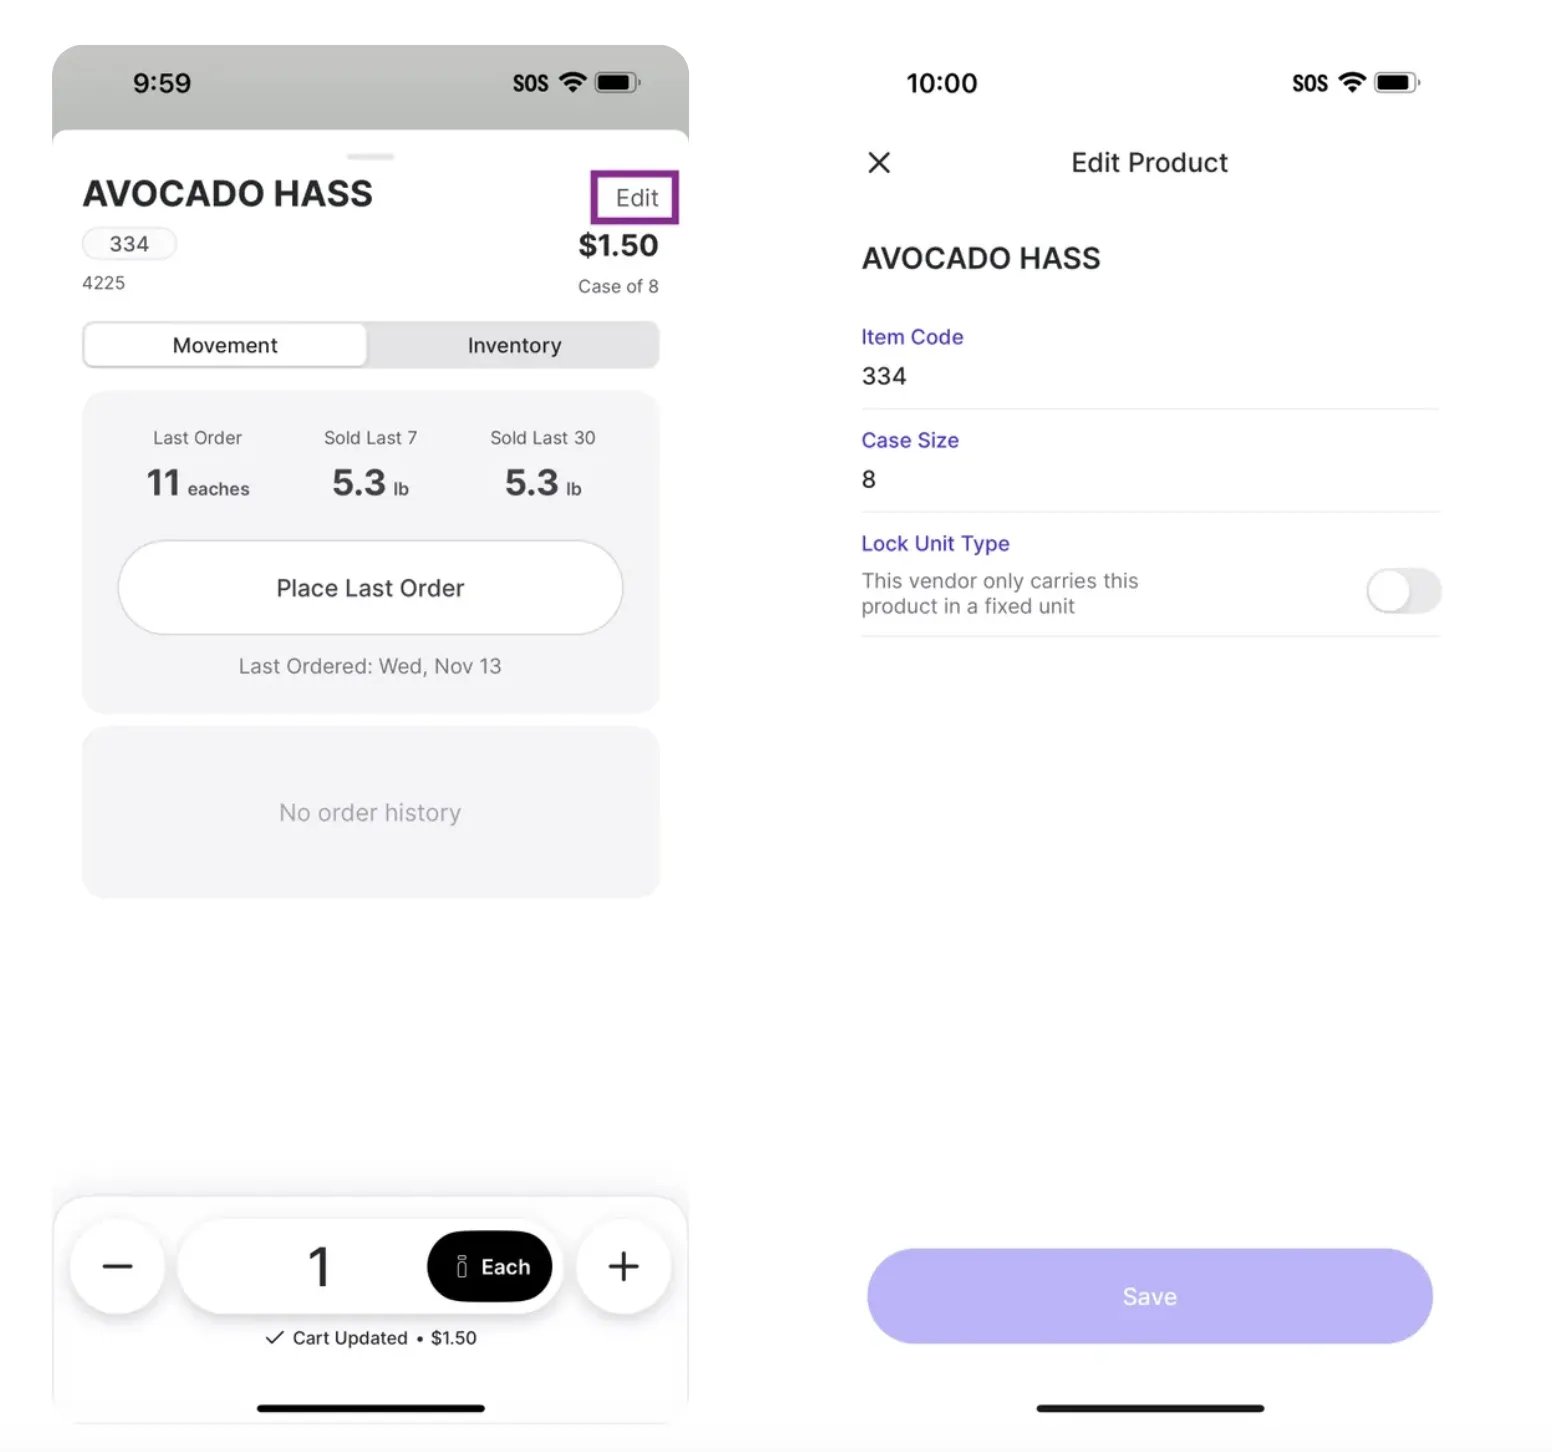
Update Order Quantity
You can set how much you’d like to order using the quantity and unit controls.- Use the + / – buttons to adjust order quantity.
- Toggle between Case and Each, depending on availability from the vendor.
- Remove products from the cart by swiping left and tapping the trash can, or select Edit from the top right corner.
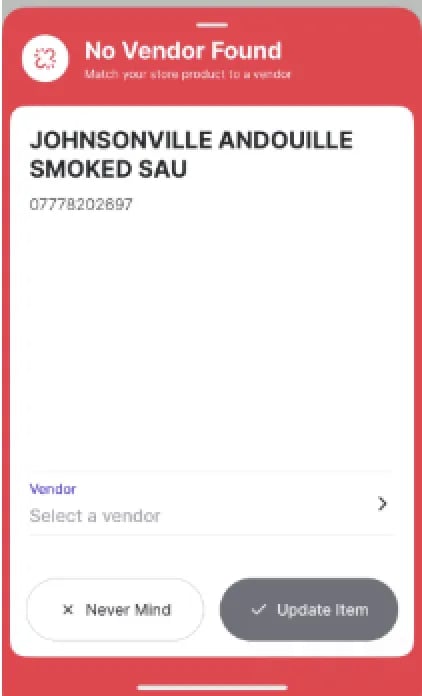
- If it’s not tied to a vendor, you’ll see a red No Vendor Found alert.
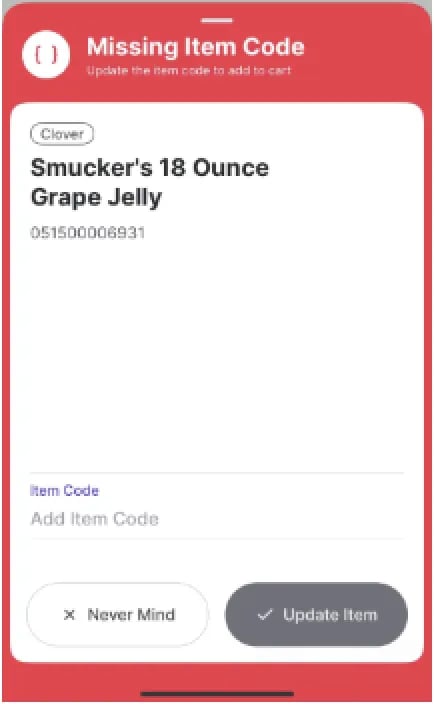
- If it’s missing an item code, you’ll see a Missing Item Code alert.
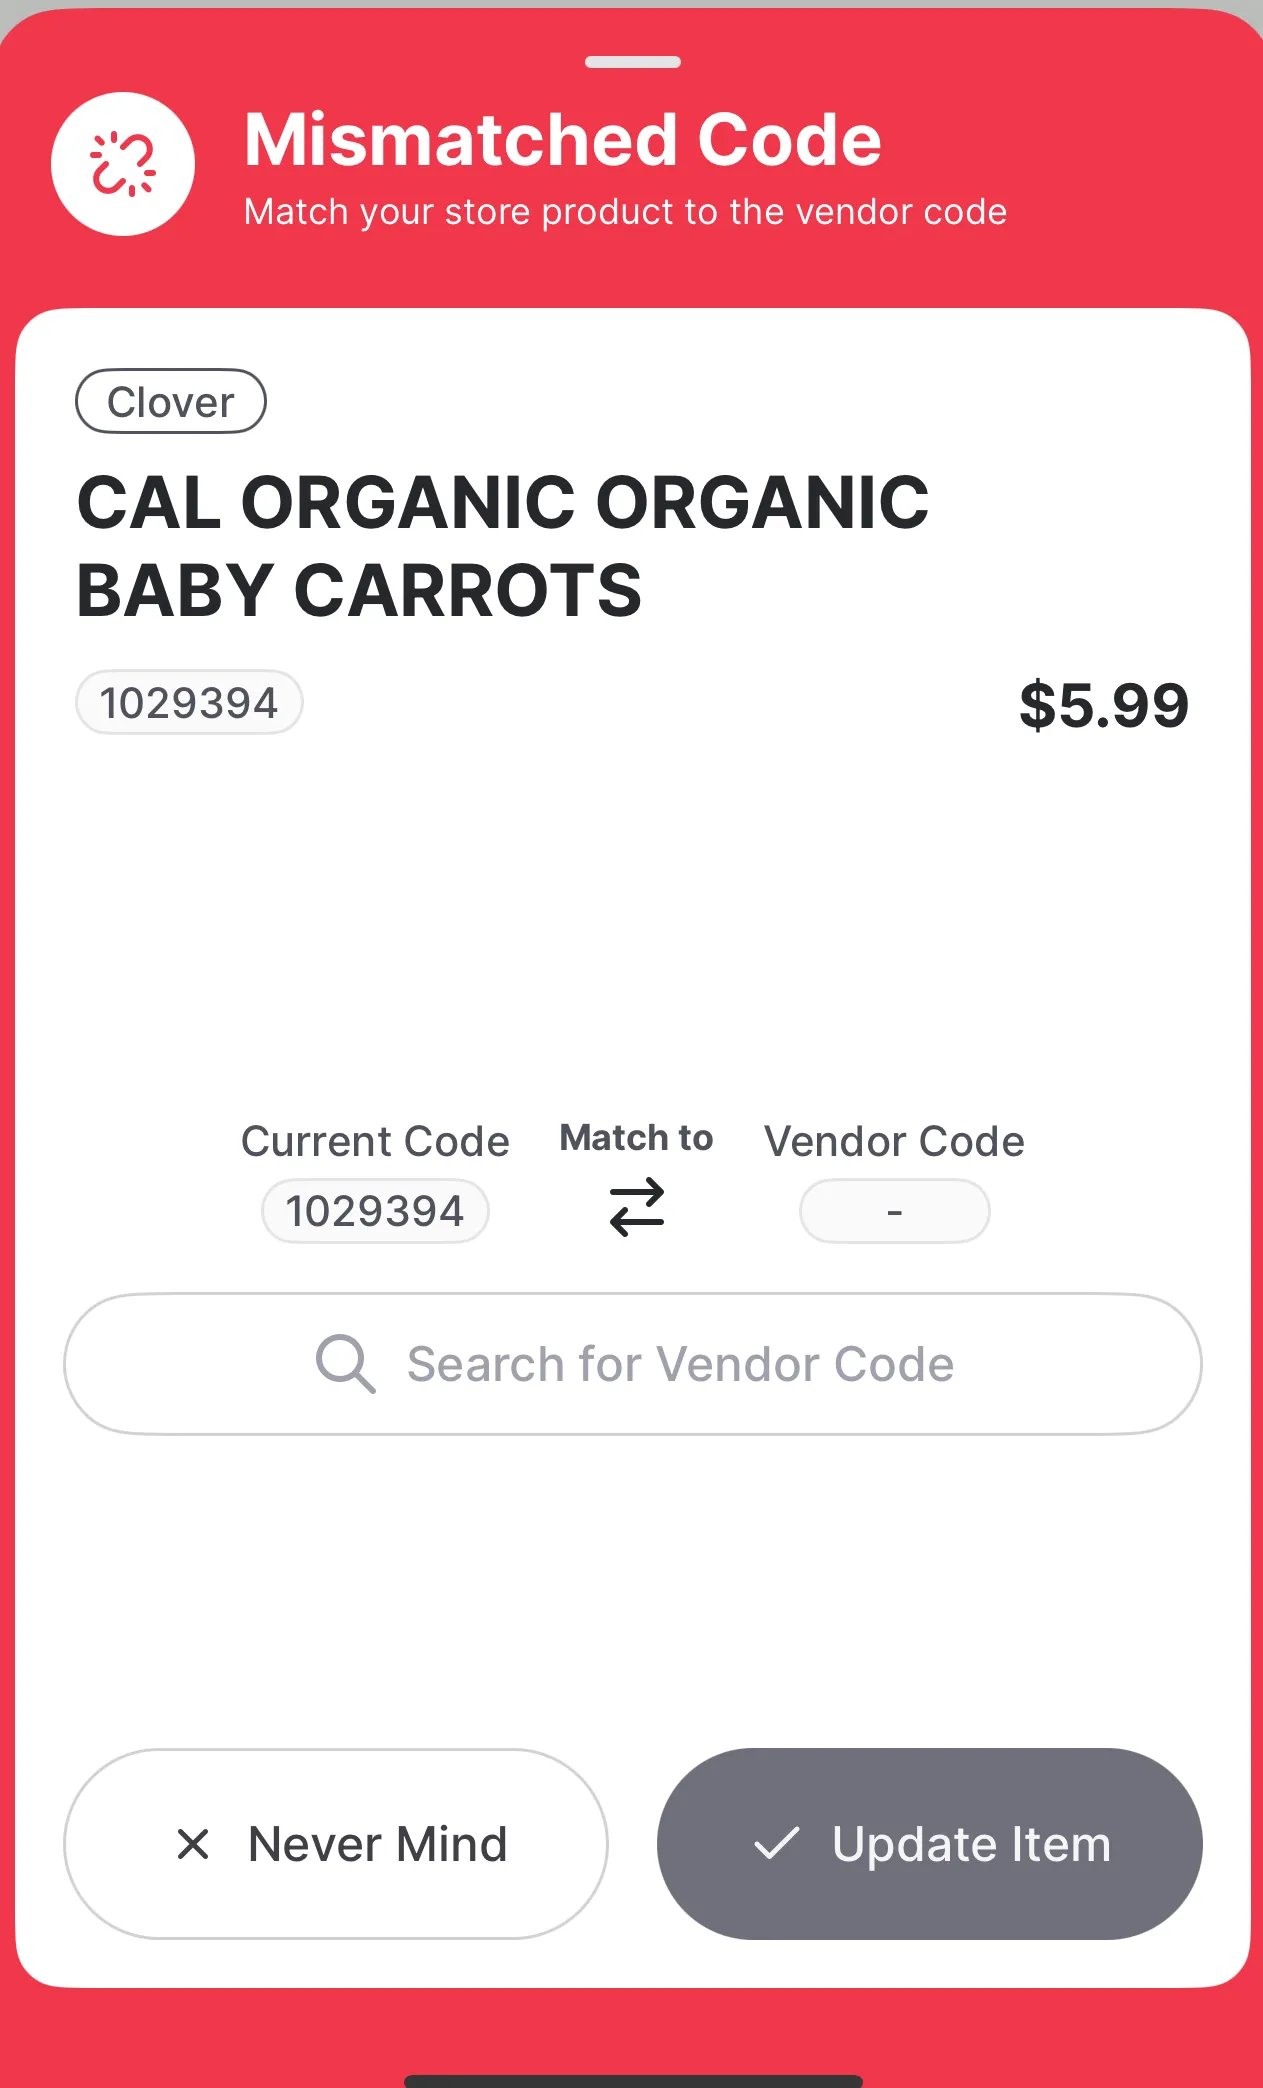
-
If the store product is not matched to the vendor code, you’ll see a Mismatched Code alert.
Create a Multi Vendor Order
Use the Multi Vendor Order function to scan or search for products from multiple vendors without selecting one upfront. Just move through your store and add items as you go (aka “one-pass scan”). Vori will sort them by vendor at checkout.
- Tap Multi Vendor Order.
- Scan or search for multiple products.
Compare Vendors for the Same Product
If the product is available from multiple vendors:- A vendor toggle appears at the bottom of the product sheet.
- Tap each vendor to compare:
- Cost
- Case size
- Unit type
- Add the product to your cart from the selected vendor.
- Easily find the best deal without switching screens. This comparison uses your store’s own vendor data. Cost information is maintained by your team and is not actively updated by vendors. Prices may change based on:
- Manual updates by your team.
- Cost changes are reflected in vendor invoices.
- Easily find the best deal without switching screens. This comparison uses your store’s own vendor data. Cost information is maintained by your team and is not actively updated by vendors. Prices may change based on:
- Go to the Back Office and open the Product Catalog.
- Find the product and click the carrot ( ˅ ) button.
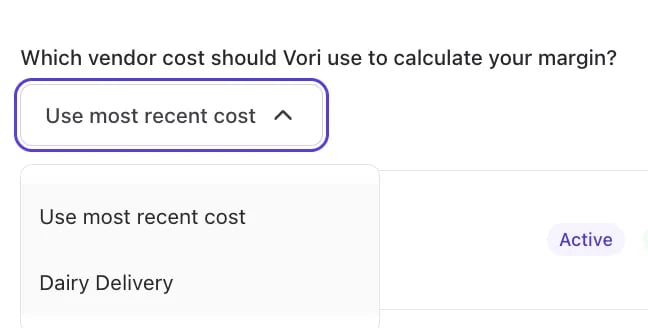
- Under Pricing, locate the field: “Which vendor cost should Vori use to calculate your margin?”
-
Choose one of the following:
- Use most recent cost (default): This pulls from the latest invoice uploaded via the Cost Changes process.
-
Select a vendor: Manually set a primary vendor for that product.
Cart Behavior
- Your cart automatically organizes items by vendor.
- You can tap into each vendor’s cart to review or edit.
Review and Place Your Order
When you’re ready to check out:- Tap Finish & Checkout.

Checkout Screen
On the checkout screen, you’ll see:- Your store name.
-
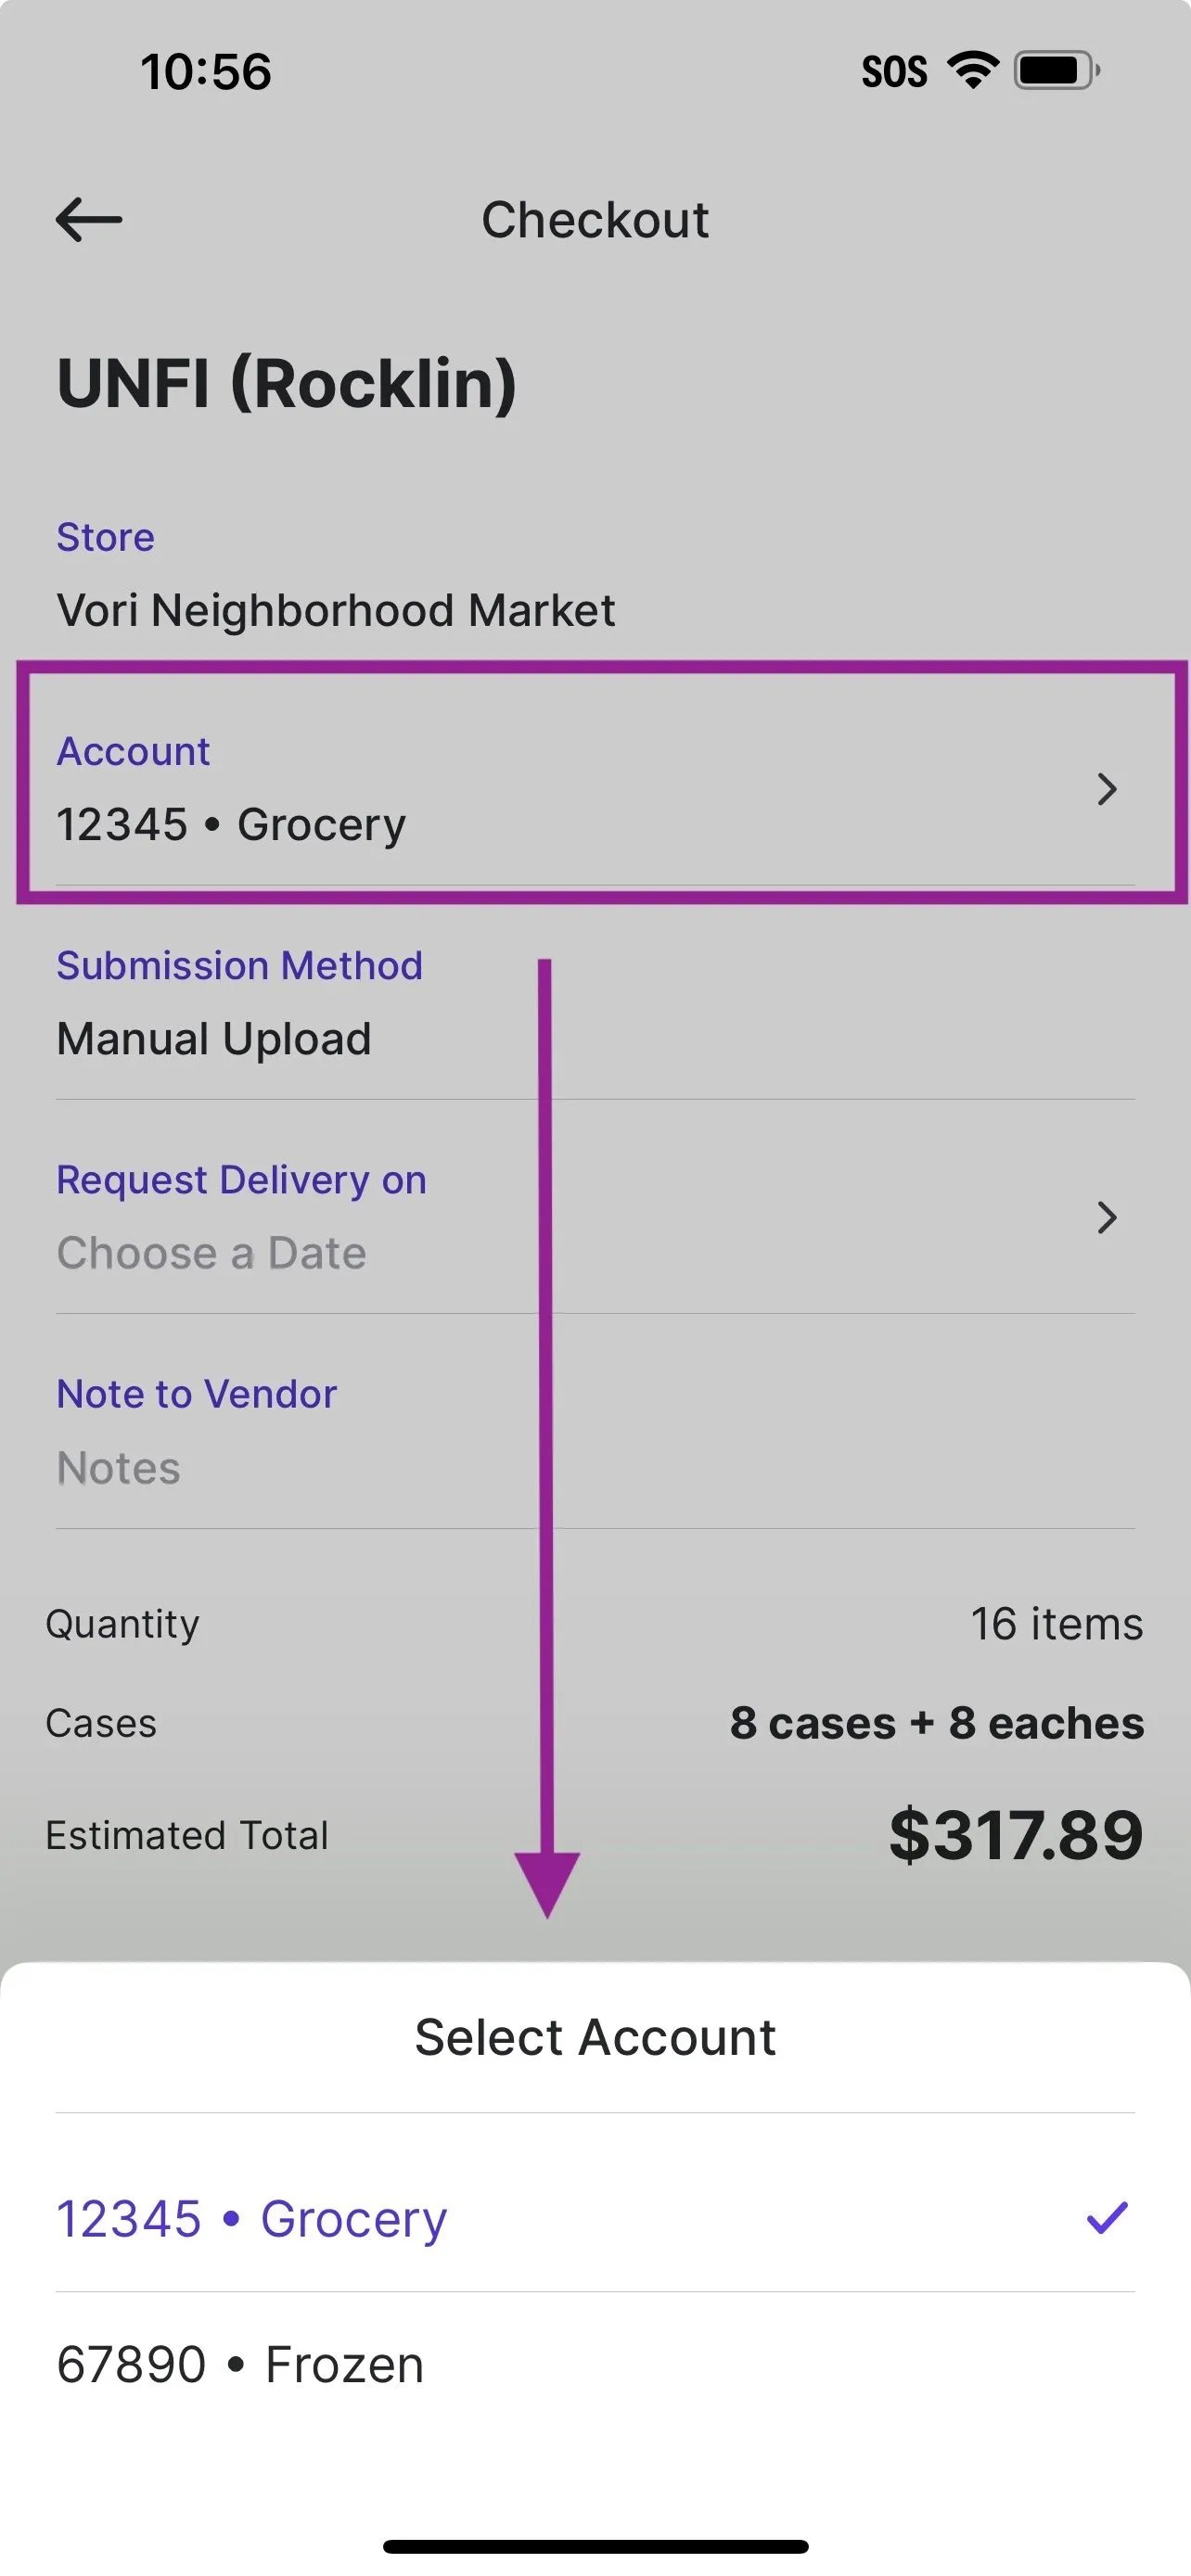
Account Number
-
Use this field to select the correct vendor account number for this order. If your store uses different account numbers for specific departments (e.g., Produce, Grocery, Deli), choose the one that matches the products in your cart.
-
Use this field to select the correct vendor account number for this order. If your store uses different account numbers for specific departments (e.g., Produce, Grocery, Deli), choose the one that matches the products in your cart.
- Send Order To: Use this field to enter an email address, either your own or the vendor’s, if the order should be sent by email.
- A delivery date picker.
- A notes field (optional).
-
A Summary: Estimated total, item count, and quantity.
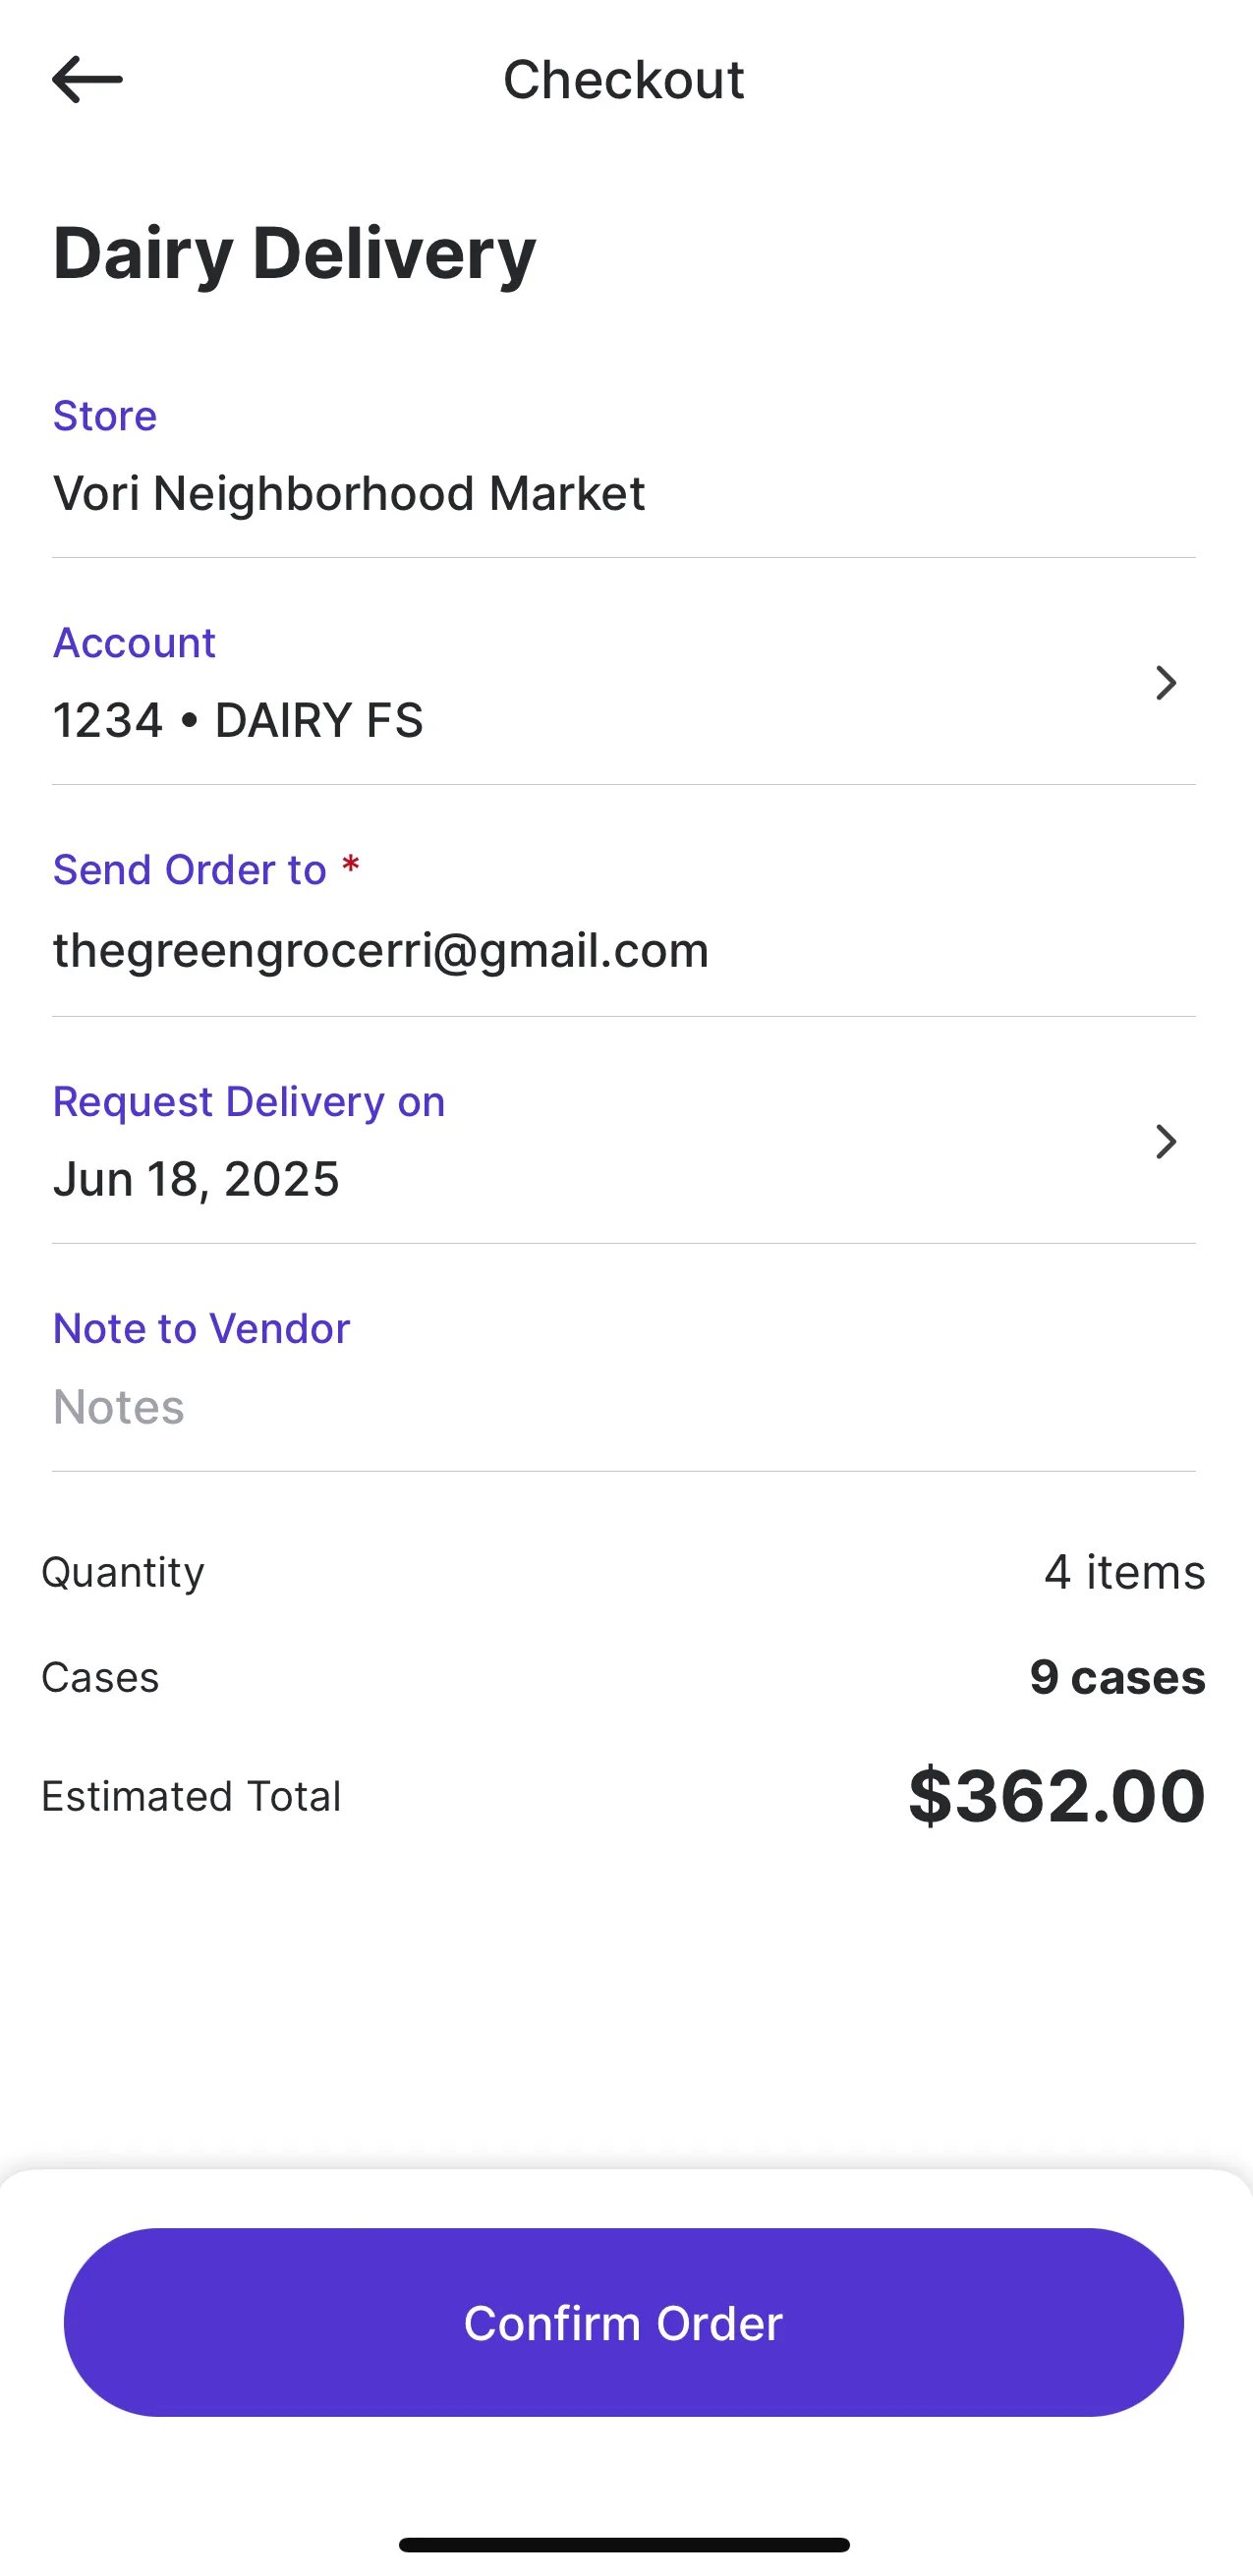
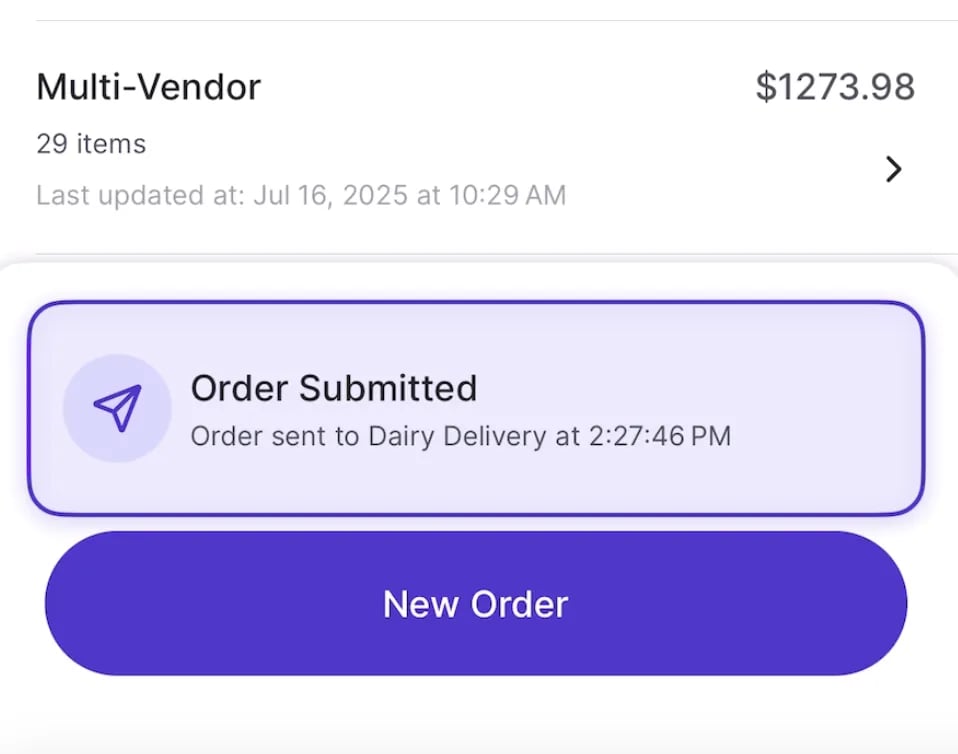
- Select Confirm Order to submit and leave the app open until you see the purple “Order Submitted” confirmation message on the Order Dashboard.\
Special Note for UNFI Orders
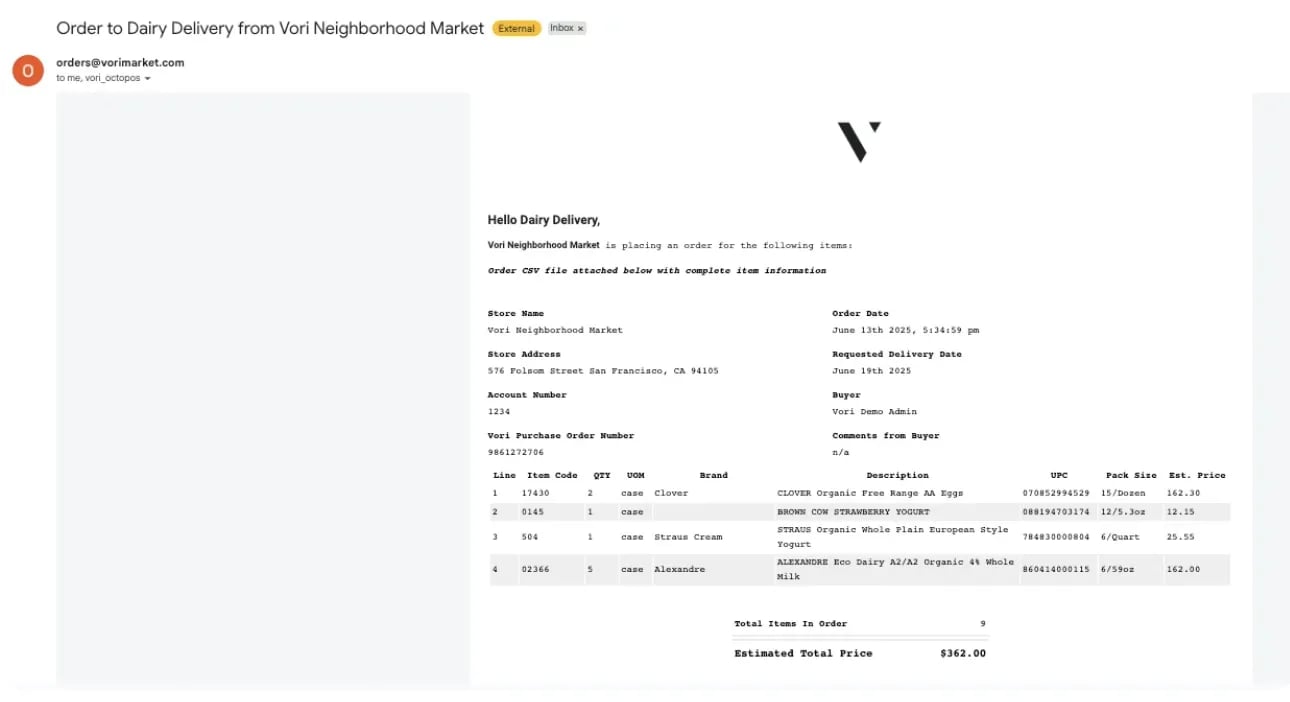
Some vendors, including UNFI and its subsidiaries (such as Tony’s and Supervalu), do not accept orders via email or direct EDI integration from Vori. Because of this, the Submission Method is automatically set to Manual Upload at checkout.- If the Submission Method is set to Manual Upload, check your email for the .csv file and follow the instructions provided by Vori.
- Do not open the CSV file. Opening it in Excel or another program may remove leading zeros from item codes.
- Simply download the file as-is.
-
Drag and drop the CSV into the UNFI portal. No need to edit or remove columns.

View Your Orders
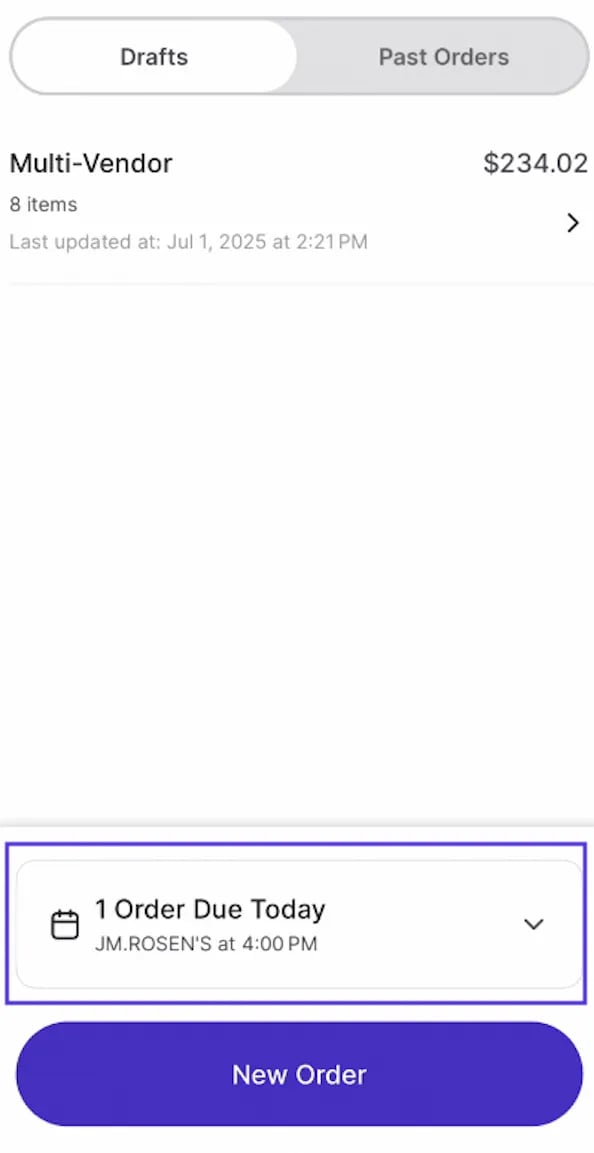
Visit the Order Dashboard to view draft and past orders. You can:- View Draft Ordersthat have not been completed. Archive draft orders by swiping left and tapping the trash can.
-
Vendors with an order due that day, and no draft order started, will appear highlighted on the ordering screen for quick visibility.
-
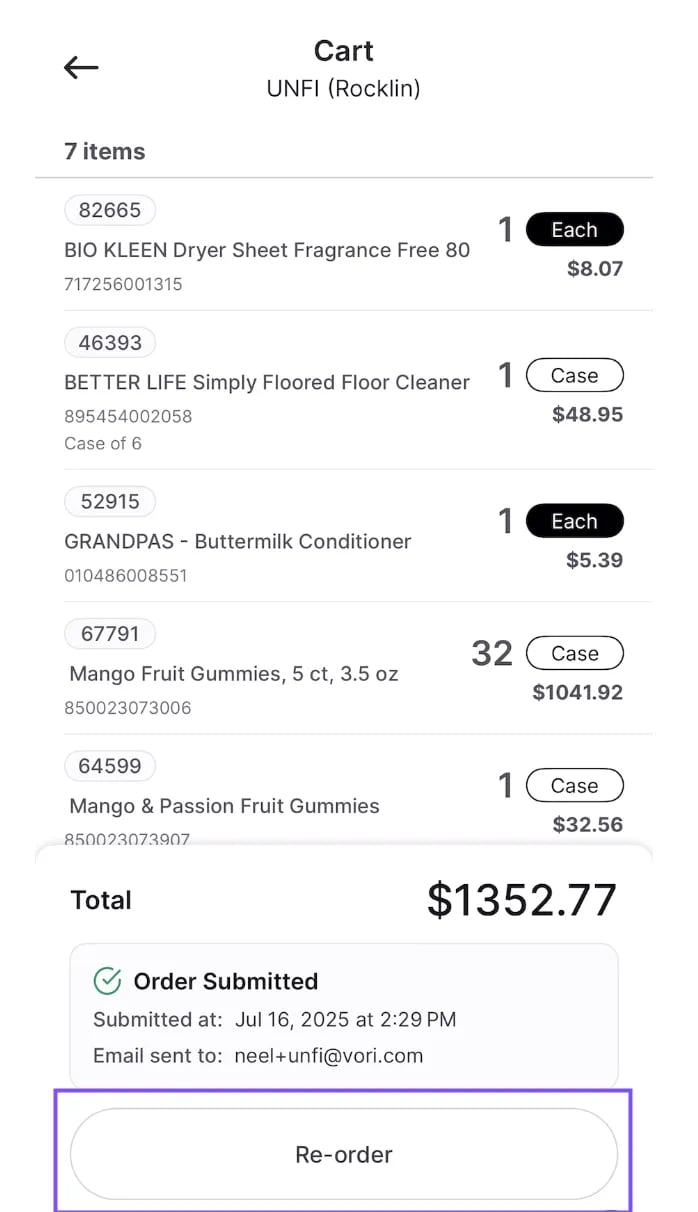
You can view and tap into Past Orders to review item details, track submission time, and see who received the confirmation email. To quickly reorder, select a past order and tap Re-order to add all items, along with their quantities, unit types, and vendor associations, into a new cart without starting from scratch.
Troubleshooting
What if a vendor doesn’t appear?- Confirm the vendor is connected in the Vendors section of the Back Office site.
- Once an order is submitted, you cannot edit the email address tied to it.
- For small orders, we recommend redoing the order with the correct email.
- For large orders, contact Vori Support.
-
Check which user you were logged in under when submitting the PO. Confirmation emails are automatically sent to the inbox of the signed in user.
- If you want to receive copies of every Purchase Order, make sure your email is added in the Vendor contact and toggle on Ordering Contact.