

Set your team up with the right access so checkout stays fast, secure, and simple.
Before You Begin
- Log in to the Back Office as an Owner or Manager.
- Navigate to Point of Sale → Cashiers to access your team roster.
- Have the employee’s first name and last name ready.
Users created here only have access to the POS. To add Back Office users and control what they can see with roles, see Manage Users and Roles in Back Office.
Your Cashiers Page
The Cashiers page shows every employee on your team with their current PIN, barcode, authentication type, role, and status.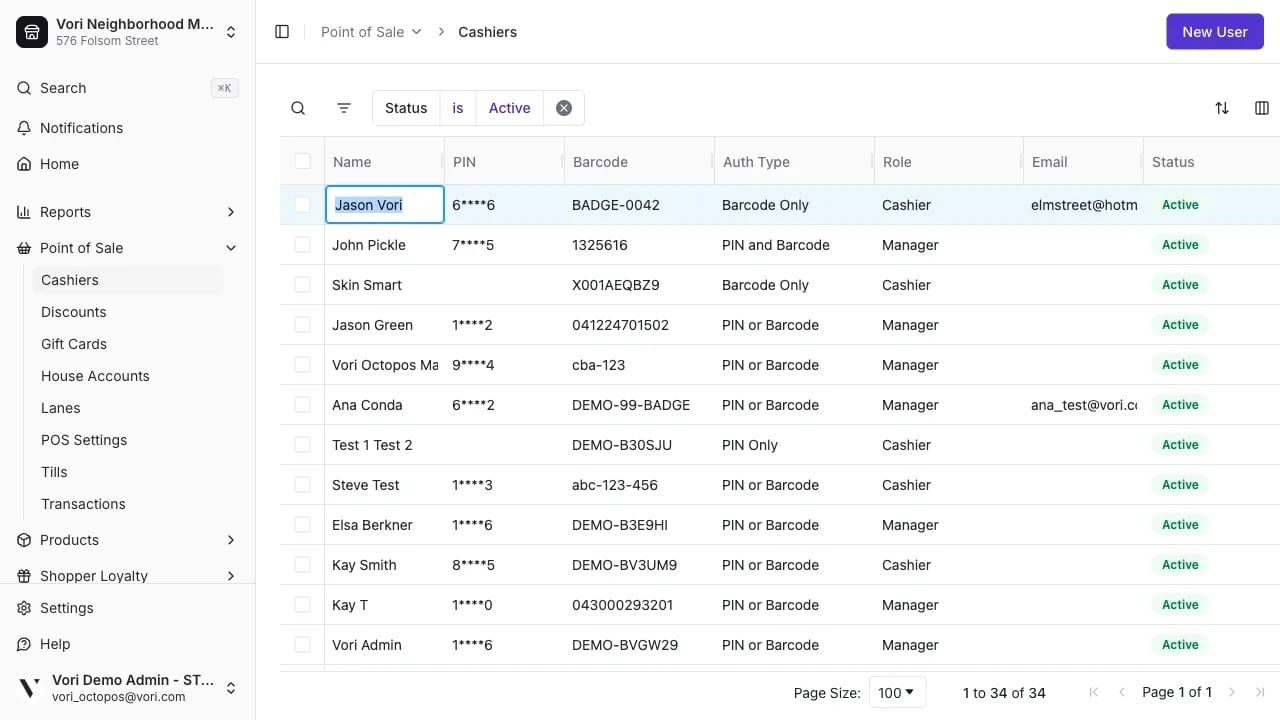
1
Sort by any column
Click a column header to sort. Click again to reverse the order.
2
Search by name
Click the search icon in the toolbar and start typing. The grid filters as you type.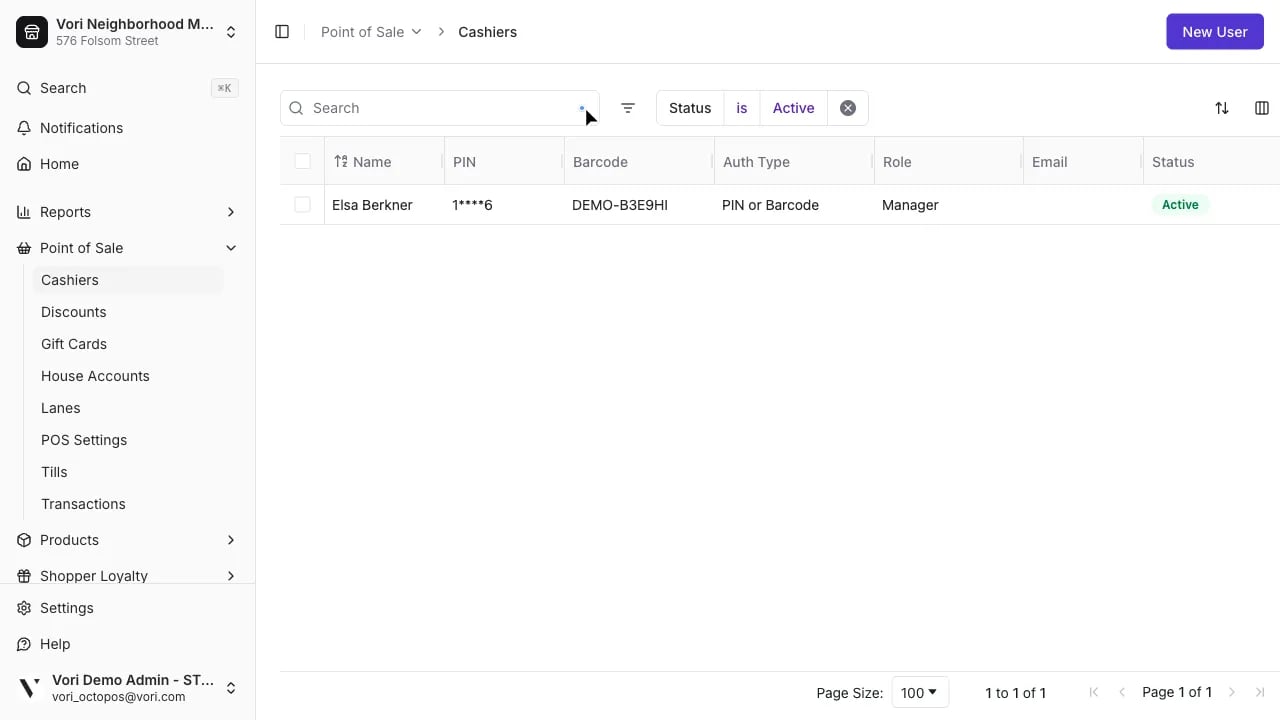
3
Filter by role or status
Click the filter icon and select a column — for example, Role to see only your managers.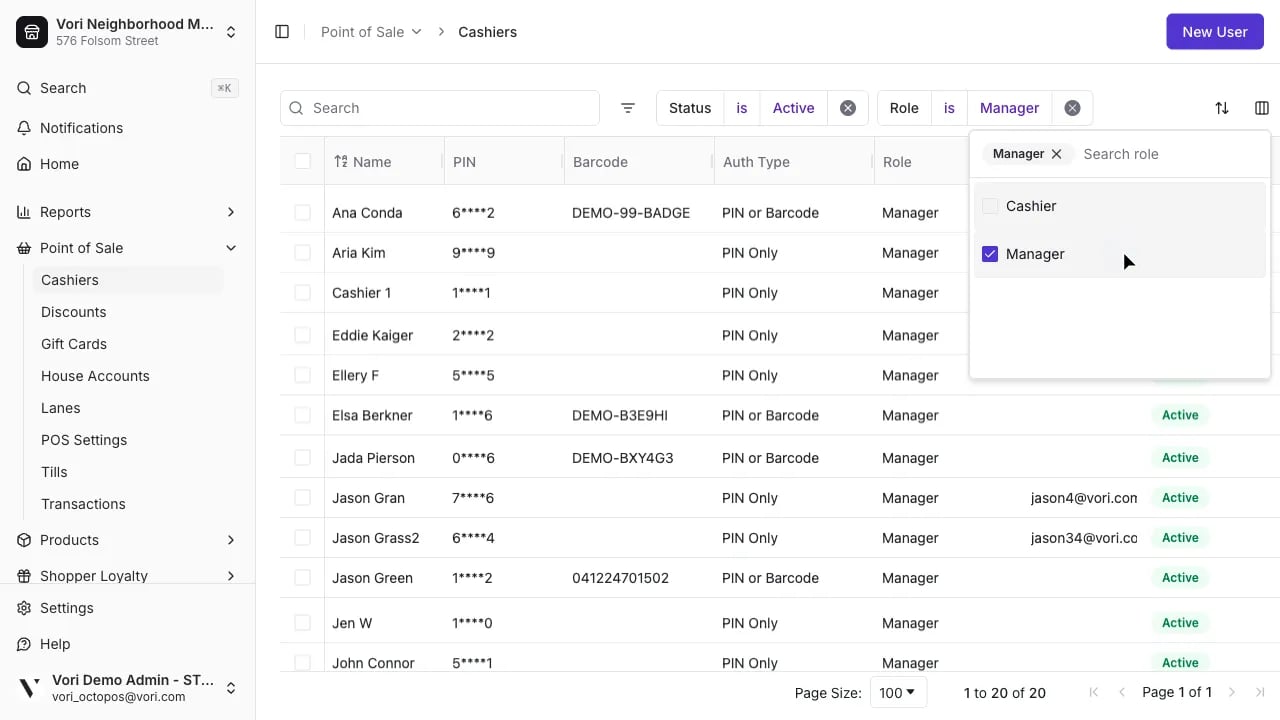
Create a New POS User
Adding a new team member takes less than a minute.1
Open the New User form
Select New User in the top right corner of the Cashiers page.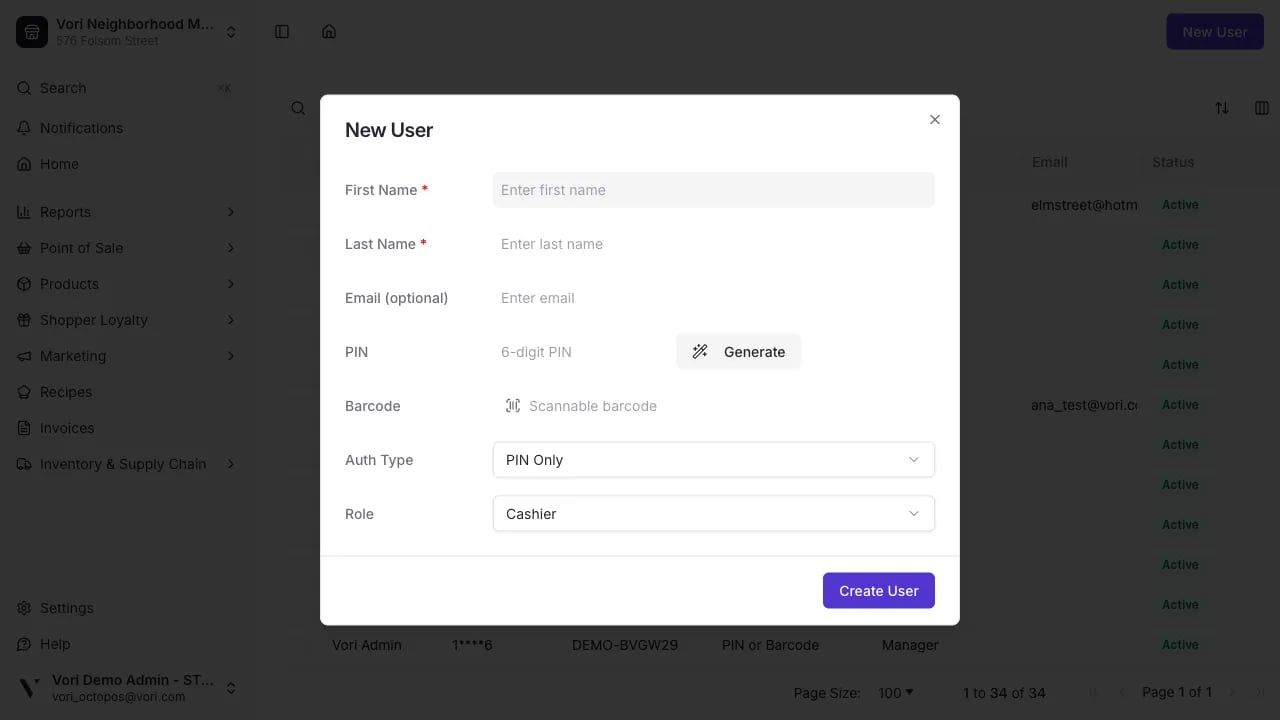
2
Enter first and last name
These are required. Email is optional.
3
Generate a PIN
Create or generate a 6-digit PIN. Vori creates a unique code automatically — no duplicates.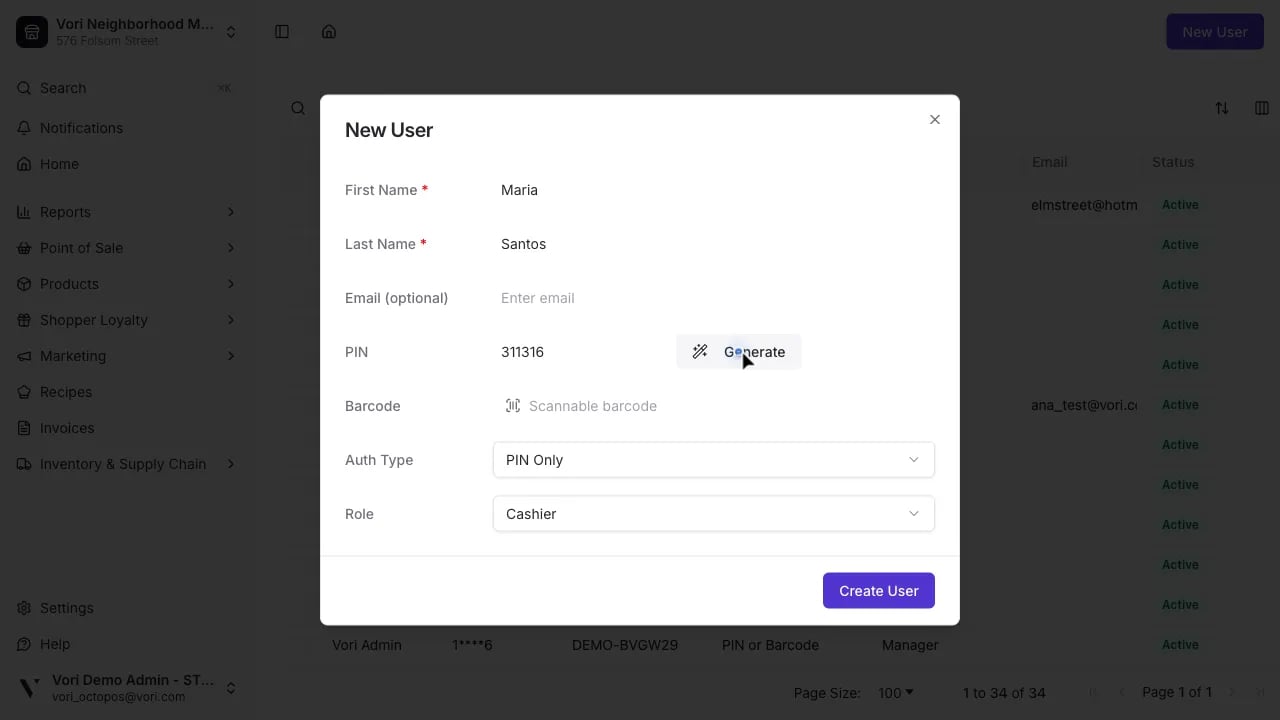
4
Set the Role
Select Cashier or Manager. Cashier is the default.
5
Set the Auth Type
Choose how this employee will sign in at the register. PIN Only is the default and works for most of your team.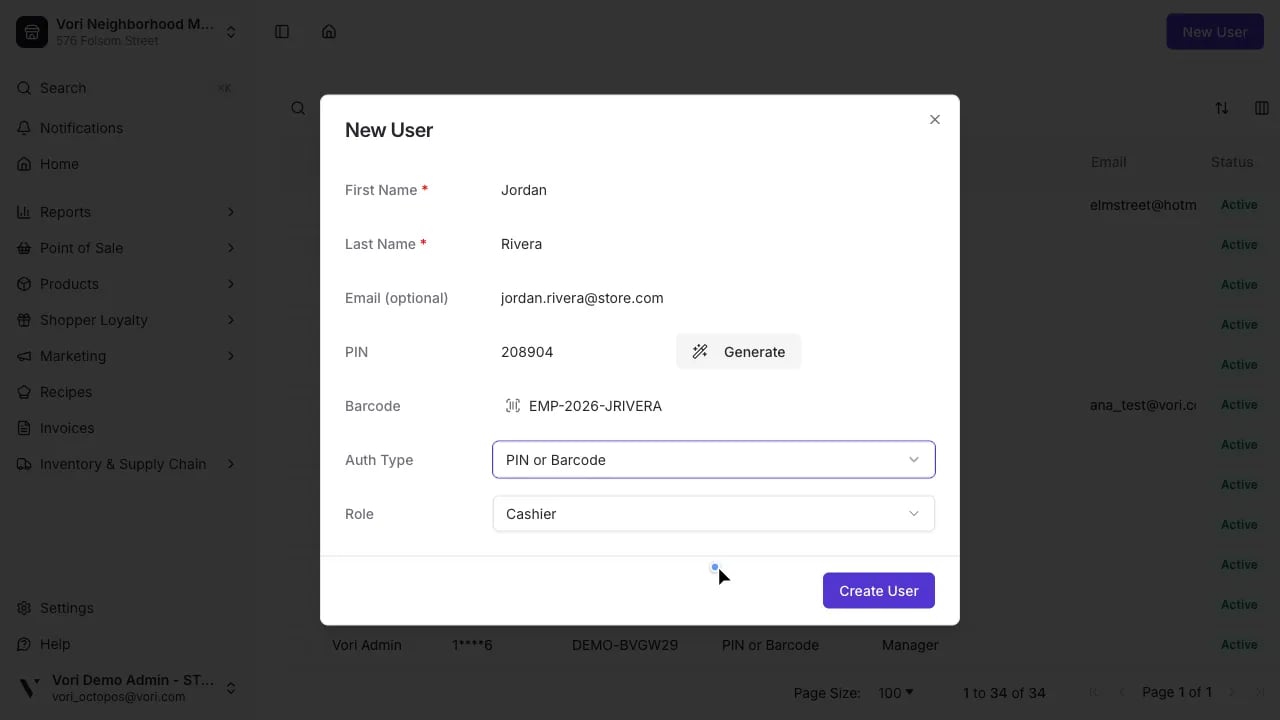
To use any barcode option, enter the employee’s badge barcode in the Barcode field. You can scan it with a USB barcode scanner or type the value manually.Vori supports the following barcode formats:
- QR Code
- Code 128
- Code 39
Your store supplies its own badge cards — Vori doesn’t provide them. Many stores generate a free barcode at Kenco Label, choose one of the formats above, then print it, laminate it, and clip it to a lanyard the cashier scans at the register. You can also order pre-printed badge cards from a label vendor if you’d rather not make your own.
6
Click Create User
The employee is added to your roster and can log in to the POS immediately.
Edit or Deactivate an Existing User
Turnover happens. Keep your store secure by updating user details or deactivating staff who no longer work at your location. Everything in the Cashiers grid is editable inline — no need to delete and re-add an employee.1
Click any cell to edit
Click the field you want to update — Name, Role, PIN, Barcode, or Auth Type. The cell enters edit mode immediately.To change the Auth Type, click the cell and then click the dropdown arrow on the right to open the options.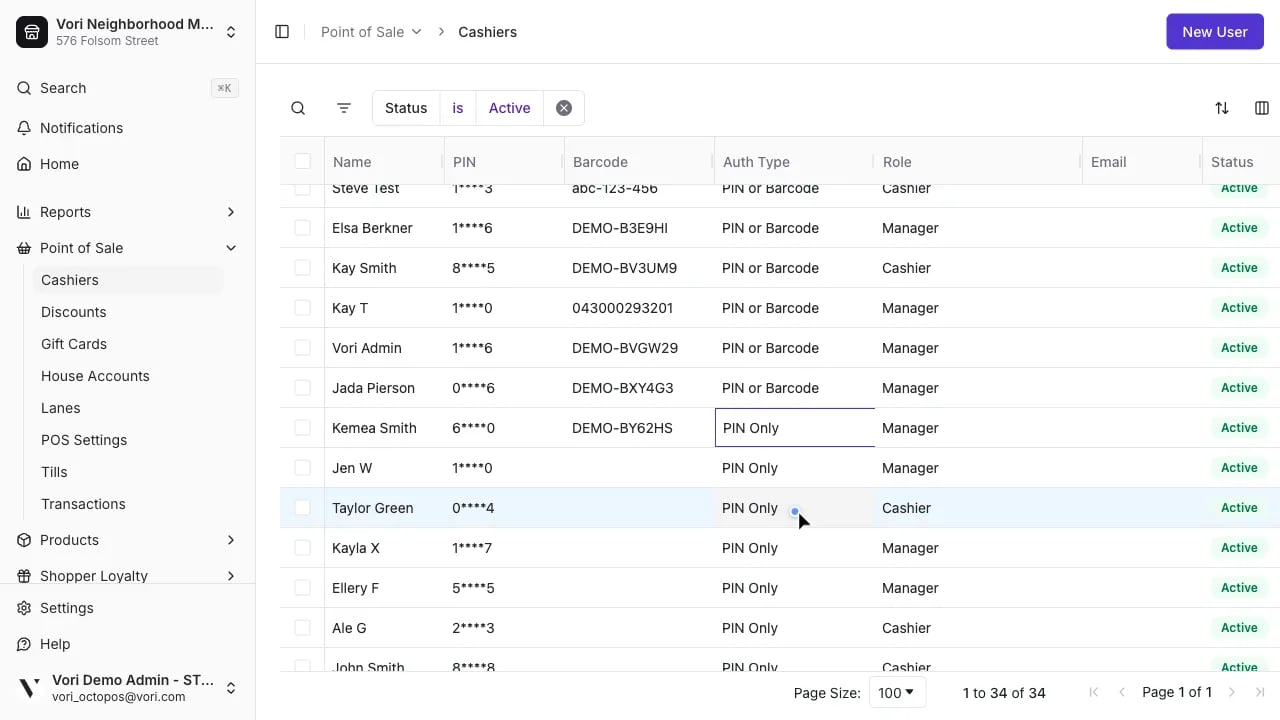
2
To remove access, deactivate the user
Change Status from Active to Inactive. The employee will no longer be able to log in to the POS.