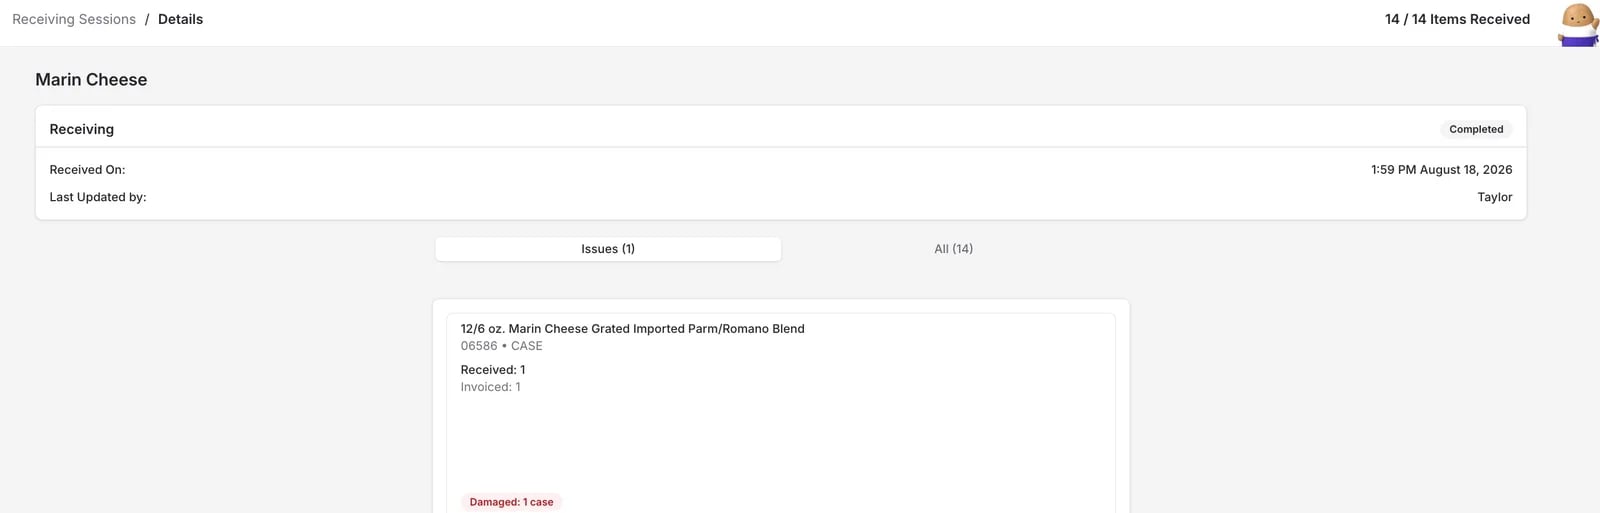
Receiving is currently in closed beta and only available to select stores.
Review What Was Received
Invoices with items received on the handheld show a receiving issue flag in the Items to Review column, so you can spot them before opening anything.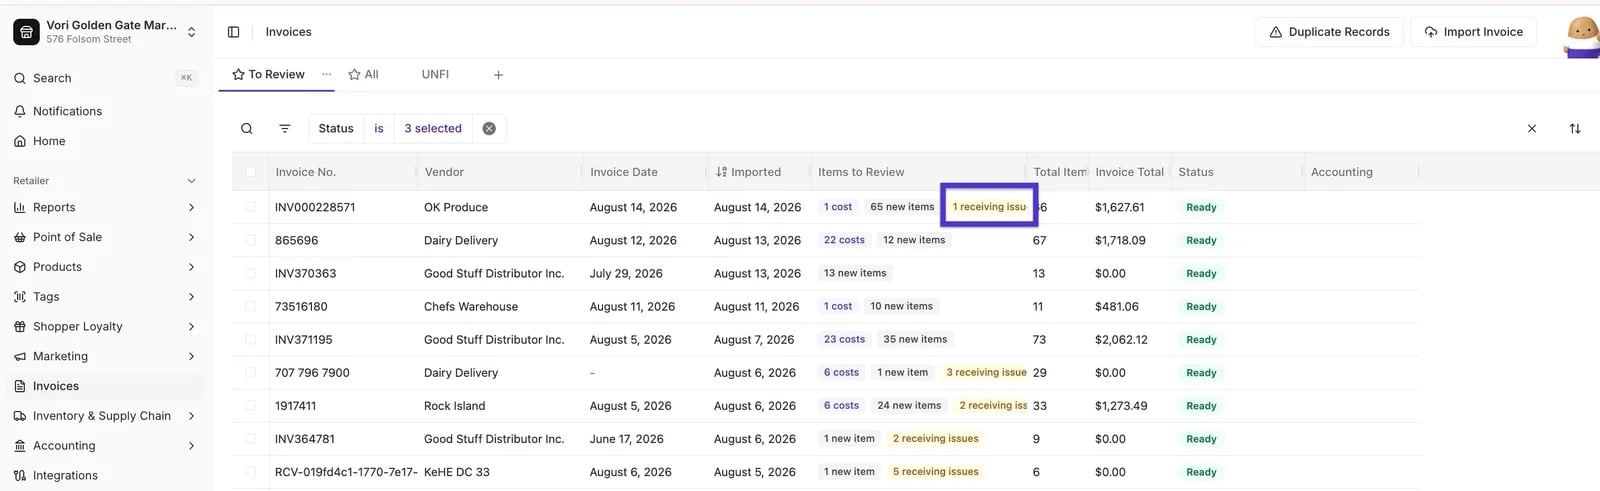
- Open Invoices and select the invoice tied to your receiving session.
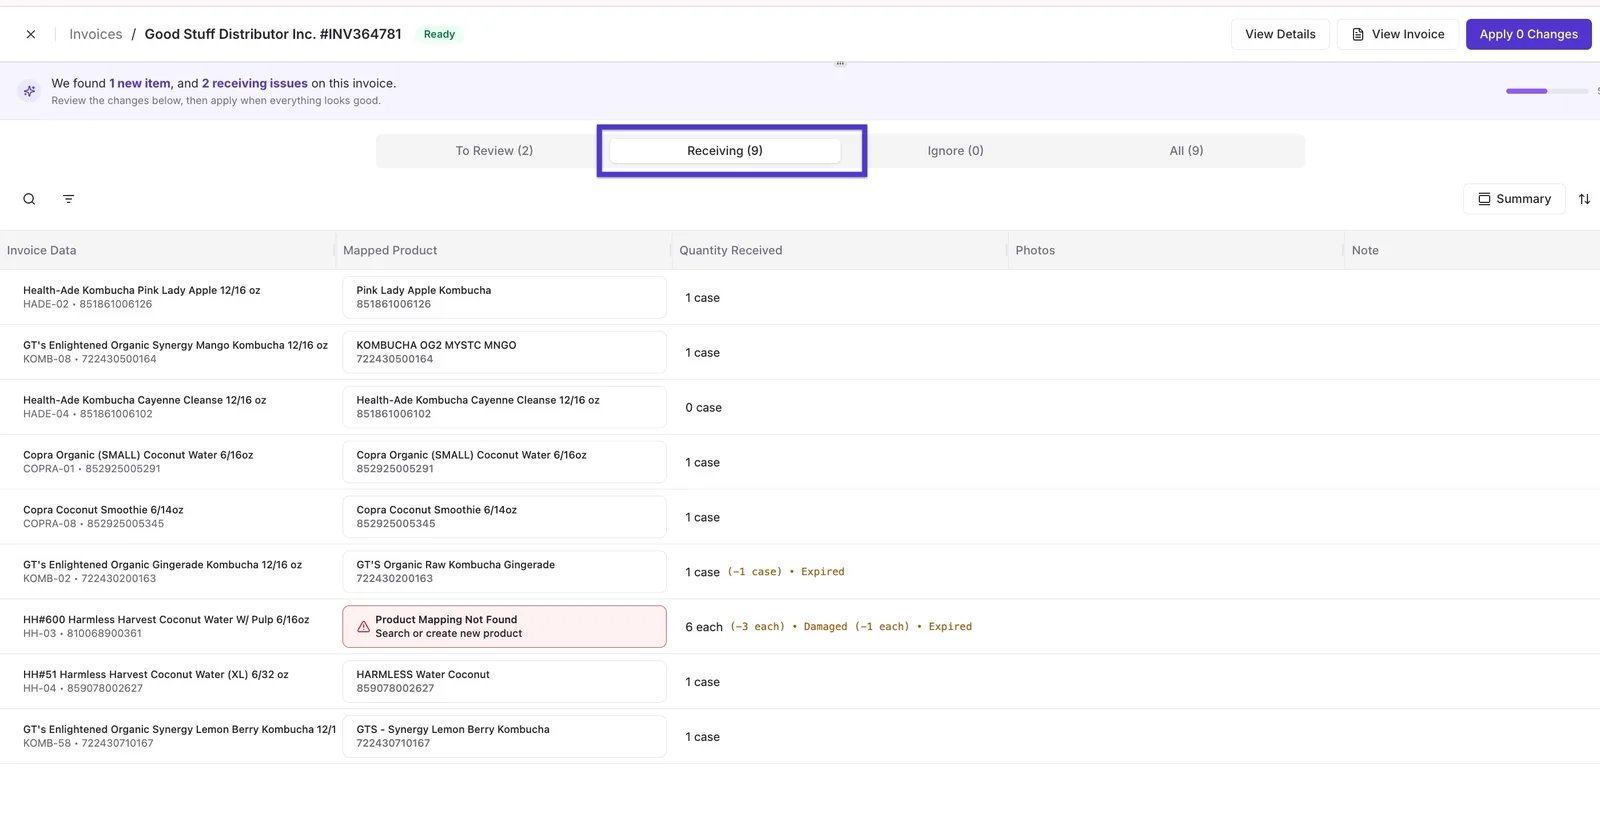
- Open the Receiving tab on the invoice to see every item from the handheld scan, with and without issues, along with the quantity received and any issues flagged — damaged, expired, or short.
Adjust Inventory Updates
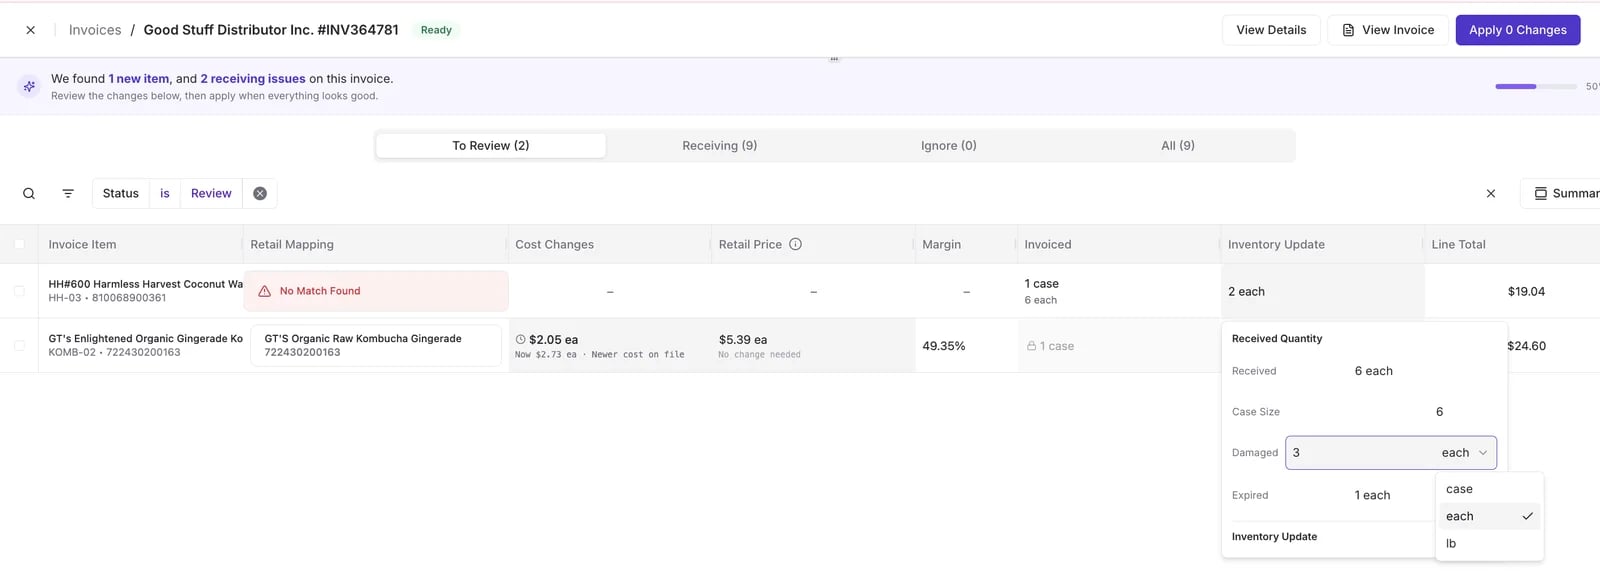
On the To Review tab, the Inventory Update column shows the net quantity that will be added to inventory for each item. Click into it to see the full breakdown: received quantity, case size, and any damaged or expired units — Vori subtracts those automatically from what gets added to inventory.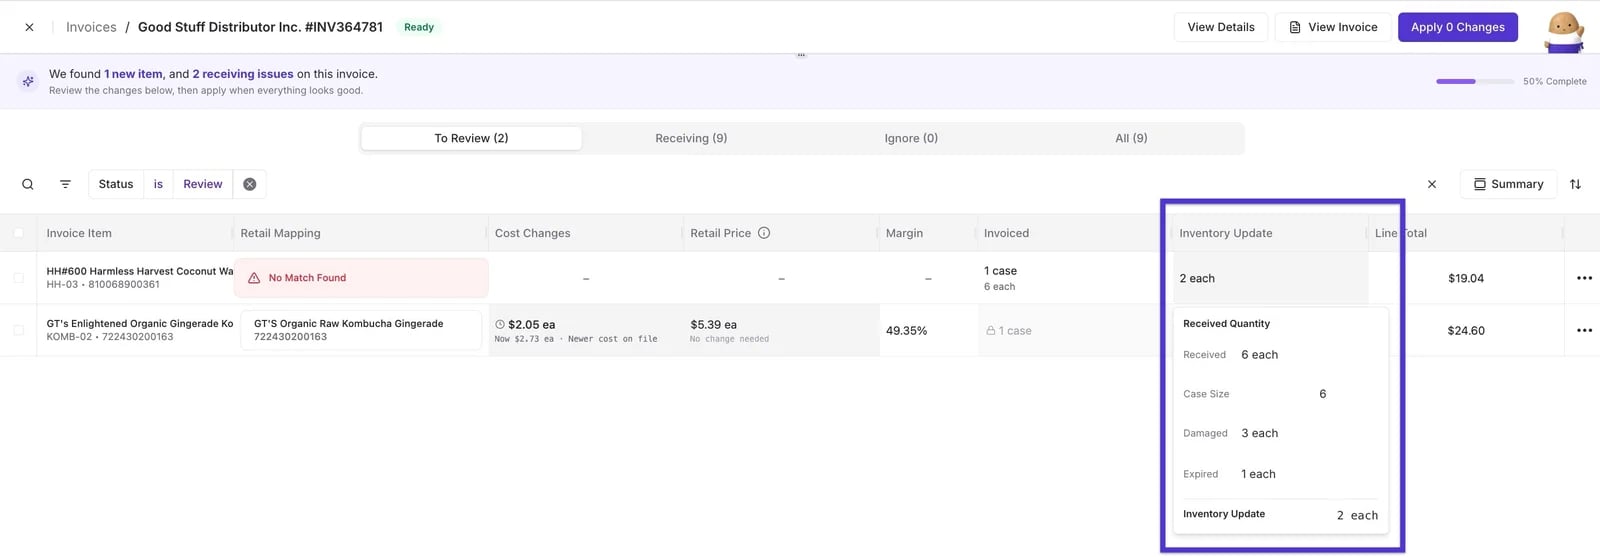
Choose What to Commit
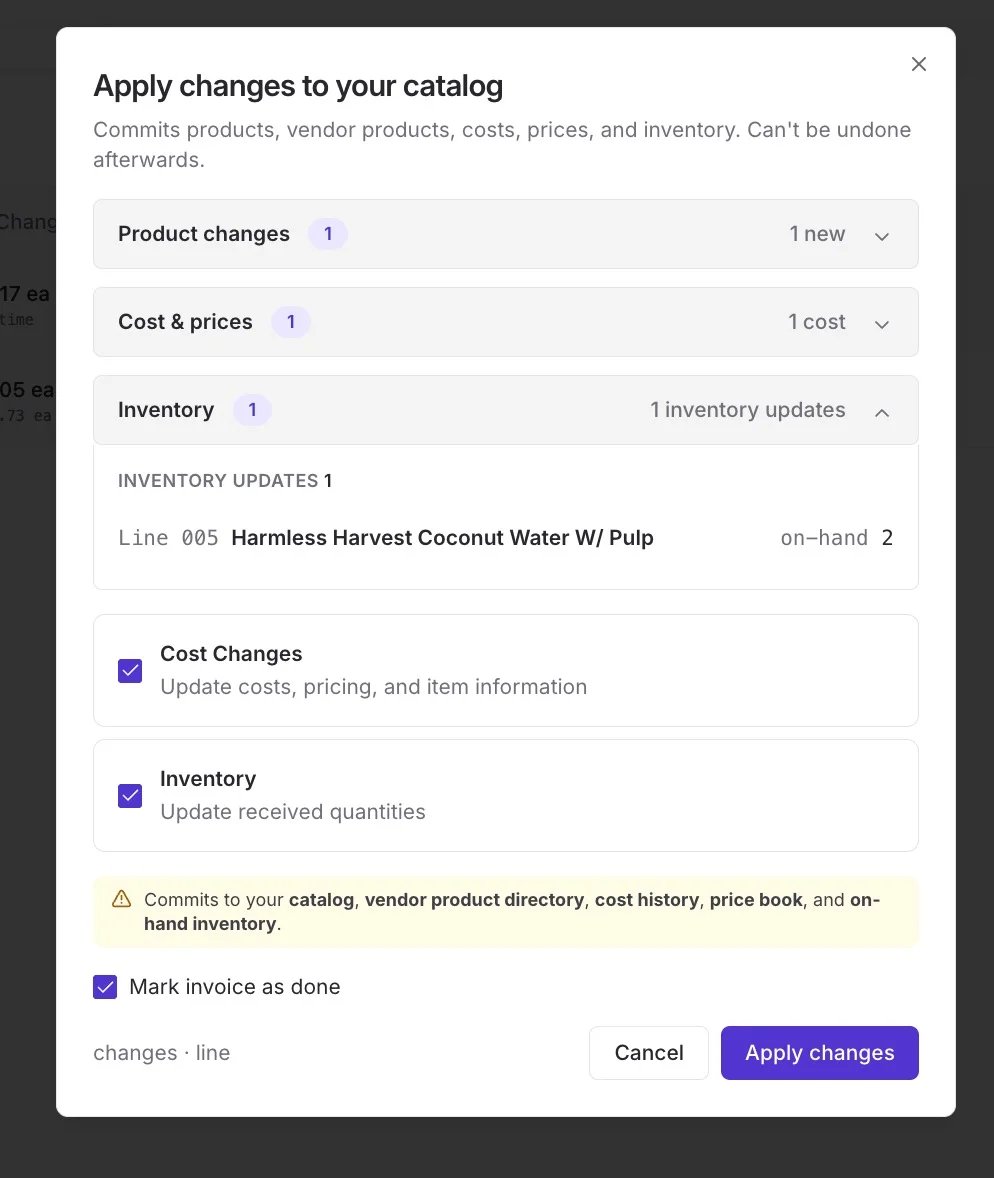
When you’re ready to finalize the invoice:- Leave Update Inventory checked to apply your cost changes and inventory updates together.
- Uncheck Update Inventory if you only want to commit cost changes for now — useful if you’re still finishing a physical count, or want to test the workflow without changing your on-hand counts.
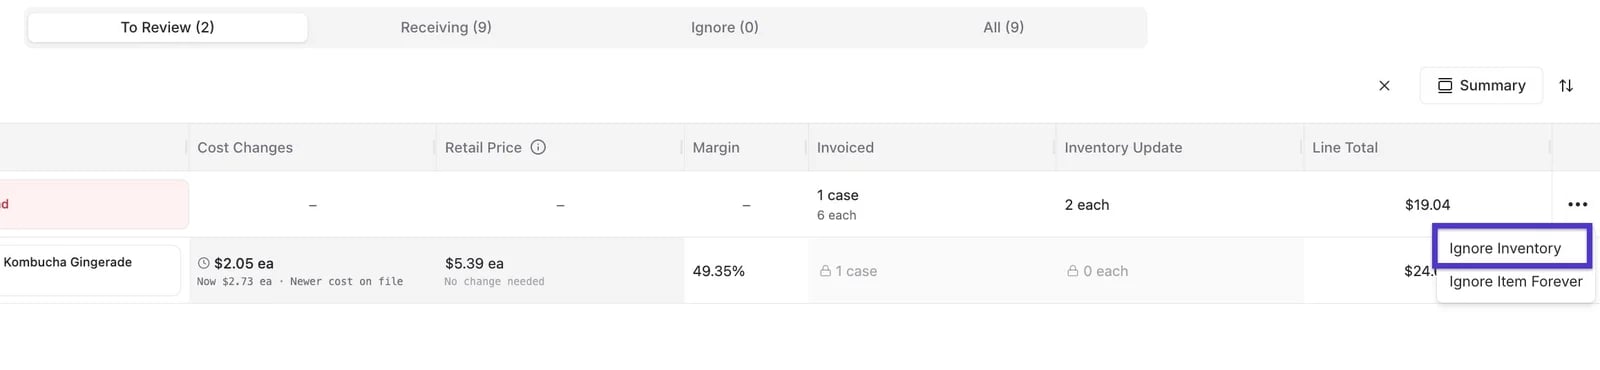
- Use Ignore Inventory from an item’s three-dot menu if you don’t want that item’s quantity to affect inventory at all.
View Your Receiving History
To see every receiving session across your store, go to Inventory & Supply Chain > Receiving.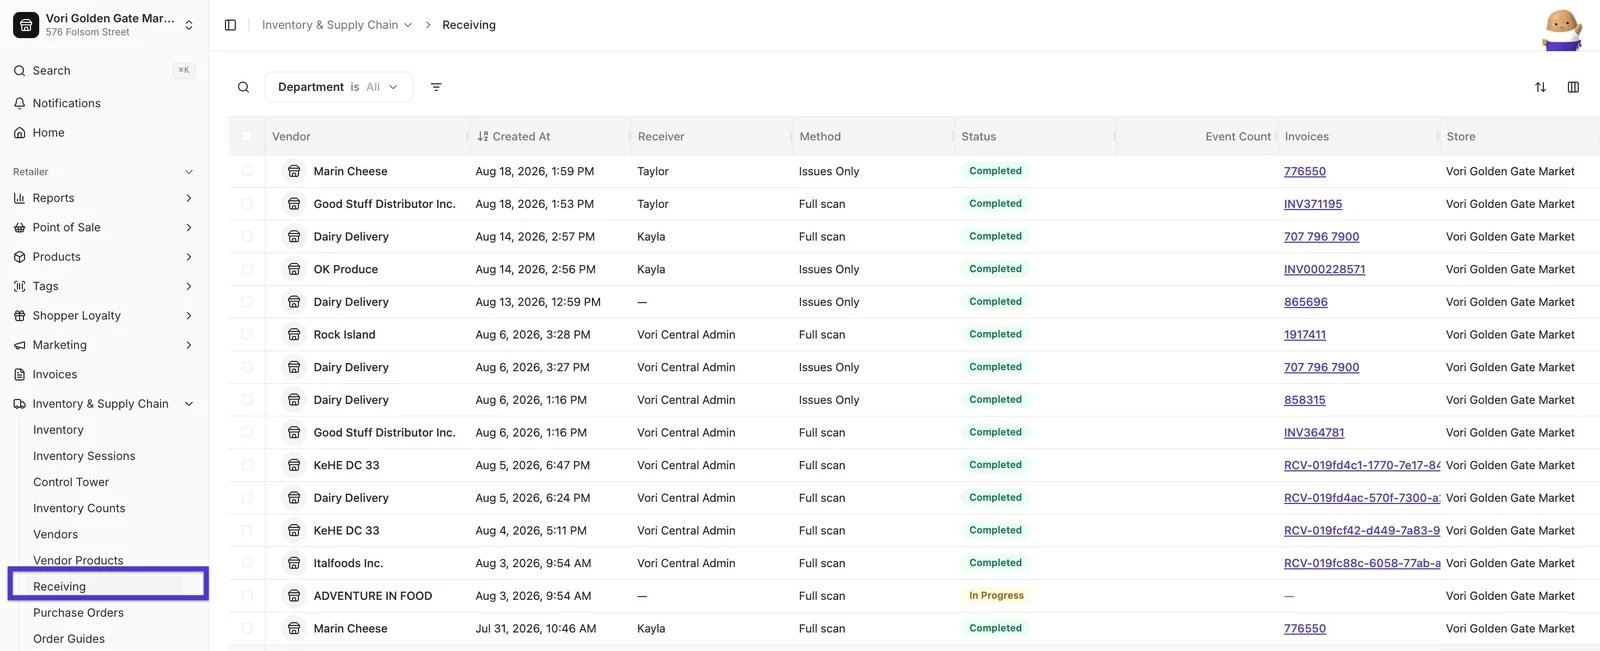
- Each row shows the vendor, when it was created, who received it, the method (Full scan or Issues Only), and its status (Completed or In Progress).
- The Invoices column links directly to the invoice tied to that session.
- Tap into a session to see a summary of what was received and any issues flagged.