

Invoices is available to stores with Advanced Inventory. You also need permission to view invoices. If you don’t see it on your home screen, ask your store admin to check your role.
Open Invoices
From the home screen, tap Invoices. Depending on how your home screen is set up, it’s under Quick actions or All tools. To pin it to the top, tap Edit next to Quick actions. The invoice list has two tabs:- To Review: Invoices that still need your attention.
- All: Every invoice for your store.
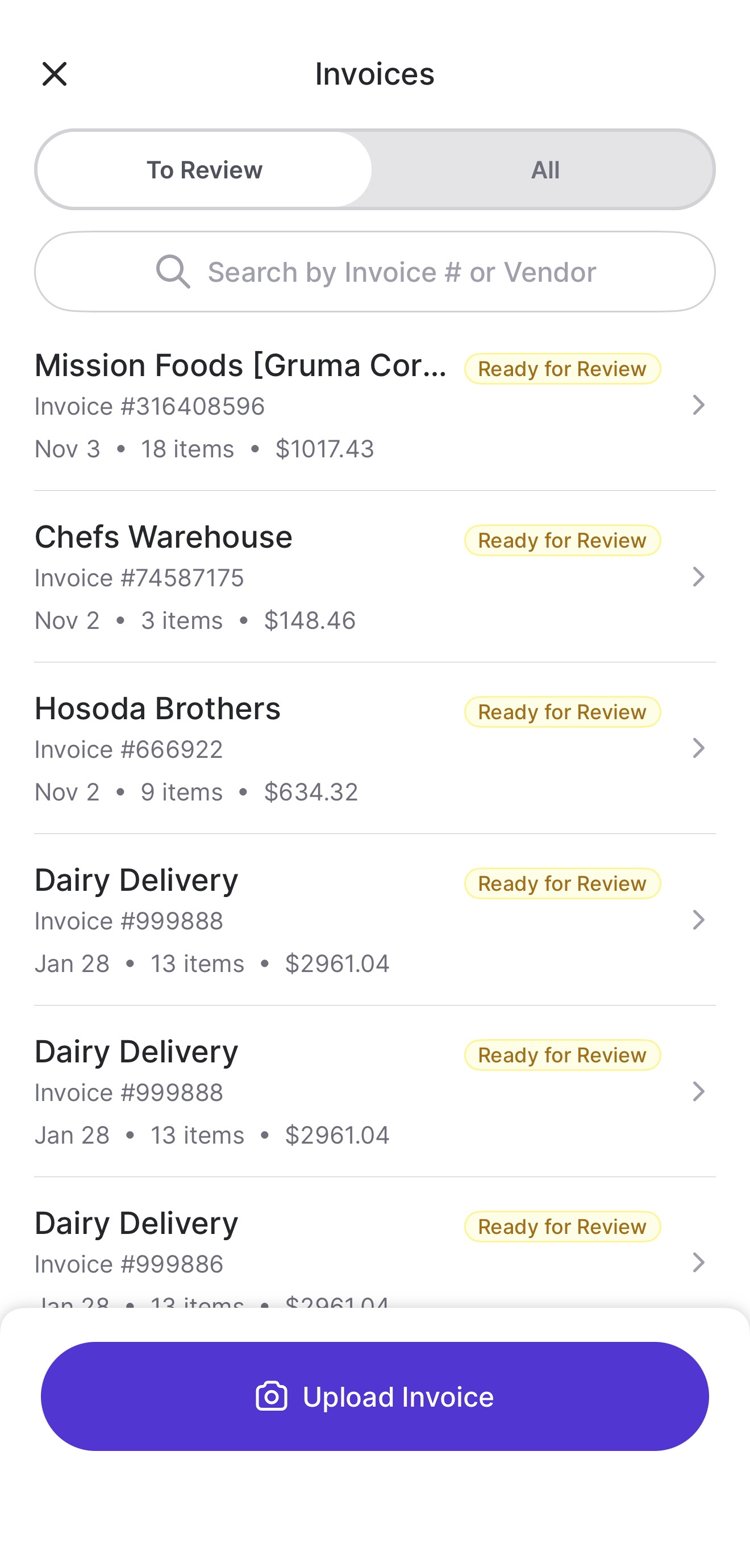
Upload an invoice
- Tap Upload Invoice.
- Hold the handheld over the invoice so the whole page is in view. The camera highlights the page and captures it when it’s steady. You can also tap the shutter button.
- Scan each additional page.
- Tap the check mark in the top-right corner when you’ve captured every page.
If your iPhone is attached to a Linea scanner, remove it from the sled first. The sled covers the camera and blocks the scan.
If Vori couldn’t find the vendor
Vori needs to know an invoice’s vendor before it can finish processing it. If Vori can’t match an invoice to one of your vendors, the invoice shows Vendor not found · Tap to fix in the list.- Tap the invoice, then tap Select Vendor.
- Search for the vendor and tap it. If the vendor isn’t in your list yet, tap Create New Vendor.
- Tap Got it.
Review an invoice
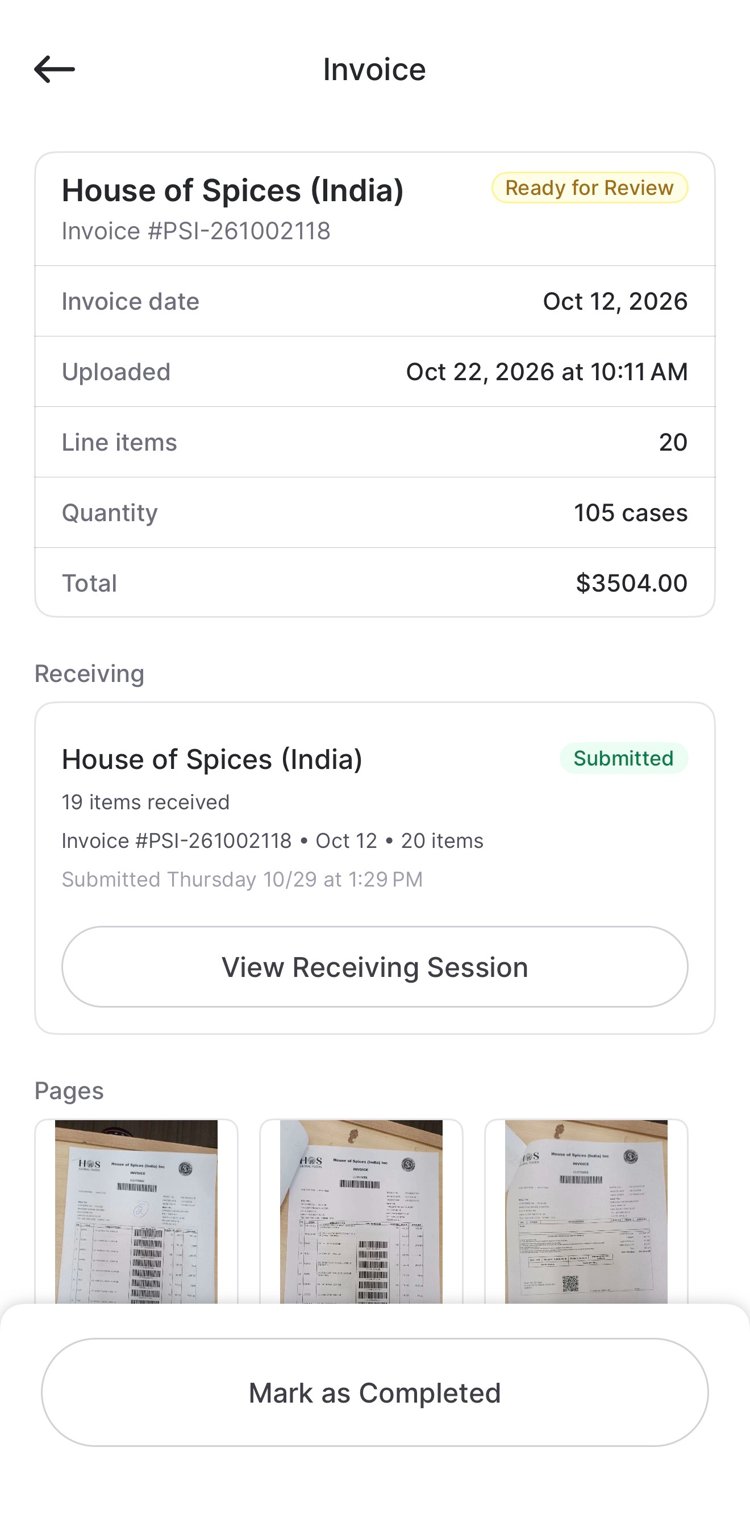
Tap an invoice to open it. You’ll see:- The vendor name, invoice number, and status at the top, with the invoice date, upload date, number of line items, quantity, and total.
- Pages: The scanned or emailed copy of the invoice. Electronic Data Interchange (EDI) invoices don’t have pages to show.
- Line items: Every product on the invoice with its quantity and cost.
- Receiving: The receiving session for this invoice, if there is one, with an In Progress or Submitted badge.
Receive against an invoice
- No receiving session yet: Tap Receive Invoice. Vori opens Receiving with this invoice already selected, so you can go straight to choosing how you want to receive.
- Session already started: Tap View Receiving Session. A session that’s in progress opens in Receiving so you can pick up where you left off. A submitted session opens right inside Invoices, and tapping back returns you to the invoice.