

How EBT Settings Work
Vori manages eligibility using a top-down approach. Setting EBT eligibility at the department level automatically applies to all products within that department. You can also set eligibility at the individual product level. A product-level setting will always override its department’s setting. This is useful for items that are exceptions to their department’s rule. ✏️ Note: An item can be marked as both taxable and EBT-eligible. You should keep the item’s normal tax setting applied. The POS will automatically waive the tax for that item when the shopper pays with an EBT card.Set EBT Eligibility by Department
Use this method in the Back Office to enable EBT for all products in a department.- Navigate to Products > Departments.
- Find the department you wish to edit and click the Edit button.
- In the “Edit Department” window, locate the Regulatory section.
-
Ensure the toggle next to EBT is Enabled.
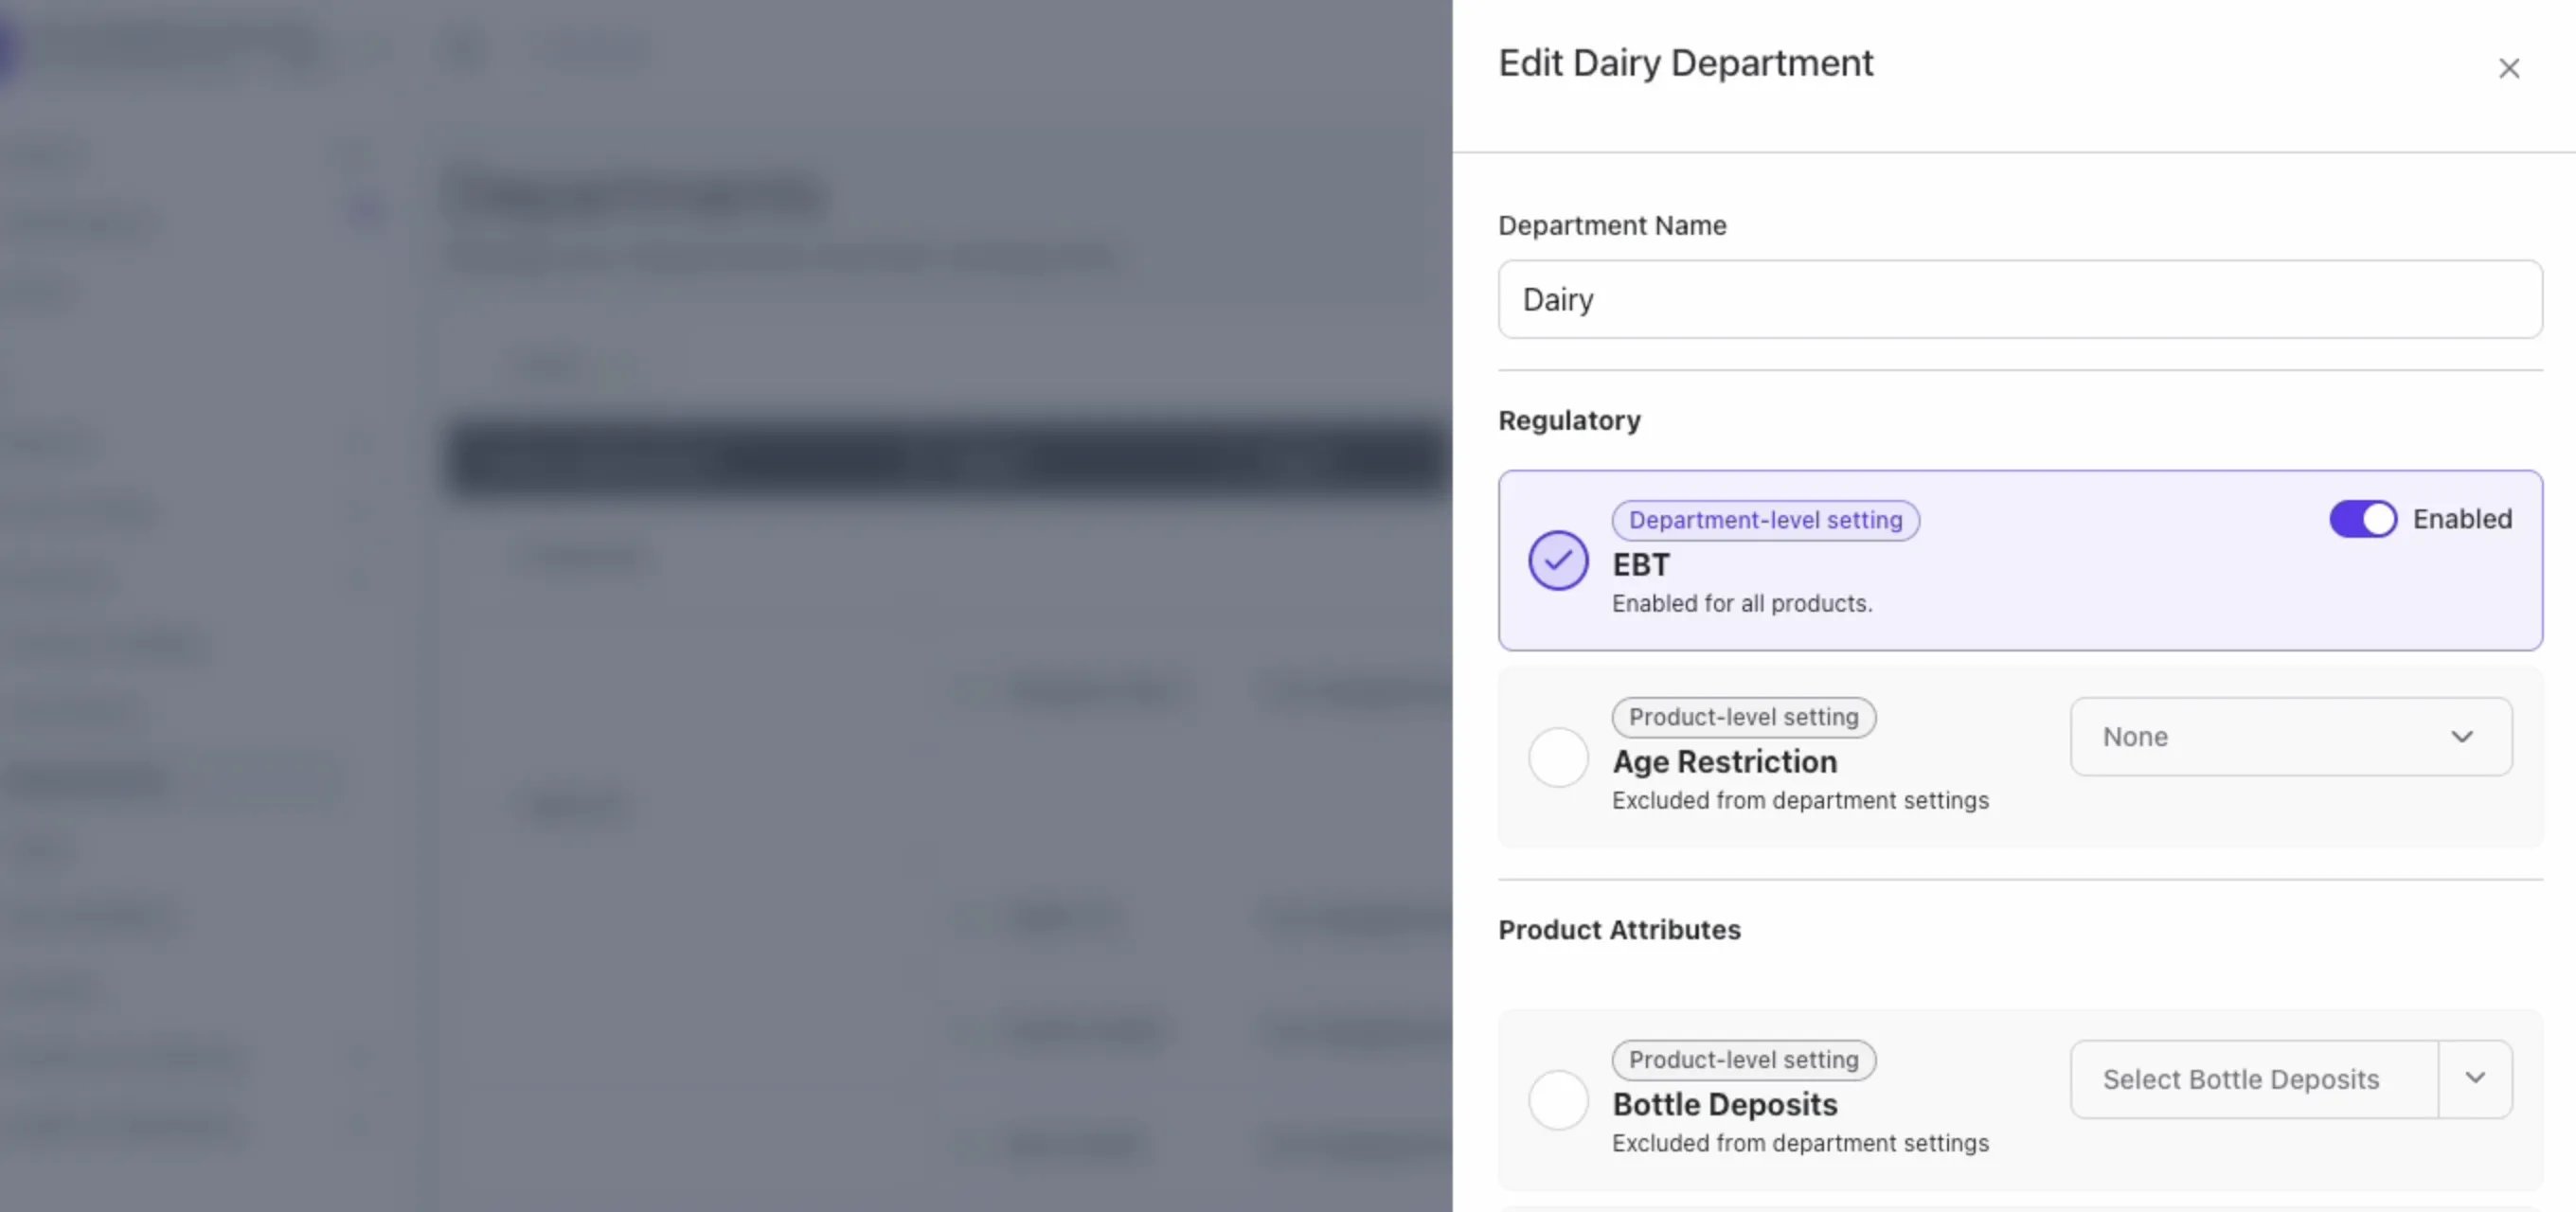
- Click Save. A confirmation message will appear: “Department Updated”.
Set EBT Eligibility for an Individual Product
Follow these steps to manage a single product’s EBT status from the Back Office or VoriOS.In the Back Office
- Navigate to Products > Products.
- Search for the product you wish to edit and click the > carrot icon.
- In the Product window, select the Product Details tab.
- Scroll down to the “Qualified for Federal or State Assistance” section.
-
Click the toggle to enable EBT.
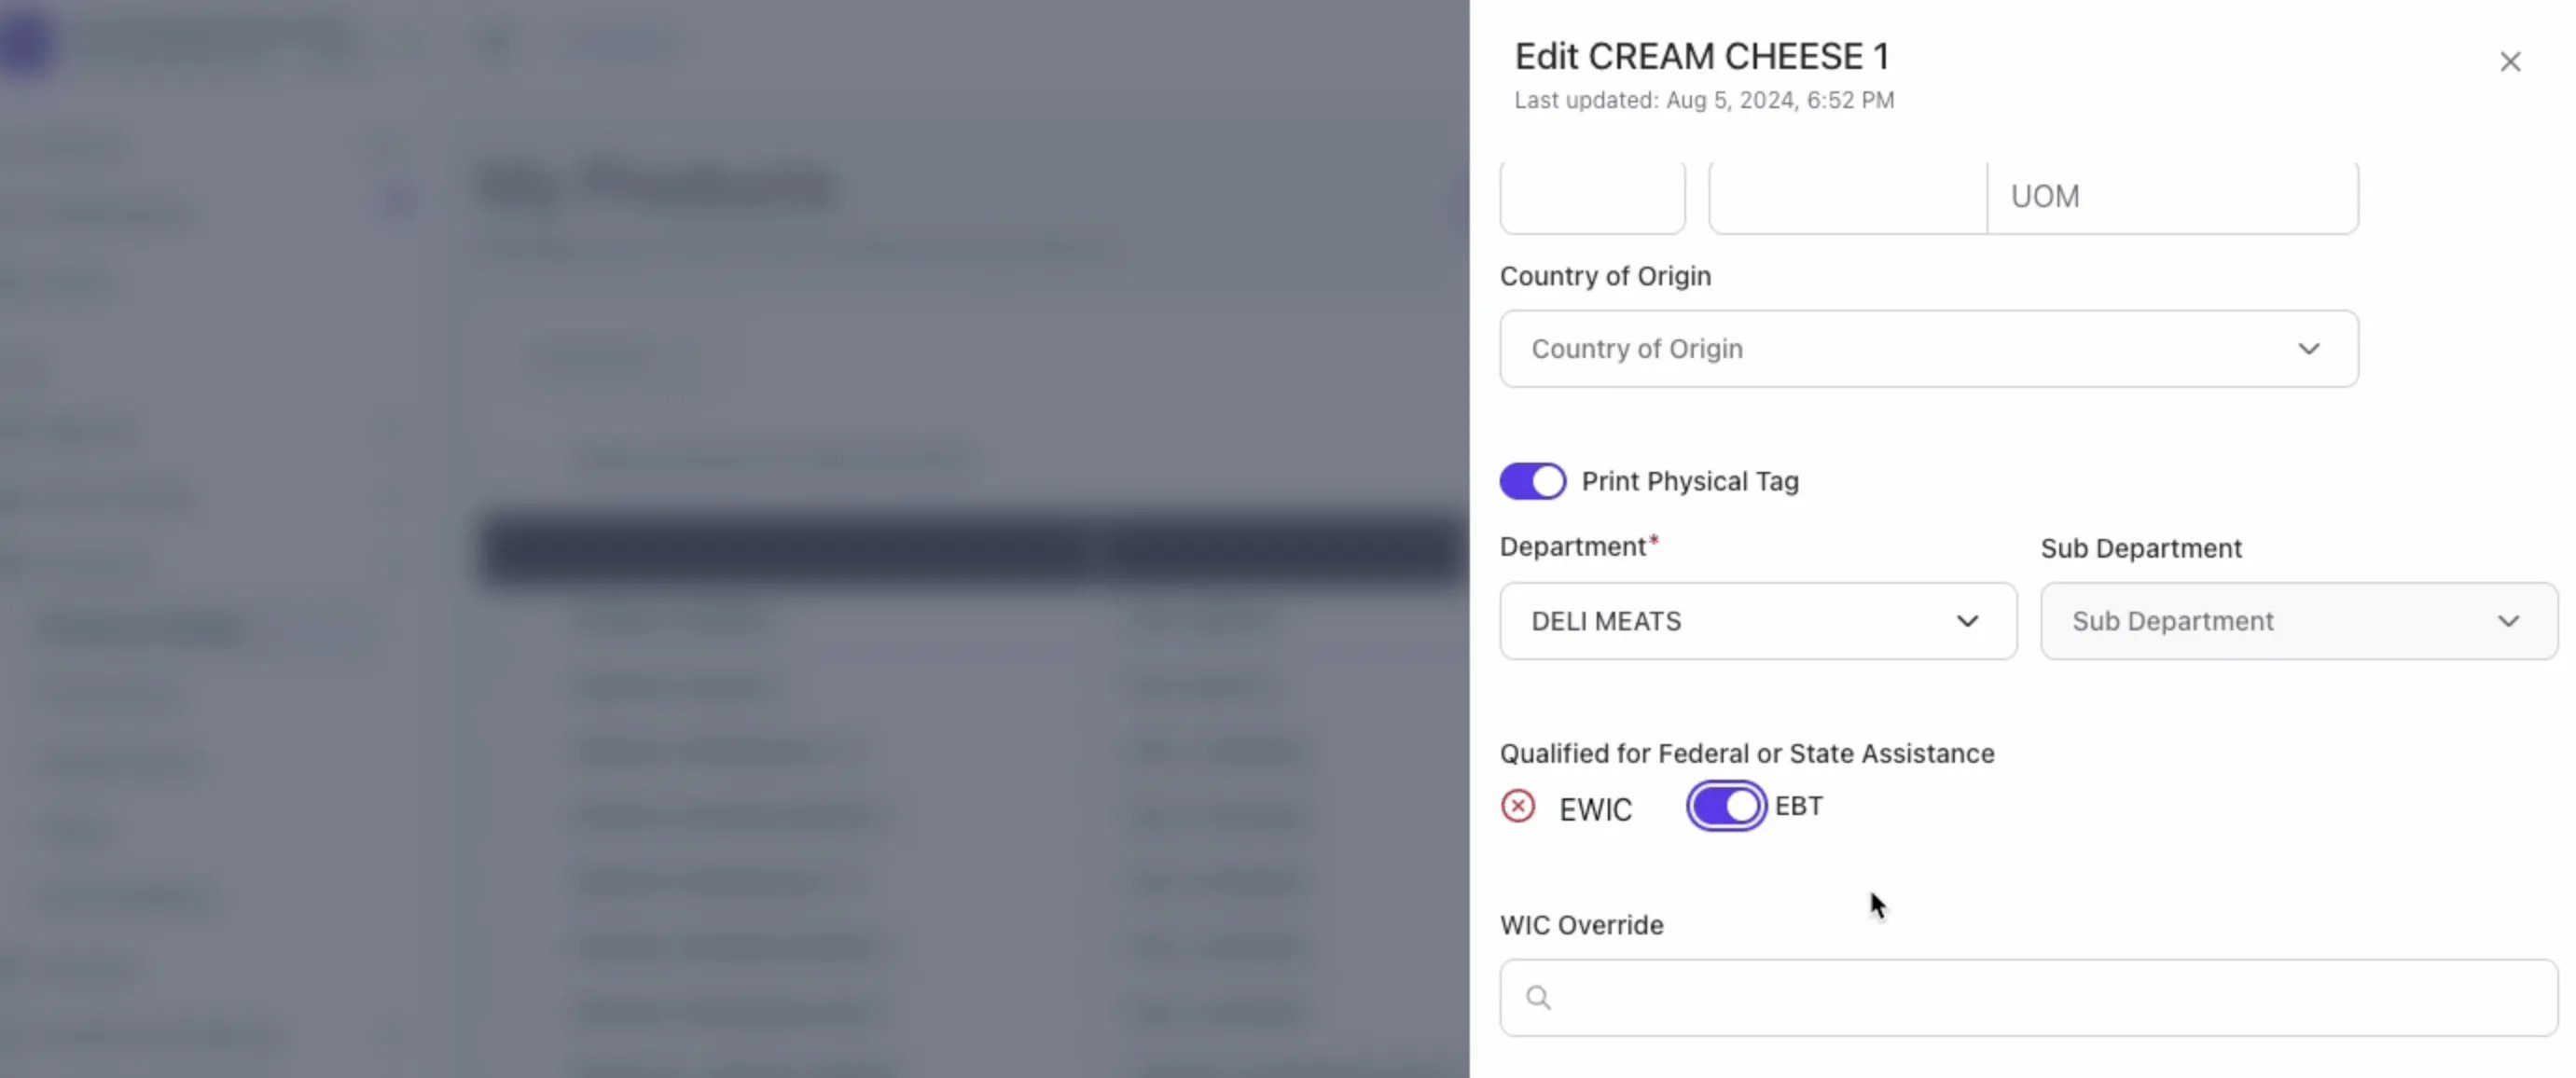
- Click Save. A confirmation message will appear: “Product Update”.
In VoriOS
- From the home screen, tap the Search bar at the bottom.
- Search or scan for and select the product you wish to edit.
- Tap Edit Product Details.
- Select the Details tab.
-
Scroll down and tap the toggle to enable EBT.
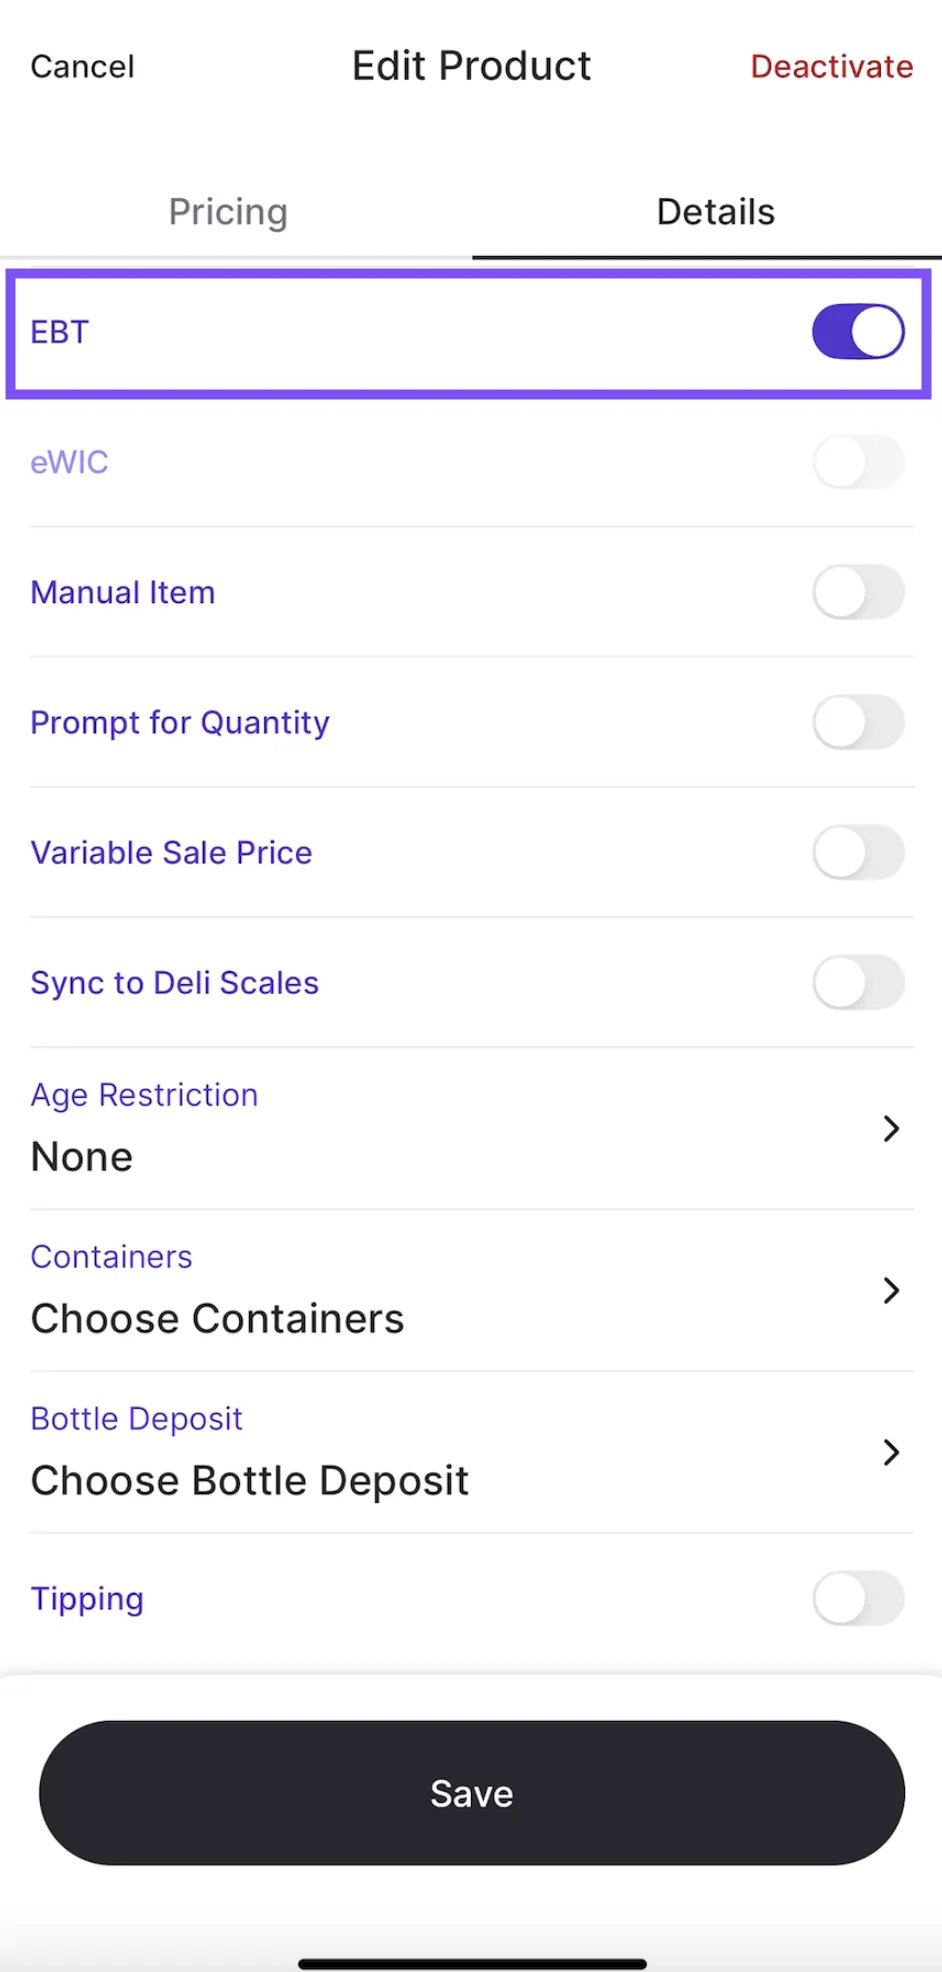
- Tap Save.
Temporarily Mark an Item as EBT Eligible on the POS
If an item isn’t flagged correctly during checkout, you can temporarily mark it as eligible for the current transaction.- Once an item is added to the basket, tap the item, and select the …More button next to the item name.
- Tap Mark as EBT eligible.
- Proceed to the payment screen. The item will now be included in the EBT-eligible total.