

What are shopper groups?
A shopper group is a named group of loyalty members you can target with promotions and identify at the register. Think of it as a label you apply to shoppers who should be treated the same way, such as Employee, VIP, Wholesale, Senior, or First Responder. Shopper groups do two jobs:- Targeted promotions — limit an offer so only members of a group receive the discount.
- Point of Sale (POS) identification — flag a group so cashiers can recognize its members during a transaction.
Creating a shopper group
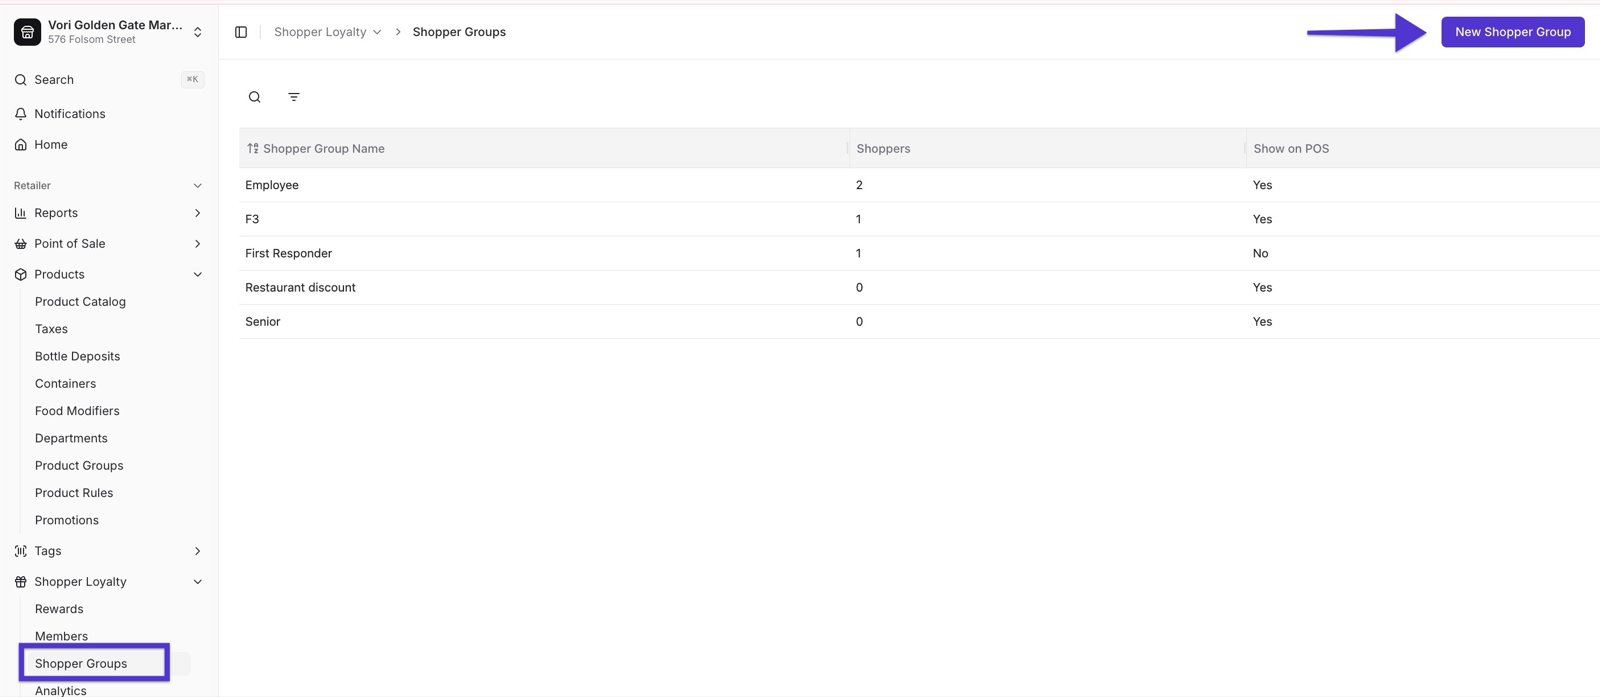
- In Back Office, select Shopper Loyalty on the lefthand menu, then select Shopper Groups.
- Select New Shopper Group in the top right corner.
- Enter a Group Name that describes who belongs to it, such as VIP, Wholesale, or Senior.
- Turn on Show on POS if you want cashiers to see this group at the register. Leave it off to use the group for promotions only.
- Select Save.
Group names are unique within a store. Choose a name that your team will recognize at a glance, since cashiers may see it during checkout.
Assigning a shopper to a group
You can assign a shopper to a group when you create their member record, or add and change groups later from an existing member’s record. When creating a new member:- Select Shopper Loyalty, then select Members.
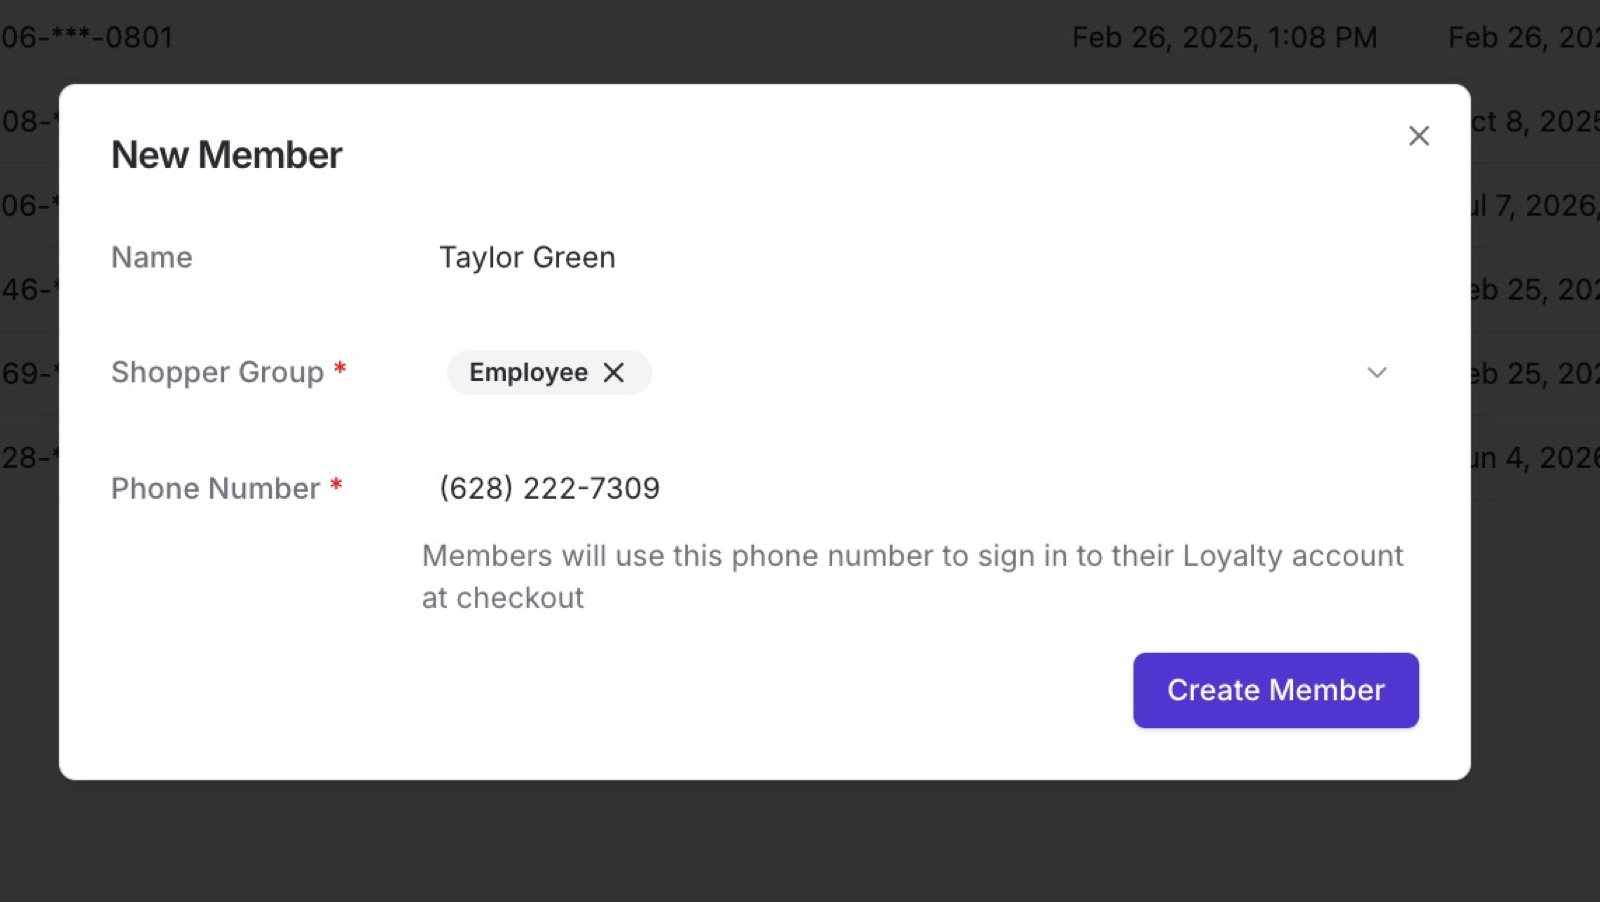
- Select New Member.
- Enter the shopper’s Name and Phone Number, then select one or more groups from the Shopper Group field.
- Select Create Member.
- Select Shopper Loyalty, then select Members.
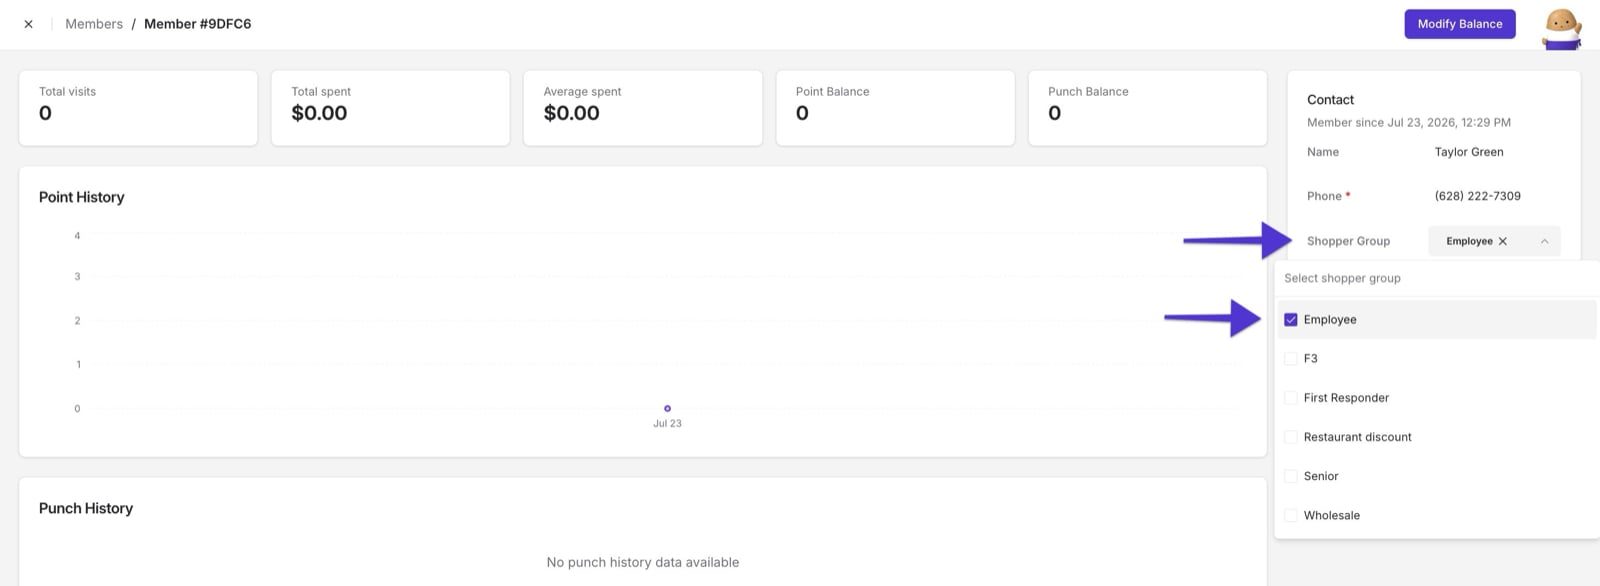
- Find the shopper you want to update, then open their member record.
- In the Contact card, open the Shopper Group dropdown and select or clear groups.
Using a shopper group in a promotion
Shopper groups let you run an offer for one audience without opening it up to every shopper.- Open the offer you want to target, or create a new one. For a walkthrough, see Adding Conditional Rules to Your Offers.
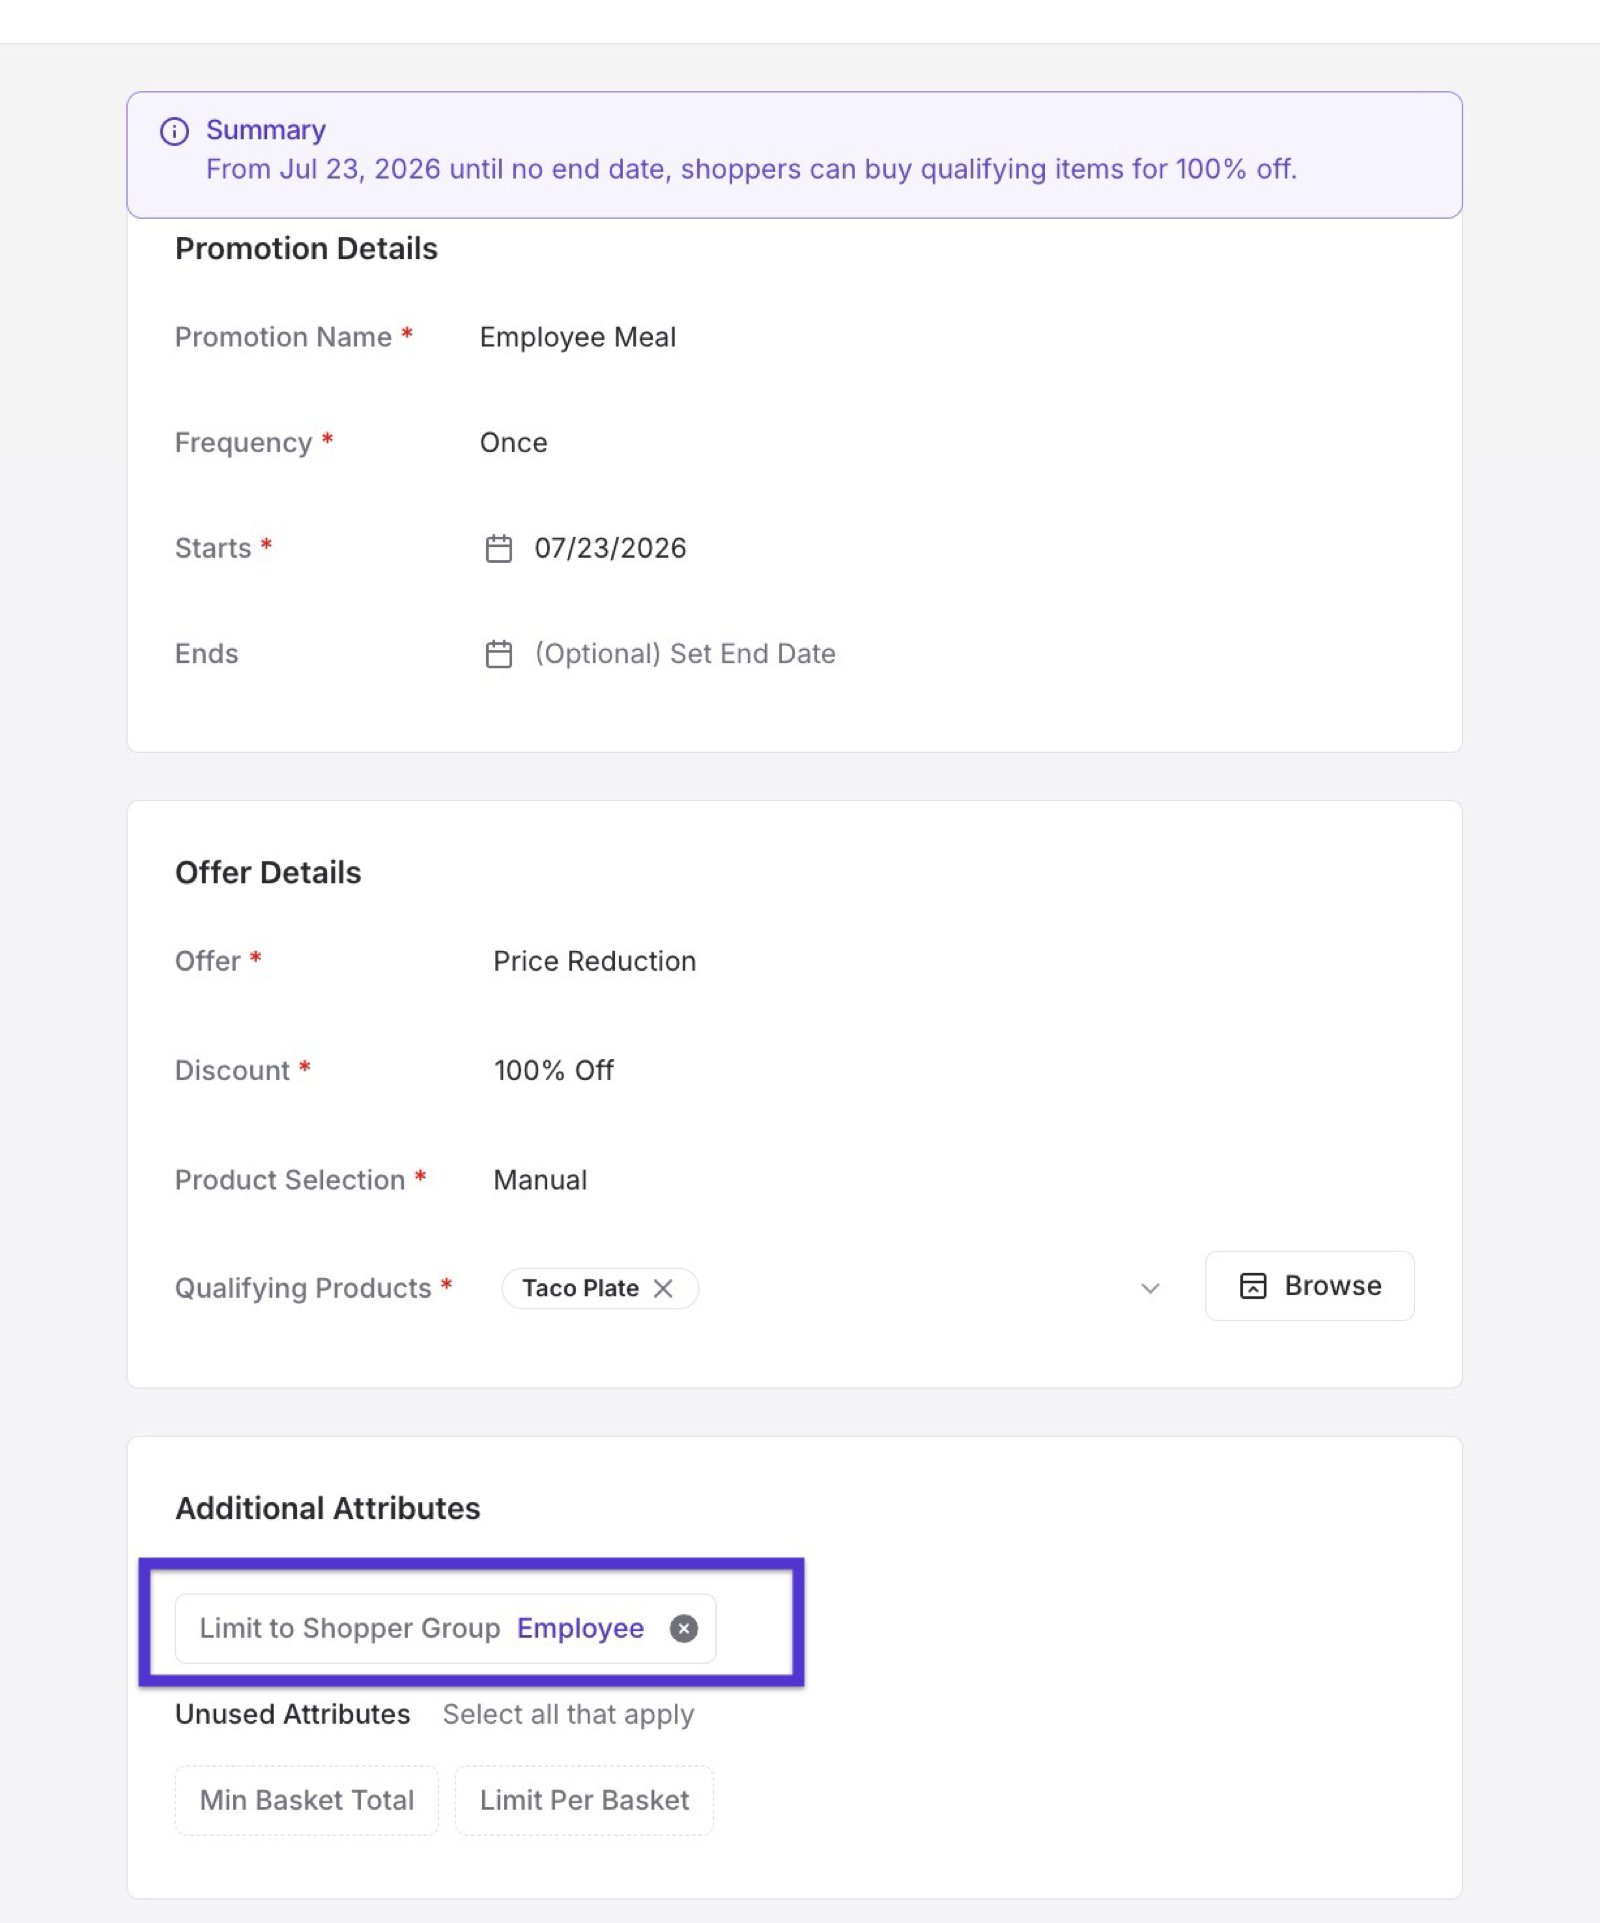
- In the Offer Details section, scroll to Additional Attributes.
- Under Unused Attributes, select Limit to Shopper Group.
- Choose the group the offer applies to.
Showing a group at the register
Without shopper groups, every loyalty member is treated the same, so discounts meant for one audience either get missed at checkout or have to be applied manually. When Show on POS is turned on for a group, cashiers can identify its members during a transaction and confirm they qualify before a discount applies, instead of relying on a workaround that does not scale across shifts. Turn Show on POS off for groups you only use behind the scenes for promotions, so the register stays uncluttered. You can change this setting for any group at any time from the Shopper Groups list. Here is what that looks like during checkout:-
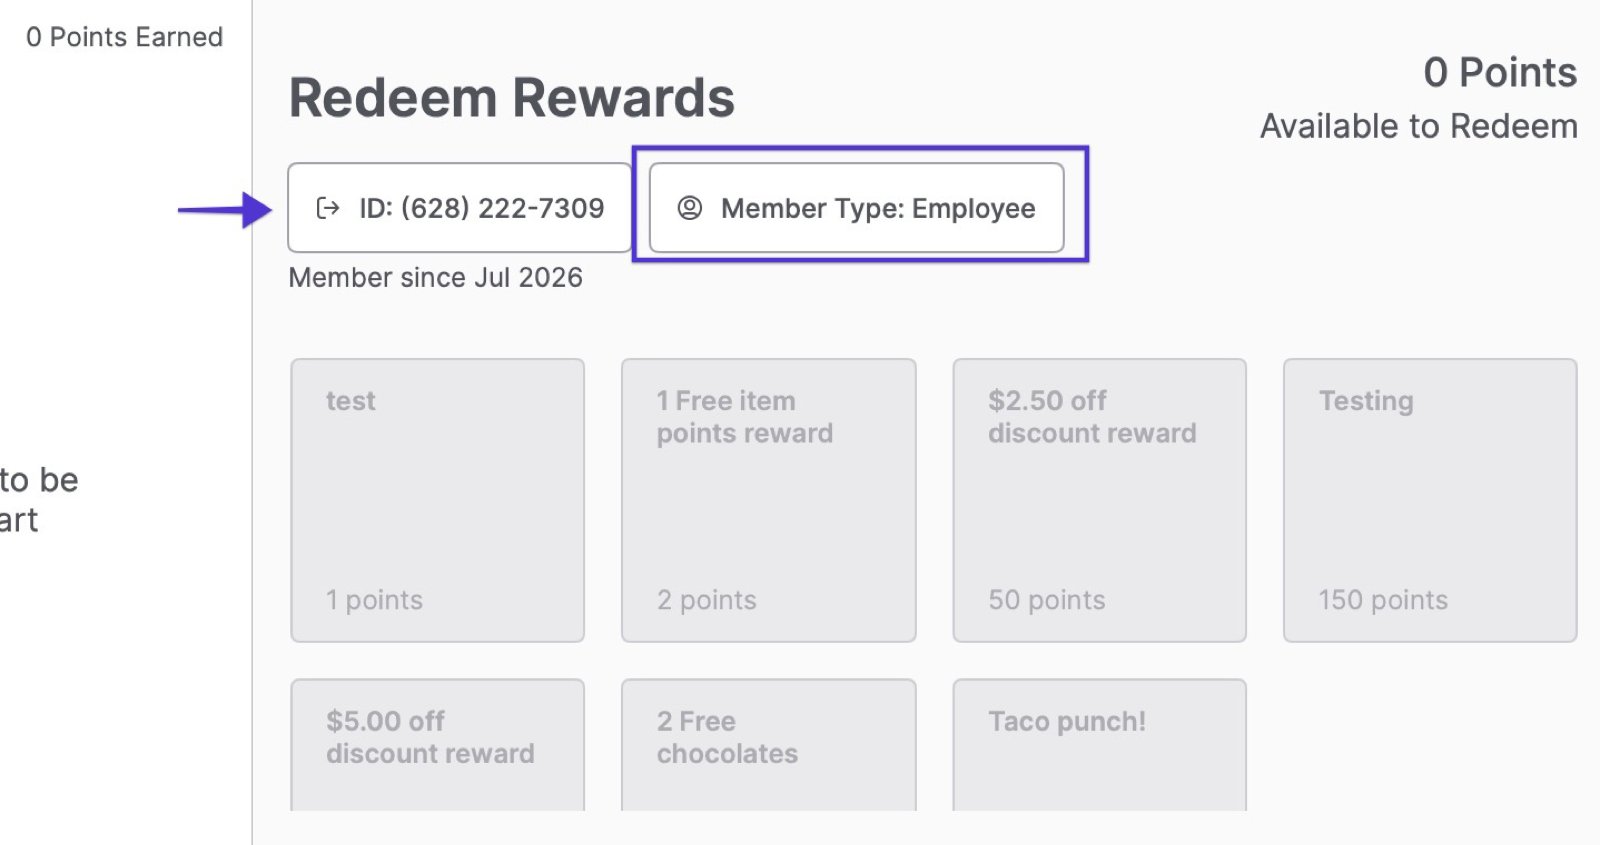
The cashier looks up the shopper by phone number. The Redeem Rewards screen shows the shopper’s Member Type, so the cashier can confirm which group they belong to.
-
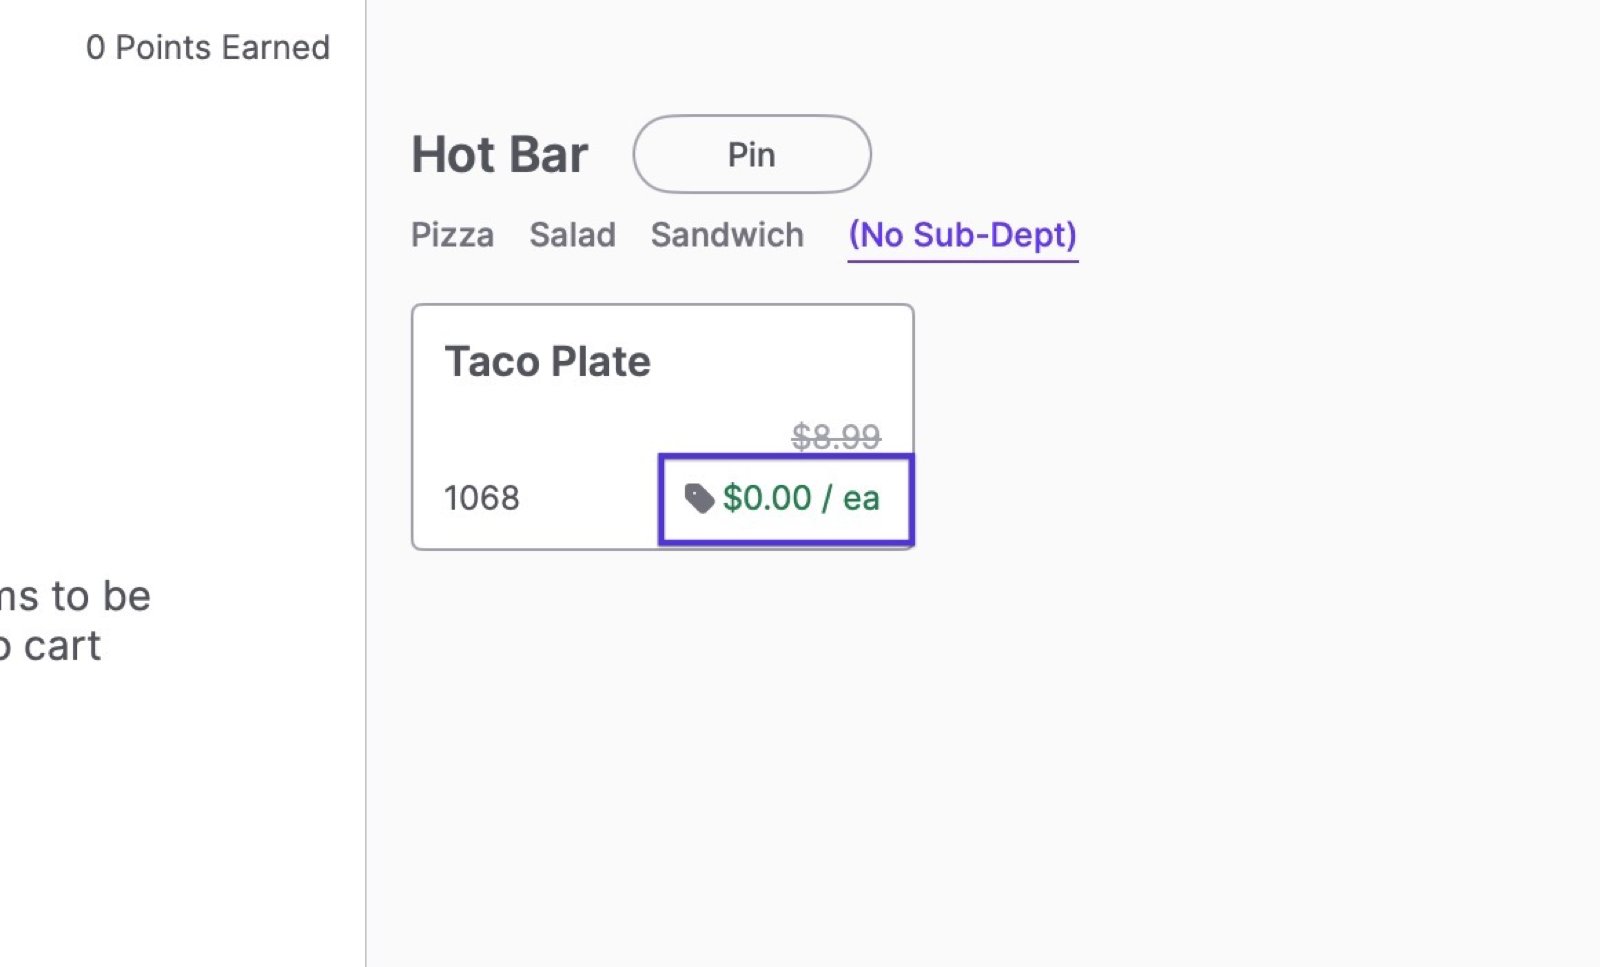
Any item with a promotion limited to that group shows its discounted price right in the product catalog, struck through against the regular price.
-
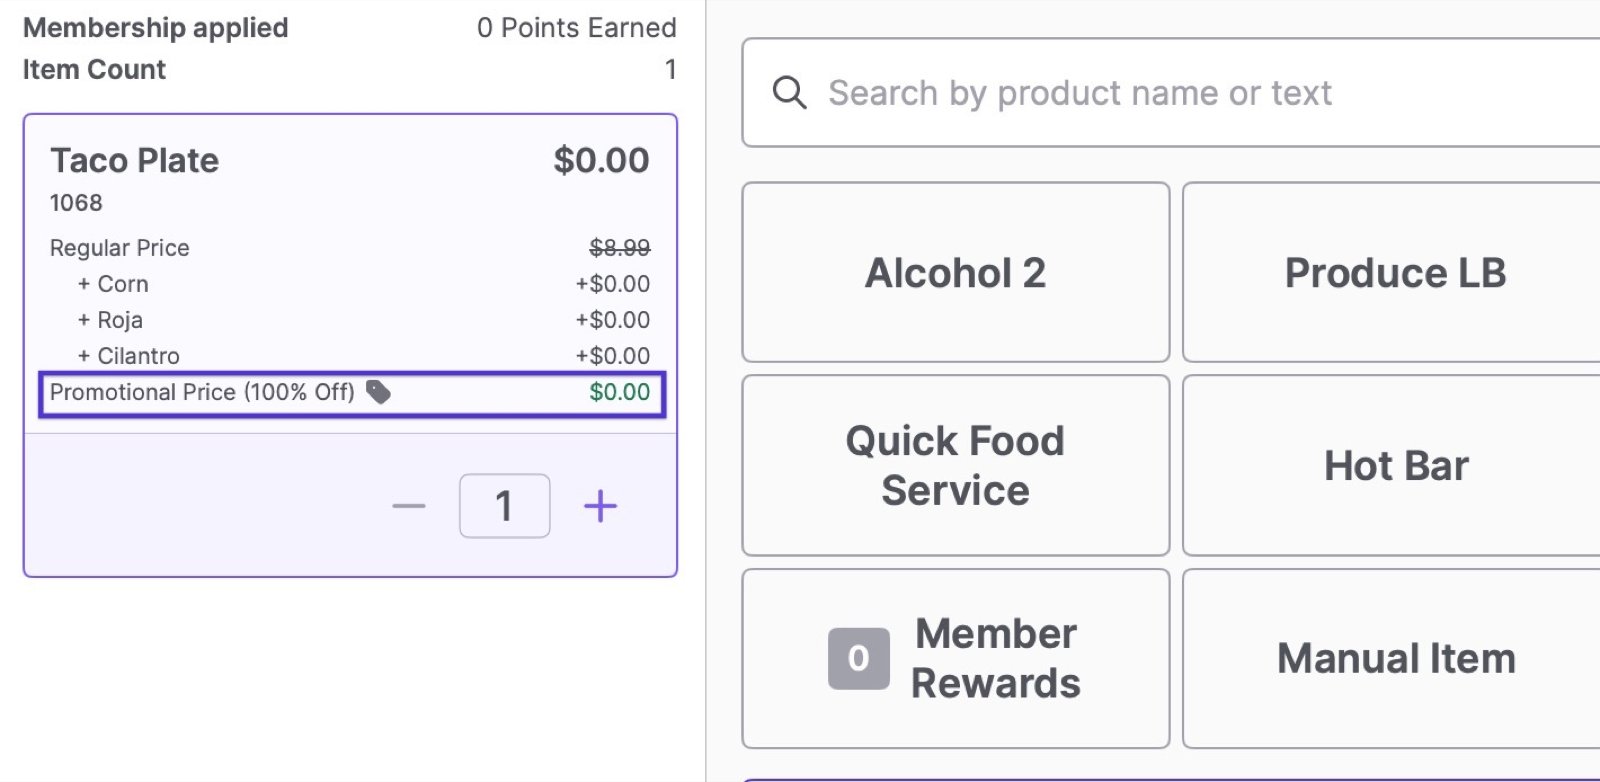
When the item is added to the cart, the promotional price and discount reason appear on the line item, so the cashier and shopper can both see why the price changed.
Because a group only changes pricing and POS visibility for the shoppers assigned to it, you can run all of these side by side without affecting the rest of your loyalty list.