Sign in
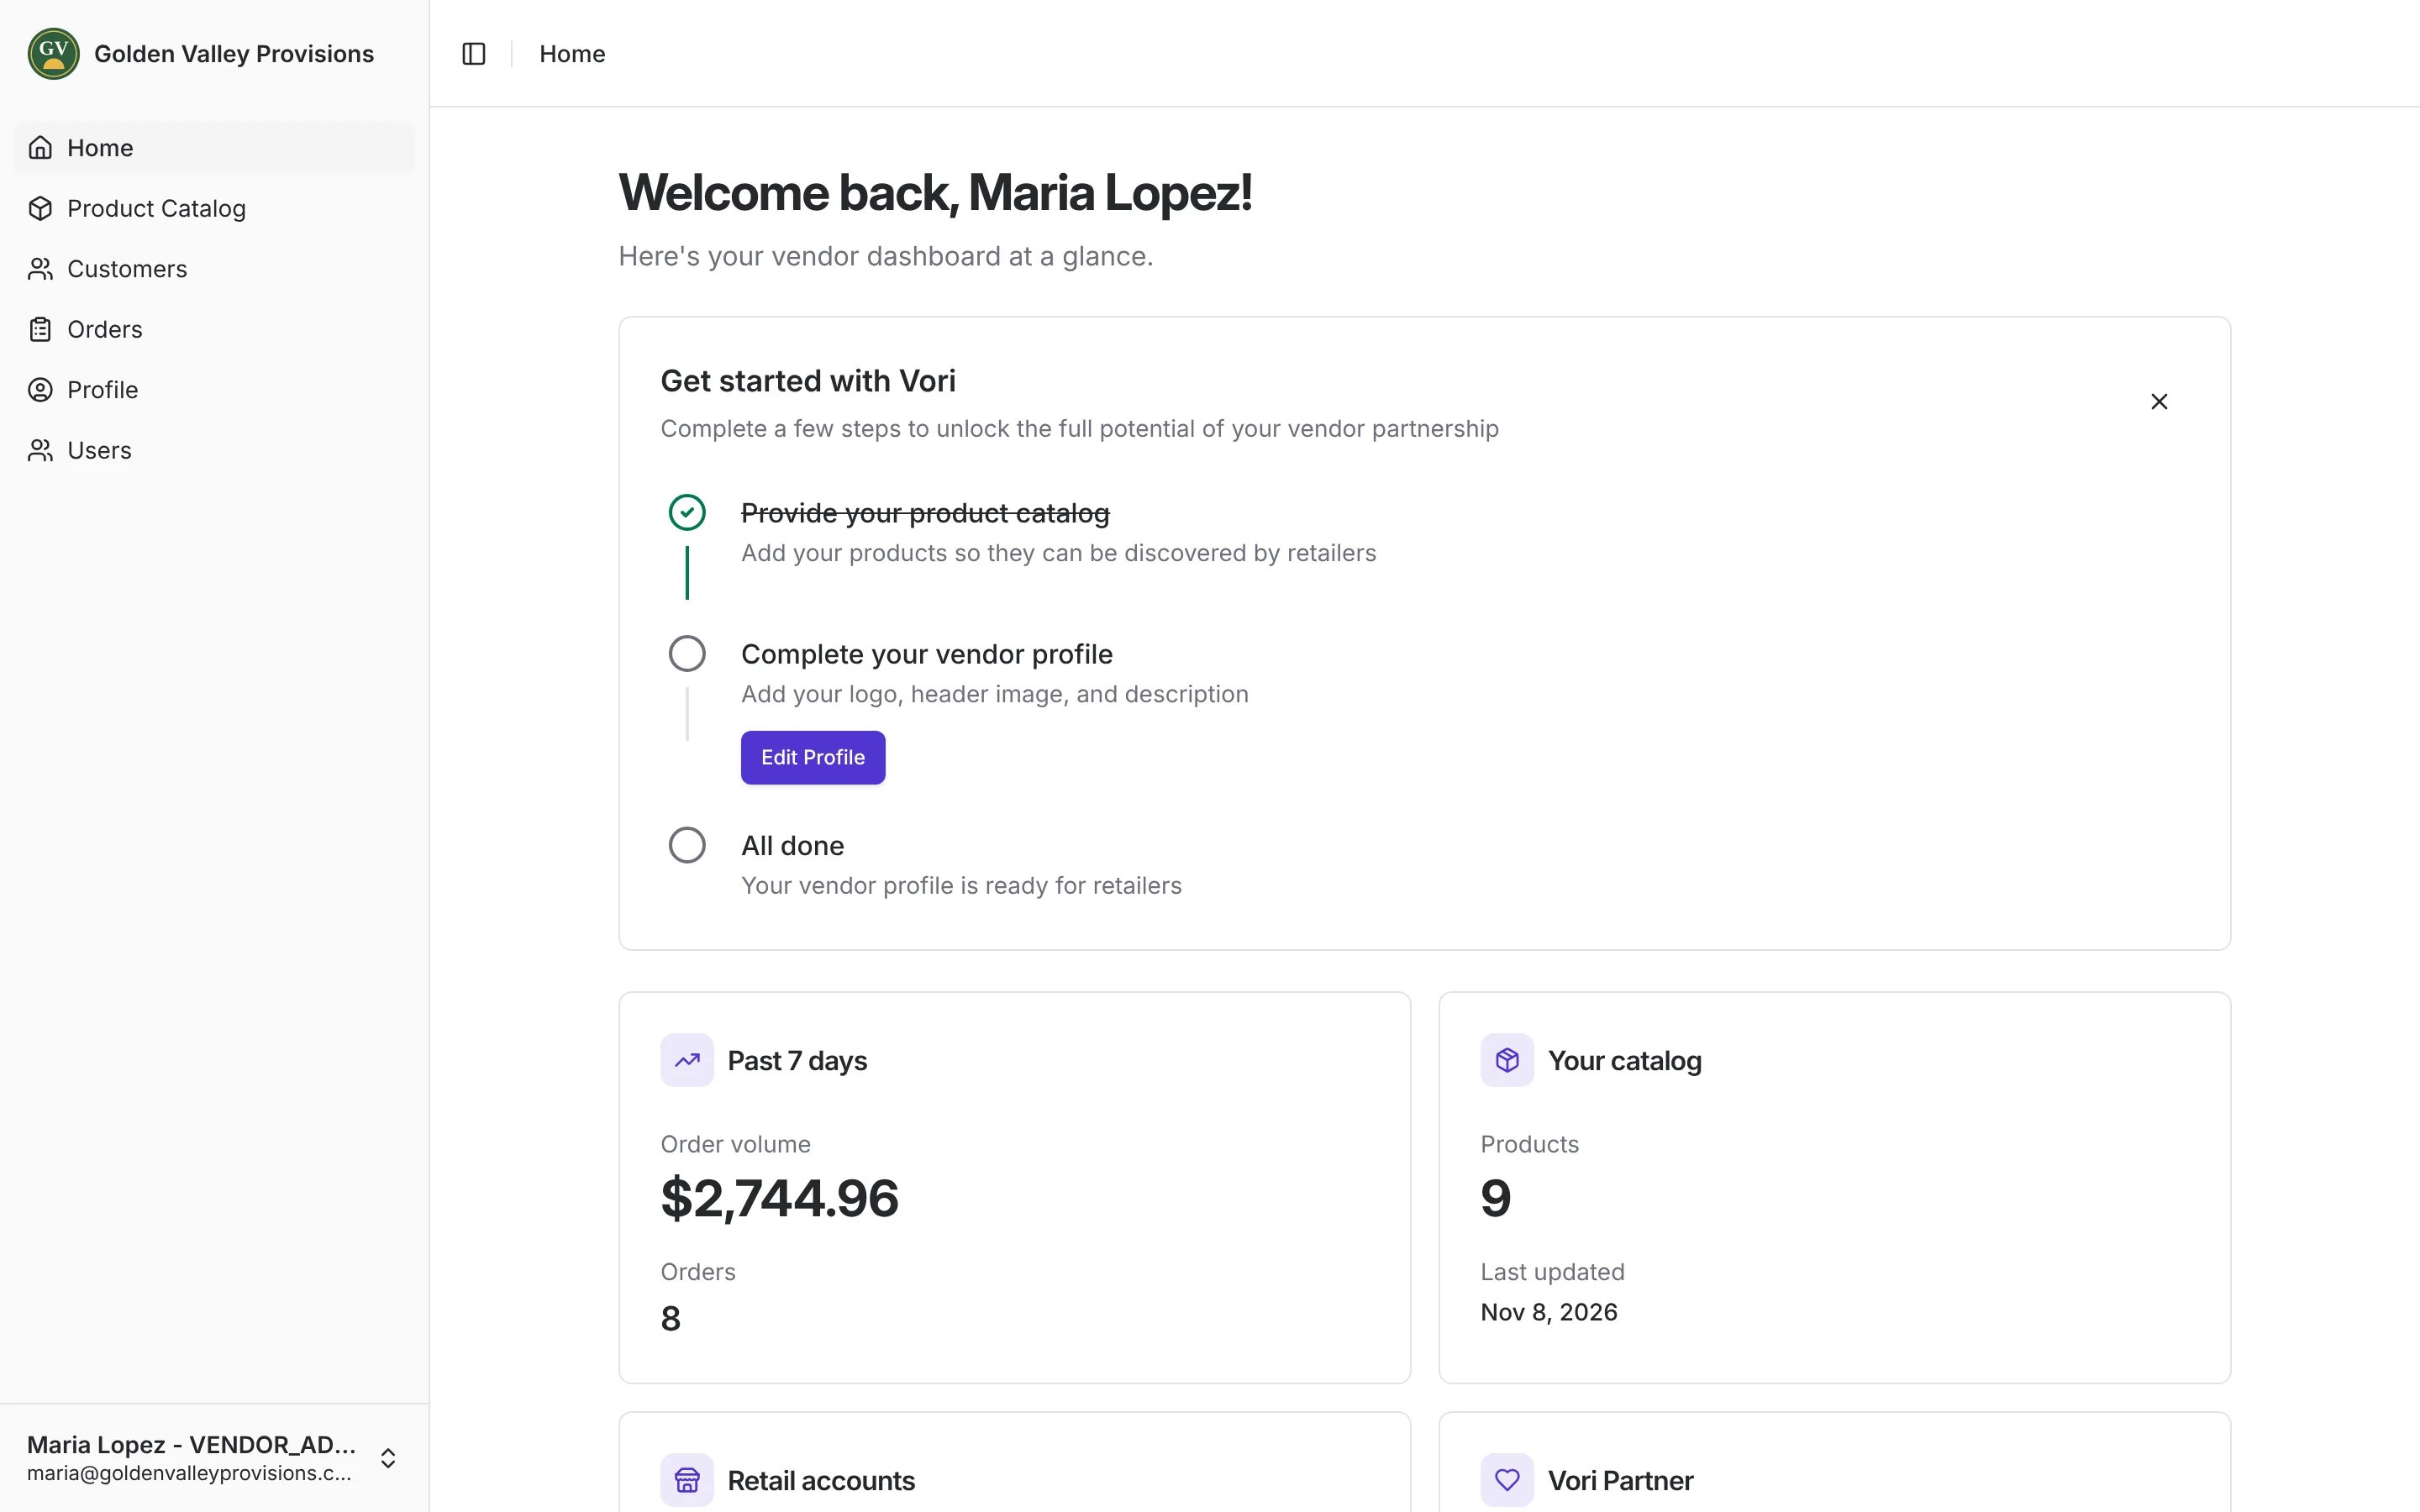
Your Vori contact creates the first portal account for your company. Sign in at app.vori.com with that email and password. The portal opens on Home. The sidebar shows the pages your account can use: Home, Product Catalog, Customers, Orders, Profile and Users. If a button is grayed out and says You do not have permission to perform this action, ask an admin on your team or contact Vori Support.Get started from Home
The Get started with Vori checklist walks you through setup:- Provide your product catalog. Click Upload Products to load your catalog from a CSV file. See Upload your catalog.
- Complete your vendor profile. Click Edit Profile to add your display name, description, logo and banner image. Retailers see these when they browse vendors.
- All done. Your profile is ready for retailers.
Manage your product catalog
Open Product Catalog to see every product you sell, with its item code, brand, category, Unit UPC, case size, unit volume and status. Search by description, item code or brand, or use the filter, sort and column controls above the grid.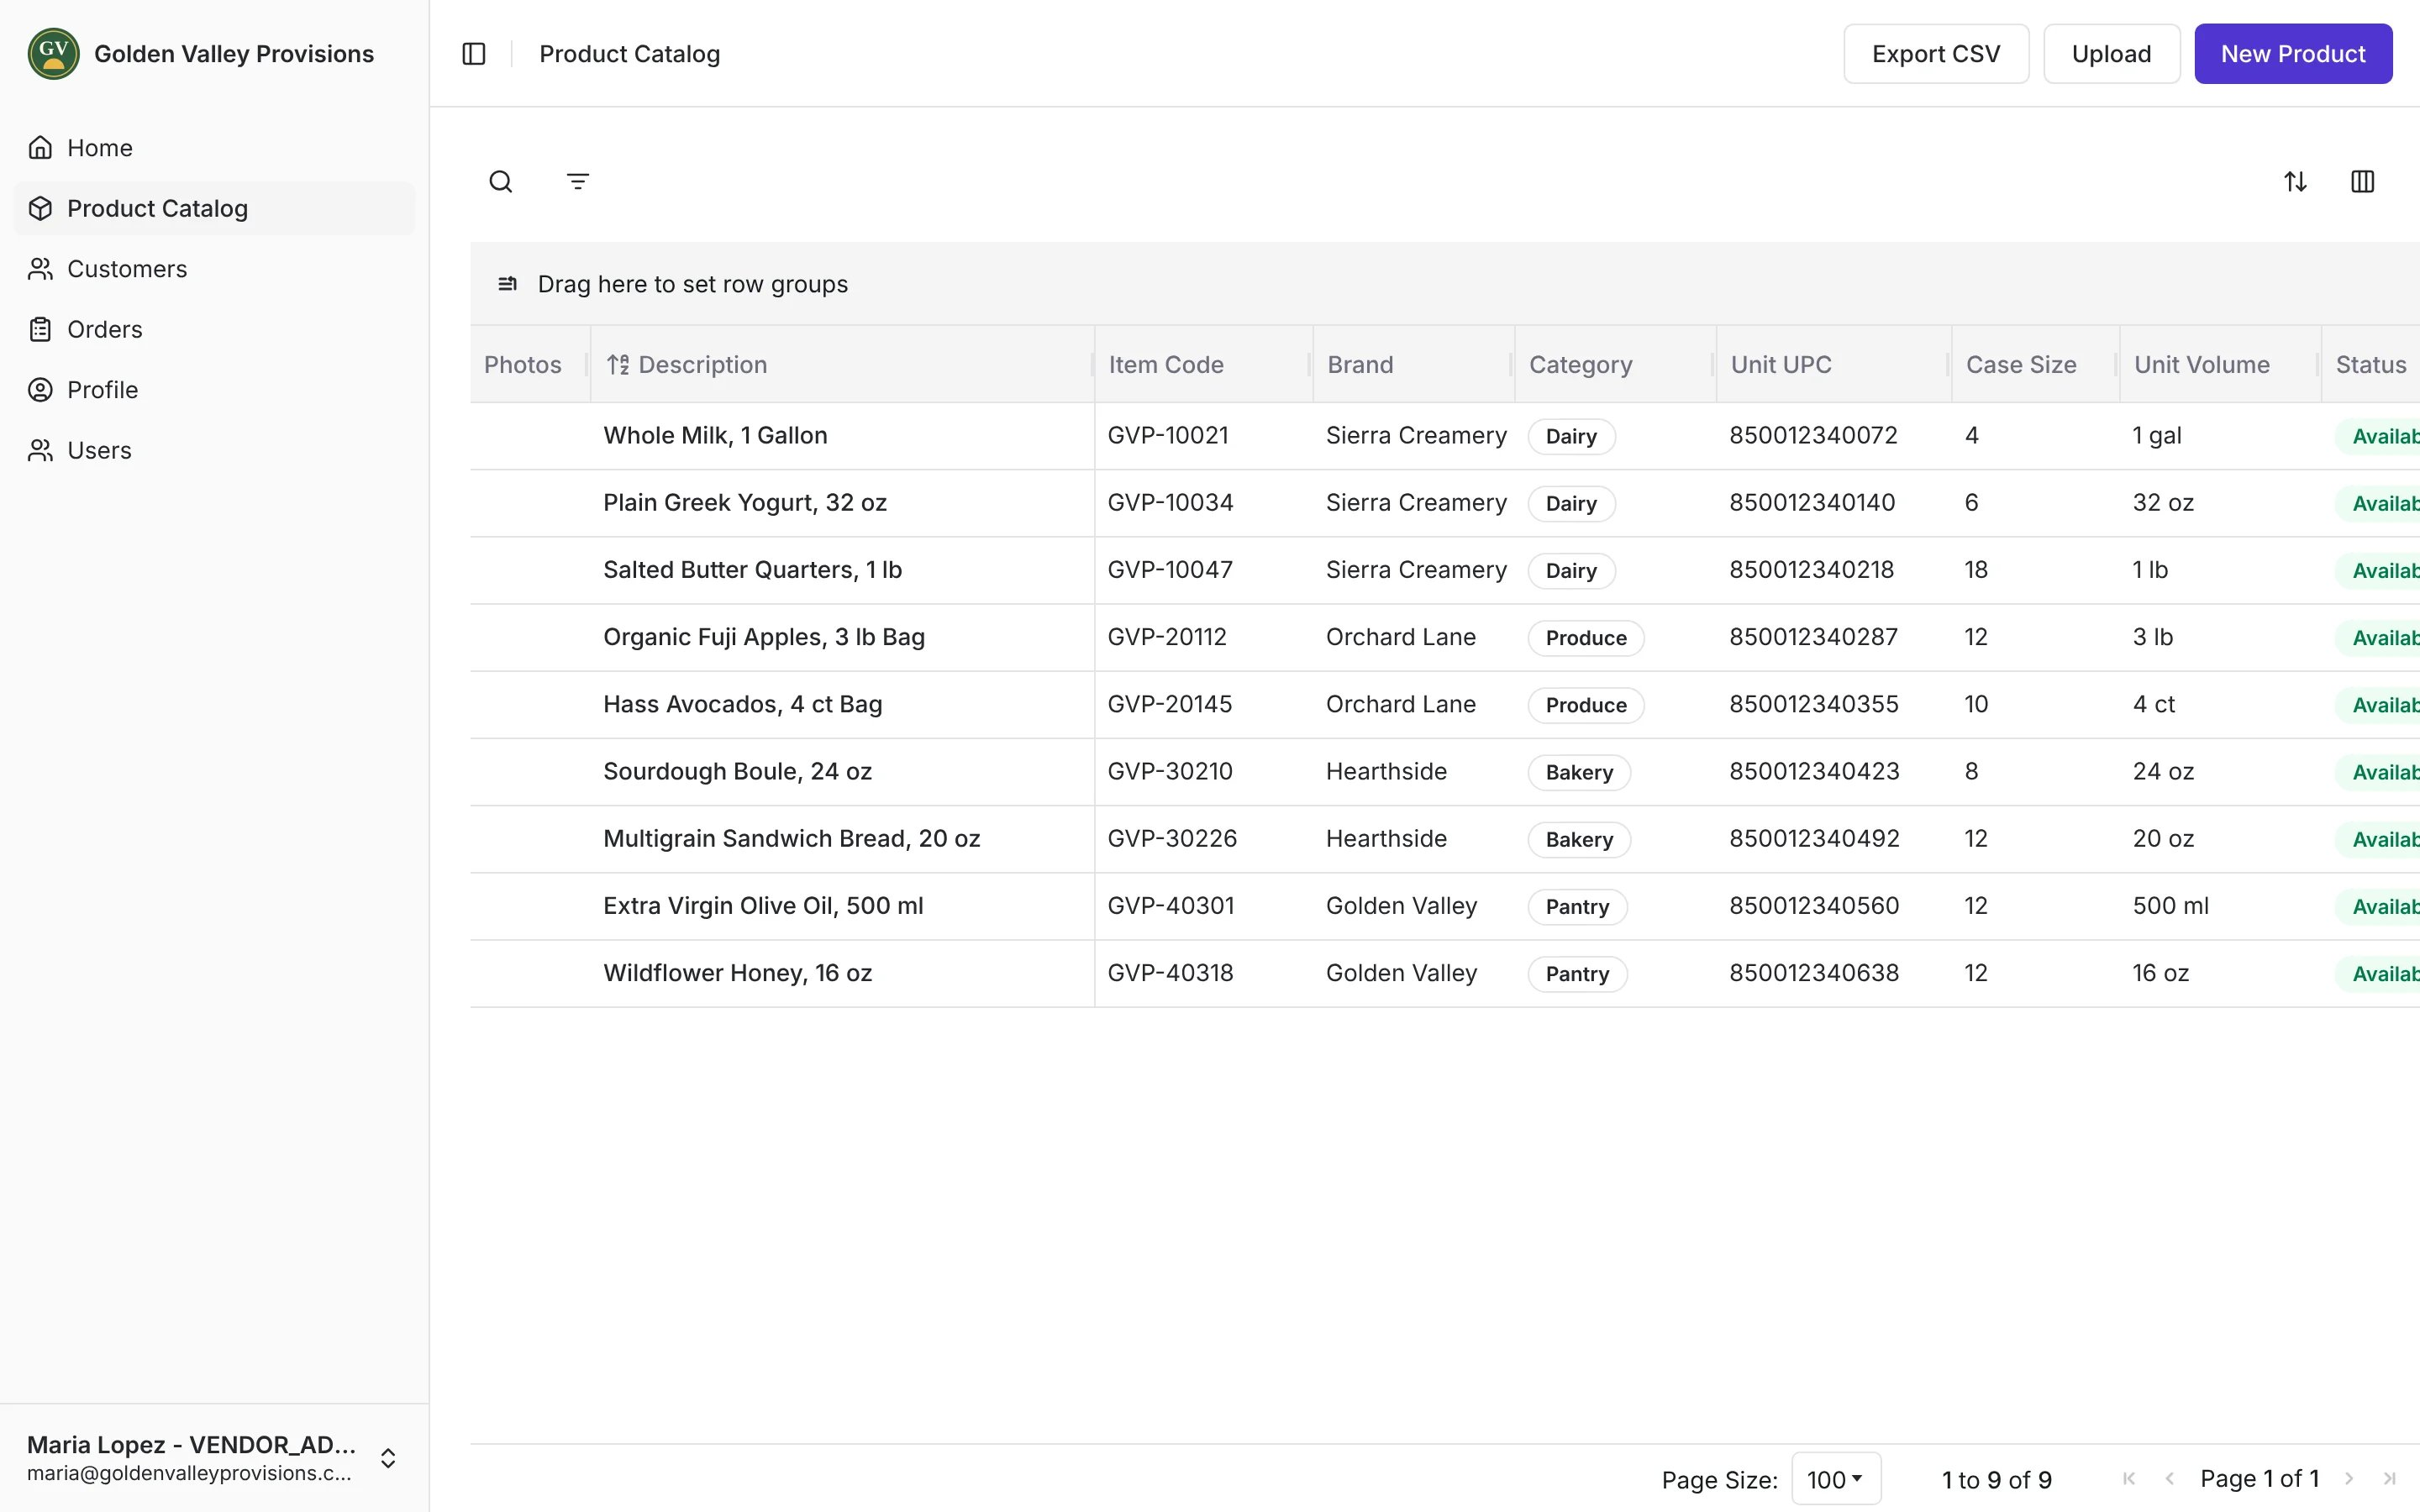
Add a product
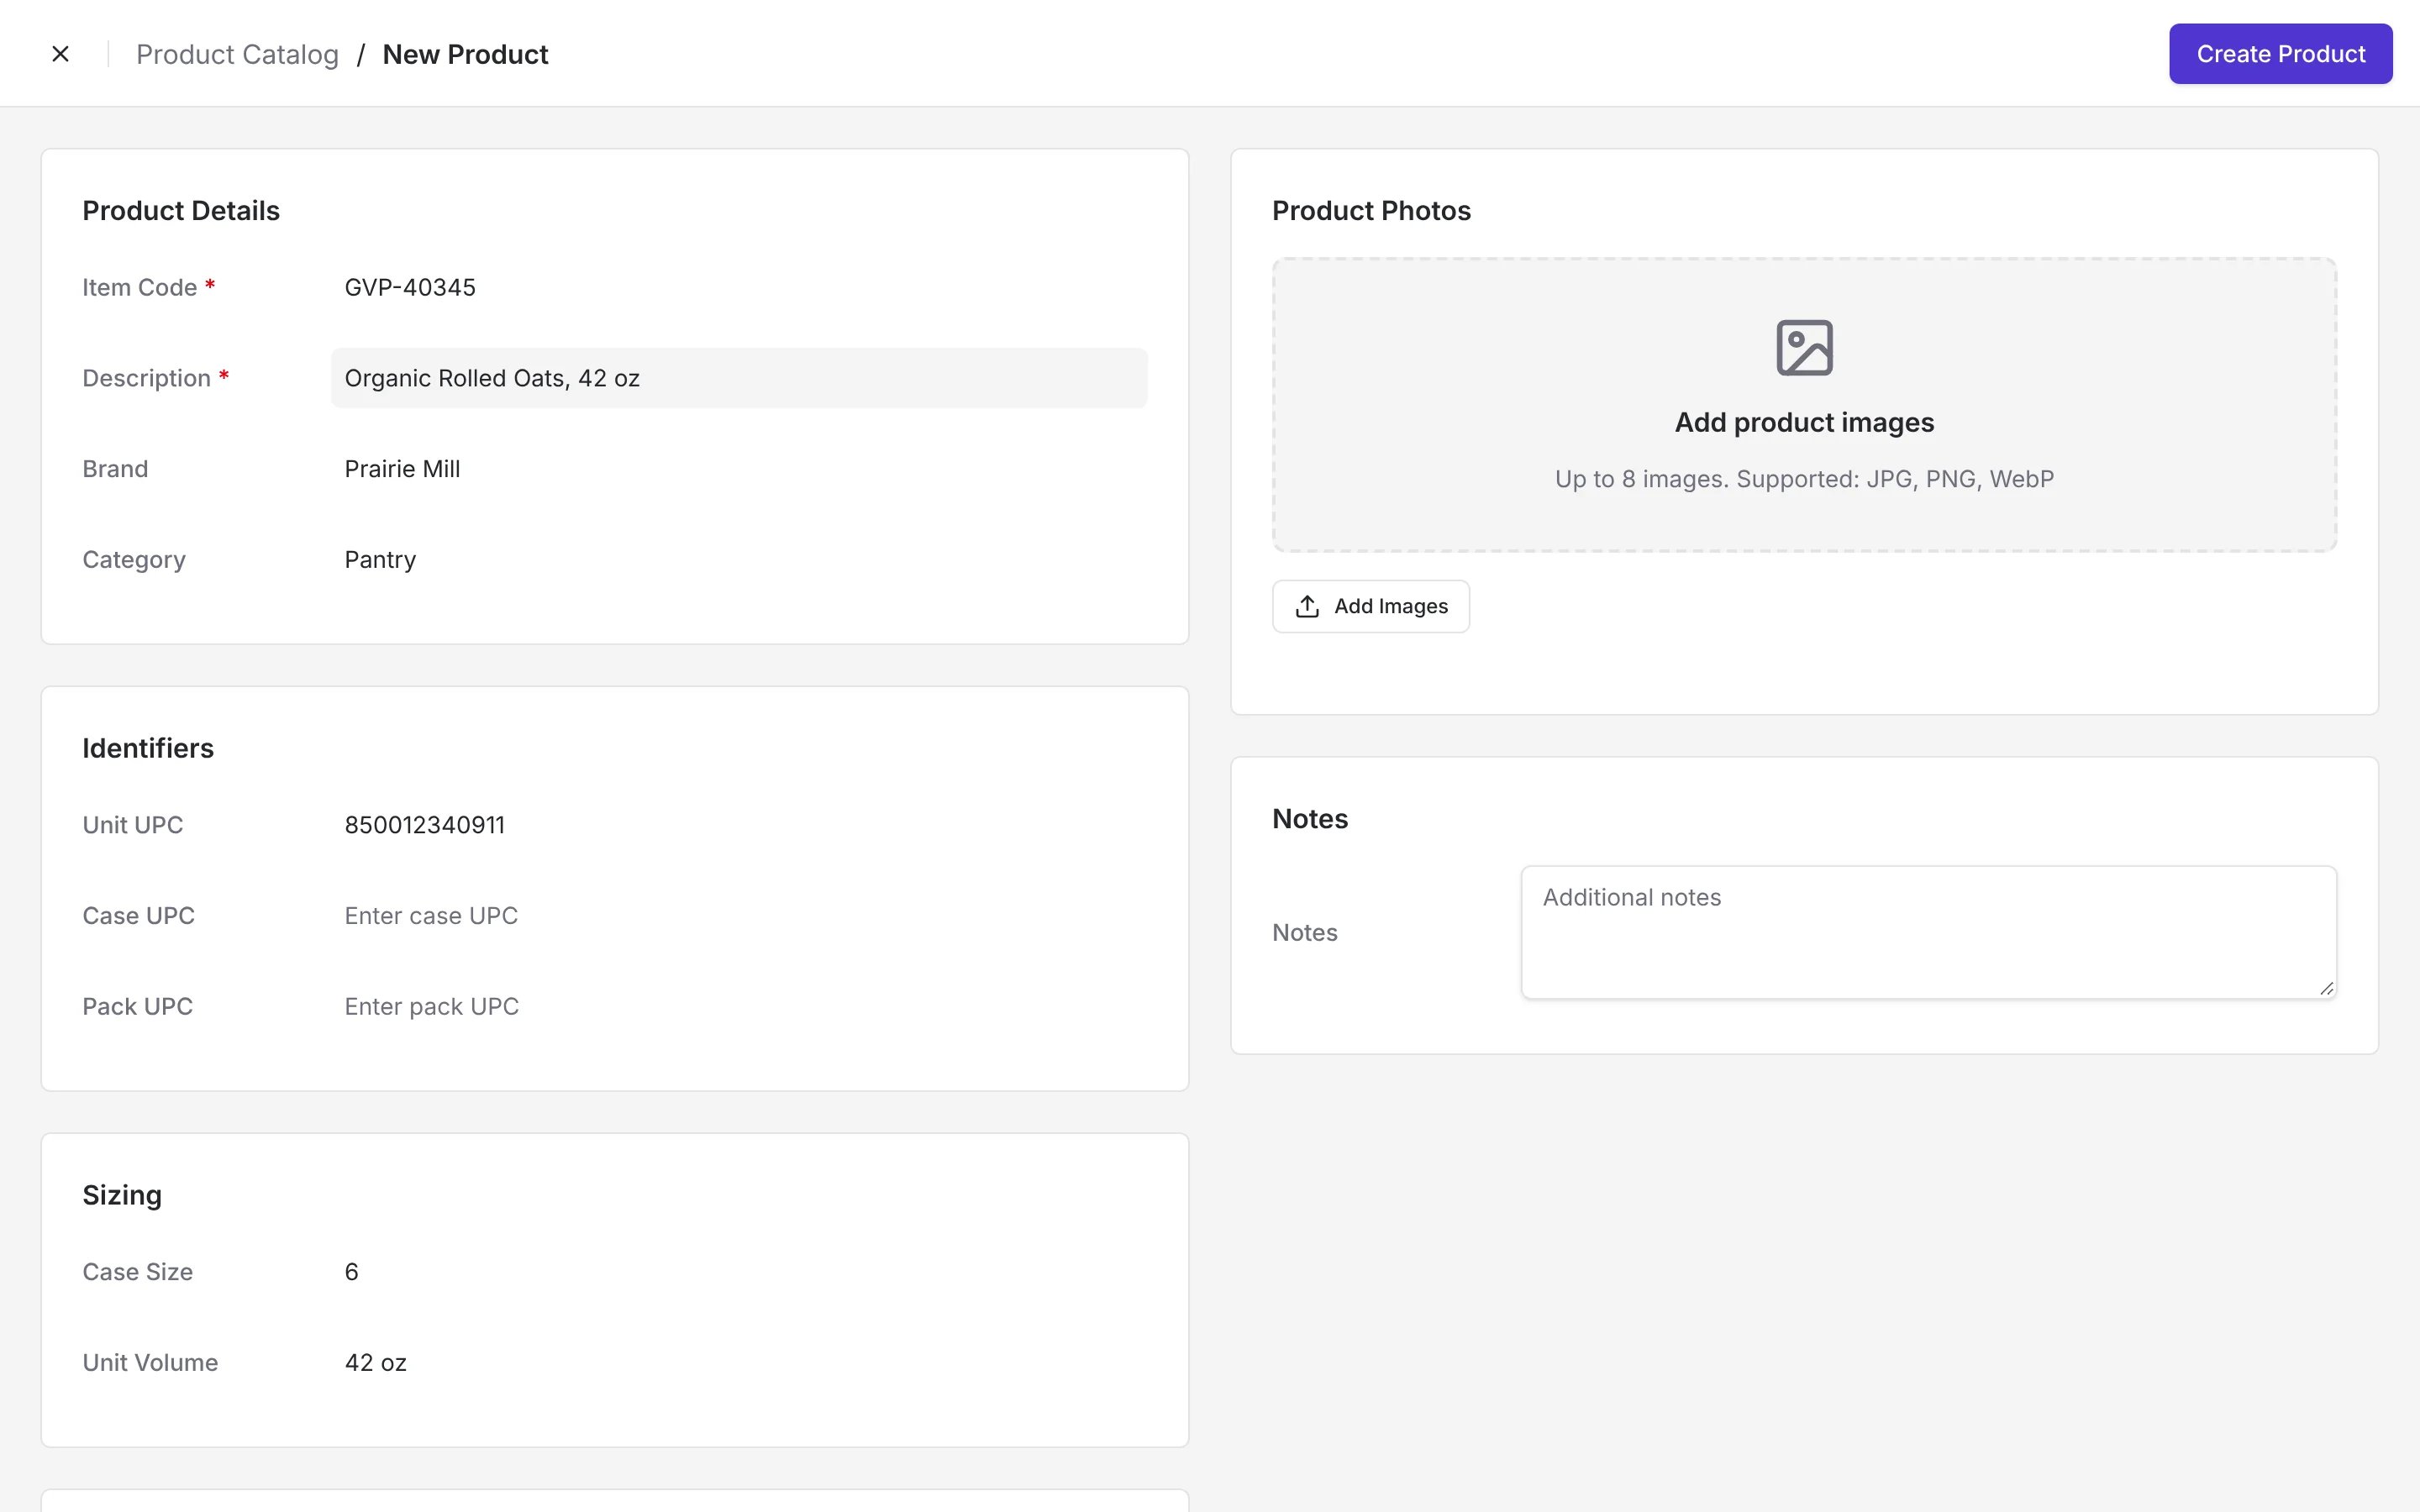
- In Product Catalog, click New Product.
- Under Product Details, enter the Item Code and Description. Both are required. Add the Brand and Category if you have them.
- Under Identifiers, enter the Unit UPC, and the Case UPC and Pack UPC if the product has them.
- Under Sizing, enter the Case Size and Unit Volume, for example
12 fl oz. - Under Pricing, enter the Wholesale Unit Price and Wholesale Case Price in dollars.
- Under Product Photos, click Add Images to add up to 8 JPG, PNG or WebP images. Click Set as cover on the image retailers should see first.
- Click Create Product.
Edit or delete a product
Click a product in the grid to open it. Make your changes and click Save Changes. To delete it, click the ⋮ menu at the top of the product, choose Delete Product, and confirm. You can’t undo a delete. The Cost History section on a product shows its five most recent costs. Costs come from purchase orders and invoices, so you can’t edit them here.Upload your catalog
Upload a CSV file to add many products at once or to update the ones you already have. Vori reads your file, suggests how its columns match Vori’s fields, and shows you every change before anything goes live.- In Product Catalog, click Upload.
- Drag your CSV file onto the page, or click Select File. The file needs a header row and at least one product row.
- Click Continue. Vori AI analyzes your file and detects its columns.
- Check the column mapping. Vori fills it in for you. Change any column that’s matched to the wrong field, then click Next.
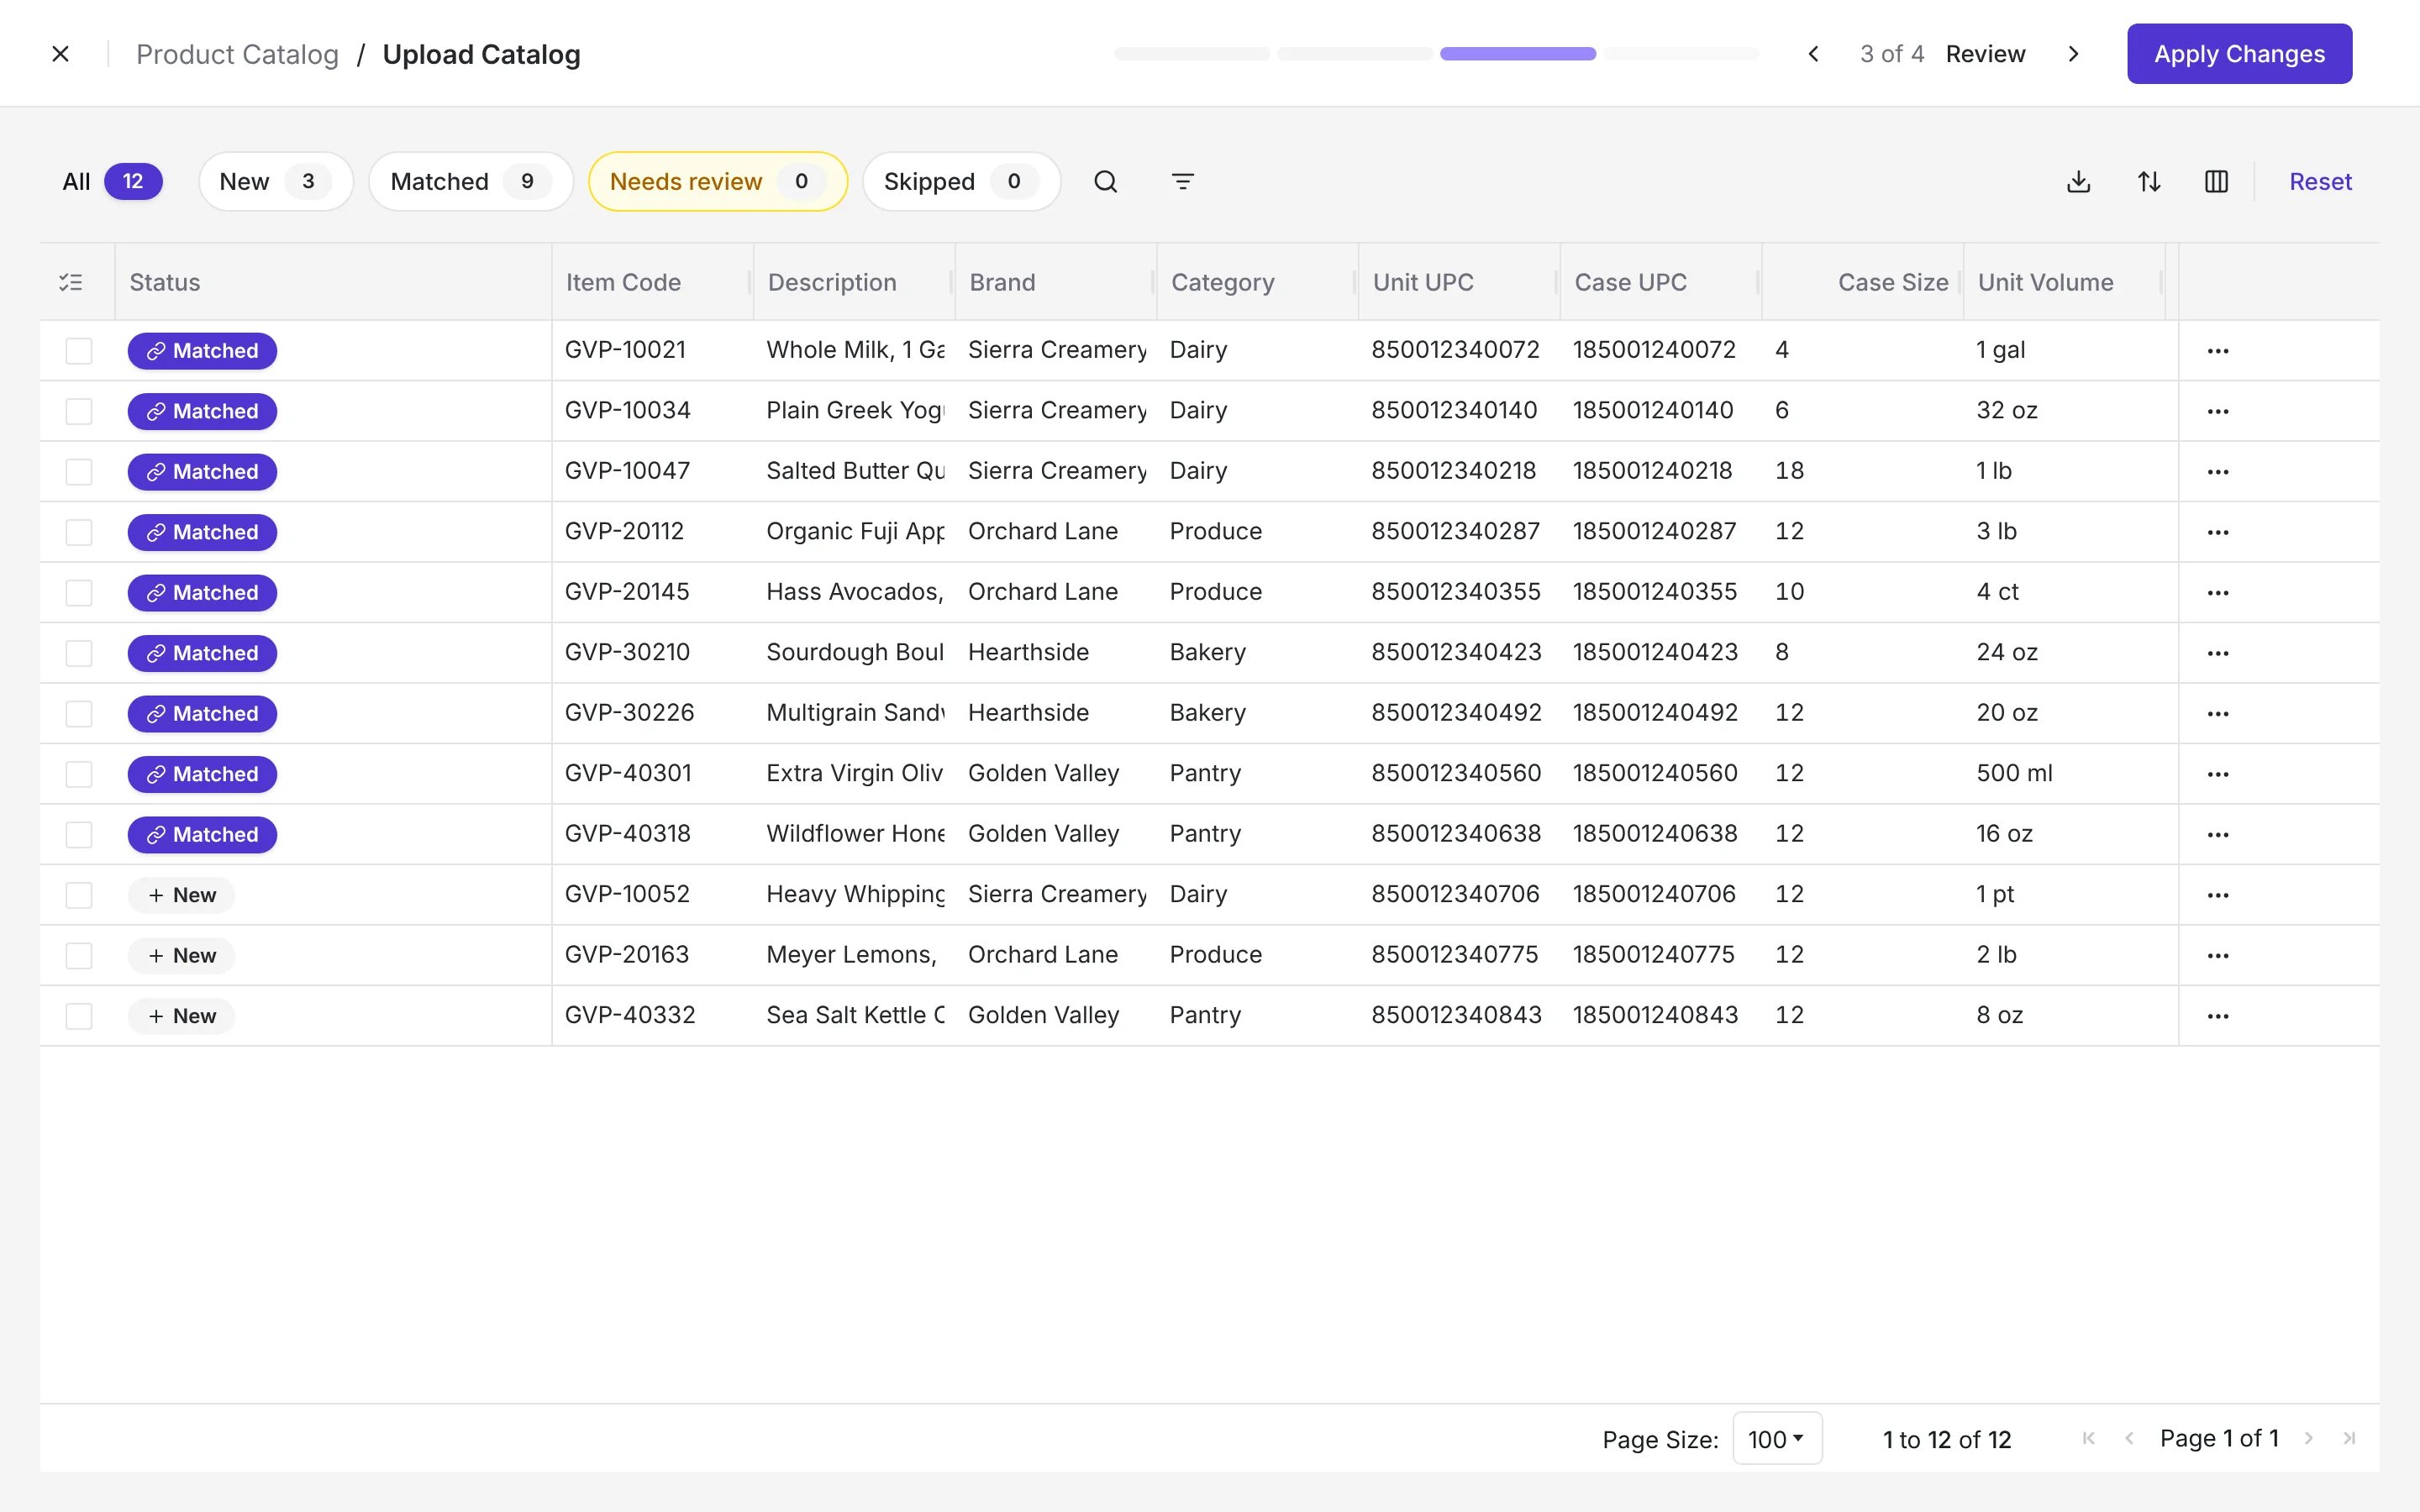
- Review the changes. Each row is marked New for a product you don’t have yet, or Matched for one that’s already in your catalog. Rows that need your attention are flagged.
- Click Accept to import a row, or Ignore to skip it. Ignored rows move to the Skipped tab.
- To act on many rows at once, select them and click Accept or Ignore for the whole selection.
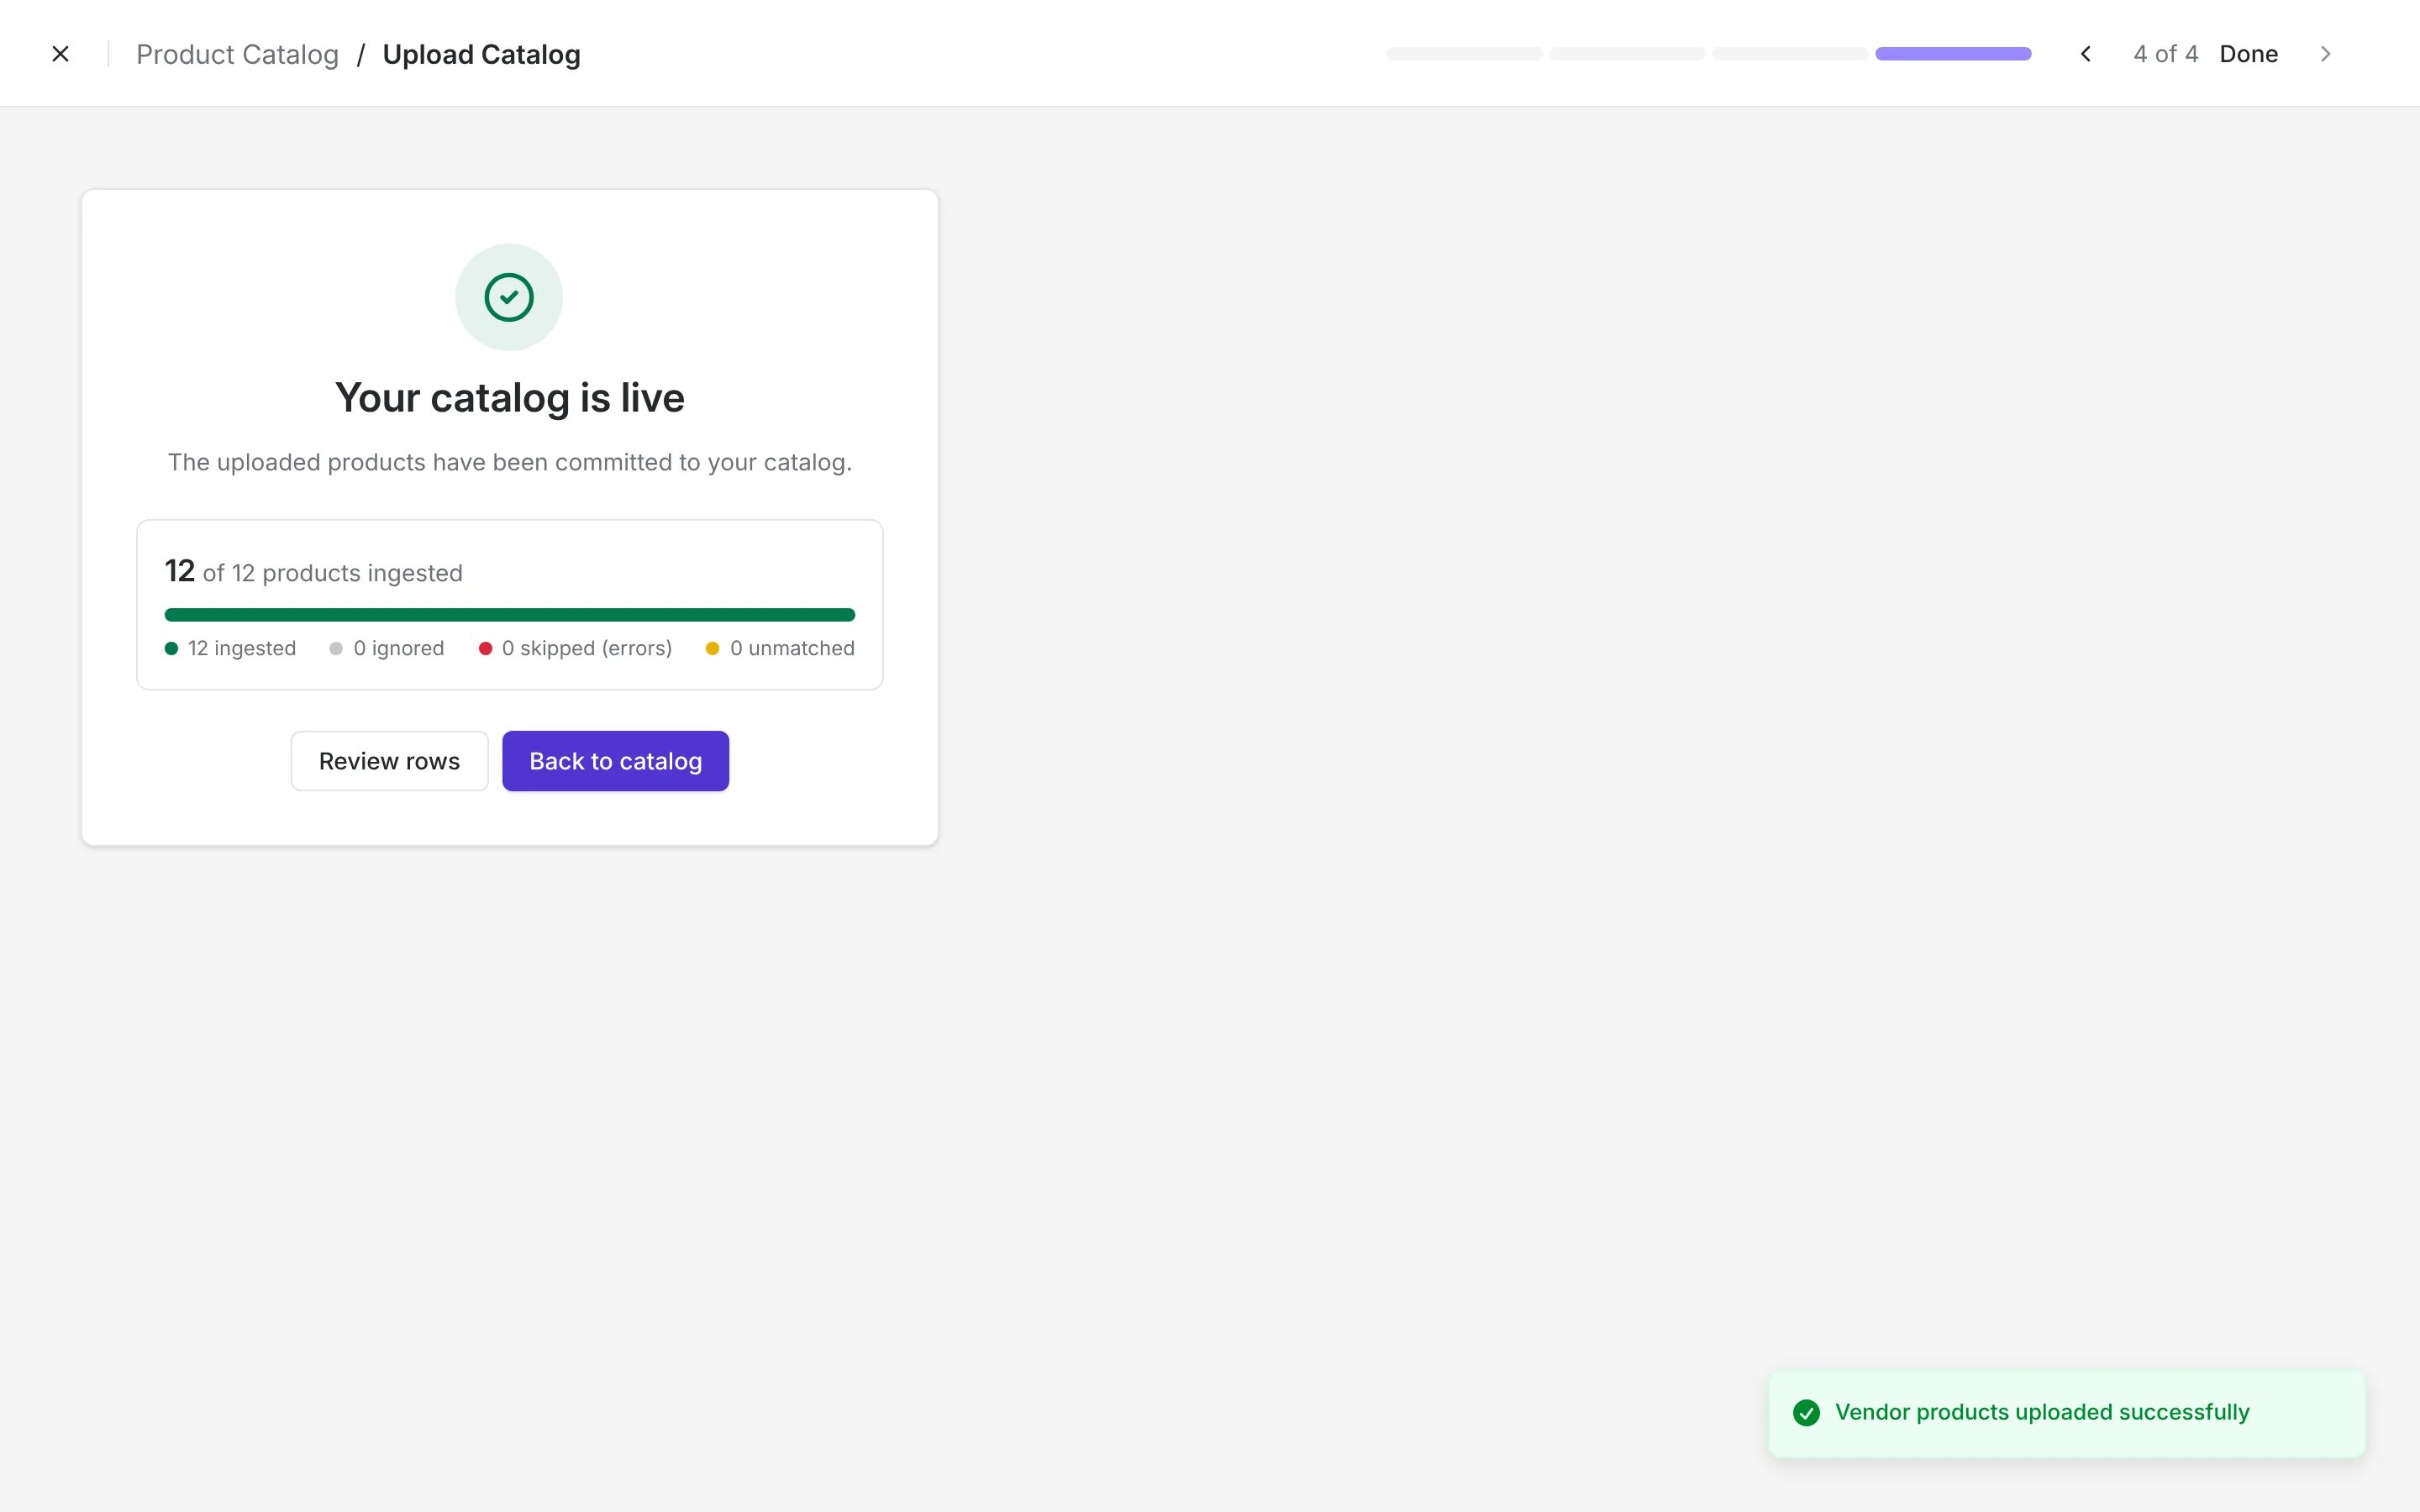
- When every flagged row is resolved, click Apply Changes.
Work with your customers
Customers lists the stores you supply. Use the tabs to see All stores, the Active ones, stores you’ve Never Invited, invited stores that are Not Signed Up, and stores with No Recent Orders.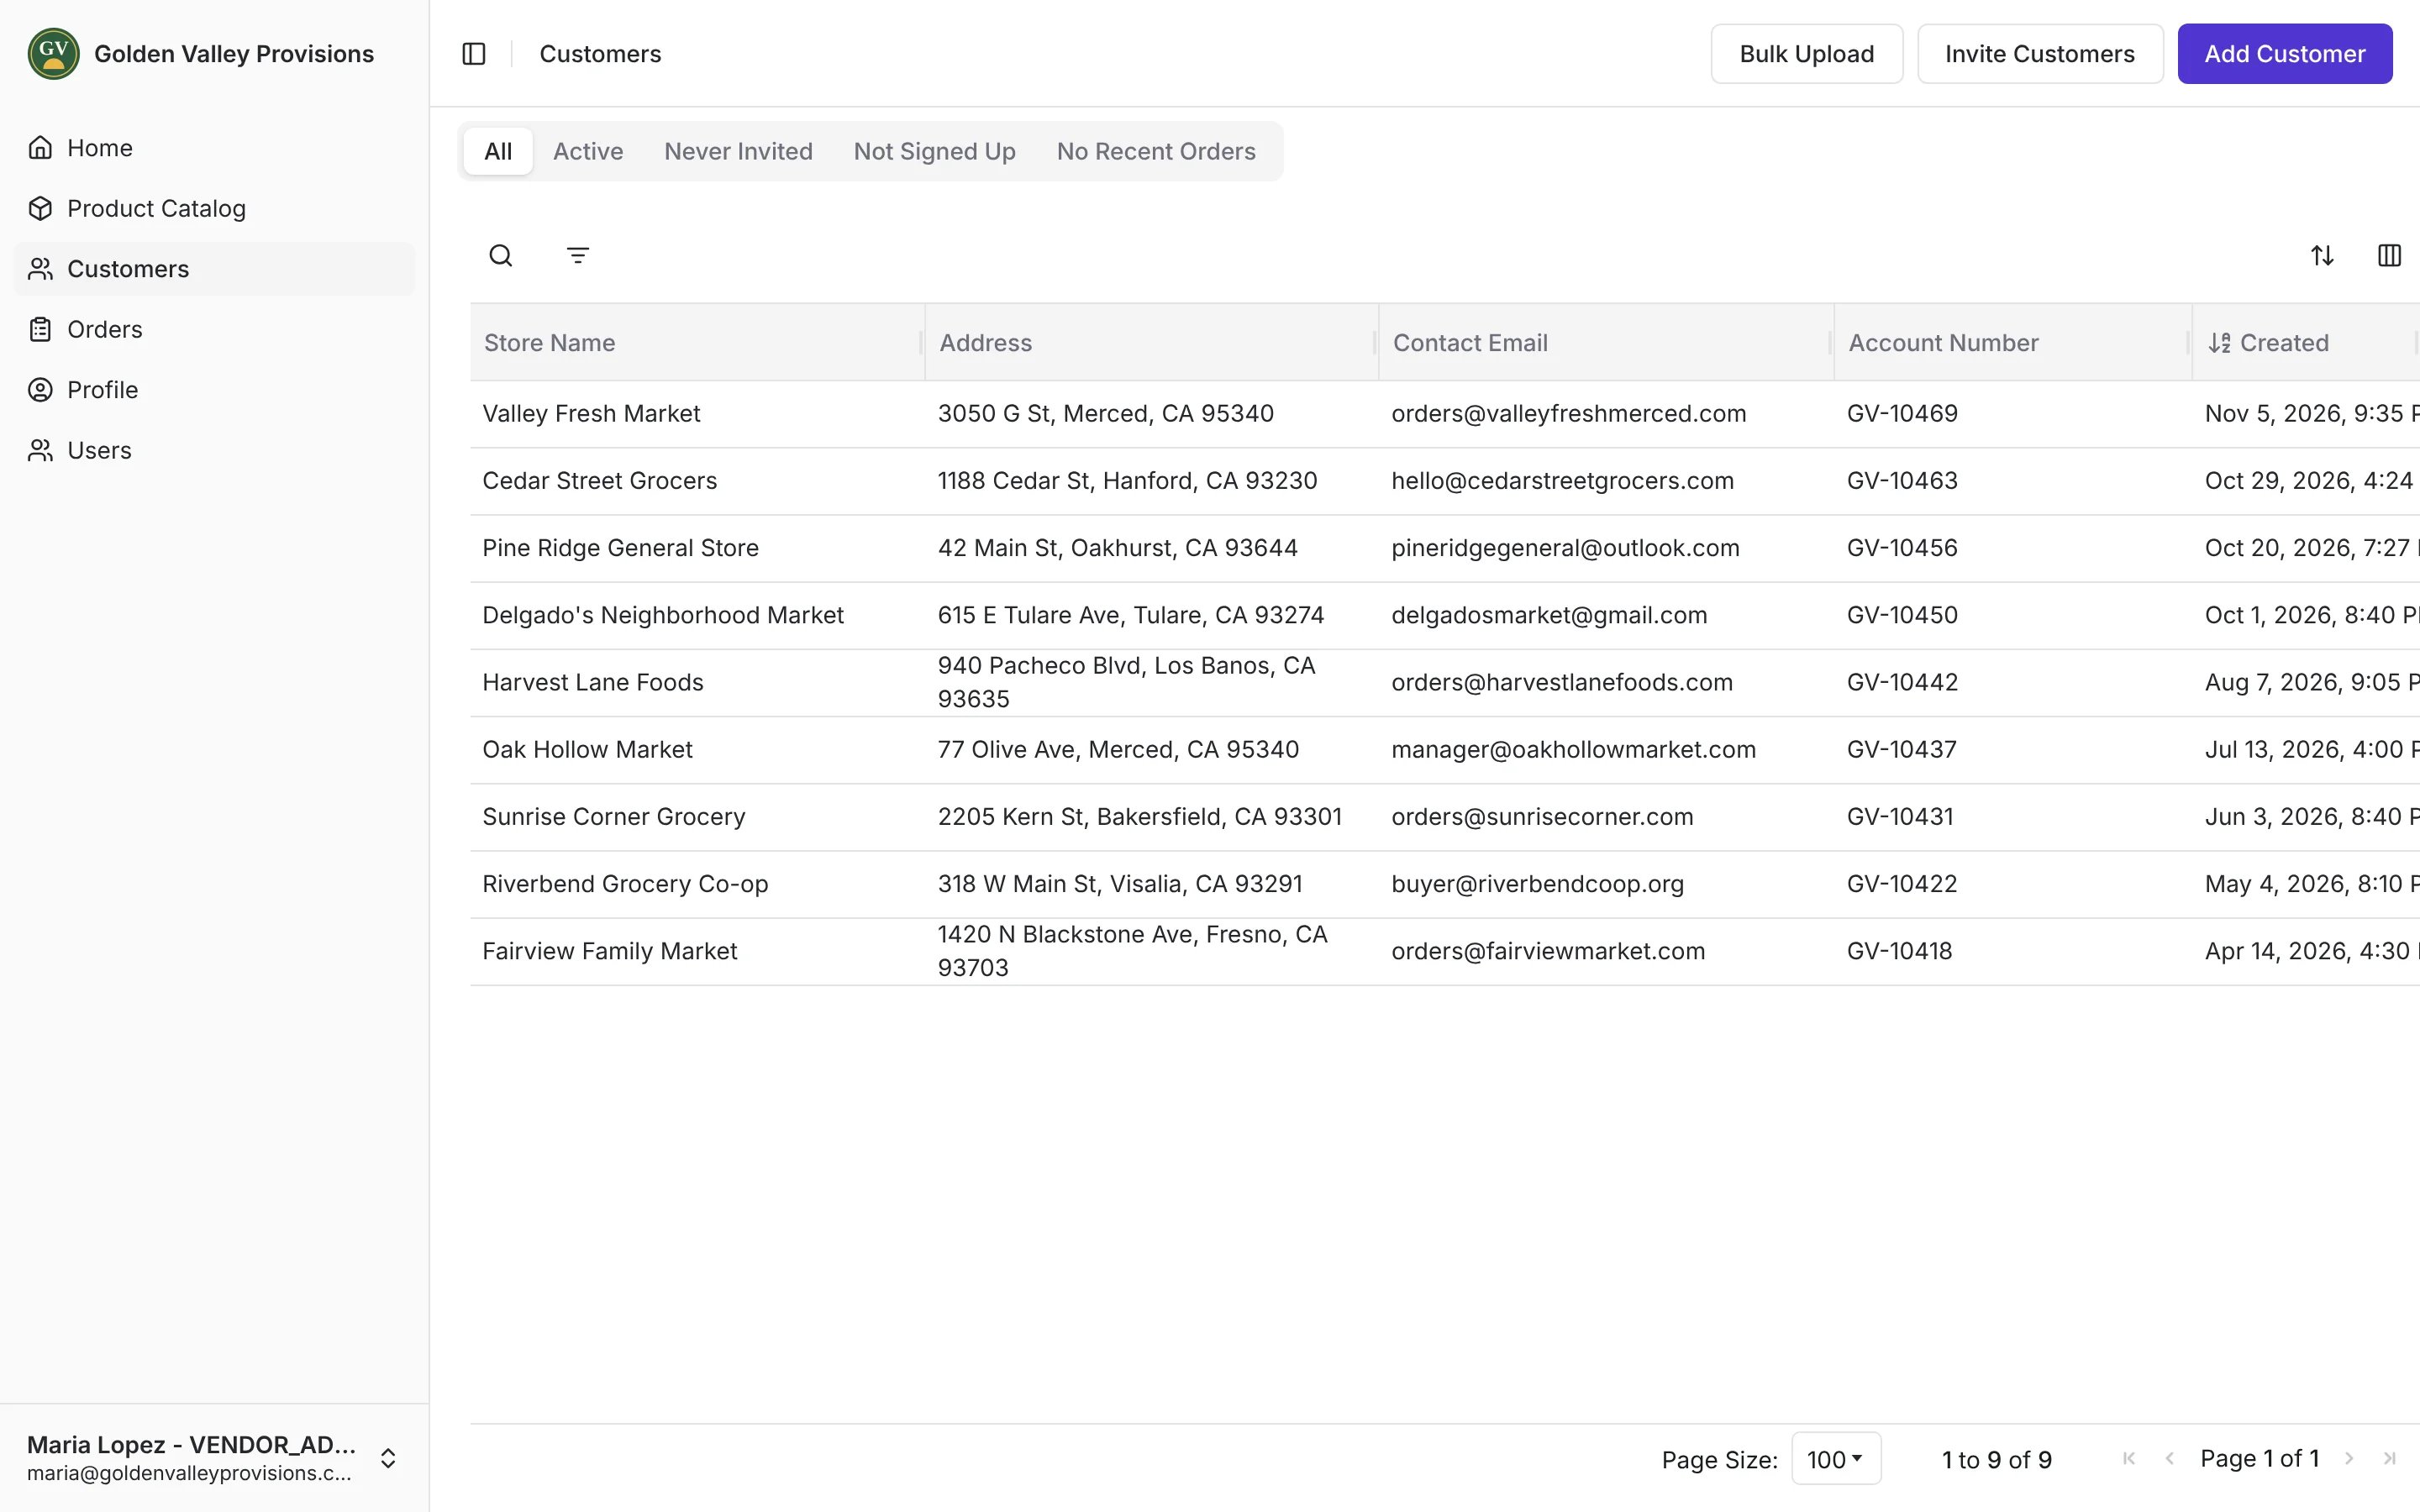
Add a customer
- In Customers, click Add Customer.
- Enter the Customer Name and Address.
- Under Contact Emails, add at least one email. Click Add Email for more, up to 25.
- Optional: enter the Account Number you use for this store.
- Click Add Customer.
customer_name, customer_address, customer_emails and account_number. Separate multiple emails with semicolons. Upload the file, check the rows Vori found, and click Add Customers. The button shows how many valid rows will be added, and rows with issues are skipped.
Invite customers to order through Vori
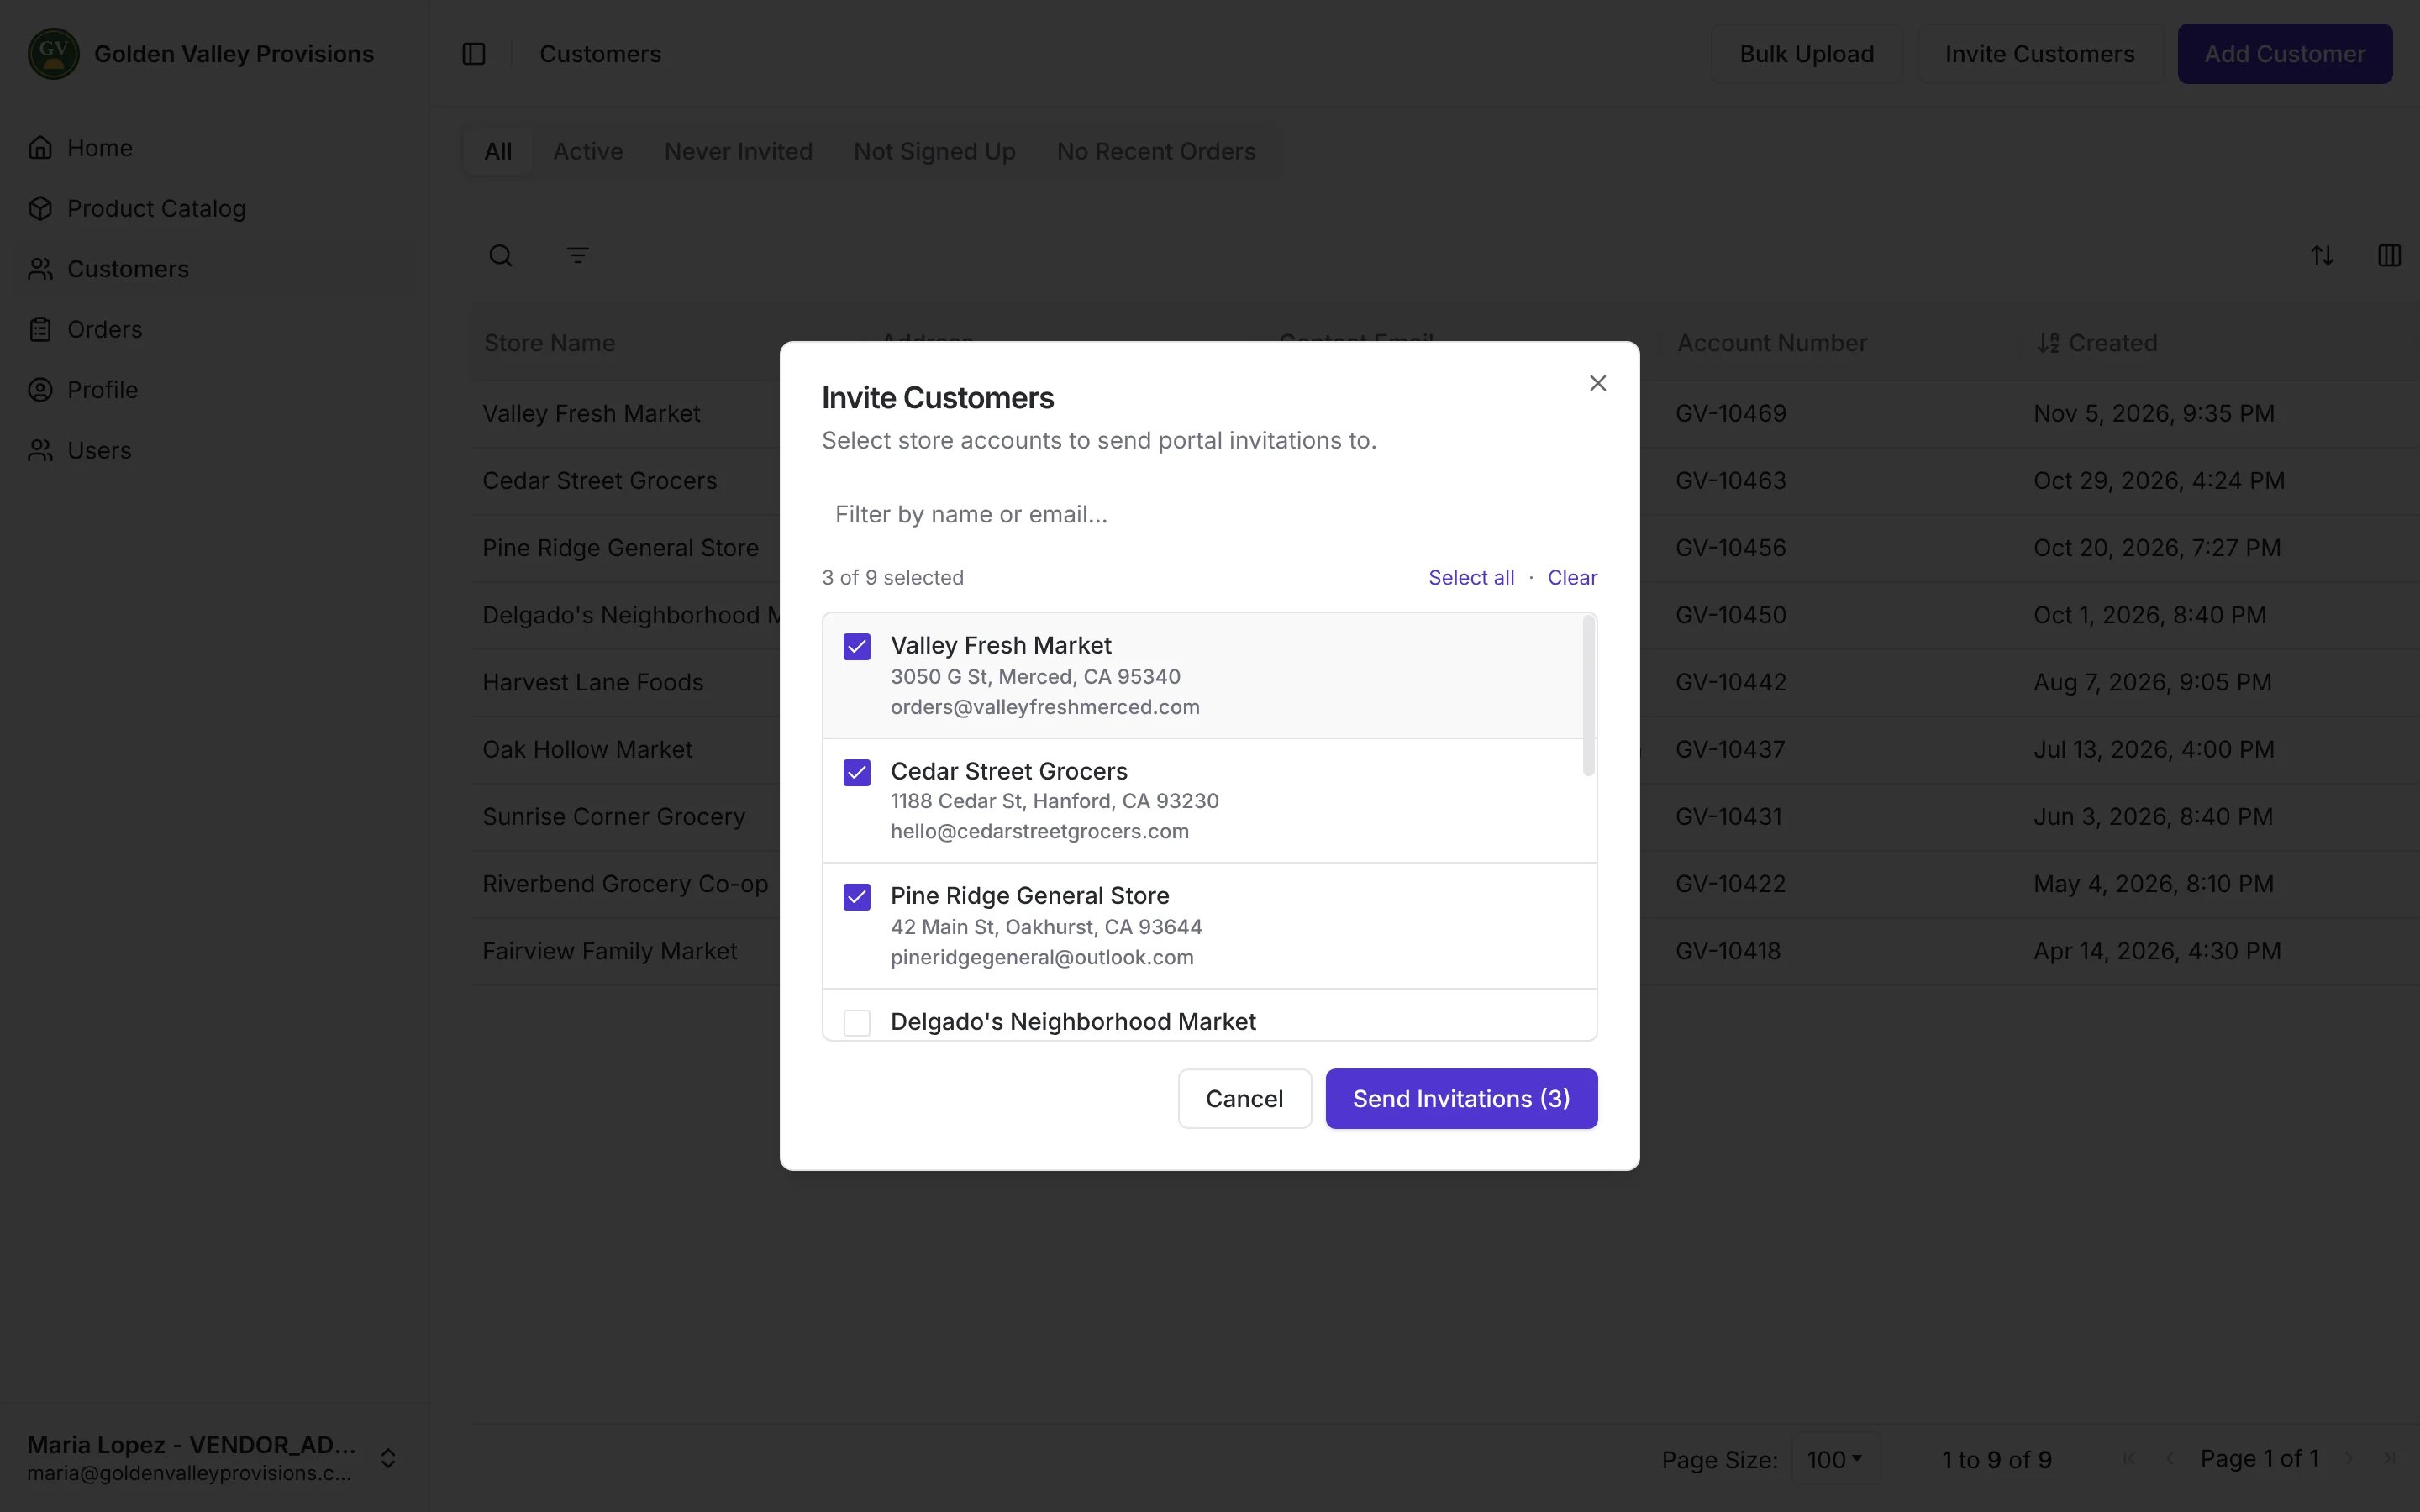
- In Customers, click Invite Customers.
- Select the stores to invite. Use the filter to find a store by name or email, or click Select all.
- Click Send Invitations. The button shows how many stores you selected.
Confirm orders
Orders lists the orders stores send you. The Unconfirmed tab shows orders that are waiting for you or that have misscanned items. Confirmed and All show the rest. Search by PO number or store name.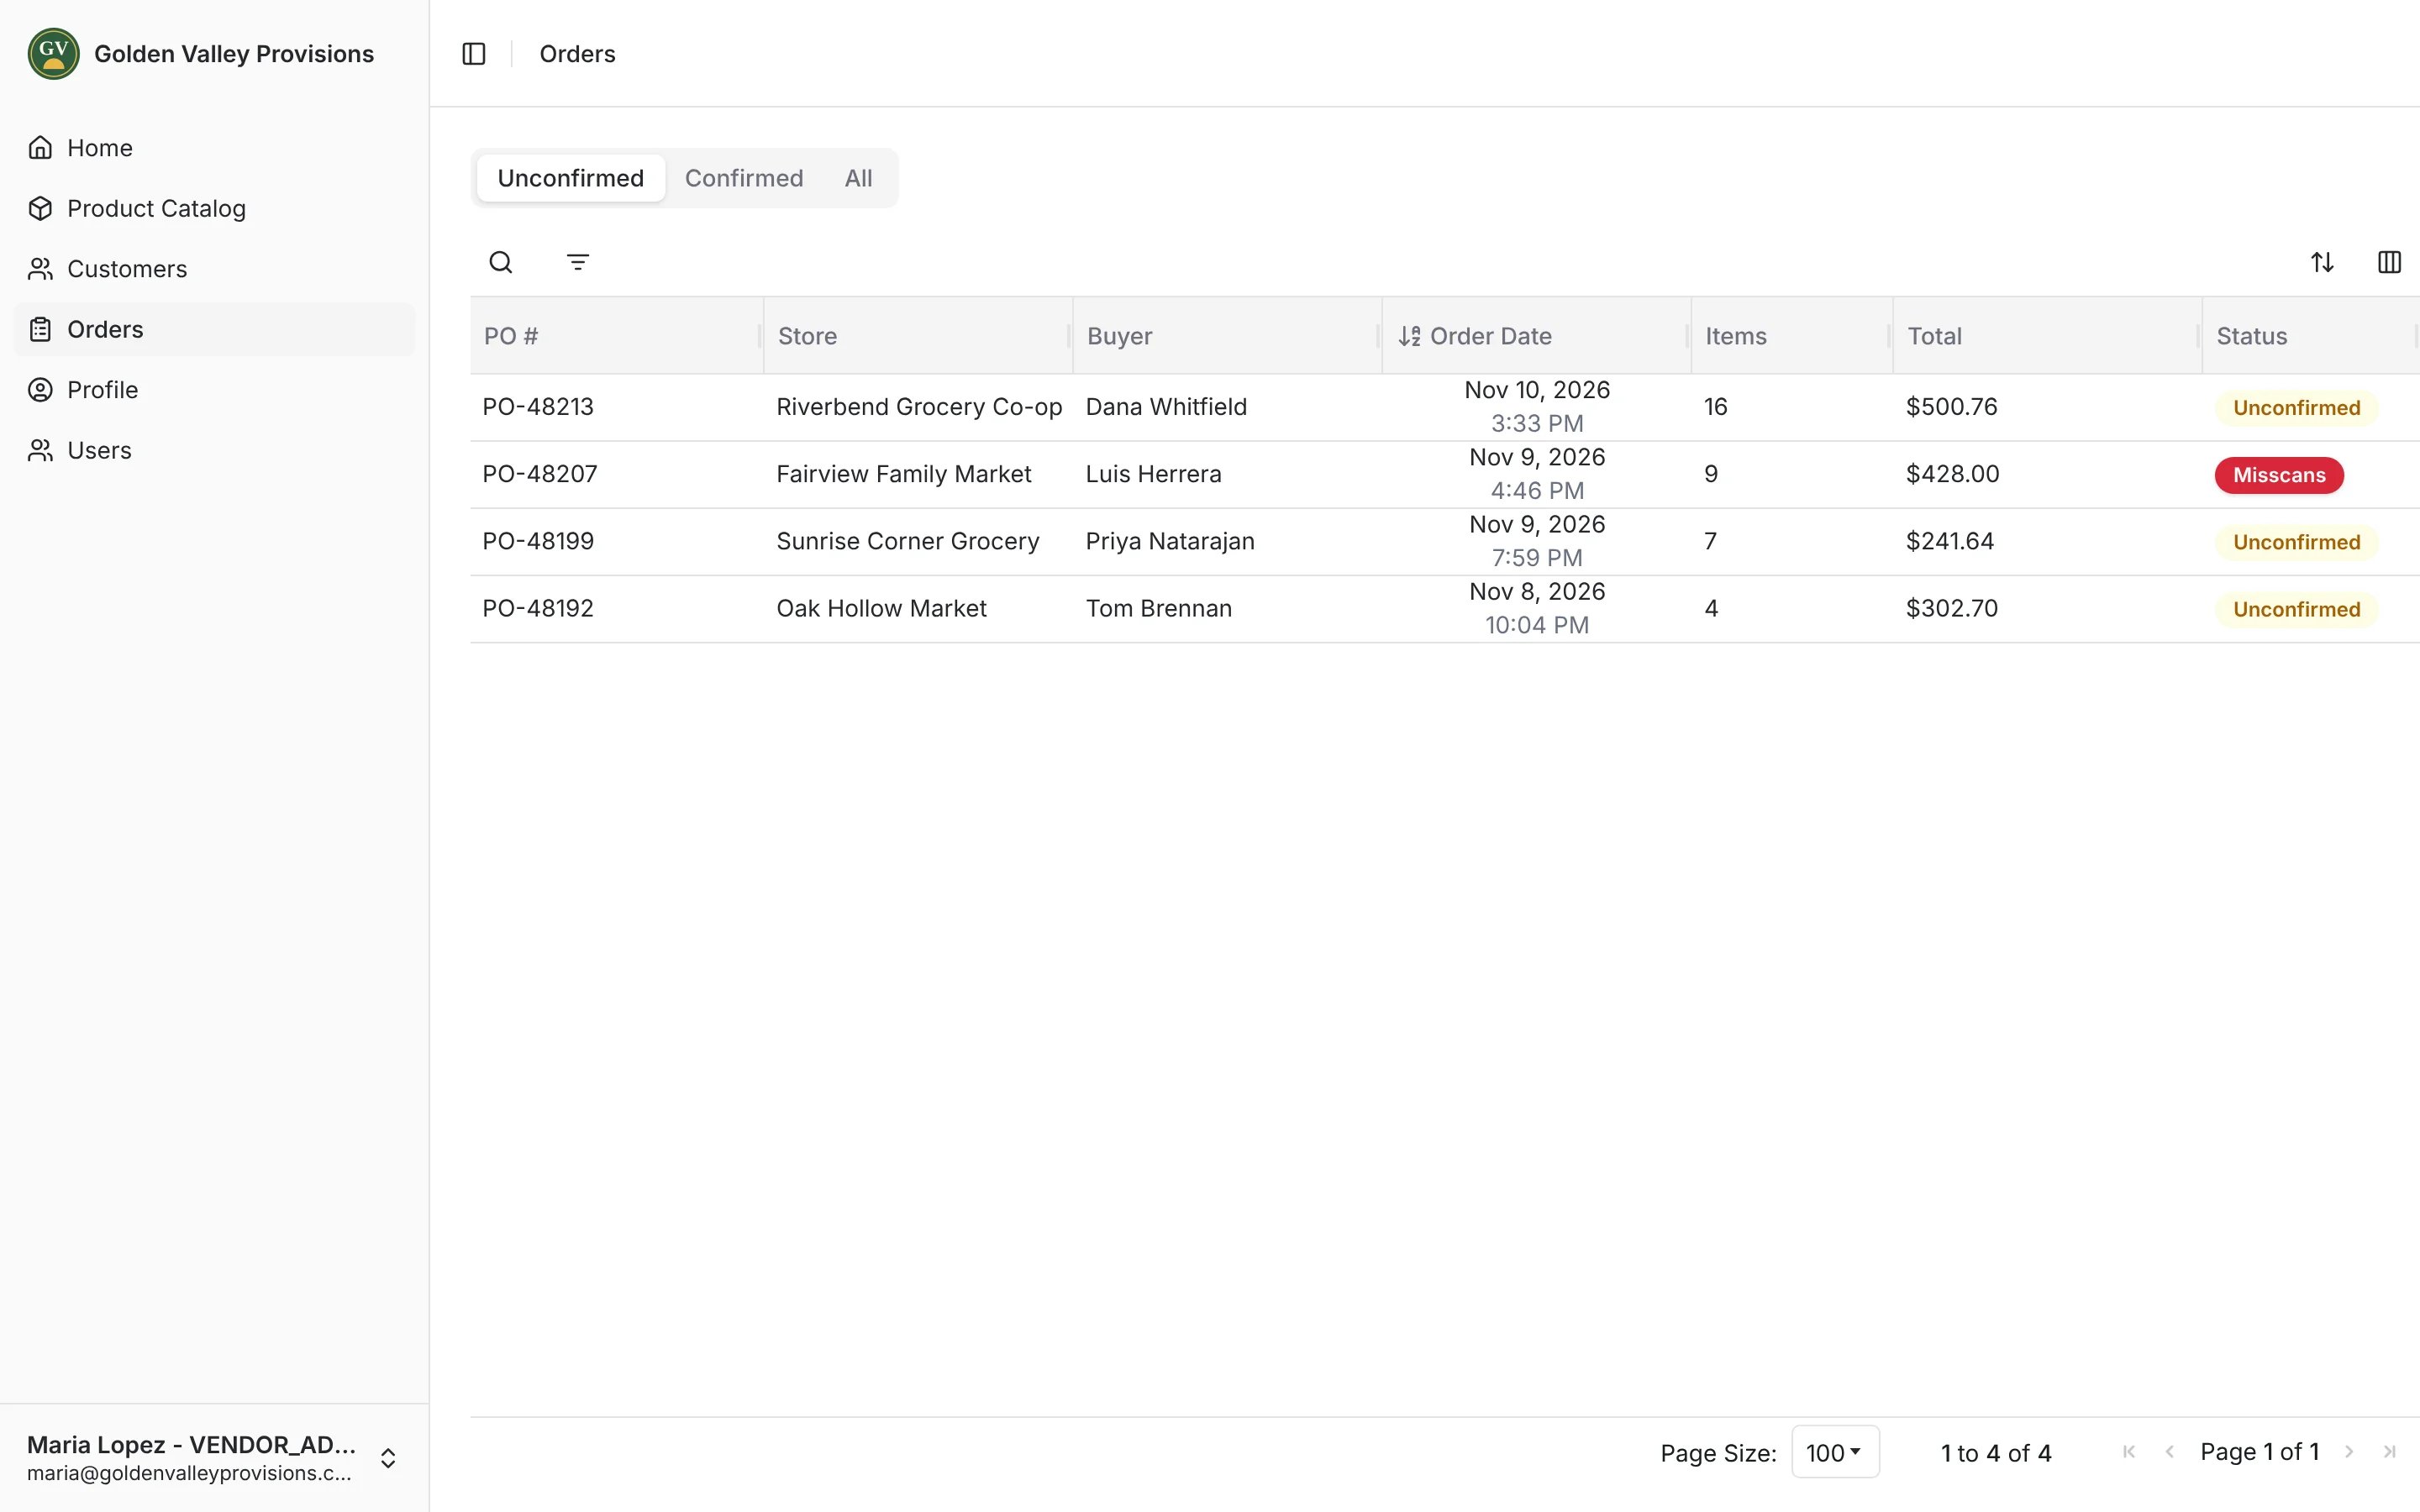
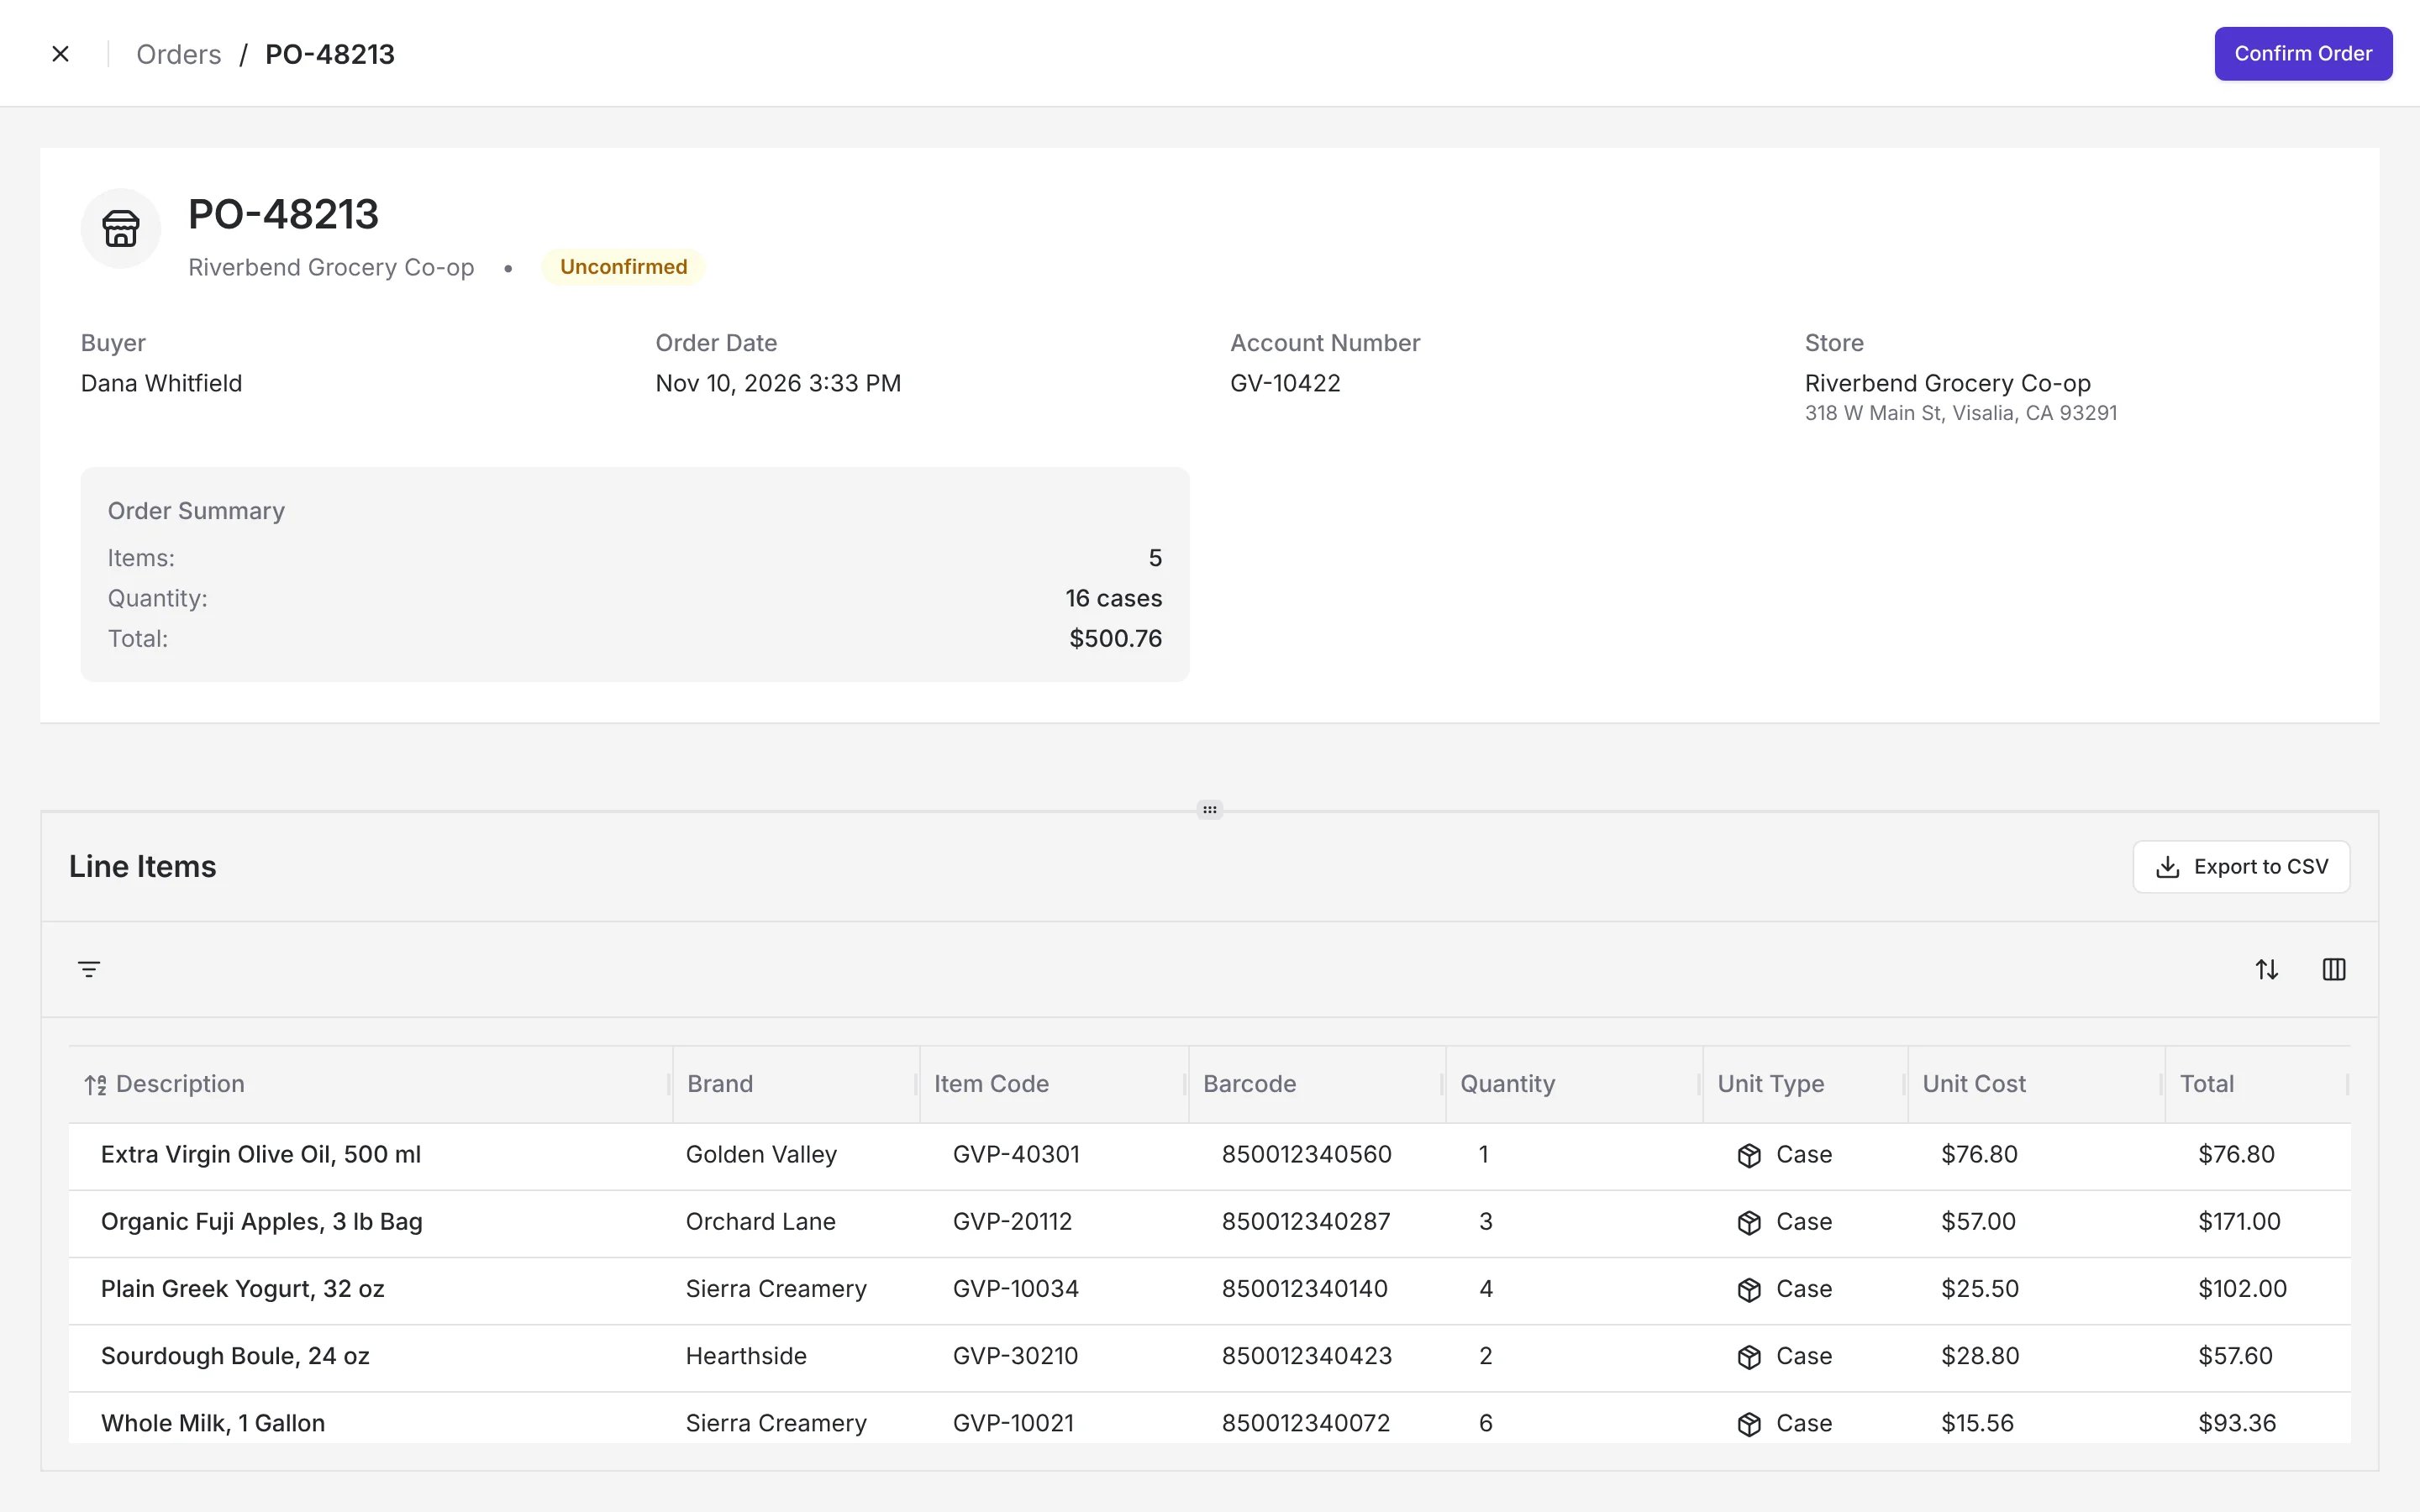
- In Orders, click an order to open it.
- Check the line items, quantities and costs.
- Click Confirm Order. The store sees that you’ve confirmed it.
Resolve misscans
A misscan is an item the store scanned that didn’t match a product in your catalog. Misscanned lines are marked Misscan, and you need to resolve them before you can confirm the order.- To replace a misscanned item, search for the right product by description or item code under Misscan Resolution and select it.
- To drop every misscanned item from the order, turn on Remove all misscans.
Set up your profile and order preferences
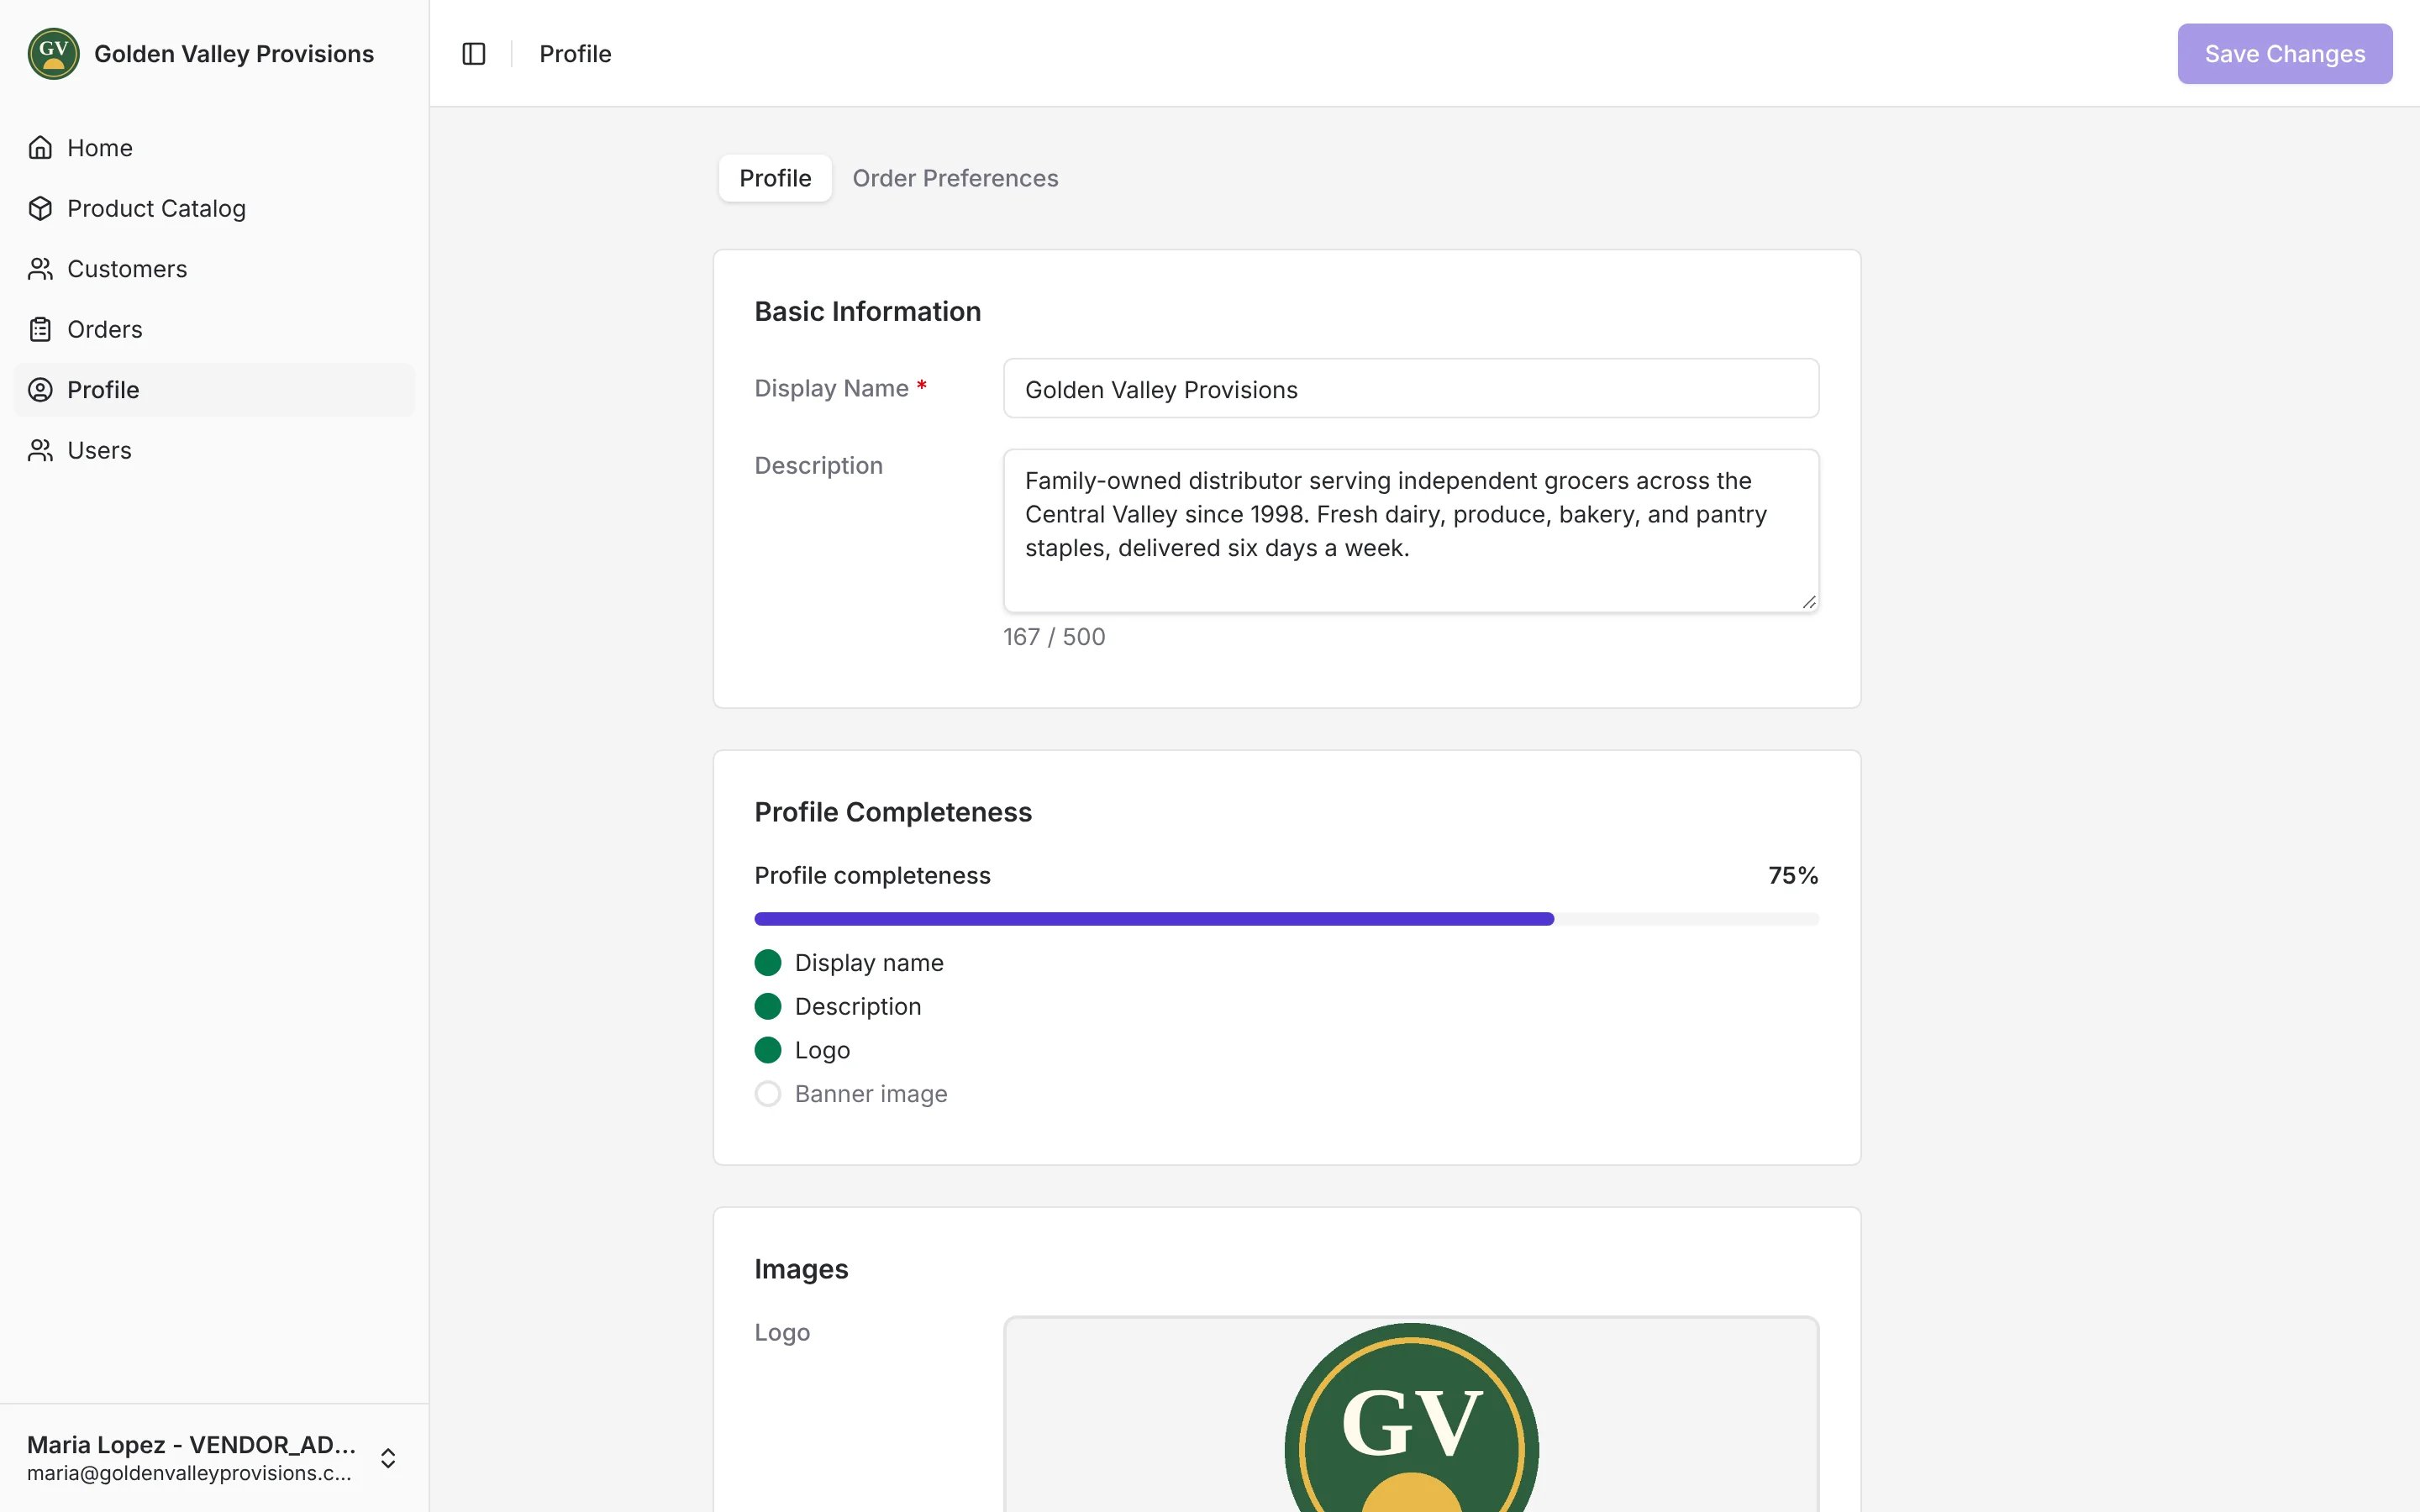
Open Profile to control how your company appears to retailers and how orders reach you. Both tabs save together, so click Save Changes when you’re done. On the Profile tab:- Display Name and Description (up to 500 characters).
- Logo and Banner Image as JPG, PNG or WebP. The banner needs to be at least 1200 × 500 pixels.
- Order Submission Method: choose Email or Vori EDI.
- Order Minimum: the smallest order a store can place.
- Order Deadline: a note buyers see, for example Wednesdays by 5 PM.
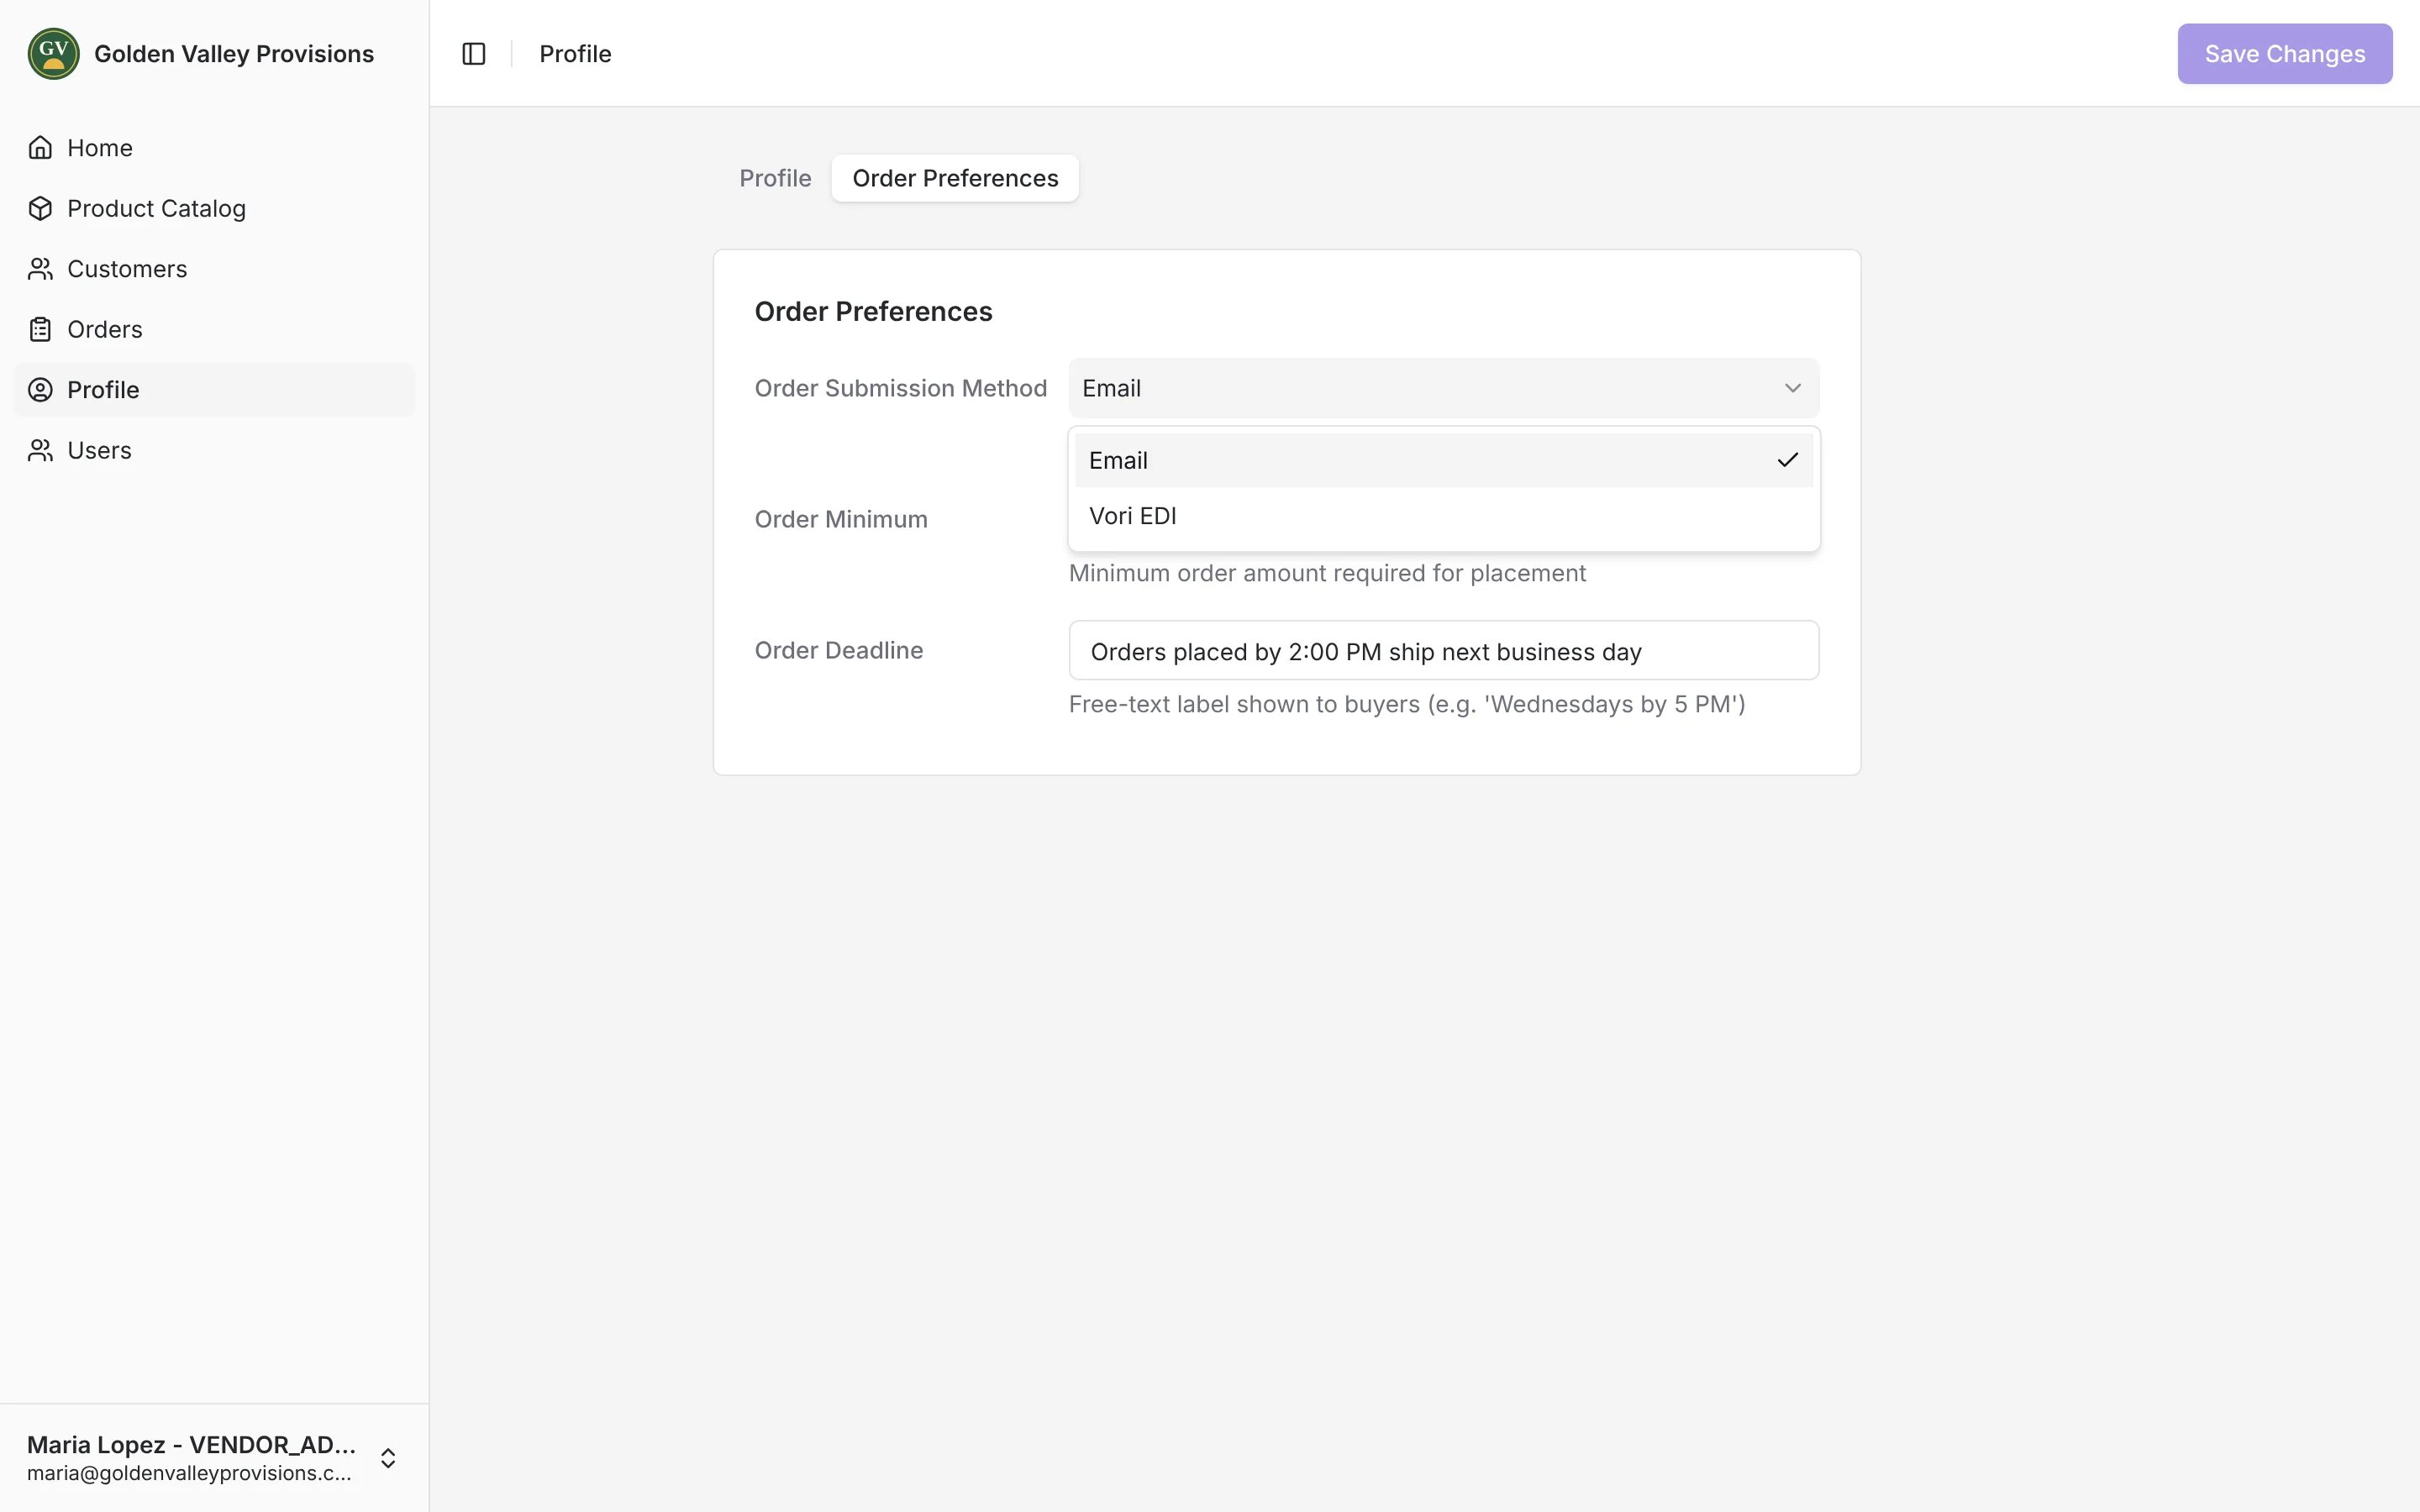
Vori EDI needs an active EDI connection. To set one up, contact Vori Support.
Add your team
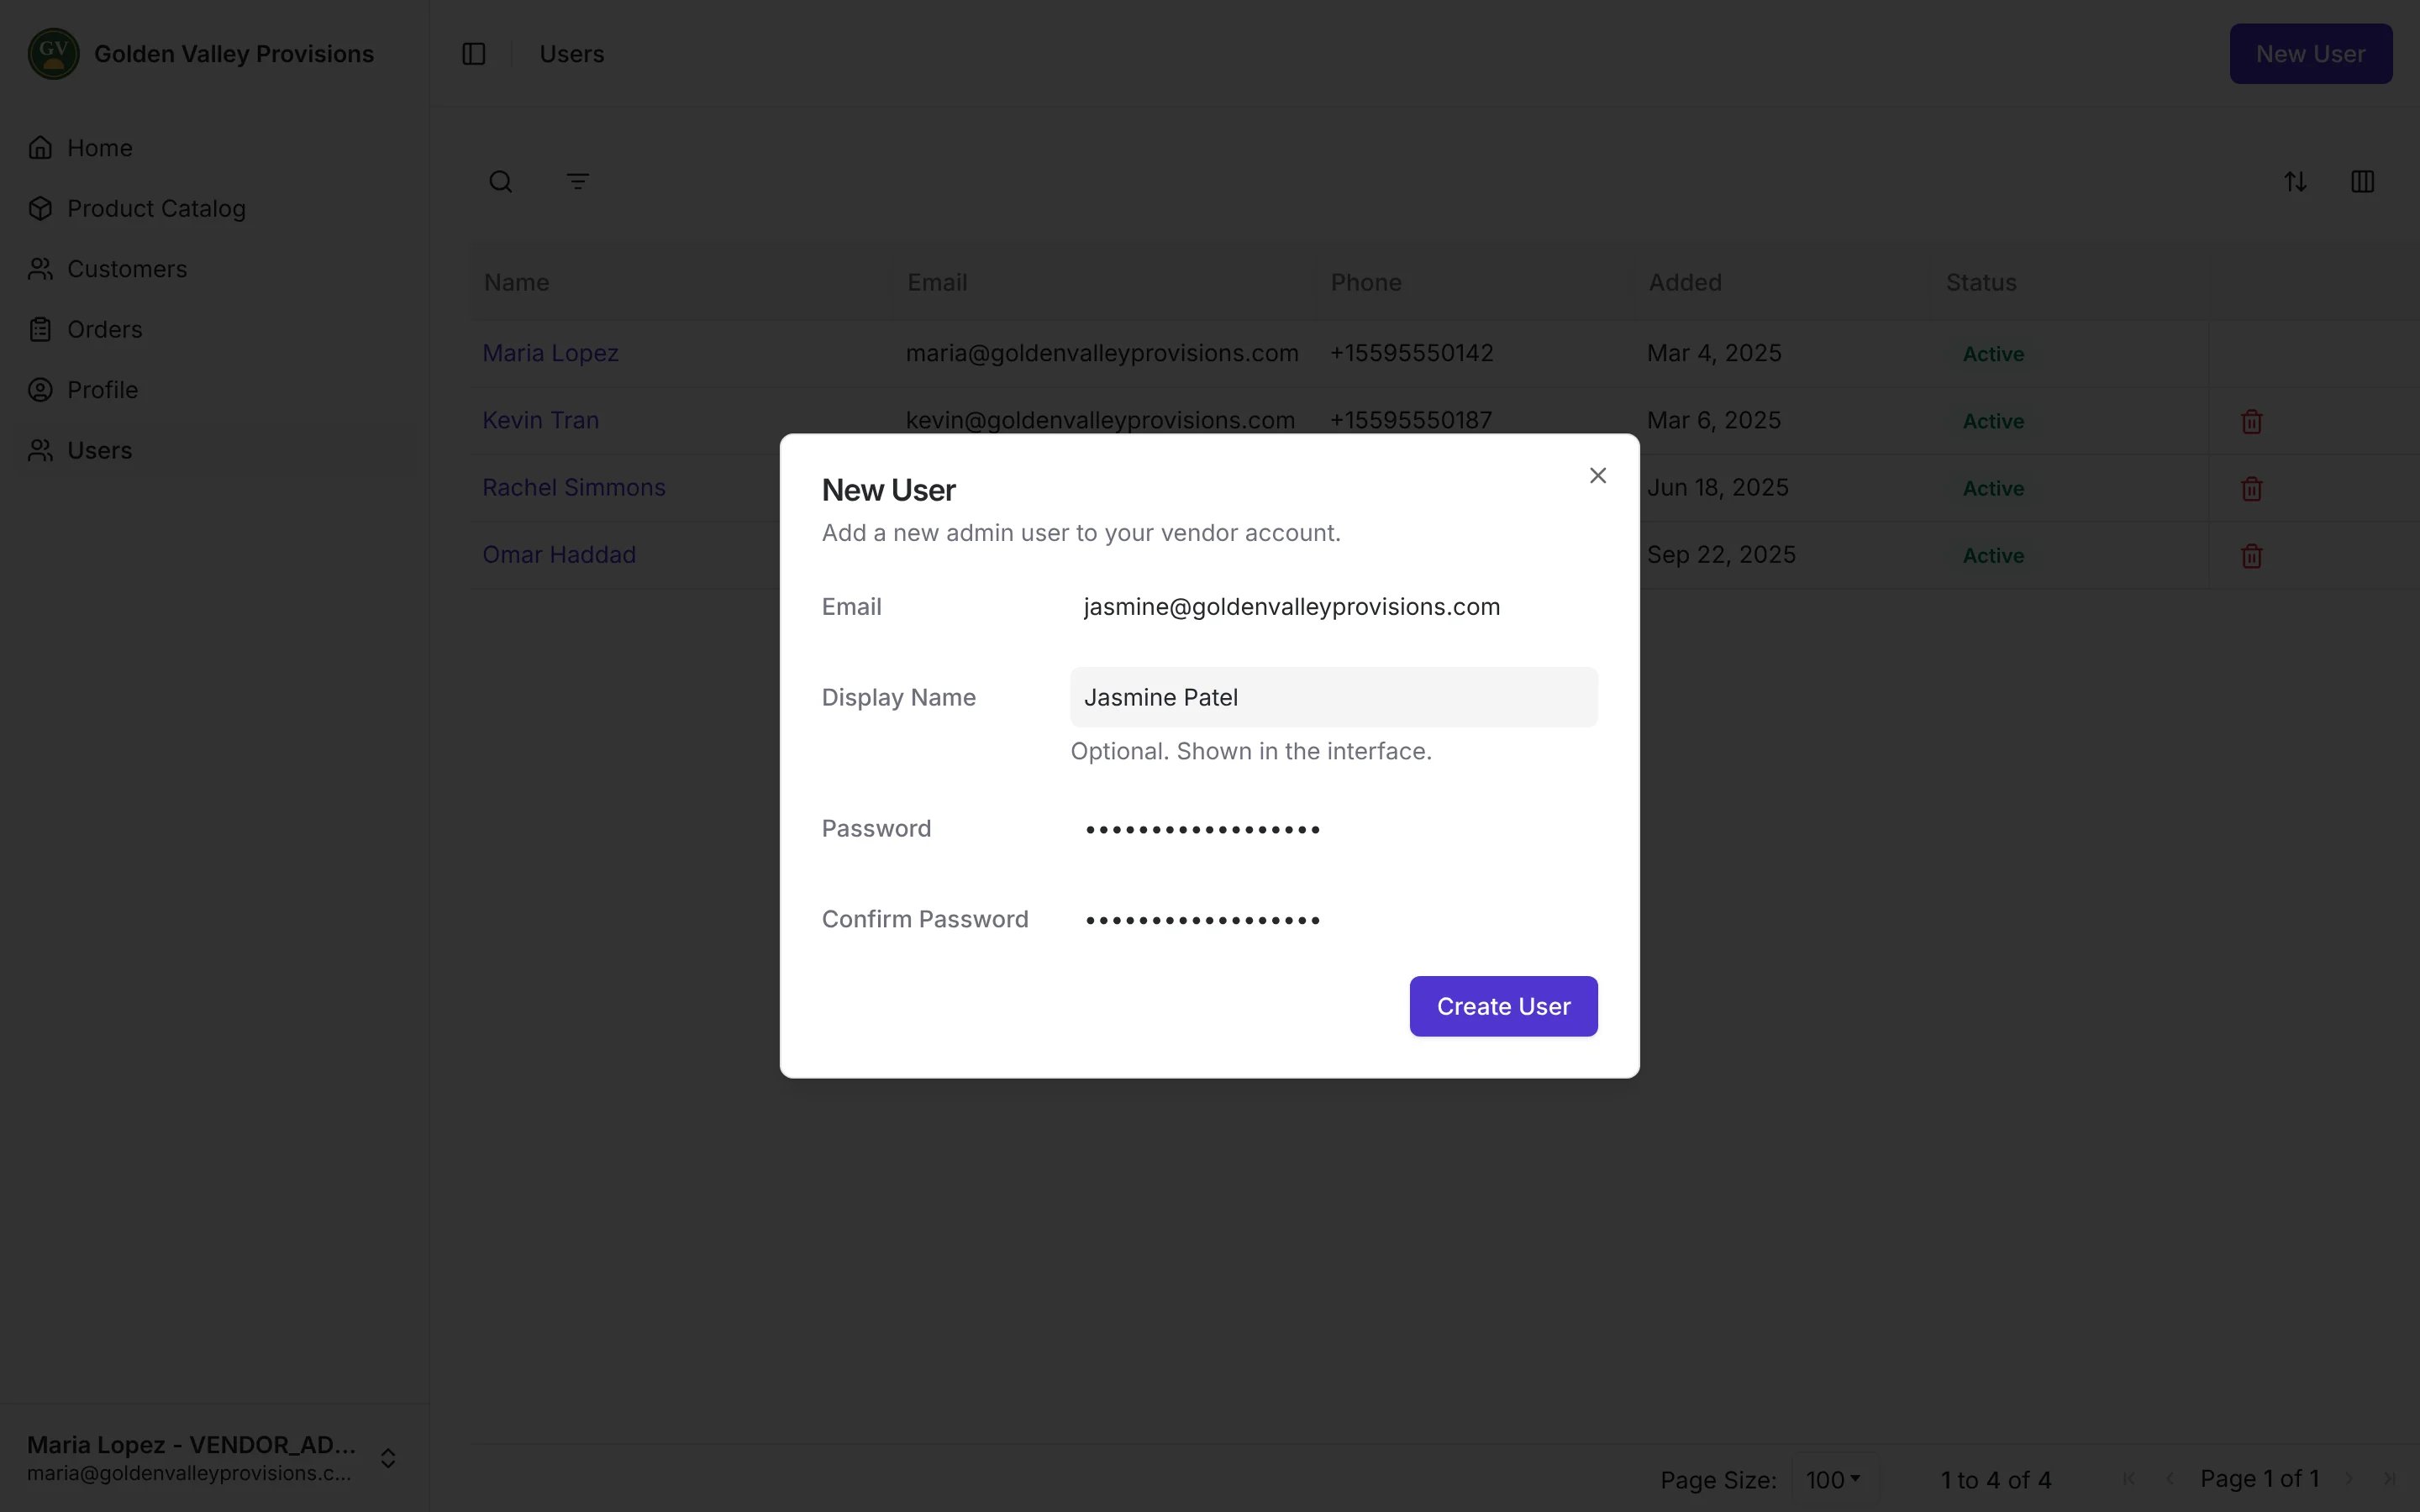
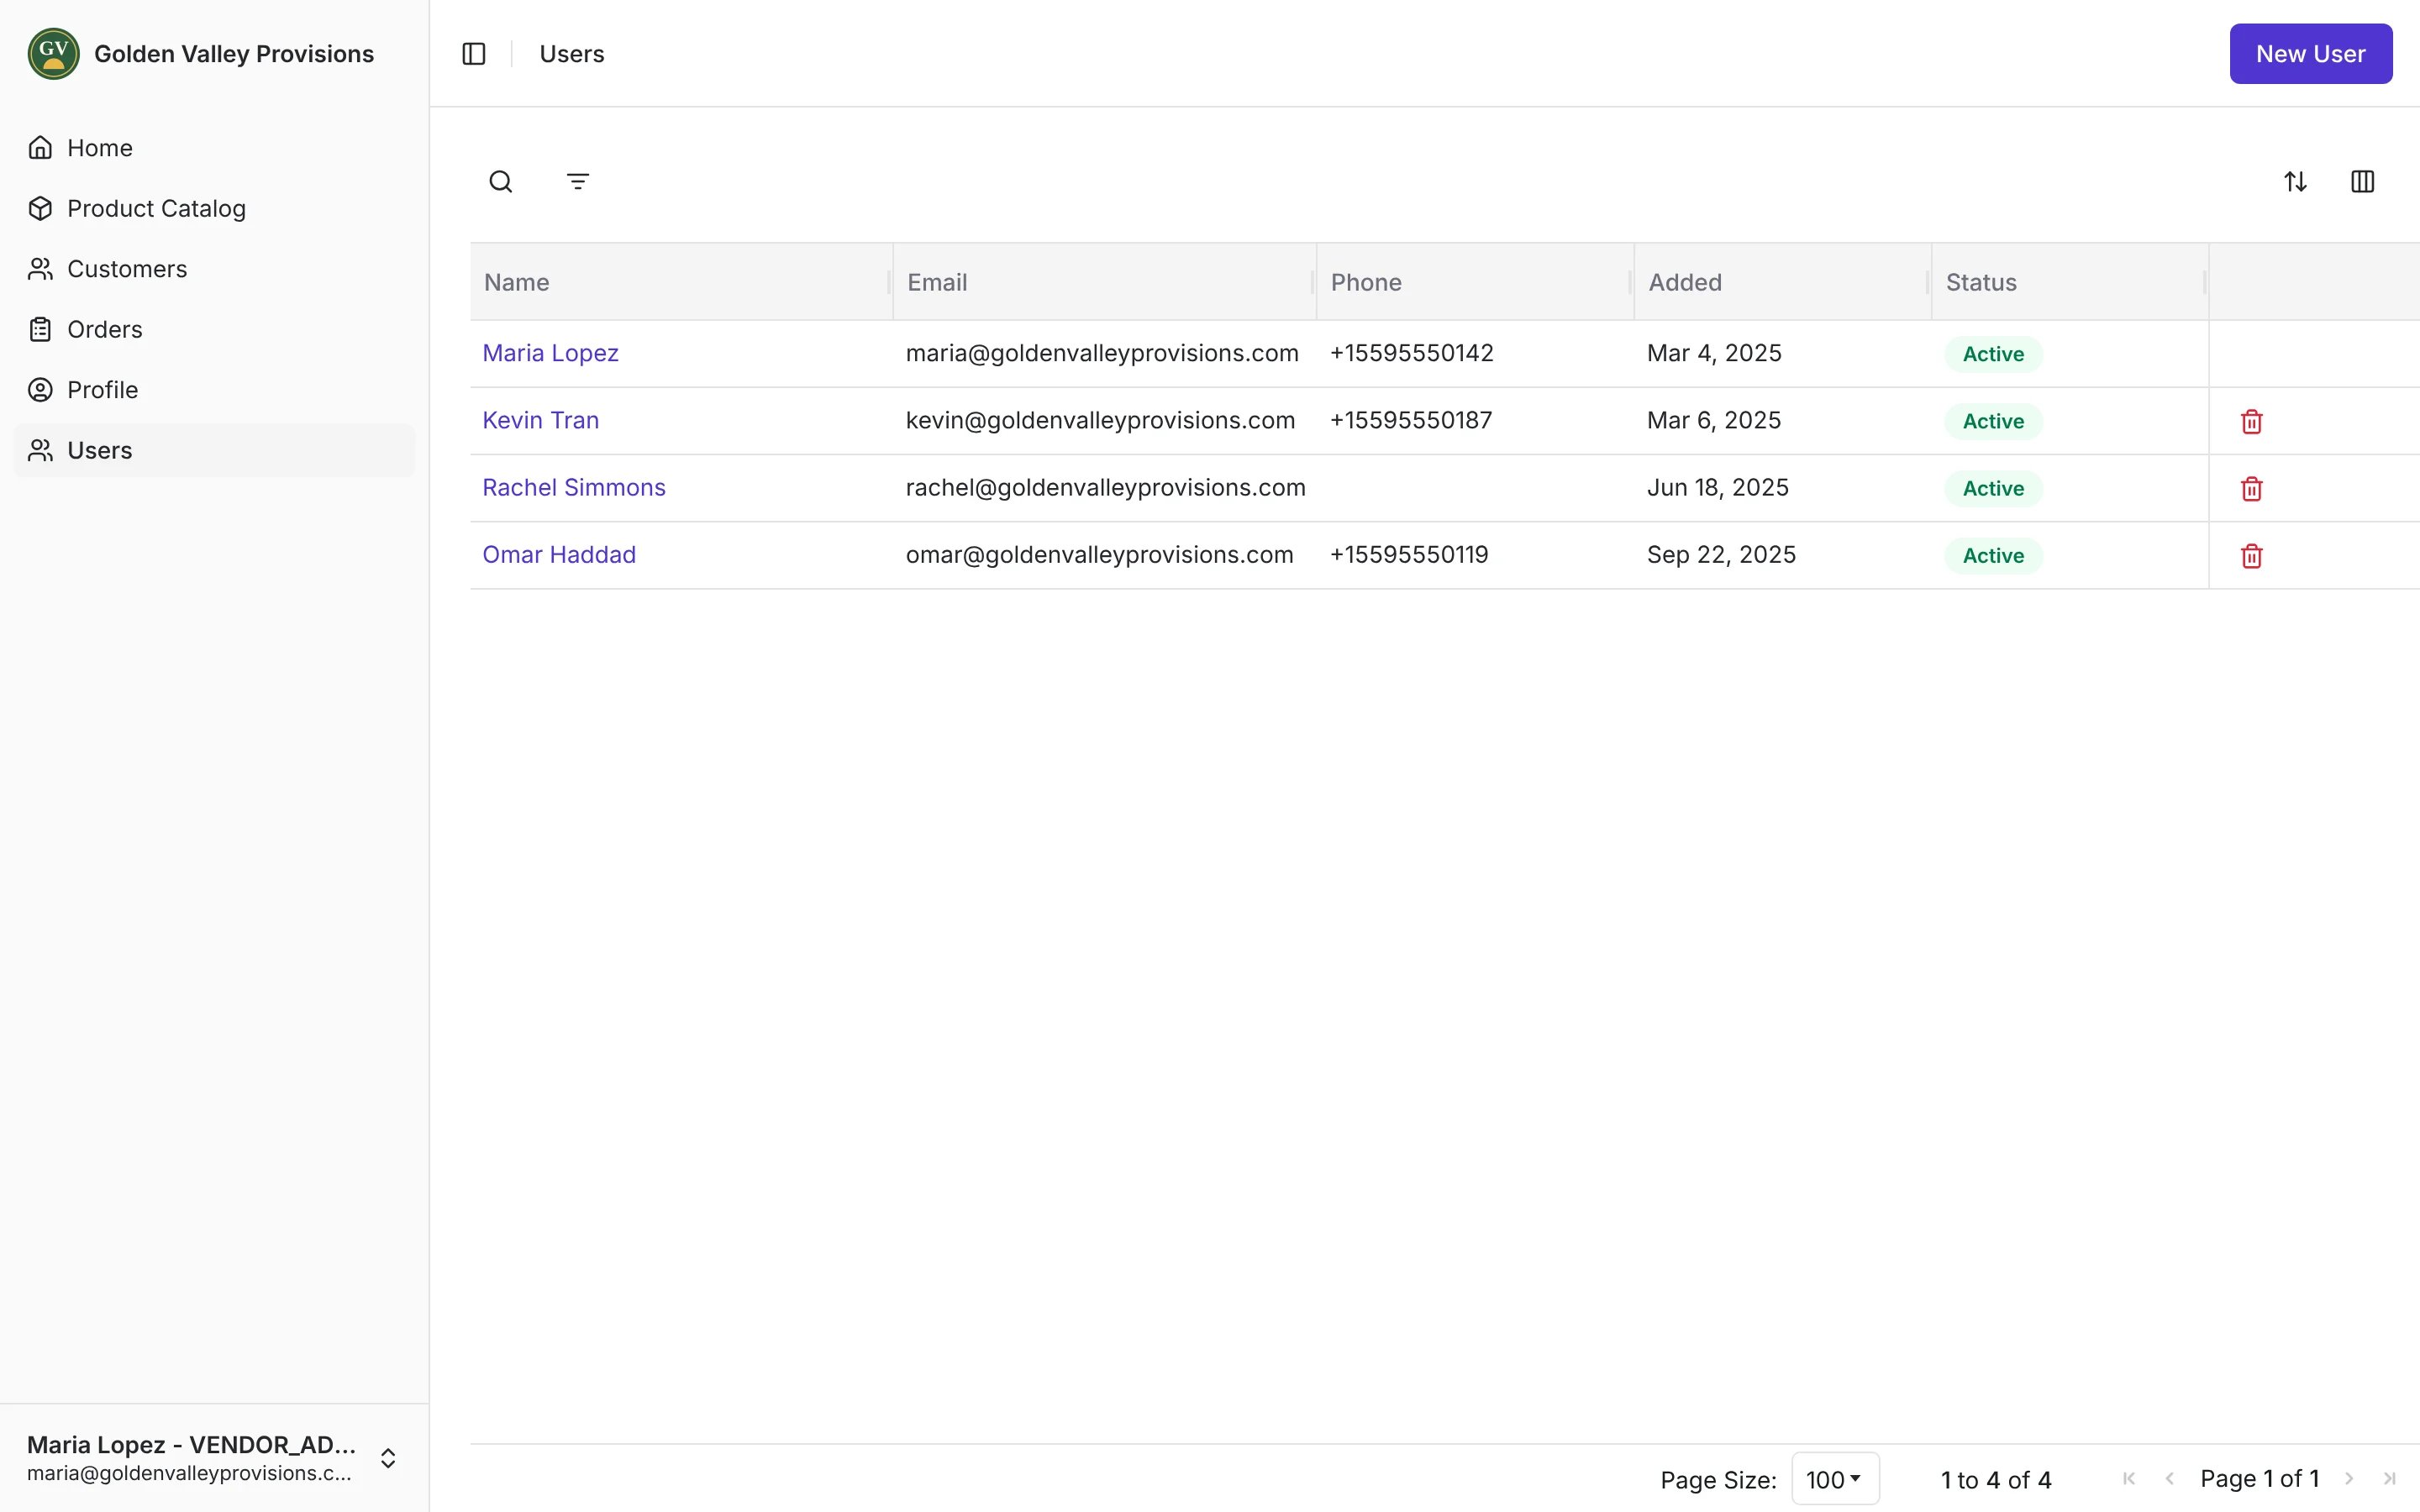
Open Users to give your colleagues their own portal sign-in. Each user you add is an admin for your company.- In Users, click New User.
- Enter their Email, and a Display Name if you want one shown in the portal.
- Enter a Password of at least 8 characters, and enter it again under Confirm Password.
- Click Create User.