

Before You Begin
Before uploading, make sure your file meets these standards. This keeps your import smooth and error-free.- File Format: Must be saved as a .CSV.
Prepare Your Import File
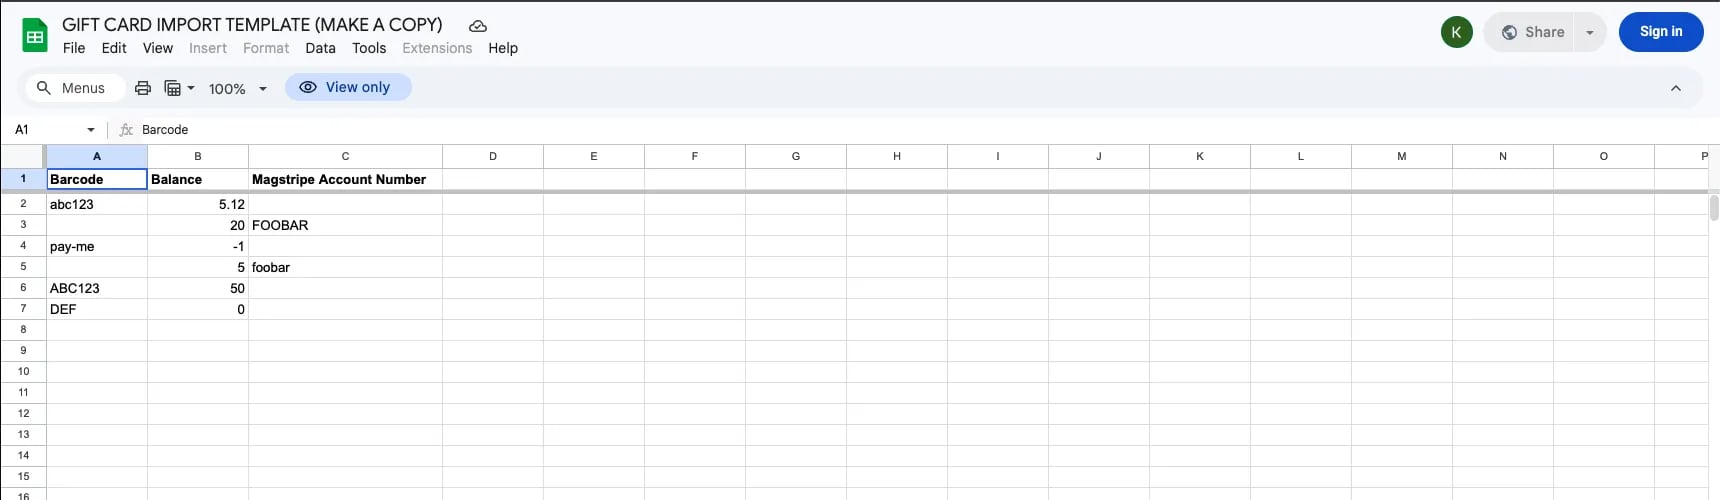
To ensure a successful upload, your spreadsheet should be saved as a CSV and include the following columns:
💡Tip: Open the Gift Card Import Template in Google Sheets, select File > Make a copy, and enter your data there to ensure the headers stay perfect.
Upload and Map Your Data
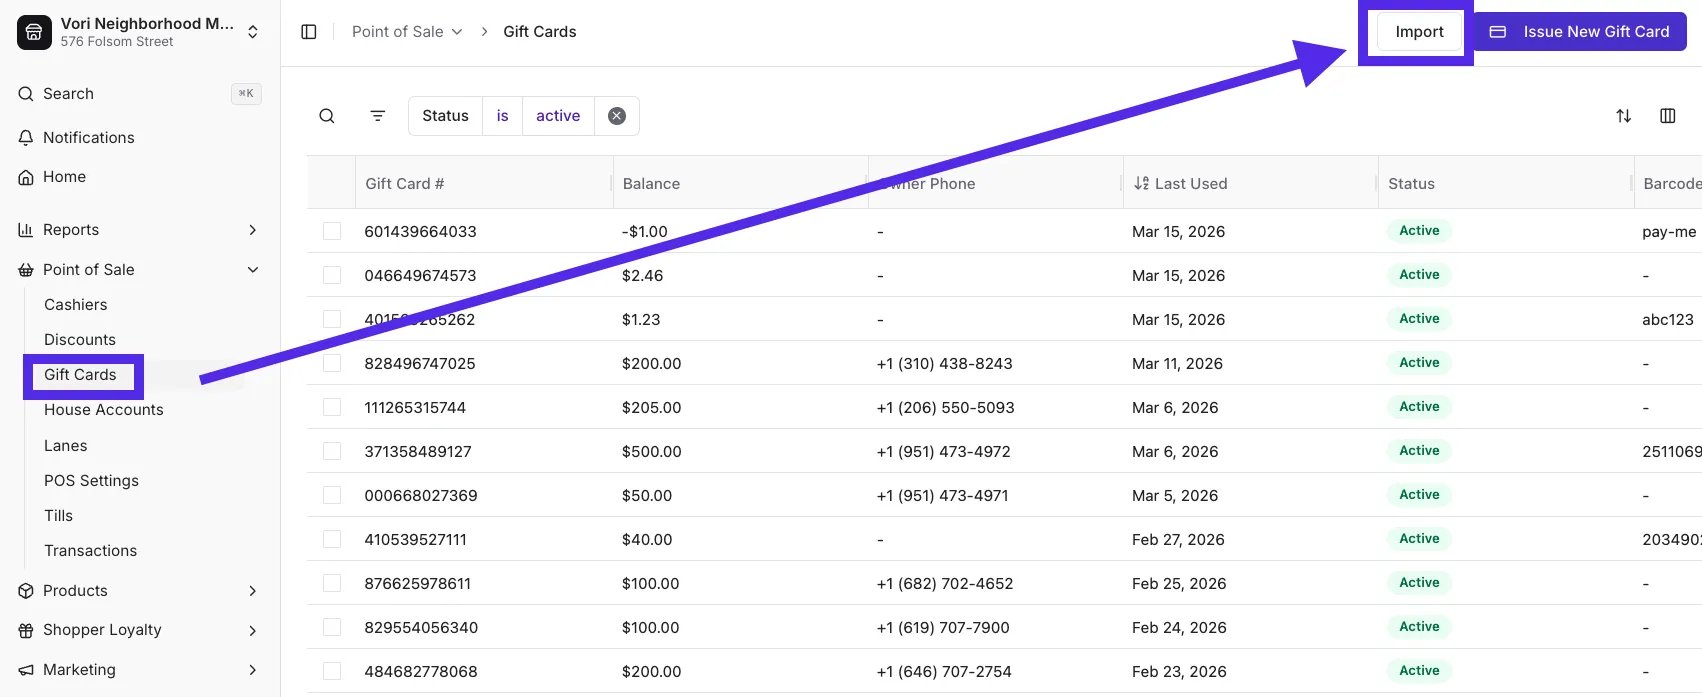
Once your file is ready, you can upload it directly into the Gift Cards section.- Navigate to the Gift Cards section under Point of Sale in New Back Office.
-
Click Import in the top right corner.
-
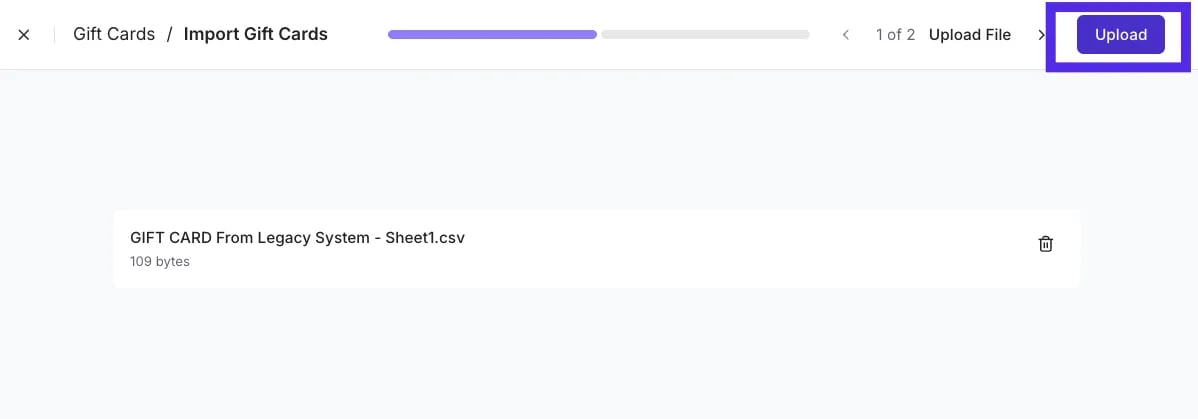
Drag and drop your CSV file into the upload area, or click Select File to browse your computer, then click Upload.
- Vori will perform auto-matching to link your file headers to the system’s fields.
-
Review the Column Mapping to ensure the balance, barcode, and magnetic stripe account number are correctly identified.
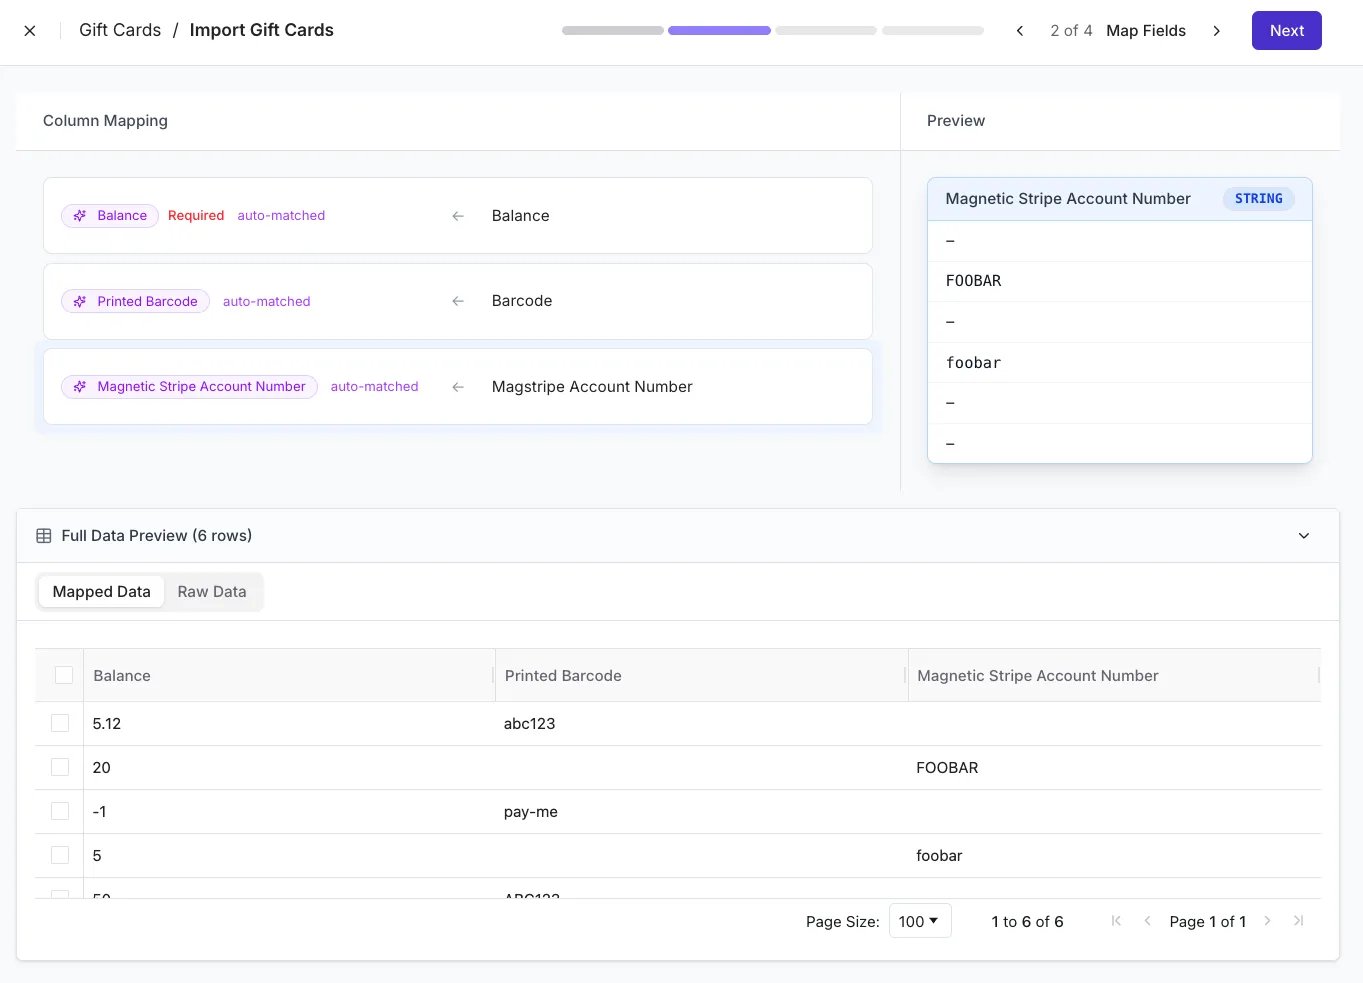
- Click Next to proceed to the review screen.
Review and Commit Changes
Before finalizing, Vori validates your data in a single frame to prevent duplicates and mistakes.-
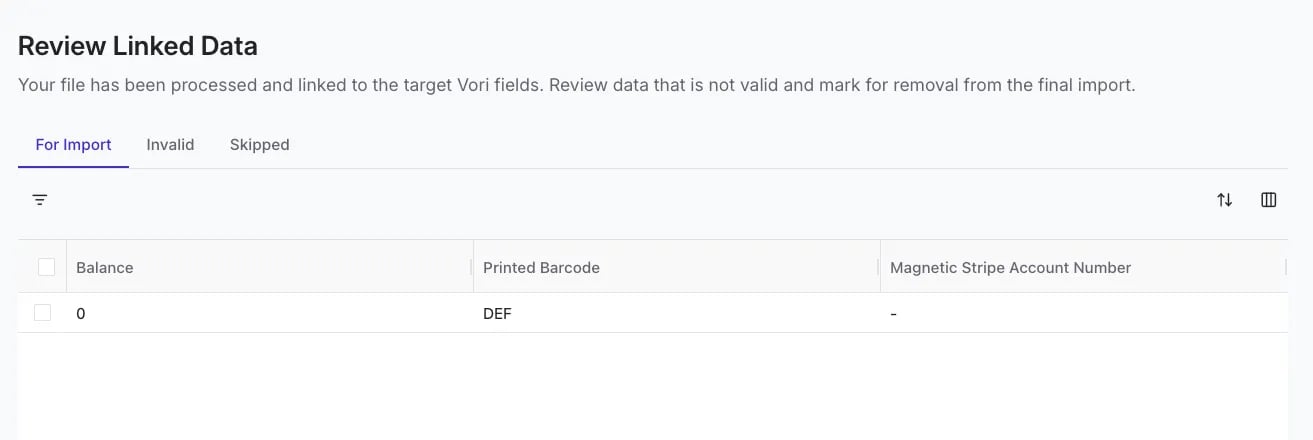
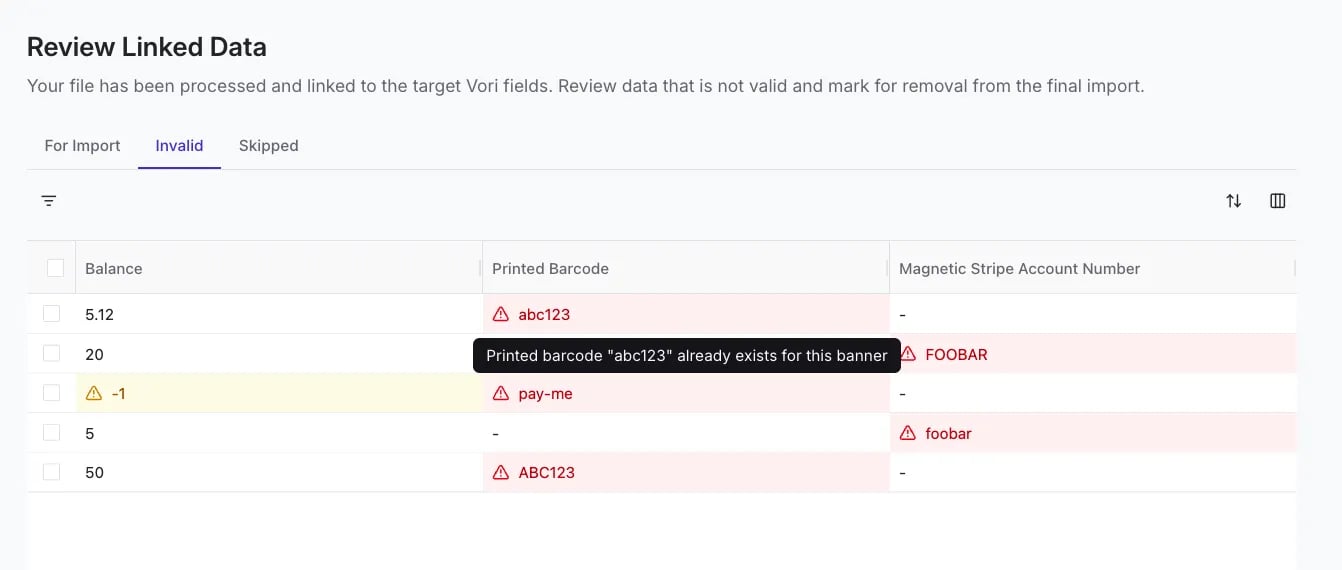
Review the Review Linked Data screen.
-
Check the In Import tab to see valid new cards ready for the system.
-
Check the Invalid tab for cards that already exist in your system or have errors.
-
Check the In Import tab to see valid new cards ready for the system.
- Once satisfied, click Commit to finish the process.
Troubleshooting
- Duplicate Barcodes: If a row is marked Invalid, it is often because that specific barcode or account number already exists in your store’s database.
- Missing Balances: The balance field is required for every row. Ensure no cells in this column are blank before uploading.