Before You Begin
Before uploading, make sure your file meets these standards. This keeps your import smooth and error-free.- File Format: Must be saved as a .CSV.
Prepare Your Import File
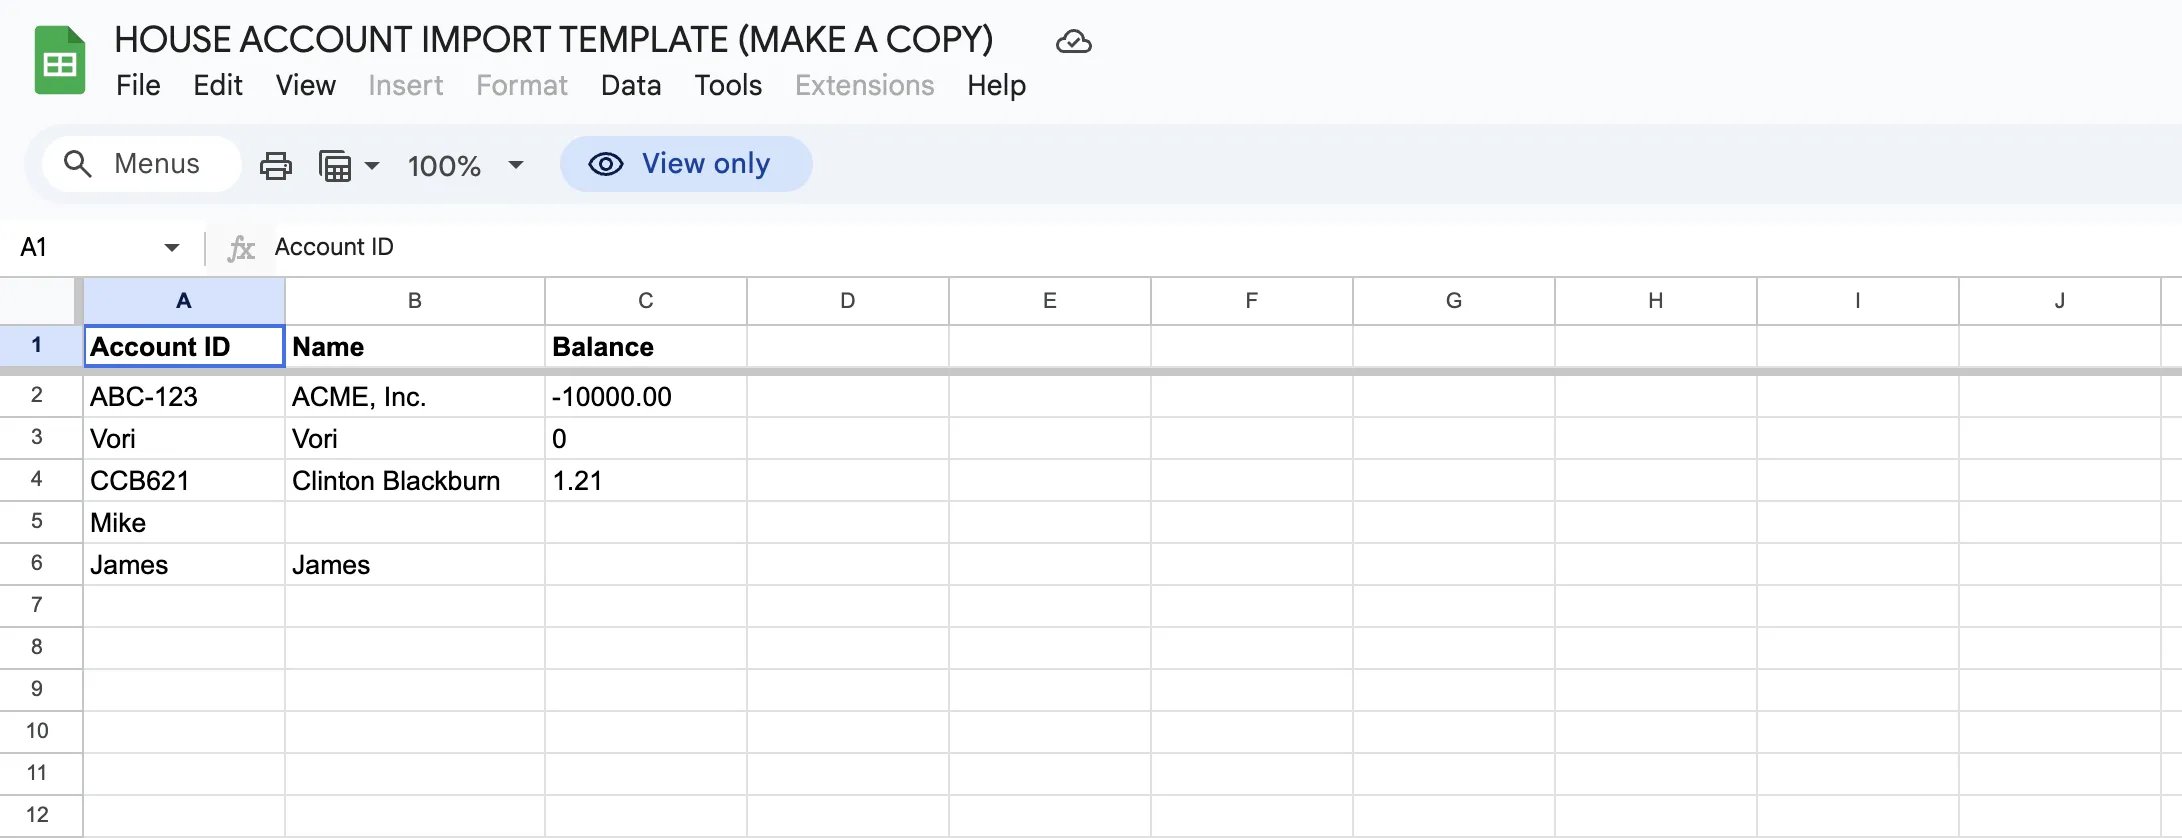
To ensure a successful import, your CSV file must be formatted correctly with specific required information.Formatting Your Balances
When importing balances, pay close attention to the positive and negative signs to ensure your ledger is accurate from day one:- Negative (-): Indicates the shopper owes the store money (e.g., -100.00).
- Positive (+): Indicates the store owes the shopper money or credit (e.g., 50.00).
- Zero/Blank: The account will start with a $0.00 balance.
Upload and Map Your Data
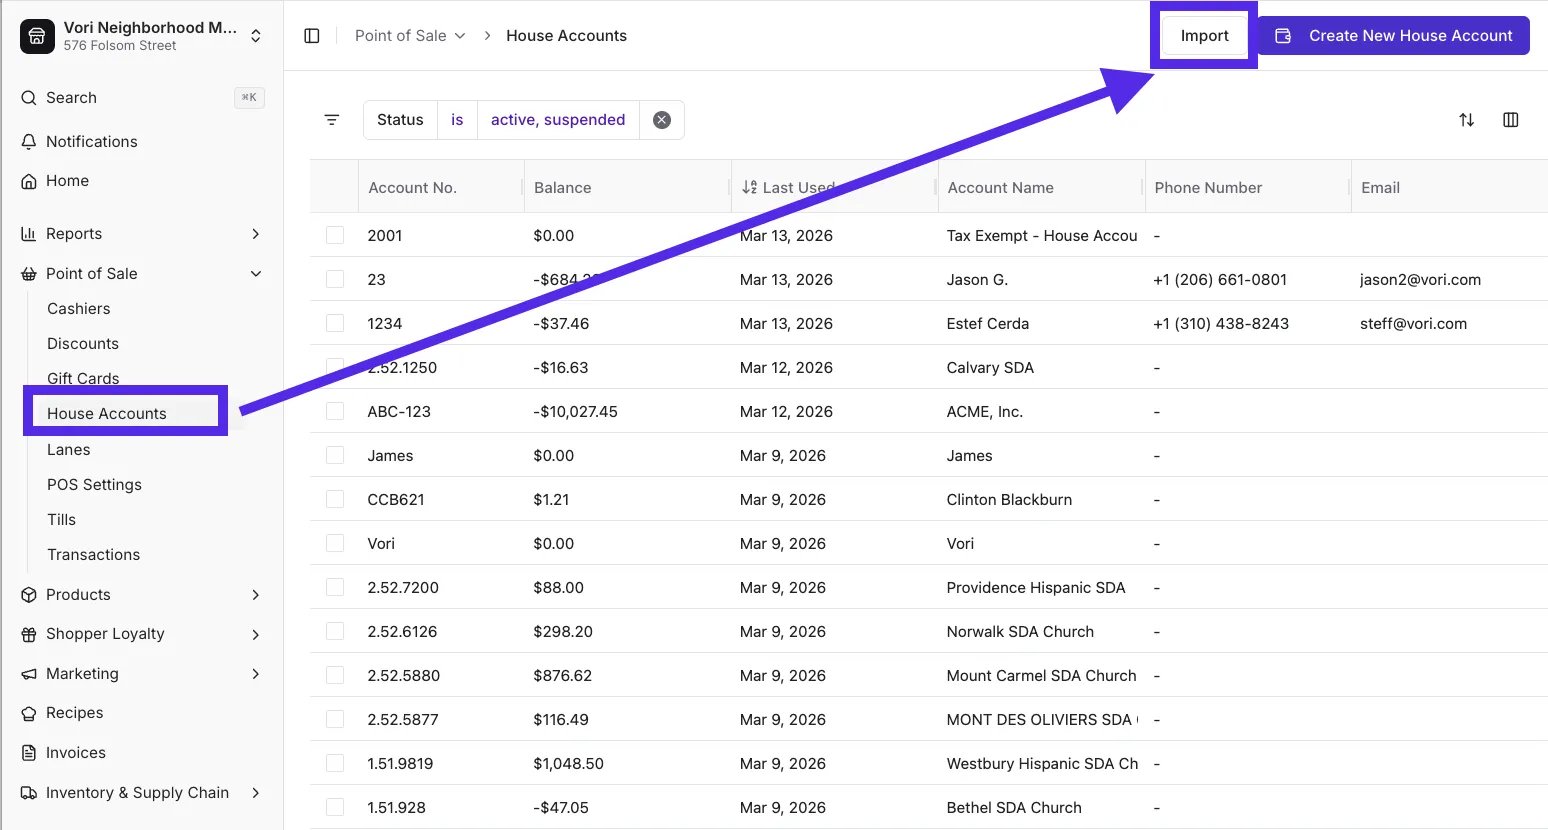
Once your file is ready, you can upload it directly into the House Accounts section.- Navigate to the House Accounts section under Point of Sale in New Back Office.
-
Click Import in the top right corner.
-
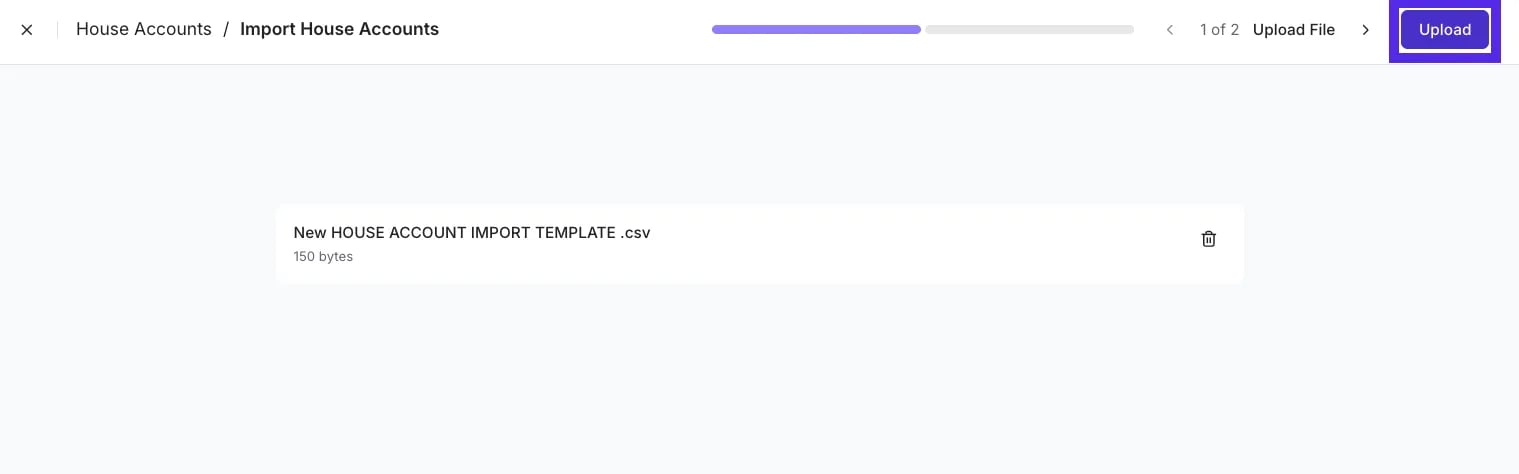
Drag and drop your CSV file into the upload area, or click Select File to browse your computer, then click Upload.
- Map your columns: Vori will attempt to auto-match your file headers to the required fields.
-
Confirm that Account Number, Name, and Balance are correctly mapped to the appropriate columns in your file.

- Click Next to proceed to the review screen.
Review and Commit Changes
The review step helps you catch mistakes before they impact your books.-
Review Linked Data: Vori performs a “soft validation” to check for errors.
- In Import: These rows are valid and ready for successful upload.
- Invalid: These rows contain errors (such as missing names or duplicate numbers) and will not be imported.
-
Review any imported balances. When you import a balance, Vori automatically creates a transaction associated with your user profile to keep your accounting transparent.
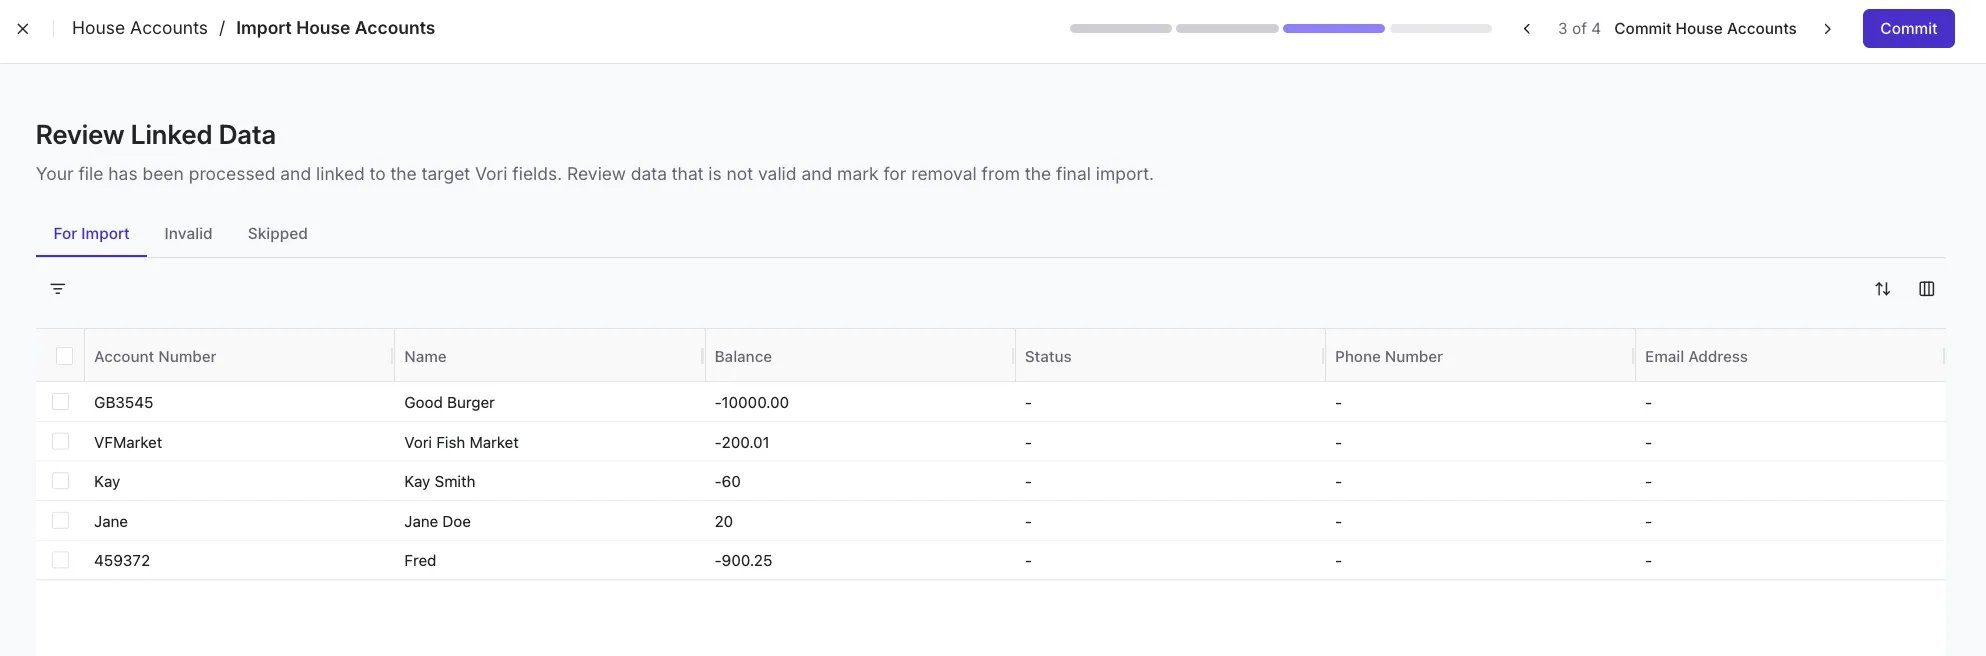
- Click Commit to finish the import and create the accounts.
Troubleshooting
Why is my row marked as “Invalid”?- Missing Name: Every account requires a name. If a row is missing this field, Vori cannot “guess” and will skip that row.
- Duplicate Account Number: Account numbers must be unique across your banner. If the number already exists in Vori, the system will prevent the duplicate from being created.
-
Double-check the negative/positive signs in your original CSV file.
- Remember: A negative sign means the shopper owes the store. If an error occurs, you can make manual adjustments later, but it is best to get the entries right during the initial import.