What are Quick Action buttons?
Quick Action buttons (aka hot key buttons) are shortcuts on your Point of Sale (POS) screen. They are designed to streamline your checkout flow. Each button is customized to your store’s setup and can be applied per POS lane. 💡Tip: The Quick Action buttons on the cashier screen are tied to either products or departments, so having items properly assigned is important.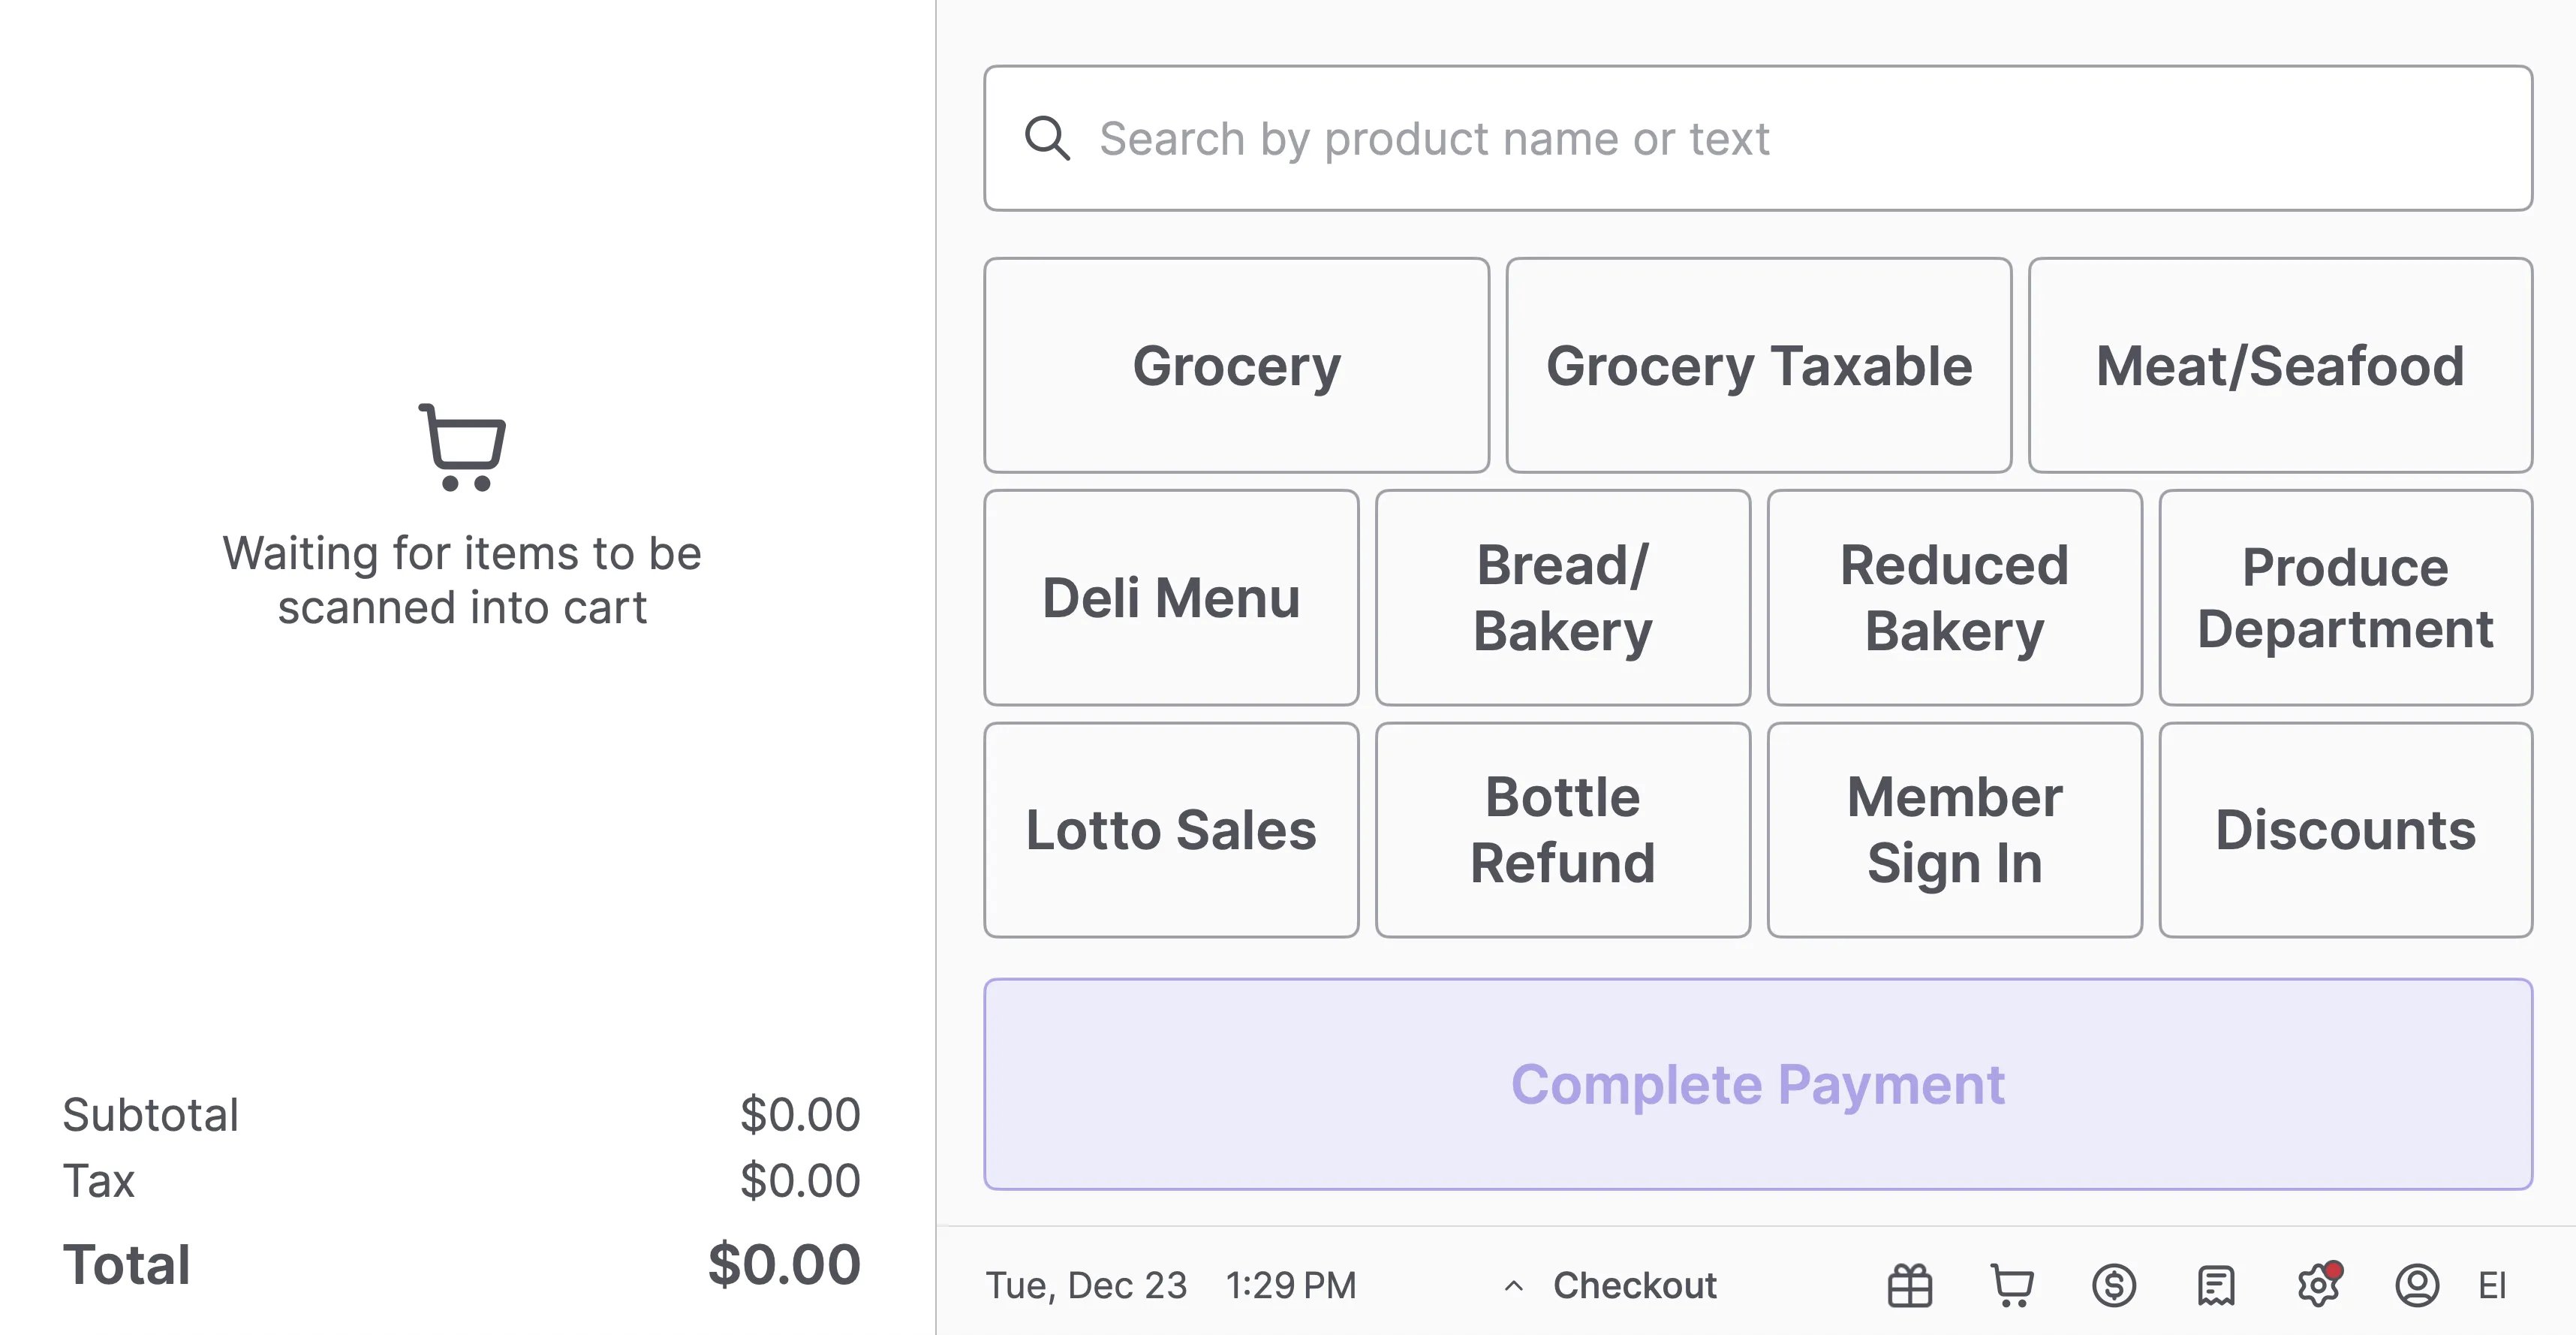
- Manual Menu: Access “catch-all” products used to ring up items that do not have a barcode or cannot be scanned.
- Bag Fee: Quickly add state or local bag fees.
- Discounts: Apply specific markdown percentages or dollar amounts.
- Membership Sign In: Trigger to enter the customer loyalty number.
- Bottle Deposit Refund: Process bottle deposit refund.
- Refund Item: Initiate an item refund.
- Open Code: Ring up items that aren’t in the system or won’t be added to the Product Catalog. This can be used for items sold by each or by weight. (e.g. Grocery Taxable or Produce LB).
- Tare: Deduct the weight of the container or packaging from items sold by weight. (e.g., salad bar, olive bar, bulk items)
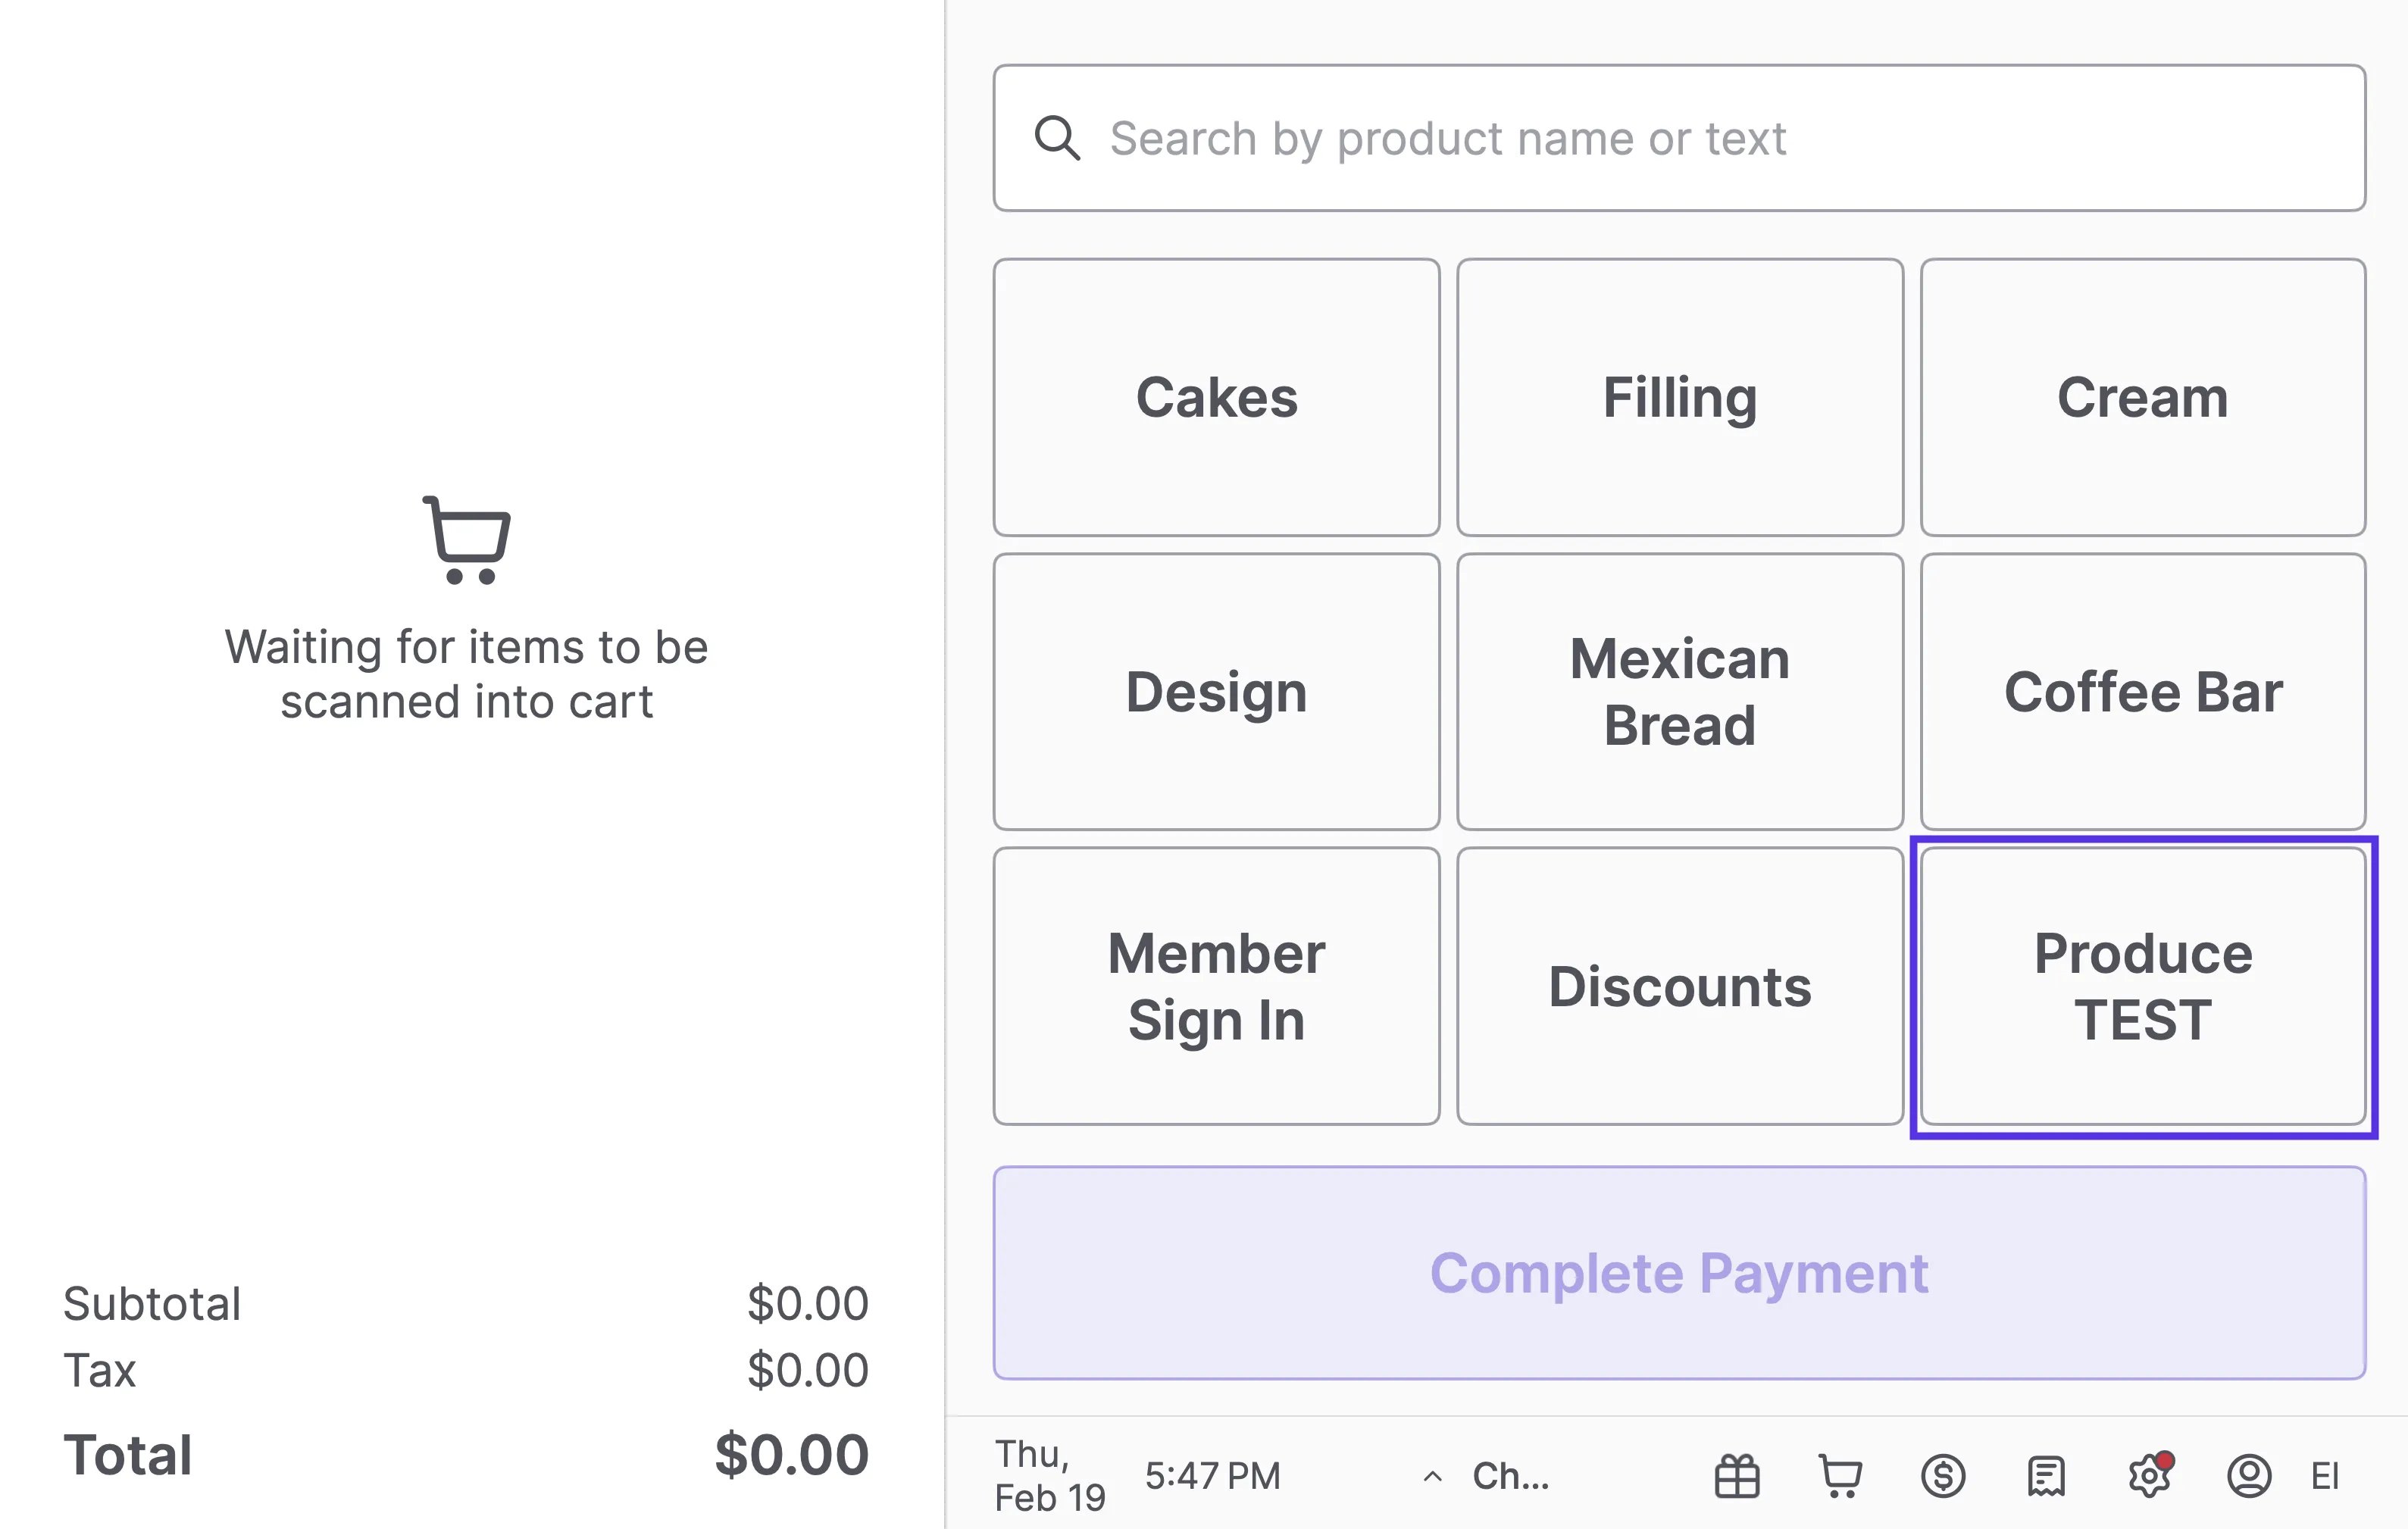
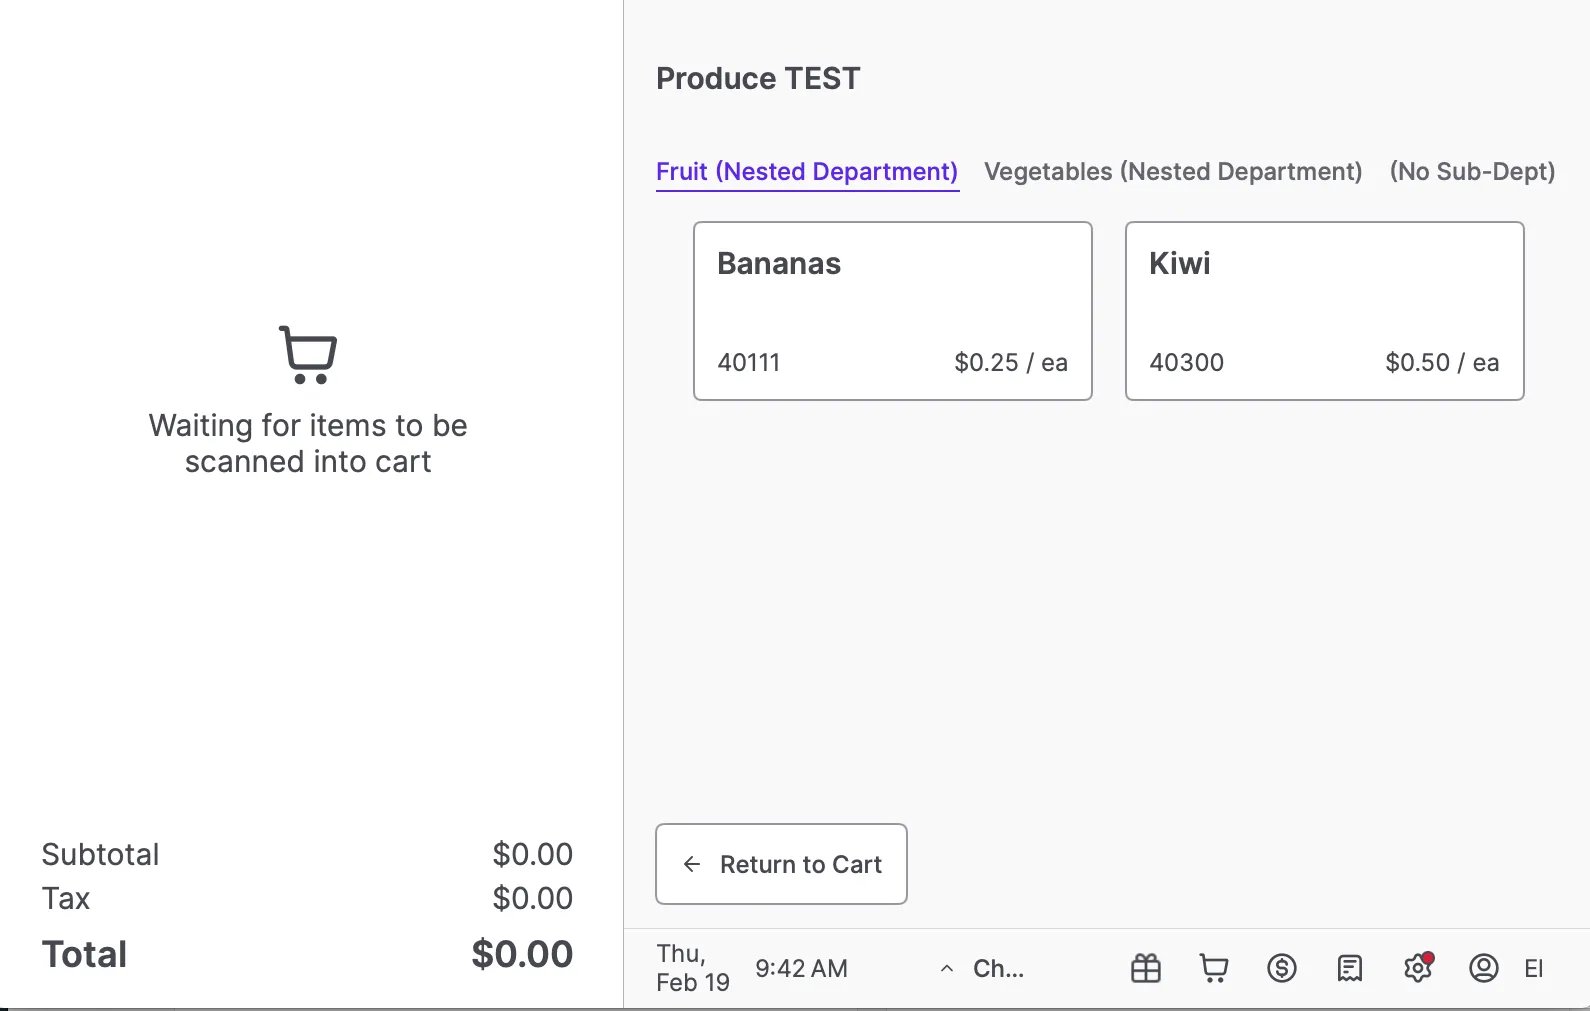
What are Nested Department Quick Actions?
Nested Department Quick Actions allow you to create large, top-level Parent department buttons that open into organized sub-menus directly on the POS screen. Instead of linking a button to just one sub-department, you can now create a structured department flow.How It Works
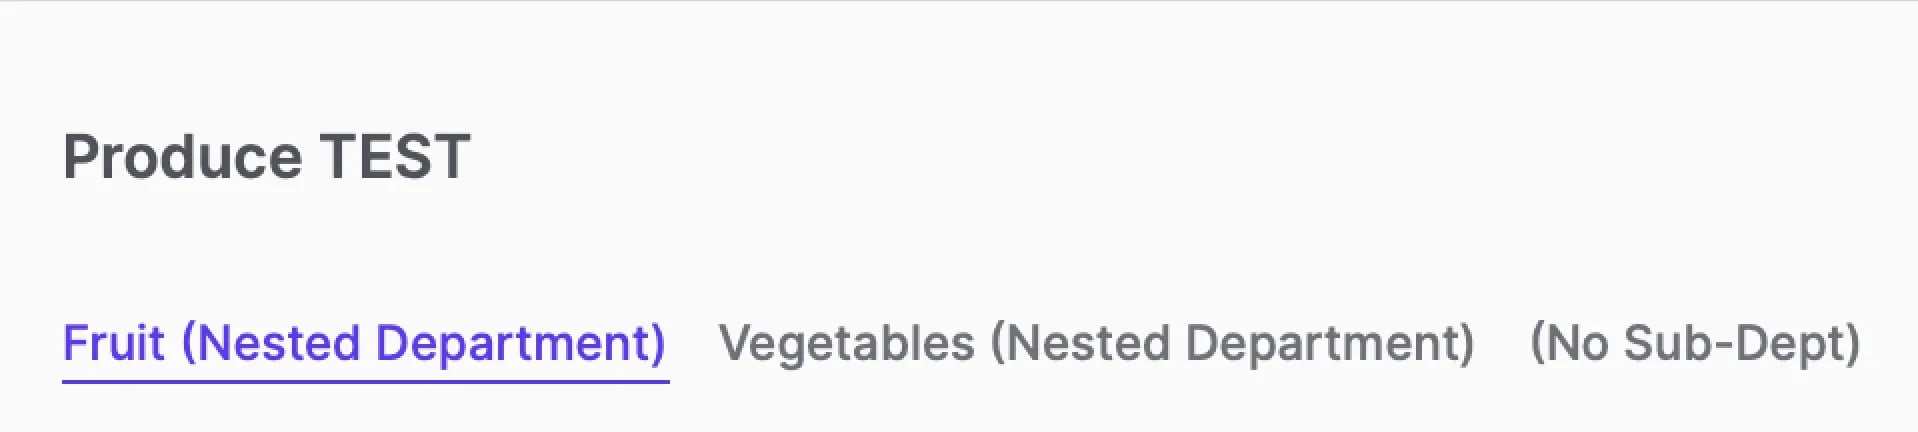
- From the Homepage of the Cashier Screen: Parent Department Button (Top-Level Tile) Example: Produce TEST
-
When tapped, it opens a sub-menu: Sub Department-Menu (Child Categories)
- Vegetables
- Fruit
- No Sub-Dept
-
From there, selecting a category displays the individual product items: Final Selection (Products)
- Bananas
- Kiwi
Why Use Nested Departments?
- Organize products by real store workflow
- Reduce screen clutter
- Improve cashier speed and accuracy
- Customize layouts by lane (e.g., Deli vs Grocery)
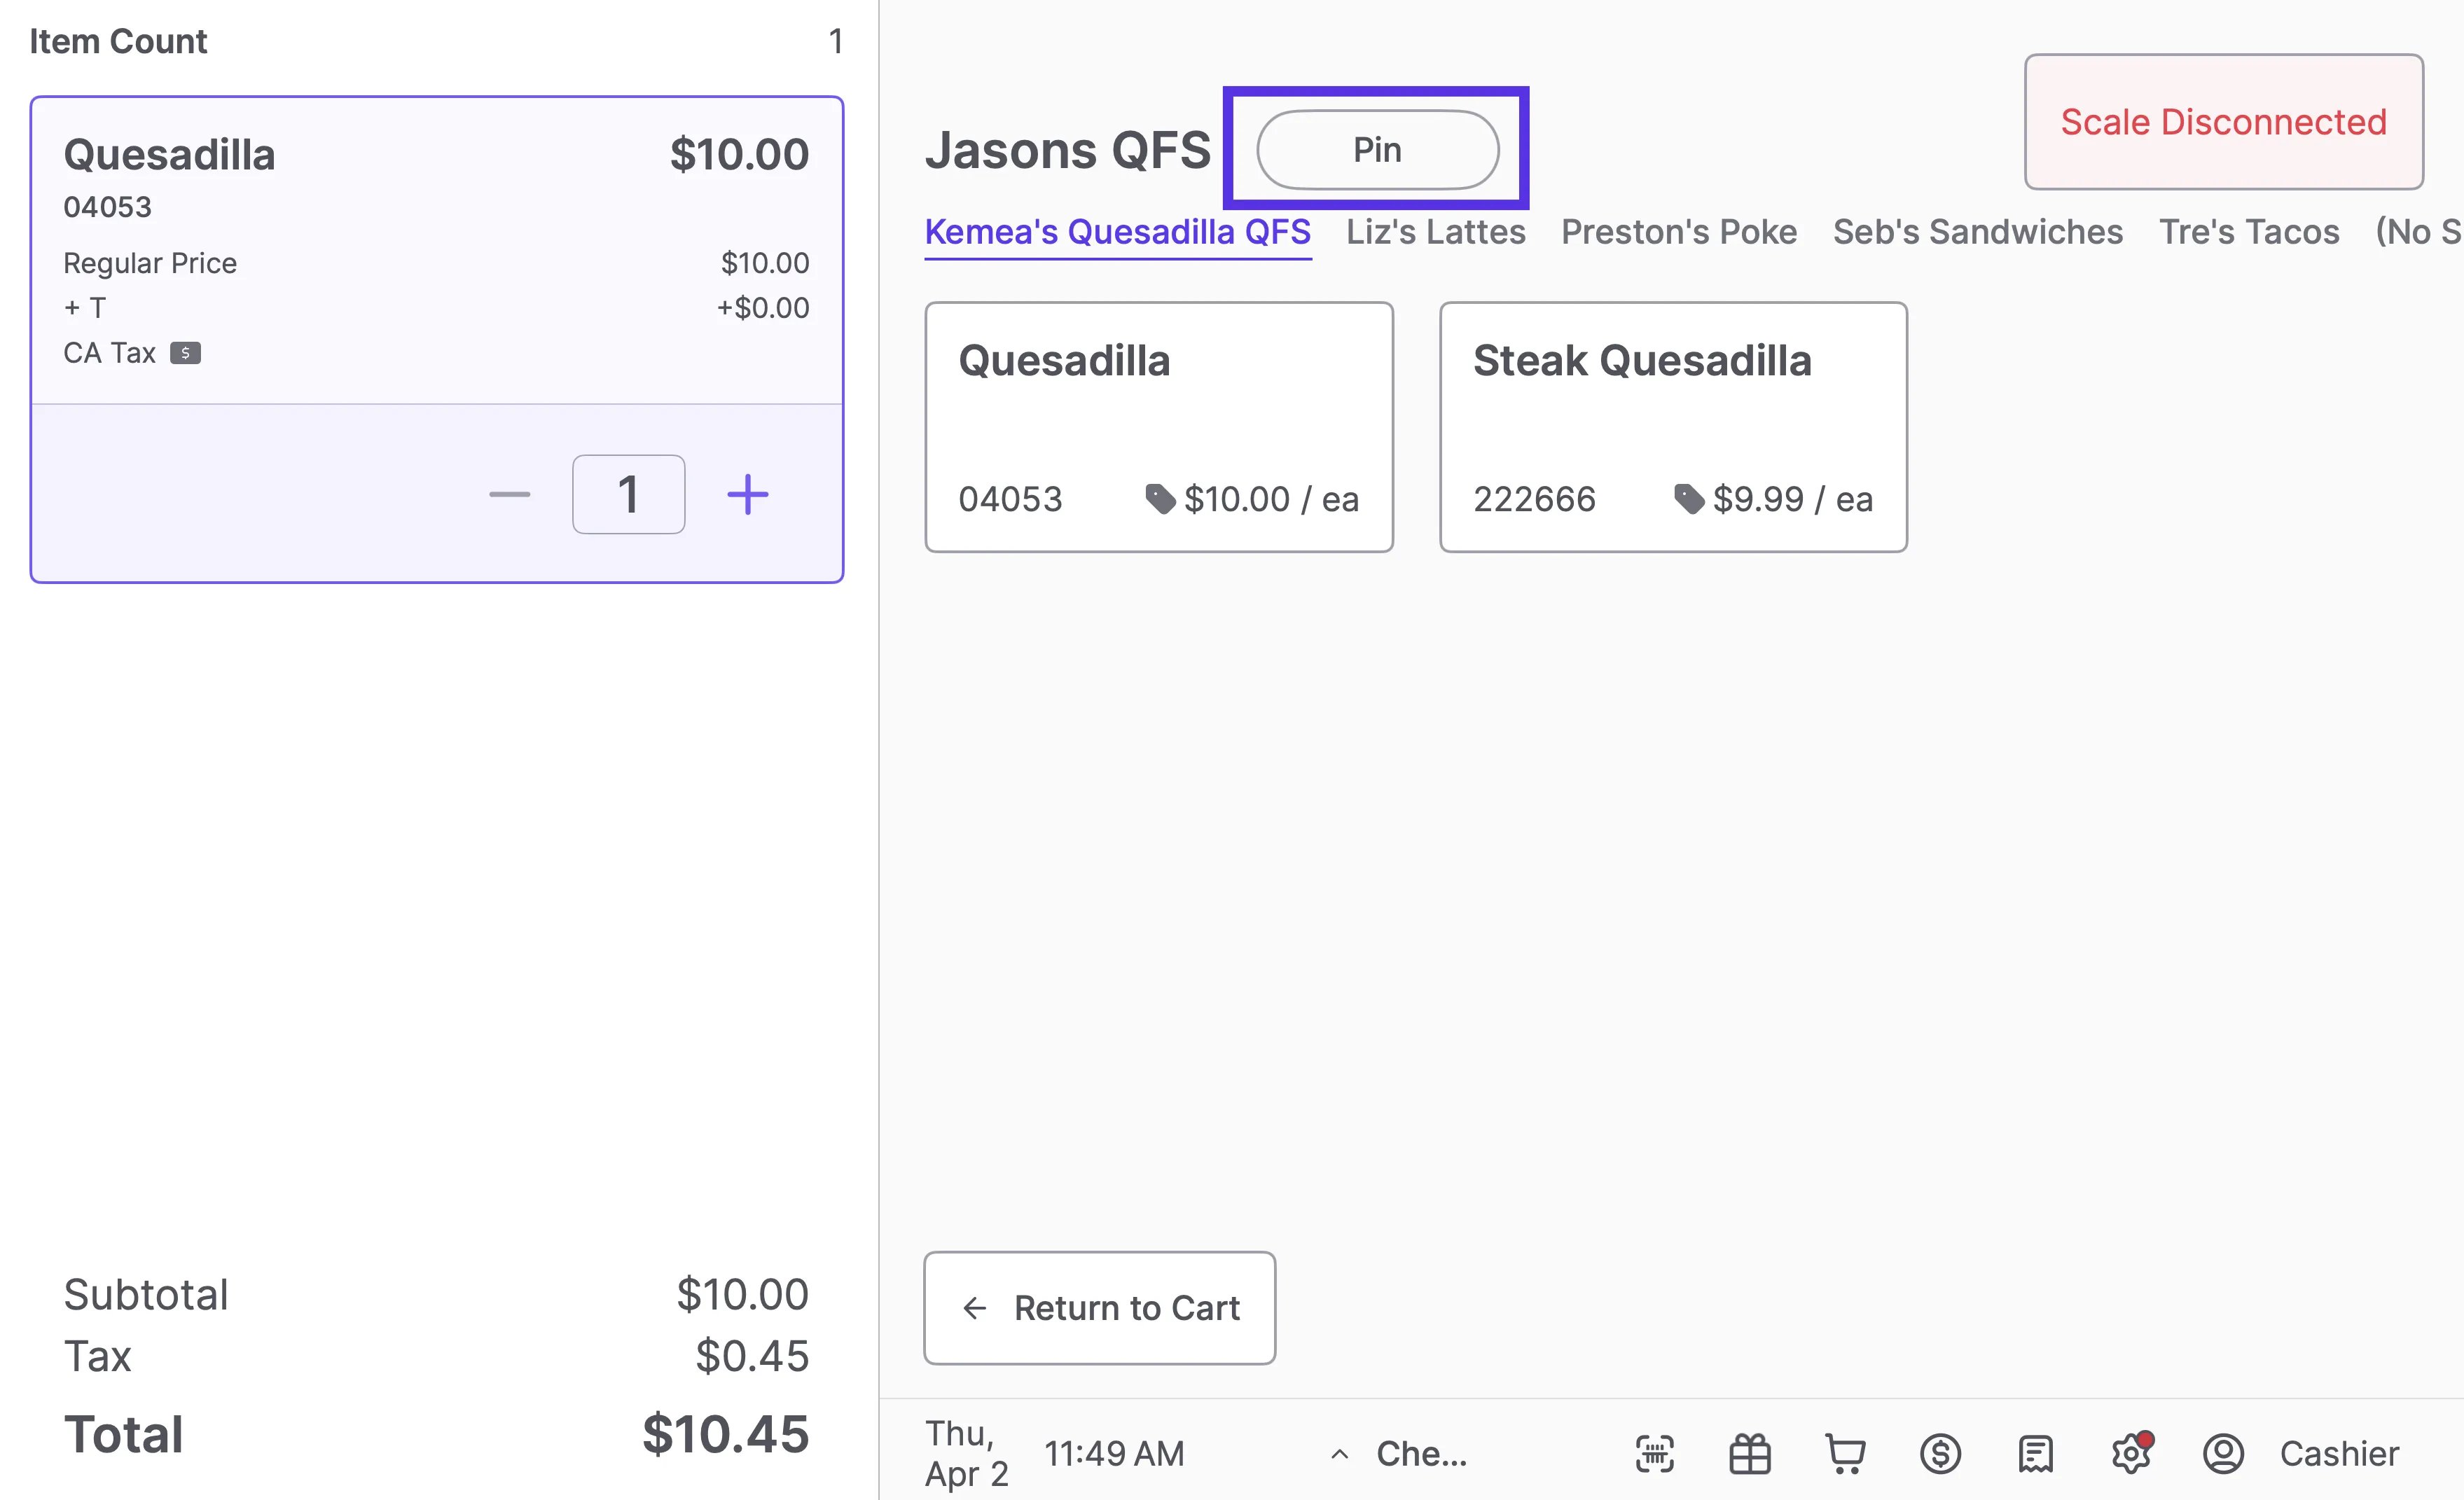
Pin and Unpin a Nested Department Menu
When a Nested Department Quick Action is tapped, it opens a sub-menu showing that department’s items — for example, a Deli button might open into Sandwiches, Hot Foods, or Soups. By default, this sub-menu closes after each transaction and the screen returns to the main Quick Actions home. You can pin the menu to keep it open between transactions, useful for dedicated lanes where cashiers work in the same department all shift. To pin a department menu:- Tap the department’s Quick Action button on the cashier screen to open its parent menu or sub-menu.
-
Tap Pin in the center right of the screen.
-
The button will display a pin icon and read Pinned to confirm it’s locked in place.
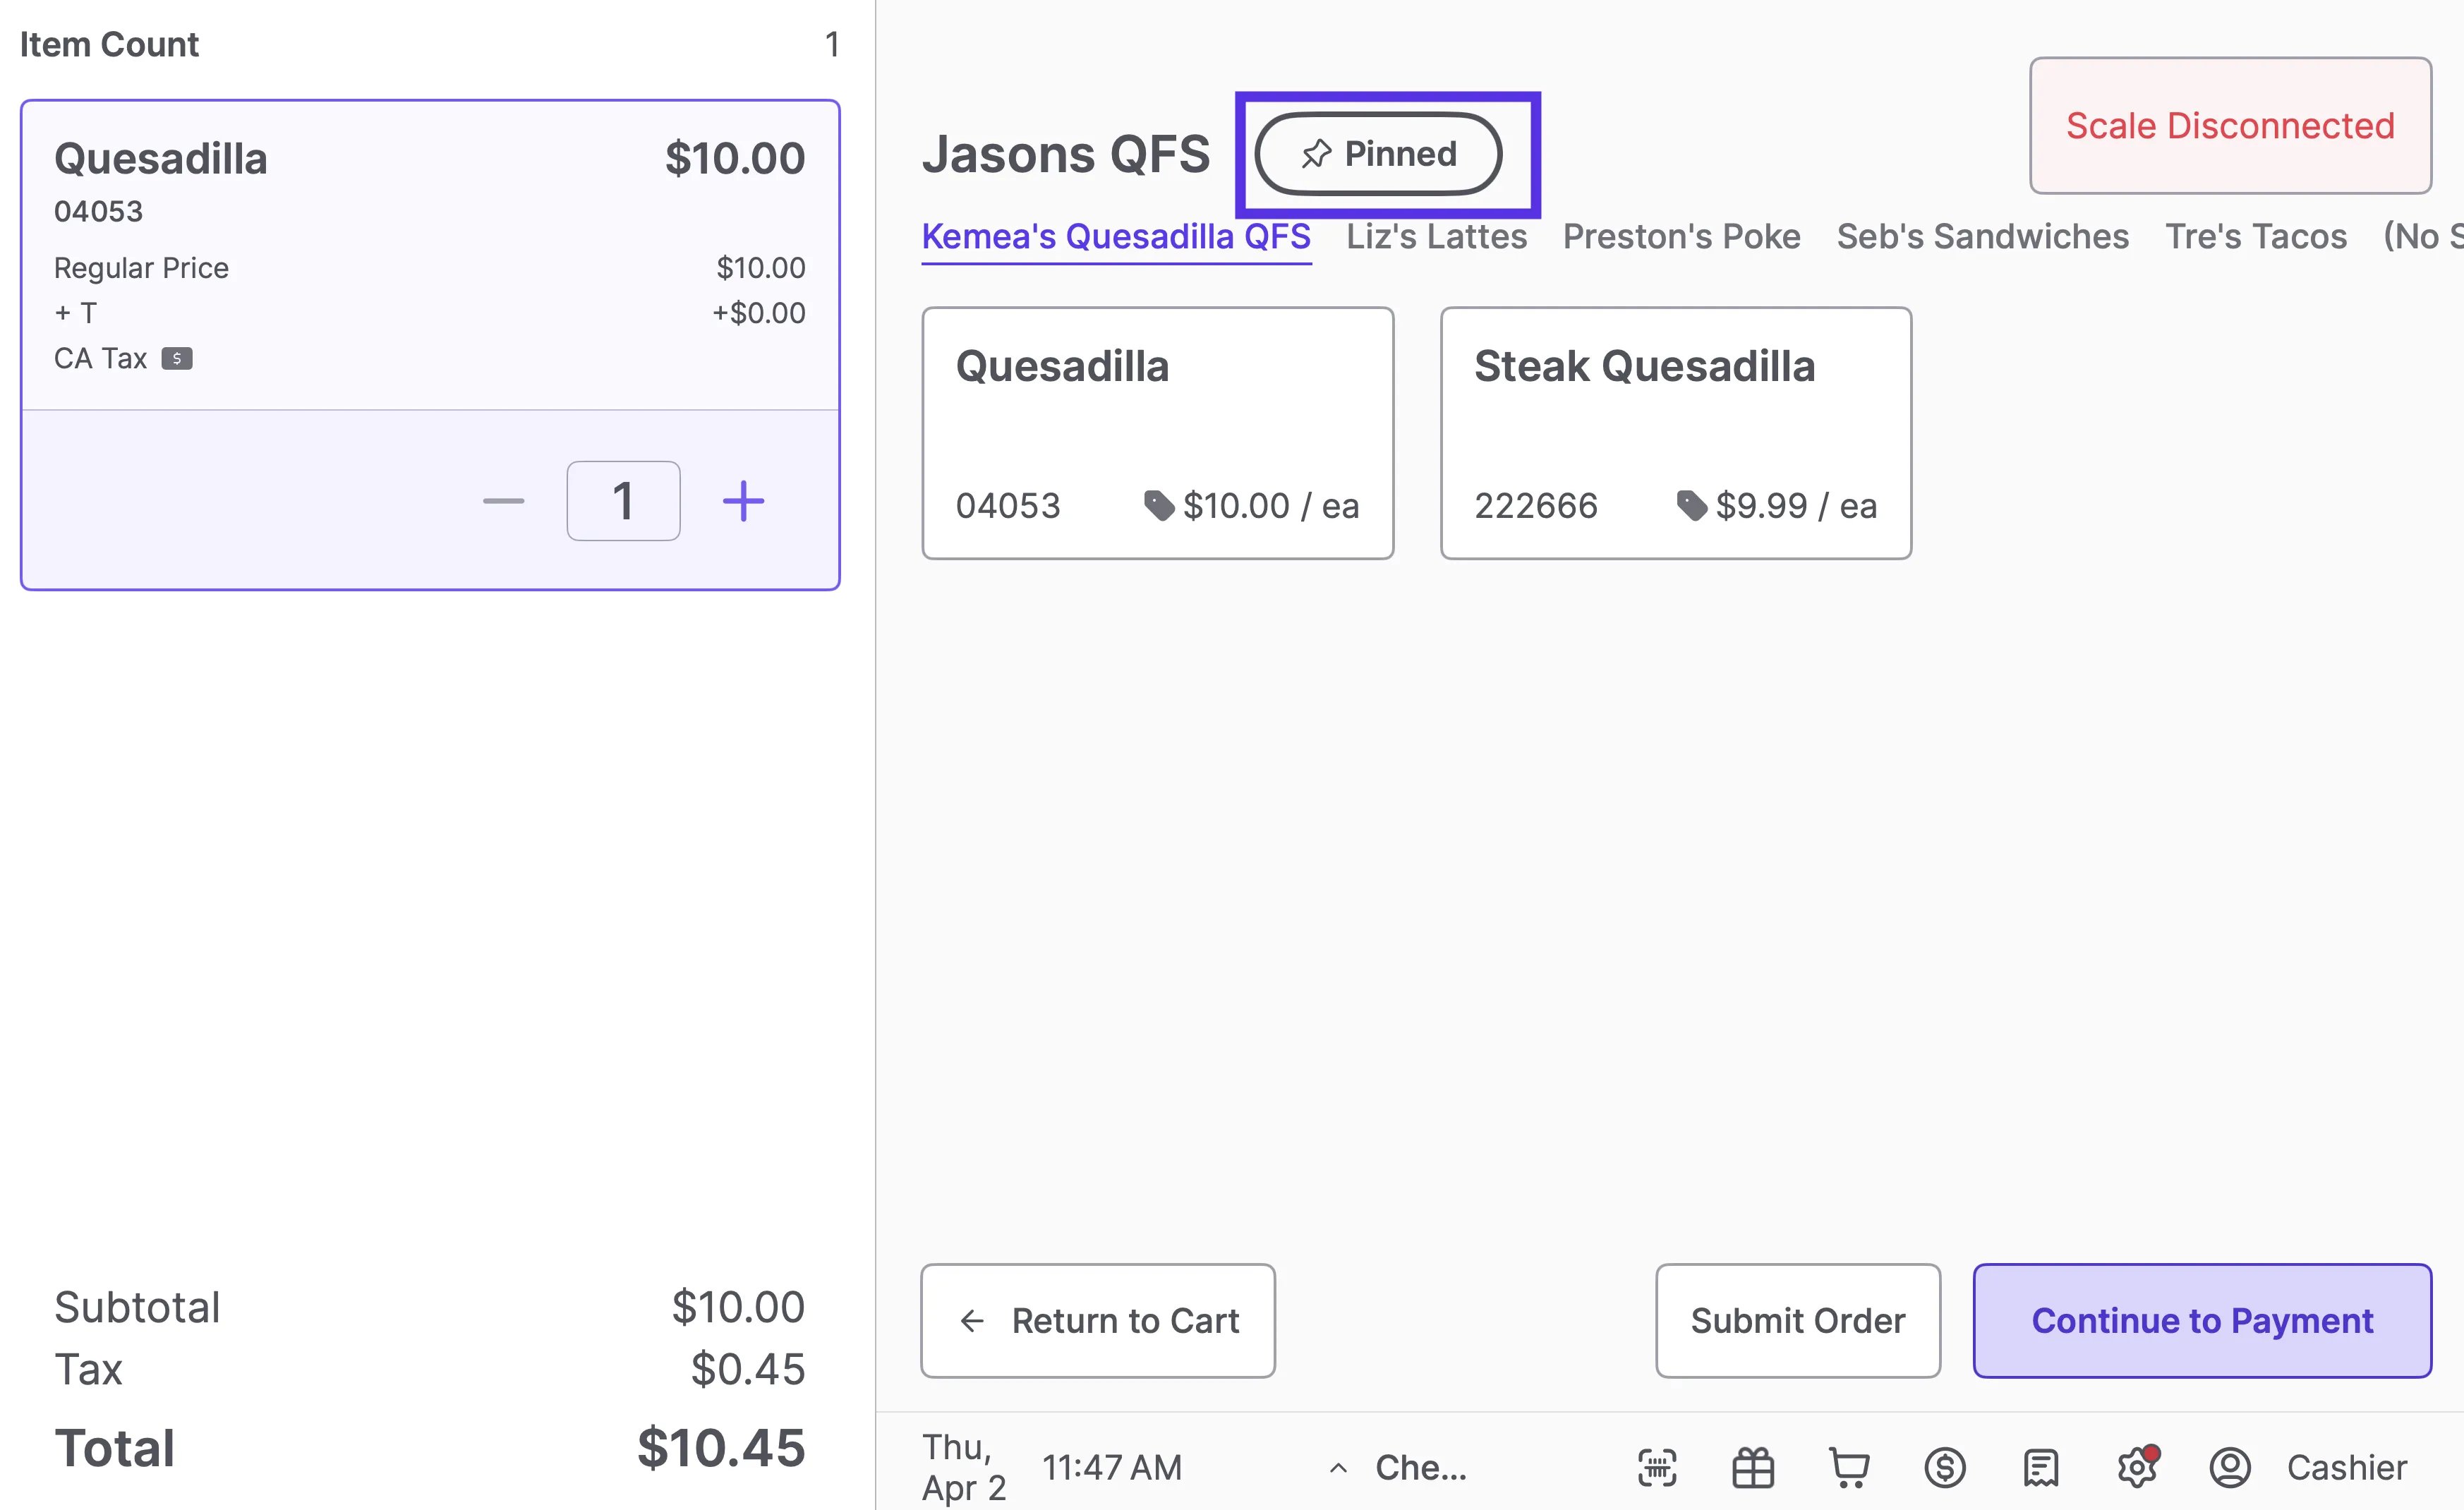
- While the sub-menu is open and pinned, tap the Pinned button in the center right of the screen.
- The button will return to Pin (unfilled), and the screen will go back to the main Quick Actions home after each transaction.
What are Manual Items?
Manual Items are generic “catch-all” products used to ring up items that do not have a barcode or cannot be scanned.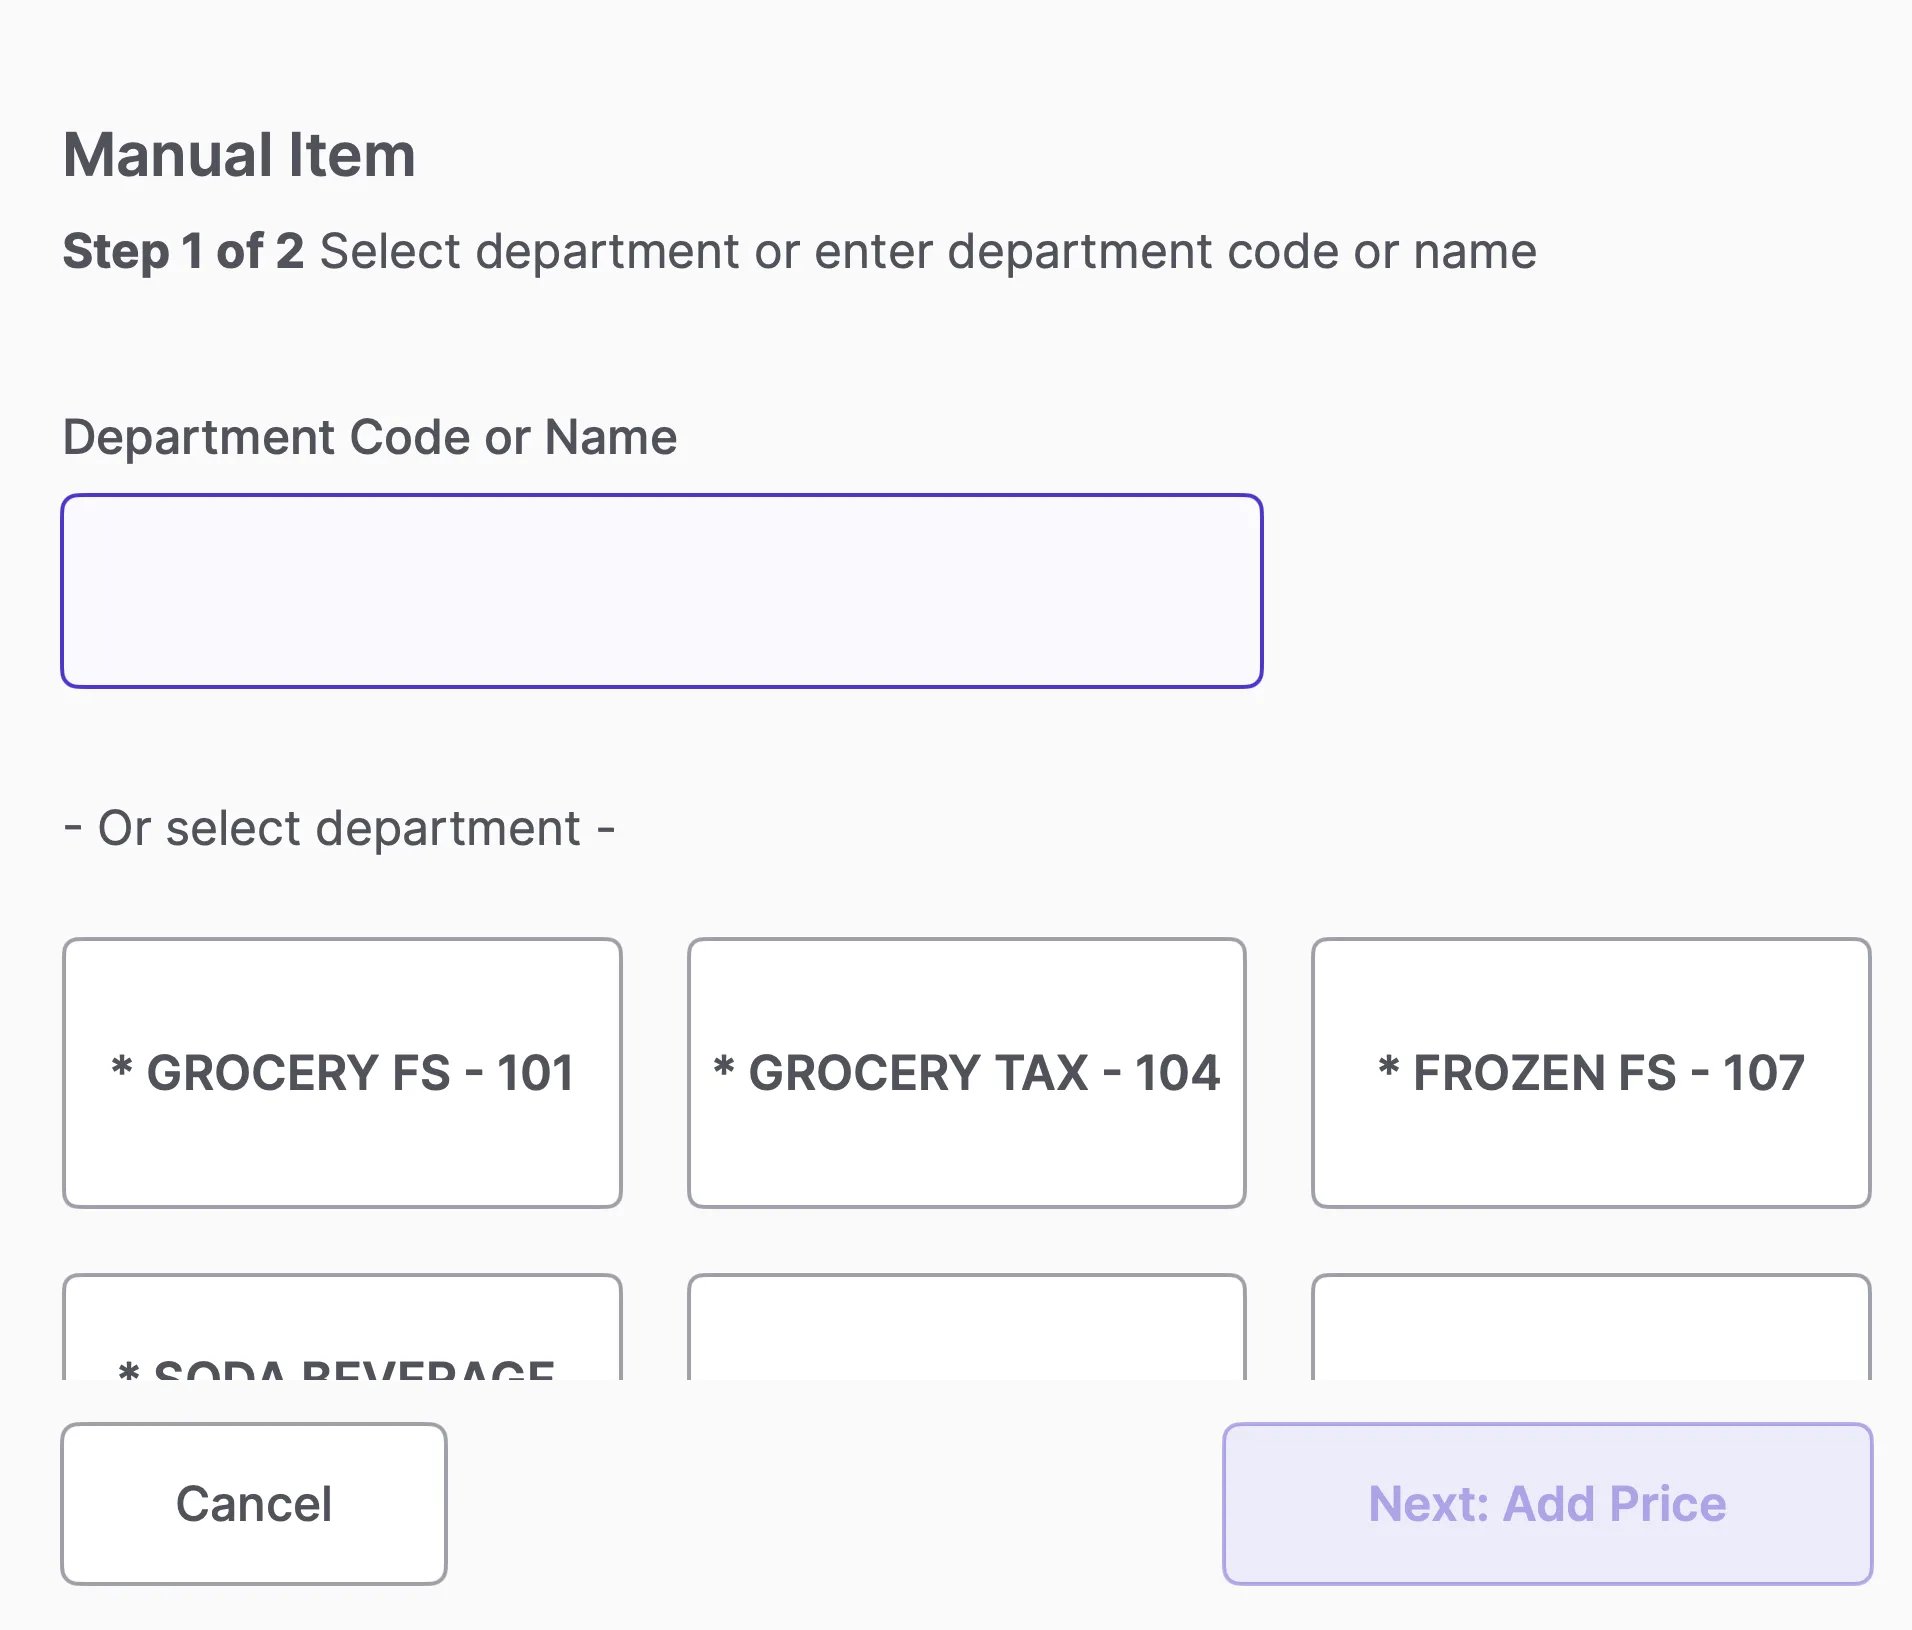
Purpose for Cashiers
Beyond handling “product not found” scan errors, Manual Items should be used in rare cases for items that do not exist in the store’s Product Catalog.Setup Strategy
Stores are encouraged to use Manual Items sparingly to maintain data accuracy. When you ring up a generic manual item, it generally does not link to a specific product ID in reporting. However, there are two common ways to set this up, depending on your reporting needs:-
Simple Setup (Recommended for speed): Most stores operate efficiently with just three general manual items:
- “Per Pound” (For variable weight items)
- “Each” (For non-taxable single items)
- “Each Taxable” (For taxable single items)
-
Department-Based Setup (Recommended for data): Some stores create specific manual items for each major department
- Produce (EA)
- Produce (LB)
- Dairy
-
- Frozen
- Meat (EA)
- Meat (LB)
- Why do this? This provides more granular data in your reports. Even if you don’t know exactly which product was sold, you will still know which department generated the revenue, helping you track sales performance more accurately.
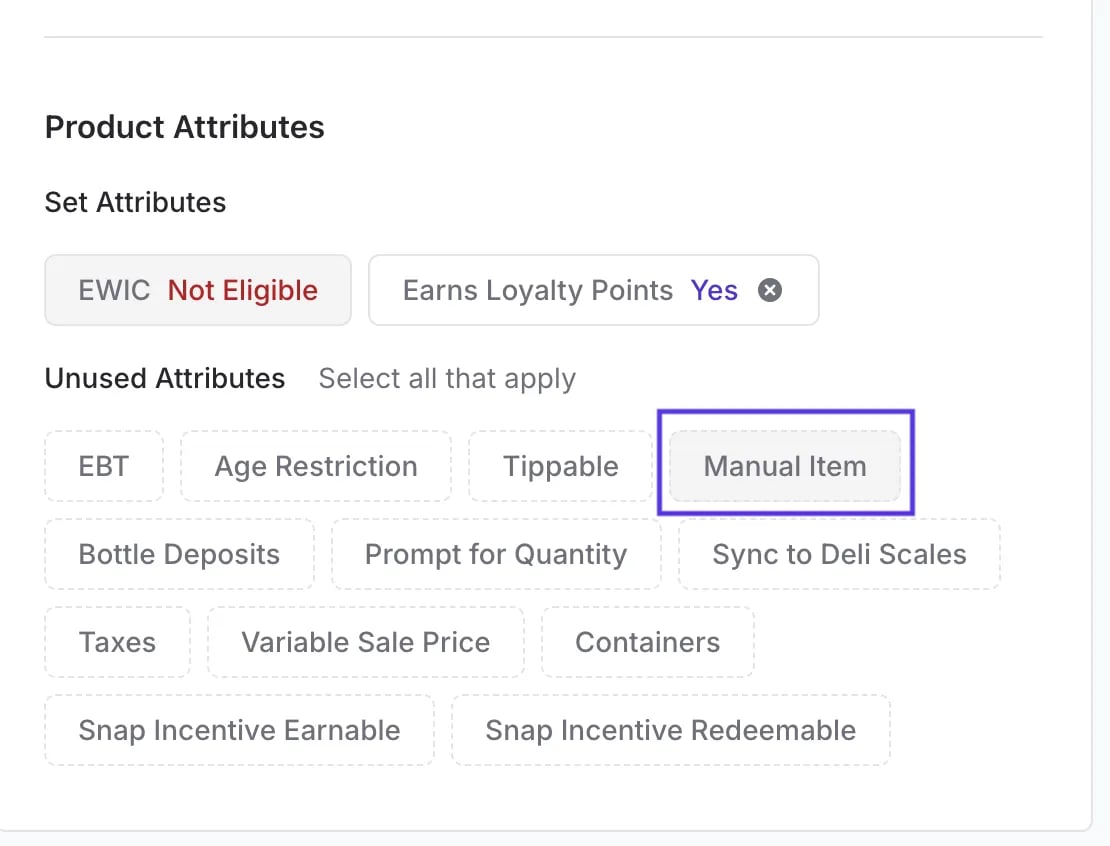
How to Enable a Manual Item
You can enable a product to appear as a Manual Item directly from the Back Office.- Open the Product Detail Page for the item you want to update.
- Scroll down to the Product Attributes section.
- Look under the Unused Attributes list.
- Select Manual Item.
Set up and manage your Quick Actions
You can create, edit, and assign Quick Action buttons directly from the Back Office — no need to contact Vori Support. See Create Quick Actions in Back Office for step-by-step instructions on building actions, creating lane templates, and assigning them to specific lanes.Troubleshooting: Missing Quick Action Buttons
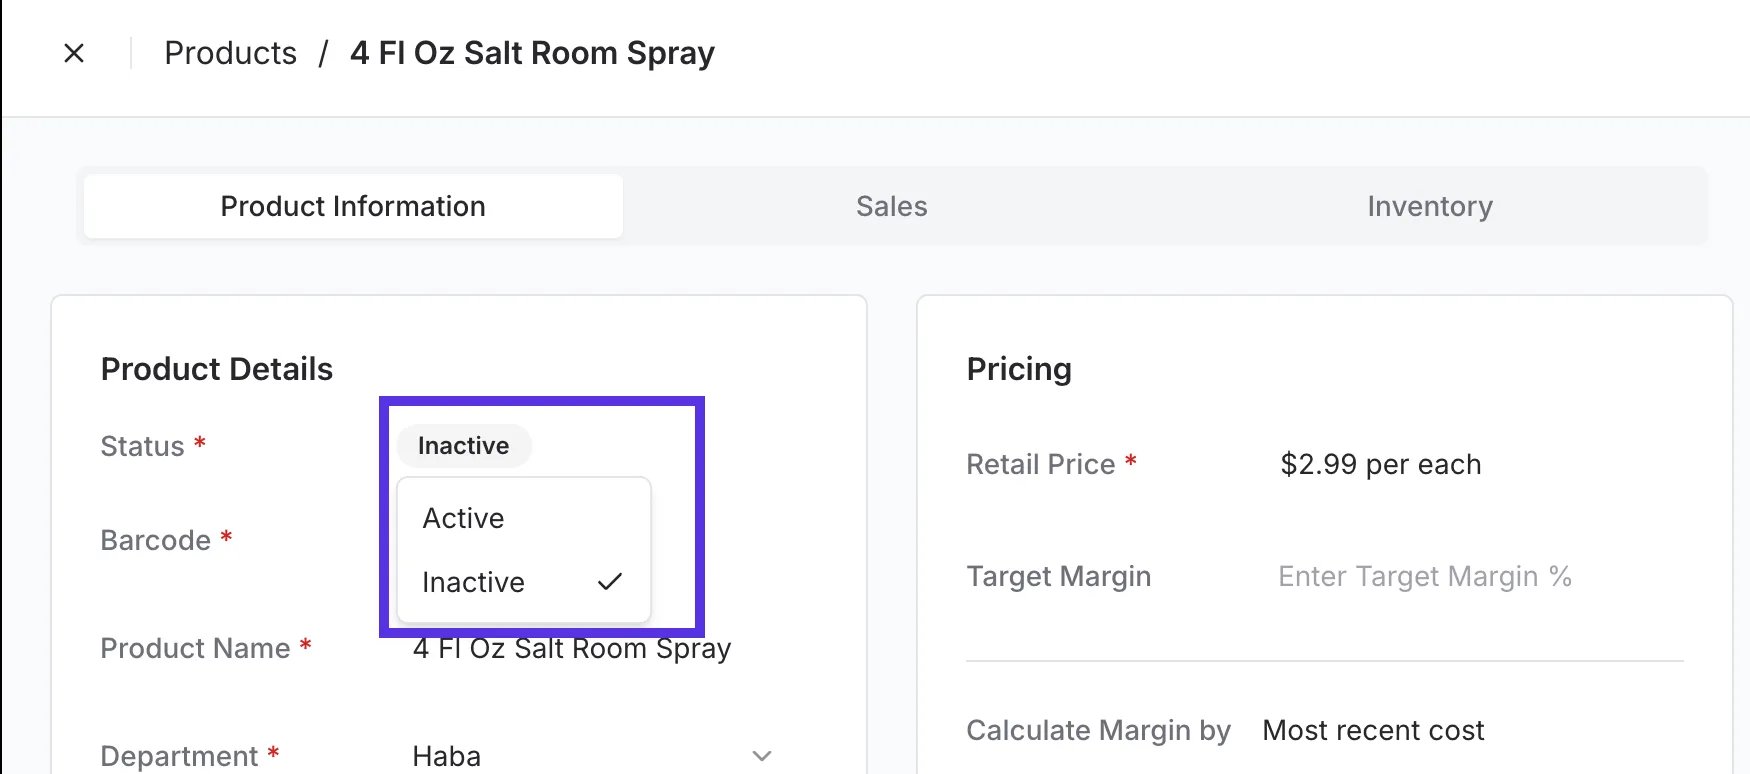
If a Quick Action button suddenly disappears from your POS screen, it is usually because the product linked to that button has been deactivated. How to investigate:- Identify the product that was linked to the missing button.
- Log in to the Back Office.
- Search for the product in your Product Catalog.
- Check the status of the product. If it is set to Inactive, the button will automatically remove itself from the POS.
-
Set the product to Active to restore the button.