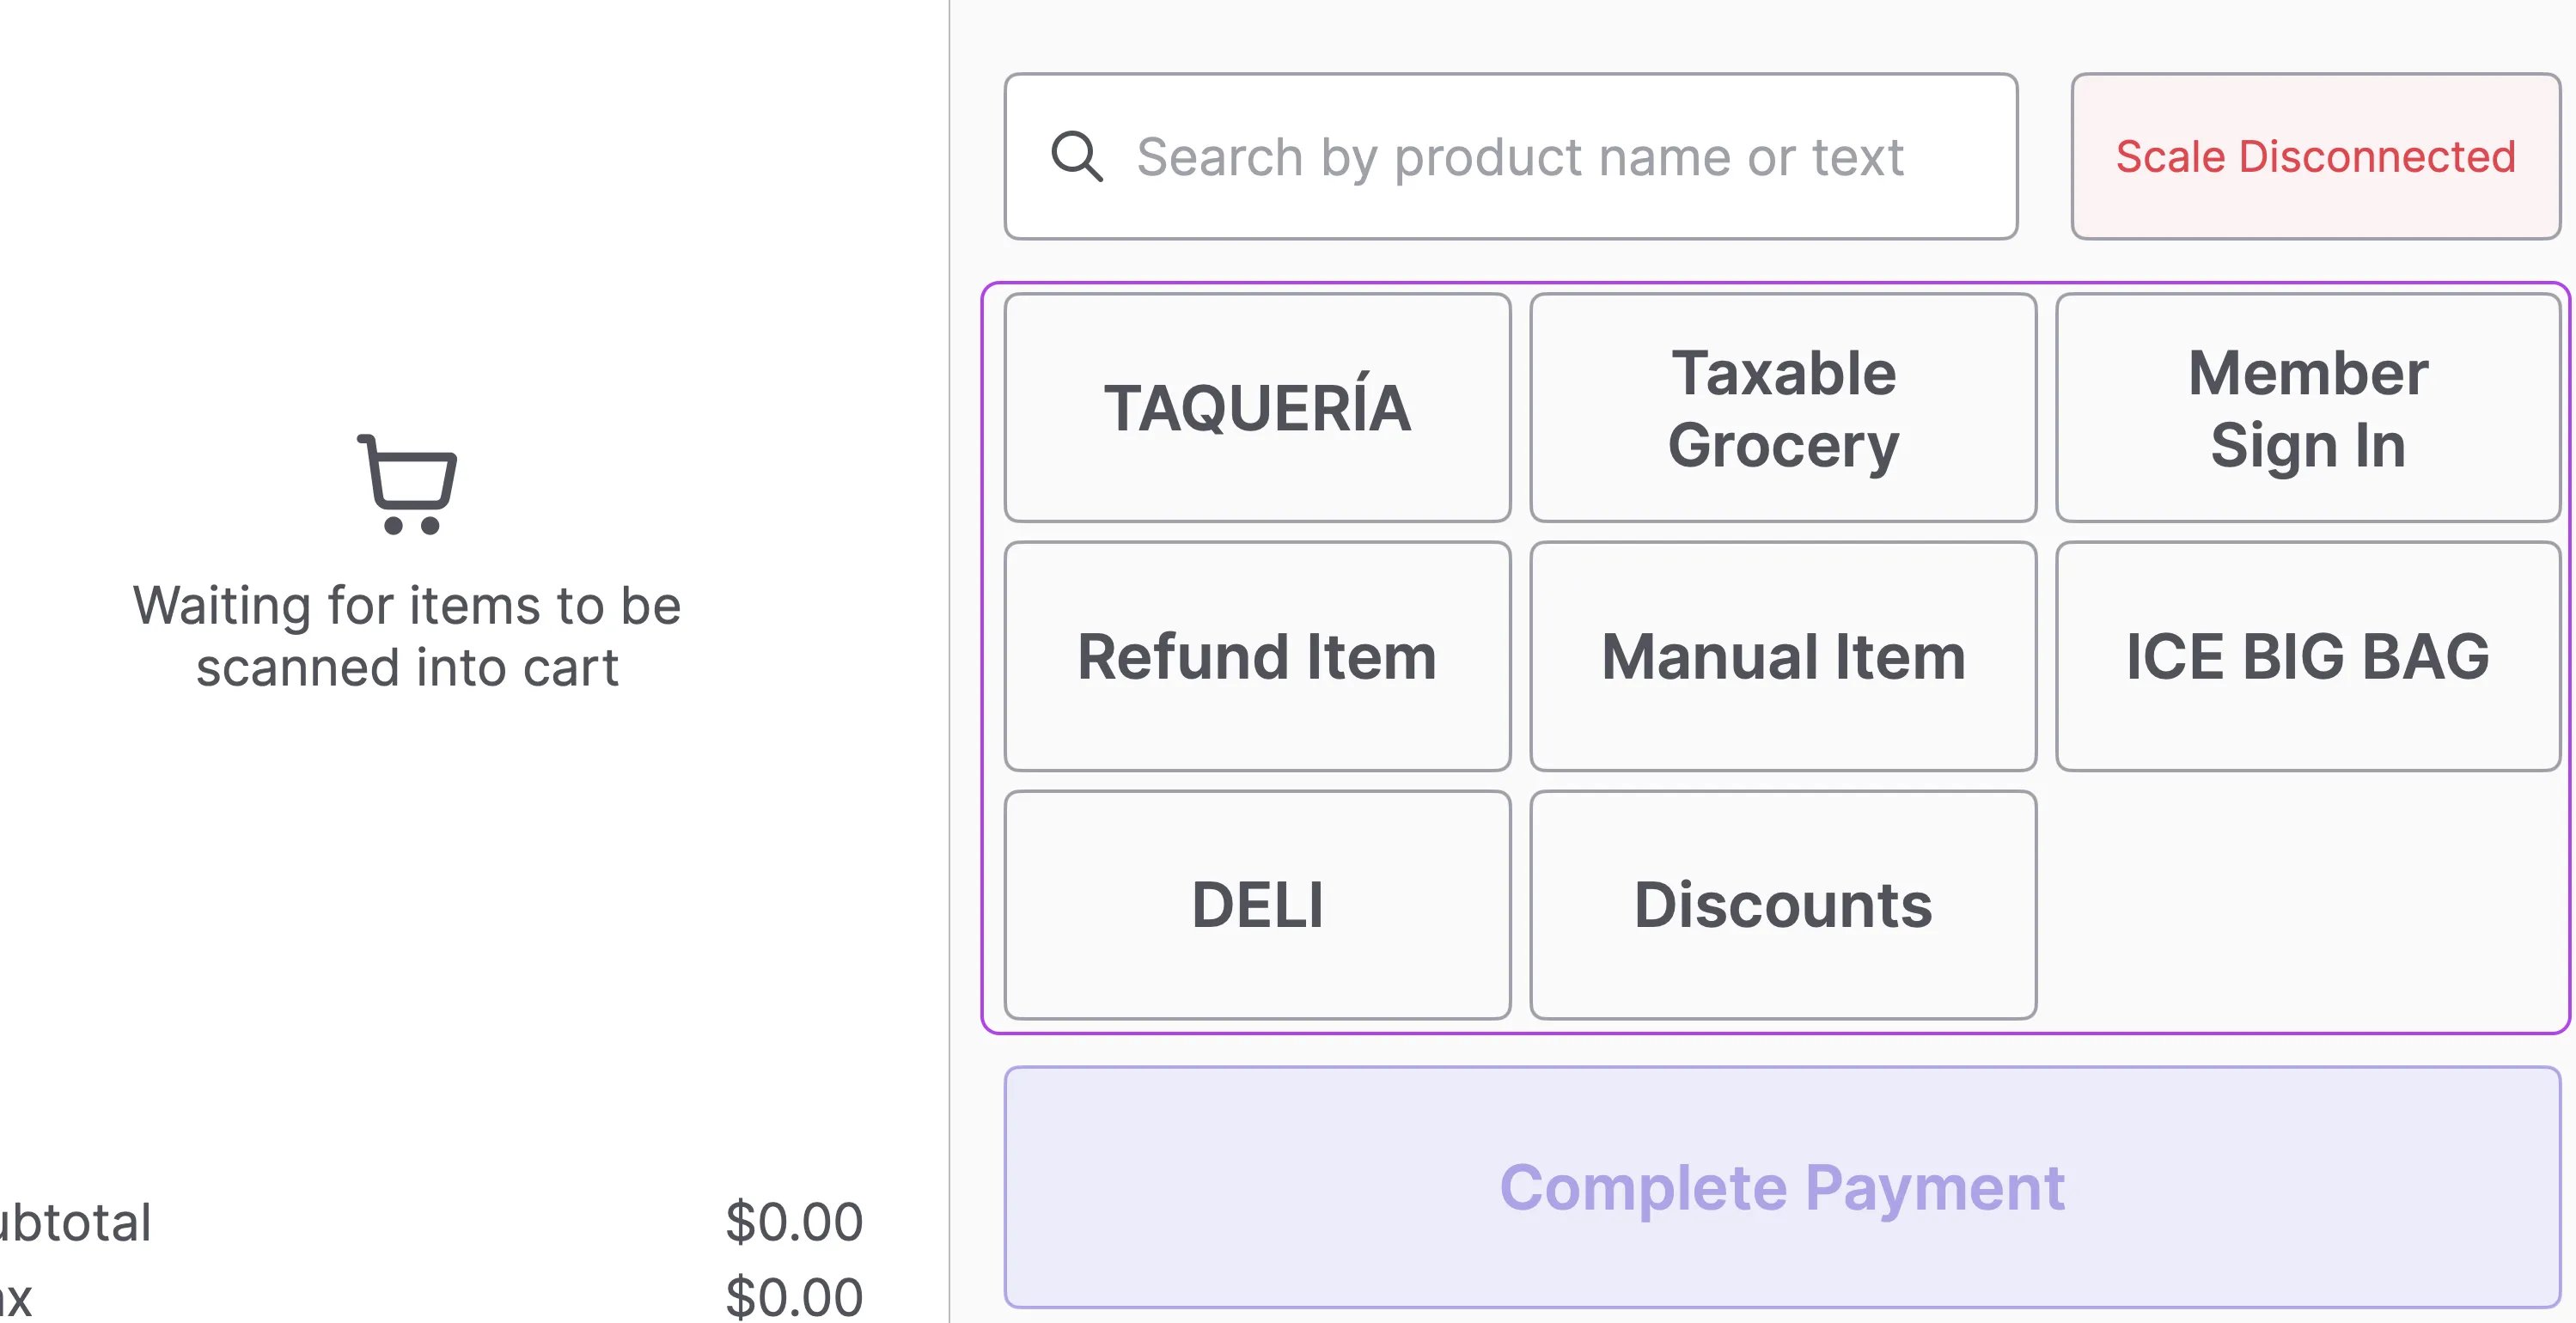
Quick Actions — also called Hot Keys — are the shortcut buttons on your POS home screen. From the Back Office, you can create individual actions, group them into a Lane Template, and assign that template to any lane in your store. This is also where you control the button order that cashiers see on the register screen.Documentation Index
Fetch the complete documentation index at: https://help.vori.com/llms.txt
Use this file to discover all available pages before exploring further.

Open POS Quick Actions
In the Back Office left navigation, expand Point of Sale and select POS Quick Actions. You’ll land on the Actions tab, which lists every action currently in your store. Use the Templates tab to manage saved layouts, and the Lanes tab to see what template is assigned where.Create a new action
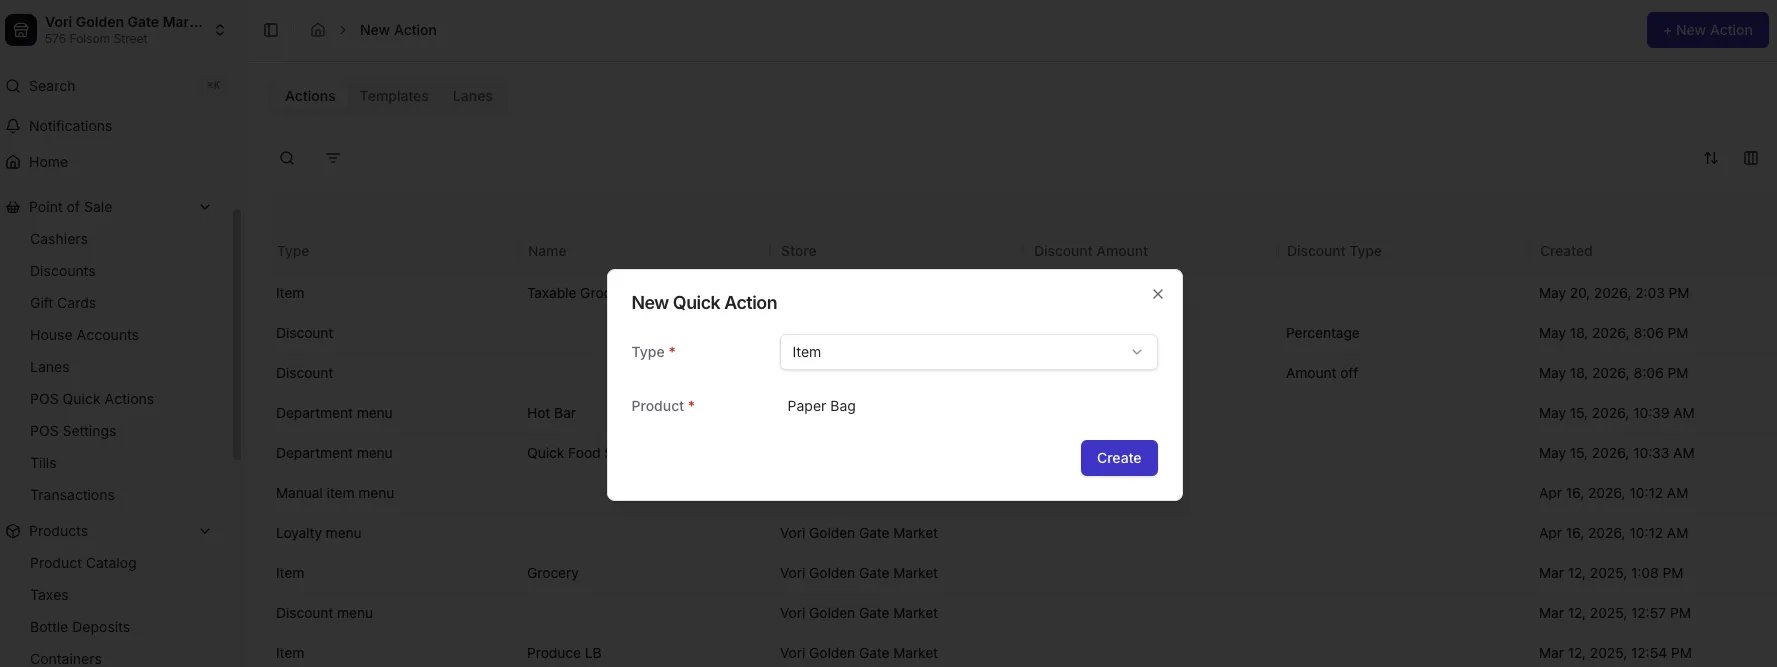
- Select + New Action.
- Open the Type dropdown and choose what this action should do. Options include:
| Type | Description | Example and use case |
|---|---|---|
| Item | Sell a specific product. | Ring up a high-volume item with one tap (e.g., Bag Fee, 24 PK Water). |
| Bottle deposit | Apply a bottle deposit to the current item. | Add a deposit on the fly when it isn’t configured on the item in Back Office (e.g., $0.05 CRV). |
| Refund item | Refund the current item. | Refund an item when the shopper doesn’t have a receipt (e.g., a damaged $5.99 bakery item). |
| Bottle refund | Process a bottle deposit return. | Process a bottle return with one tap (e.g., refund a $2.00 glass milk bottle deposit). See Issuing a bottle refund using the Quick Action button. |
| Discount | Apply a fixed discount. | Apply a preset discount without opening the discount menu (e.g., 10% First Responder Discount). |
| Discount menu | Open the discount picker. | Browse and apply any custom or manual discount from one menu (e.g., Senior 5%, Employee 10%). |
| Department menu | Open a department-specific menu. | Ring up items from a specific department, including its sub-departments (e.g., a Coffee Bar department with nested sub-departments). See Set up your Quick Food Service departments. |
| Loyalty menu | Open the loyalty flow. | Member sign-in. Sign in Loyalty members and view their rewards at the register. |
| Manual item menu | Open the manual item entry screen. | Ring up catch-all items that don’t have a barcode or can’t be scanned (e.g., Open Produce, Open Deli). |
| Variable weight menu | Open the weighed-item entry screen. | Give cashiers a fast way to select a tare weight for bulk items (e.g., a Tare (containers) menu). |
- Fill in any required fields for the type you selected. For an Item action, search for and select the product.
- Select Create.
Build a lane template
A Lane Template is a saved layout of Quick Actions you can apply to one or more lanes — for example, a Default grocery layout or a Coffee Bar layout.
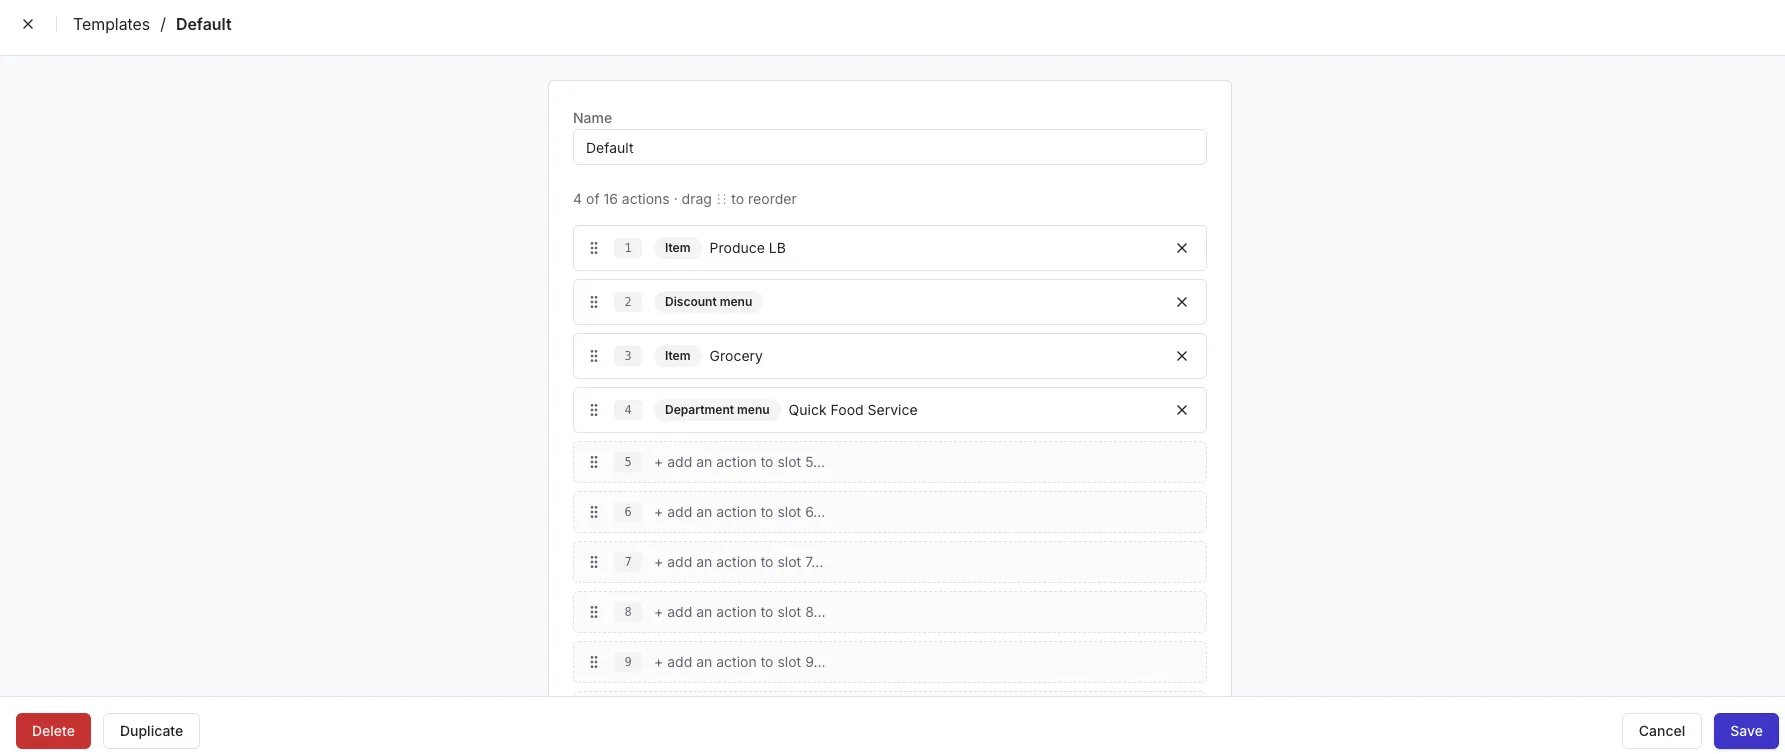
- Select the Templates tab, then + New Template.
- Enter a Template Name (for example, Default or Coffee Bar).
- Select the Quick Actions you want to include.
- Drag each button into the order you want it to appear at the POS.
- To remove a button, tap the X on it.
- Tap Save.
Assign a template to a lane
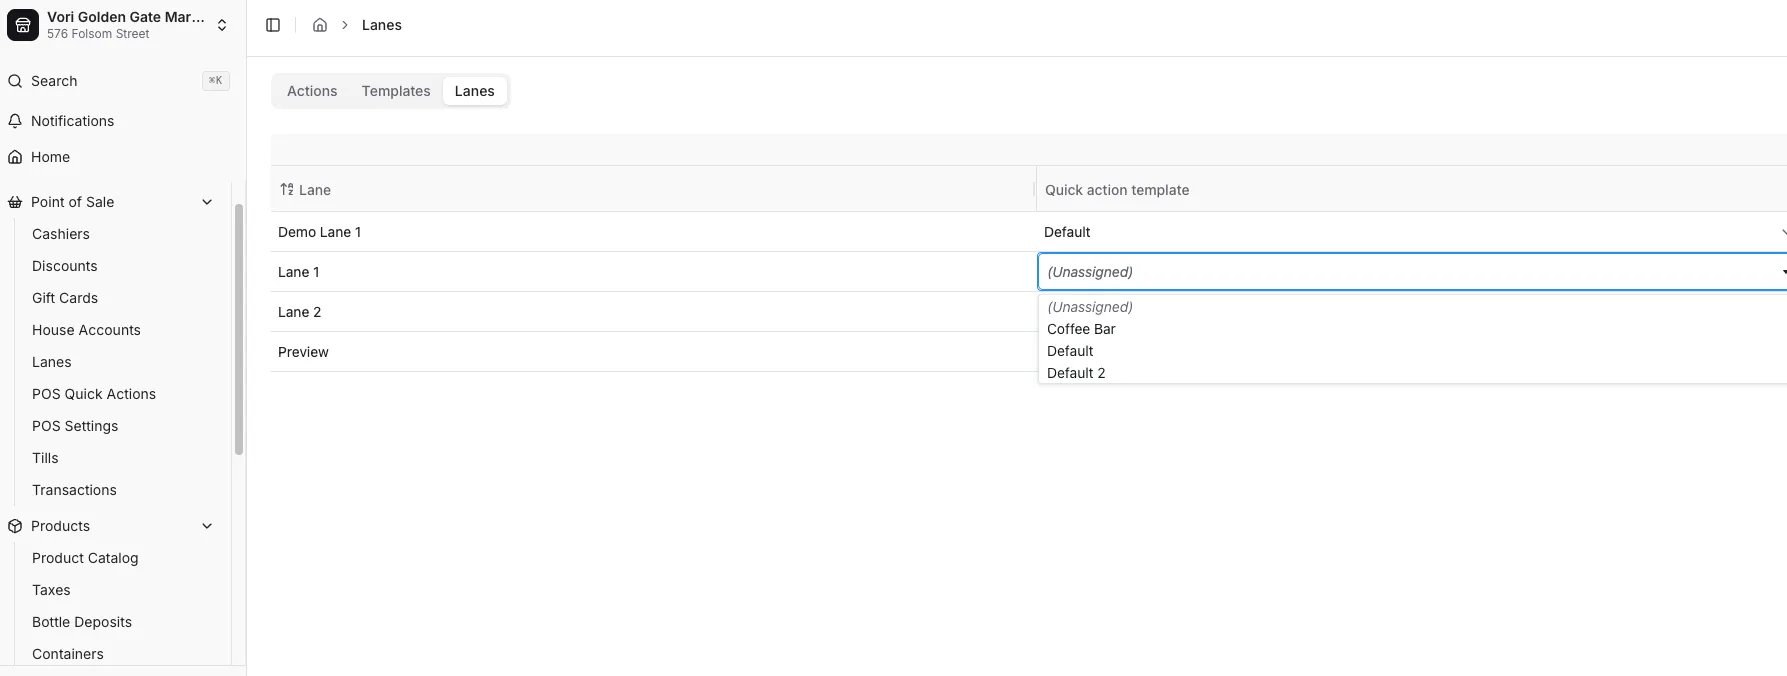
- Select the Lanes tab.
- Open the lane you want to update.
- Under Quick Action template, select the Lane Template you built in the previous tab.
- The lane auto-saves. A confirmation appears in the bottom-right corner.
Additional notes
- Each template can hold up to 16 Quick Actions.
- For new stores, you can assign a Lane Template up to 3 days before install.