Introduction
Discounts allow your team to offer special pricing at the POS. You can choose from a list of preset discounts or apply a manual discount for one-off use cases.Set up and manage your Discounts
You can create, edit, and assign Quick Action buttons directly from the Back Office — no need to contact Vori Support. See Create Quick Actions in Back Office for step-by-step instructions on building actions, creating lane templates, and assigning them to specific lanes.Viewing Your Discounts at the POS
To view all active discounts on the POS:- Tap the Discounts quick action button at the top of the screen.
-
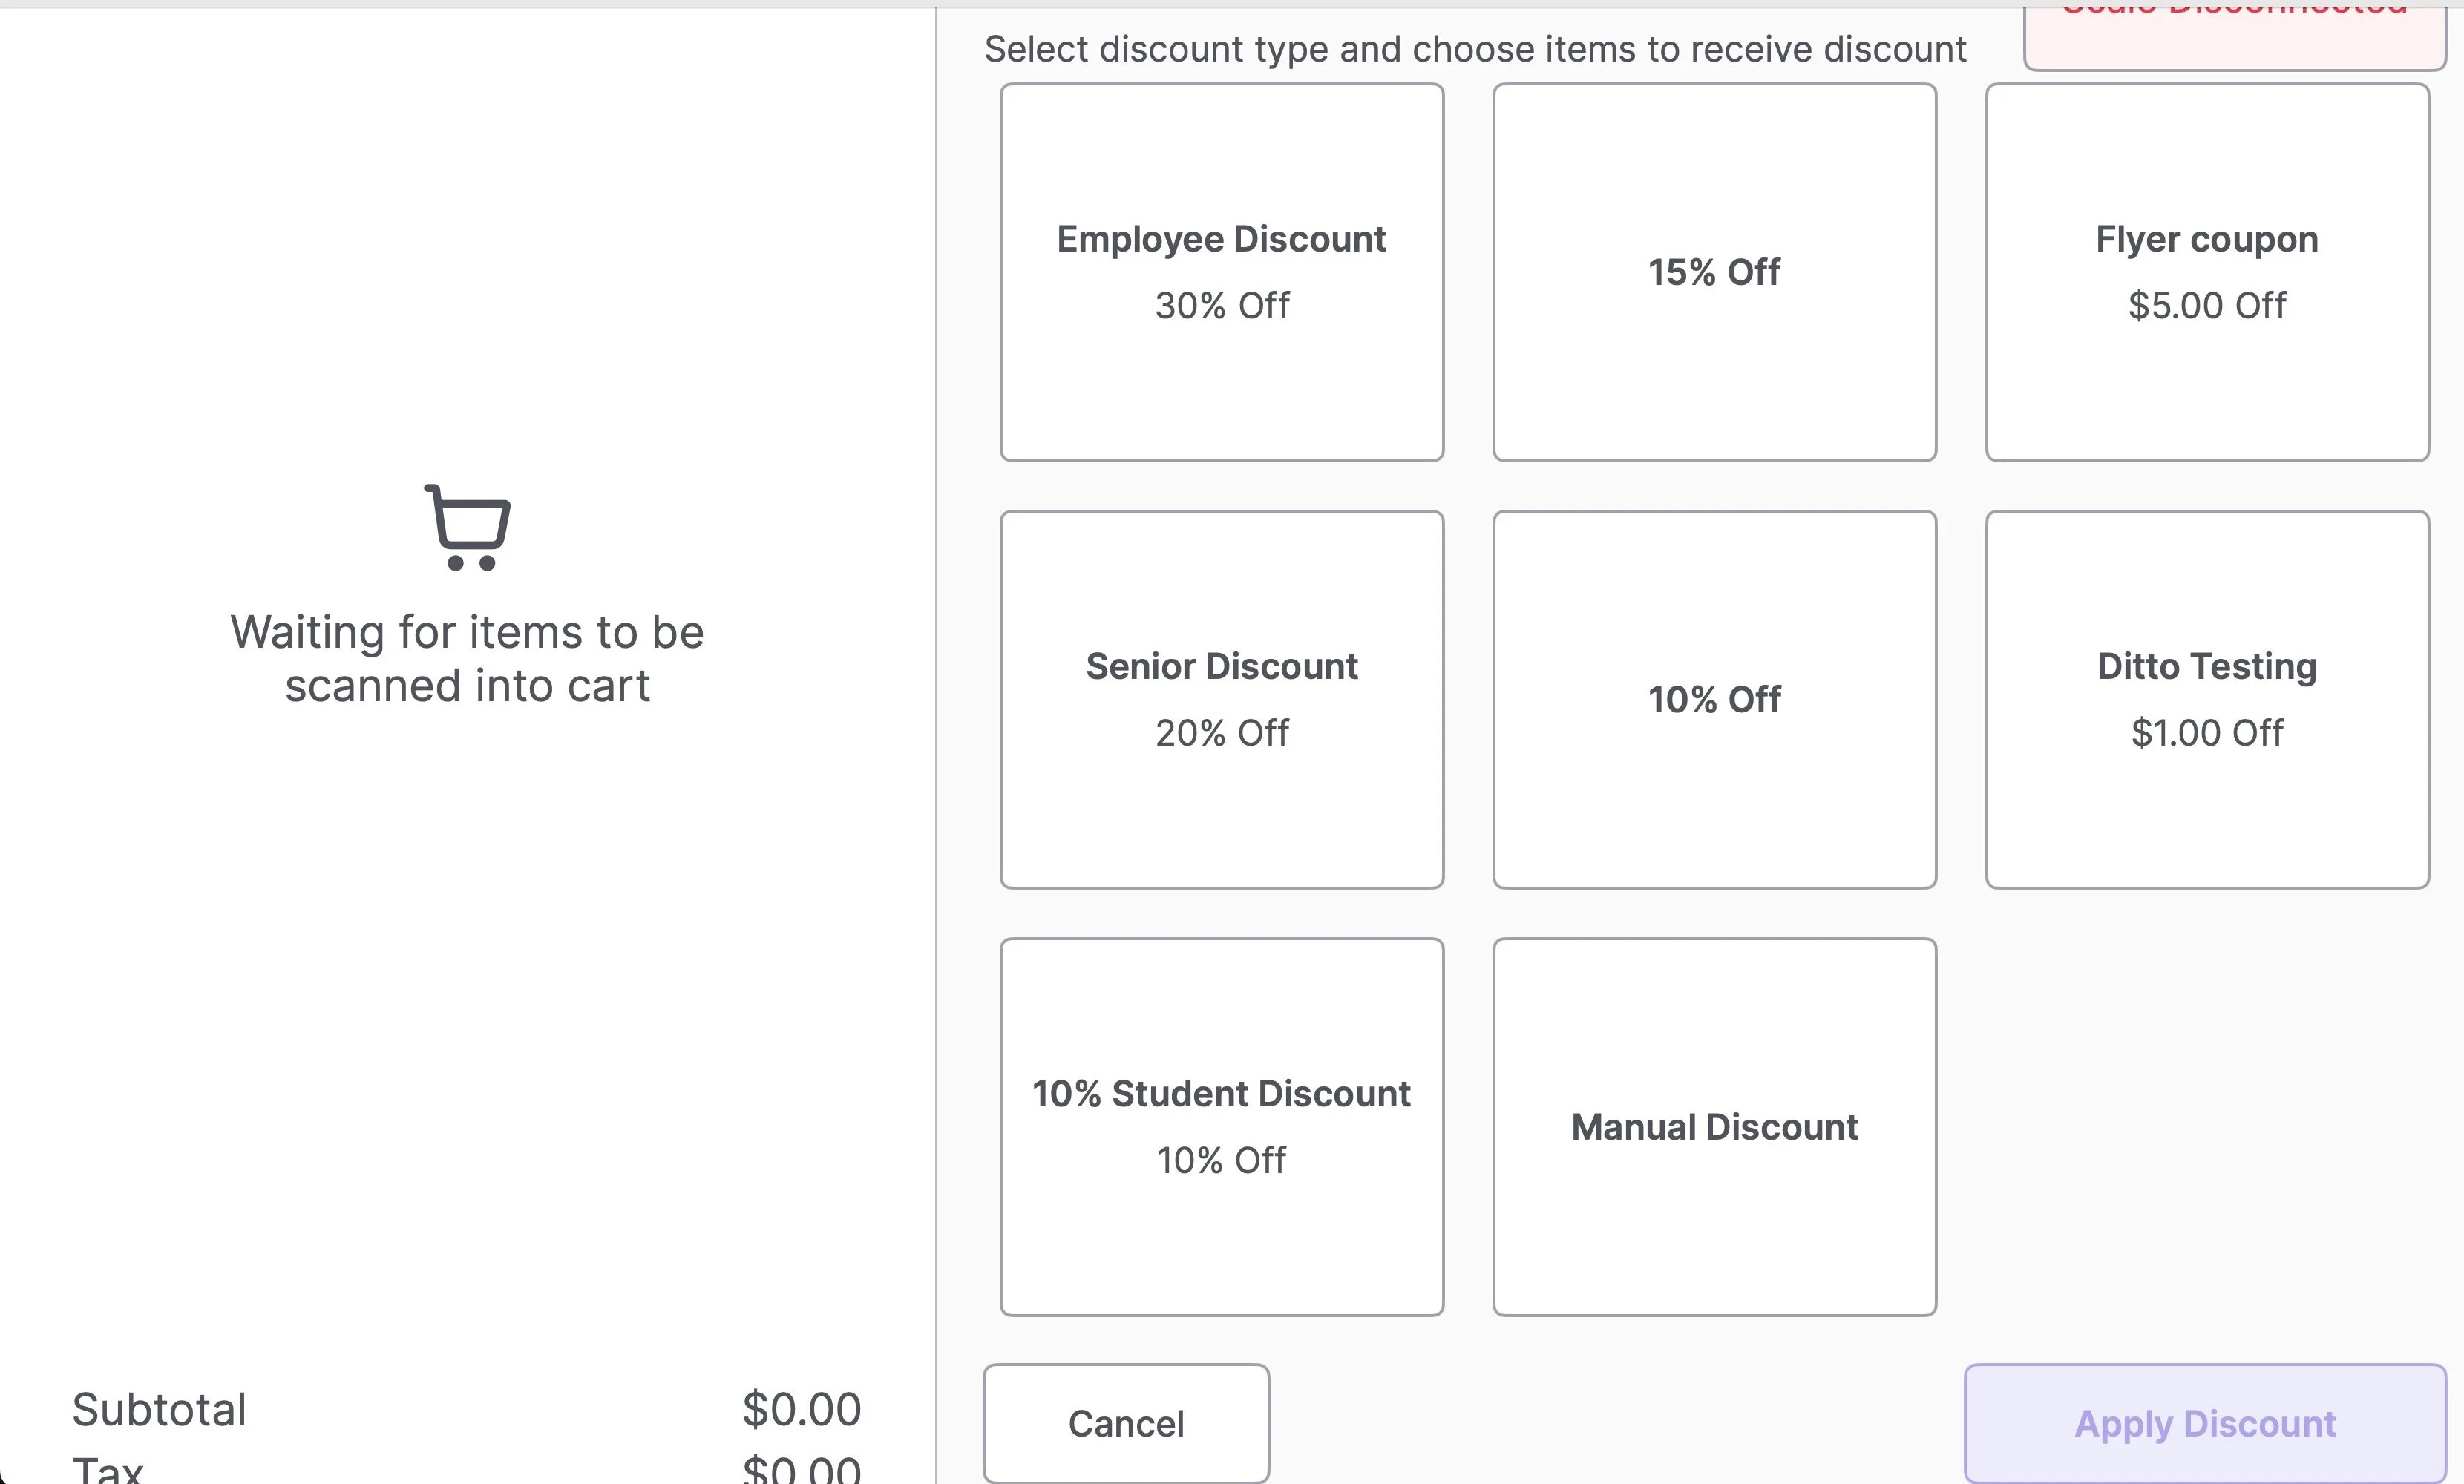
A list of available discount types will appear.
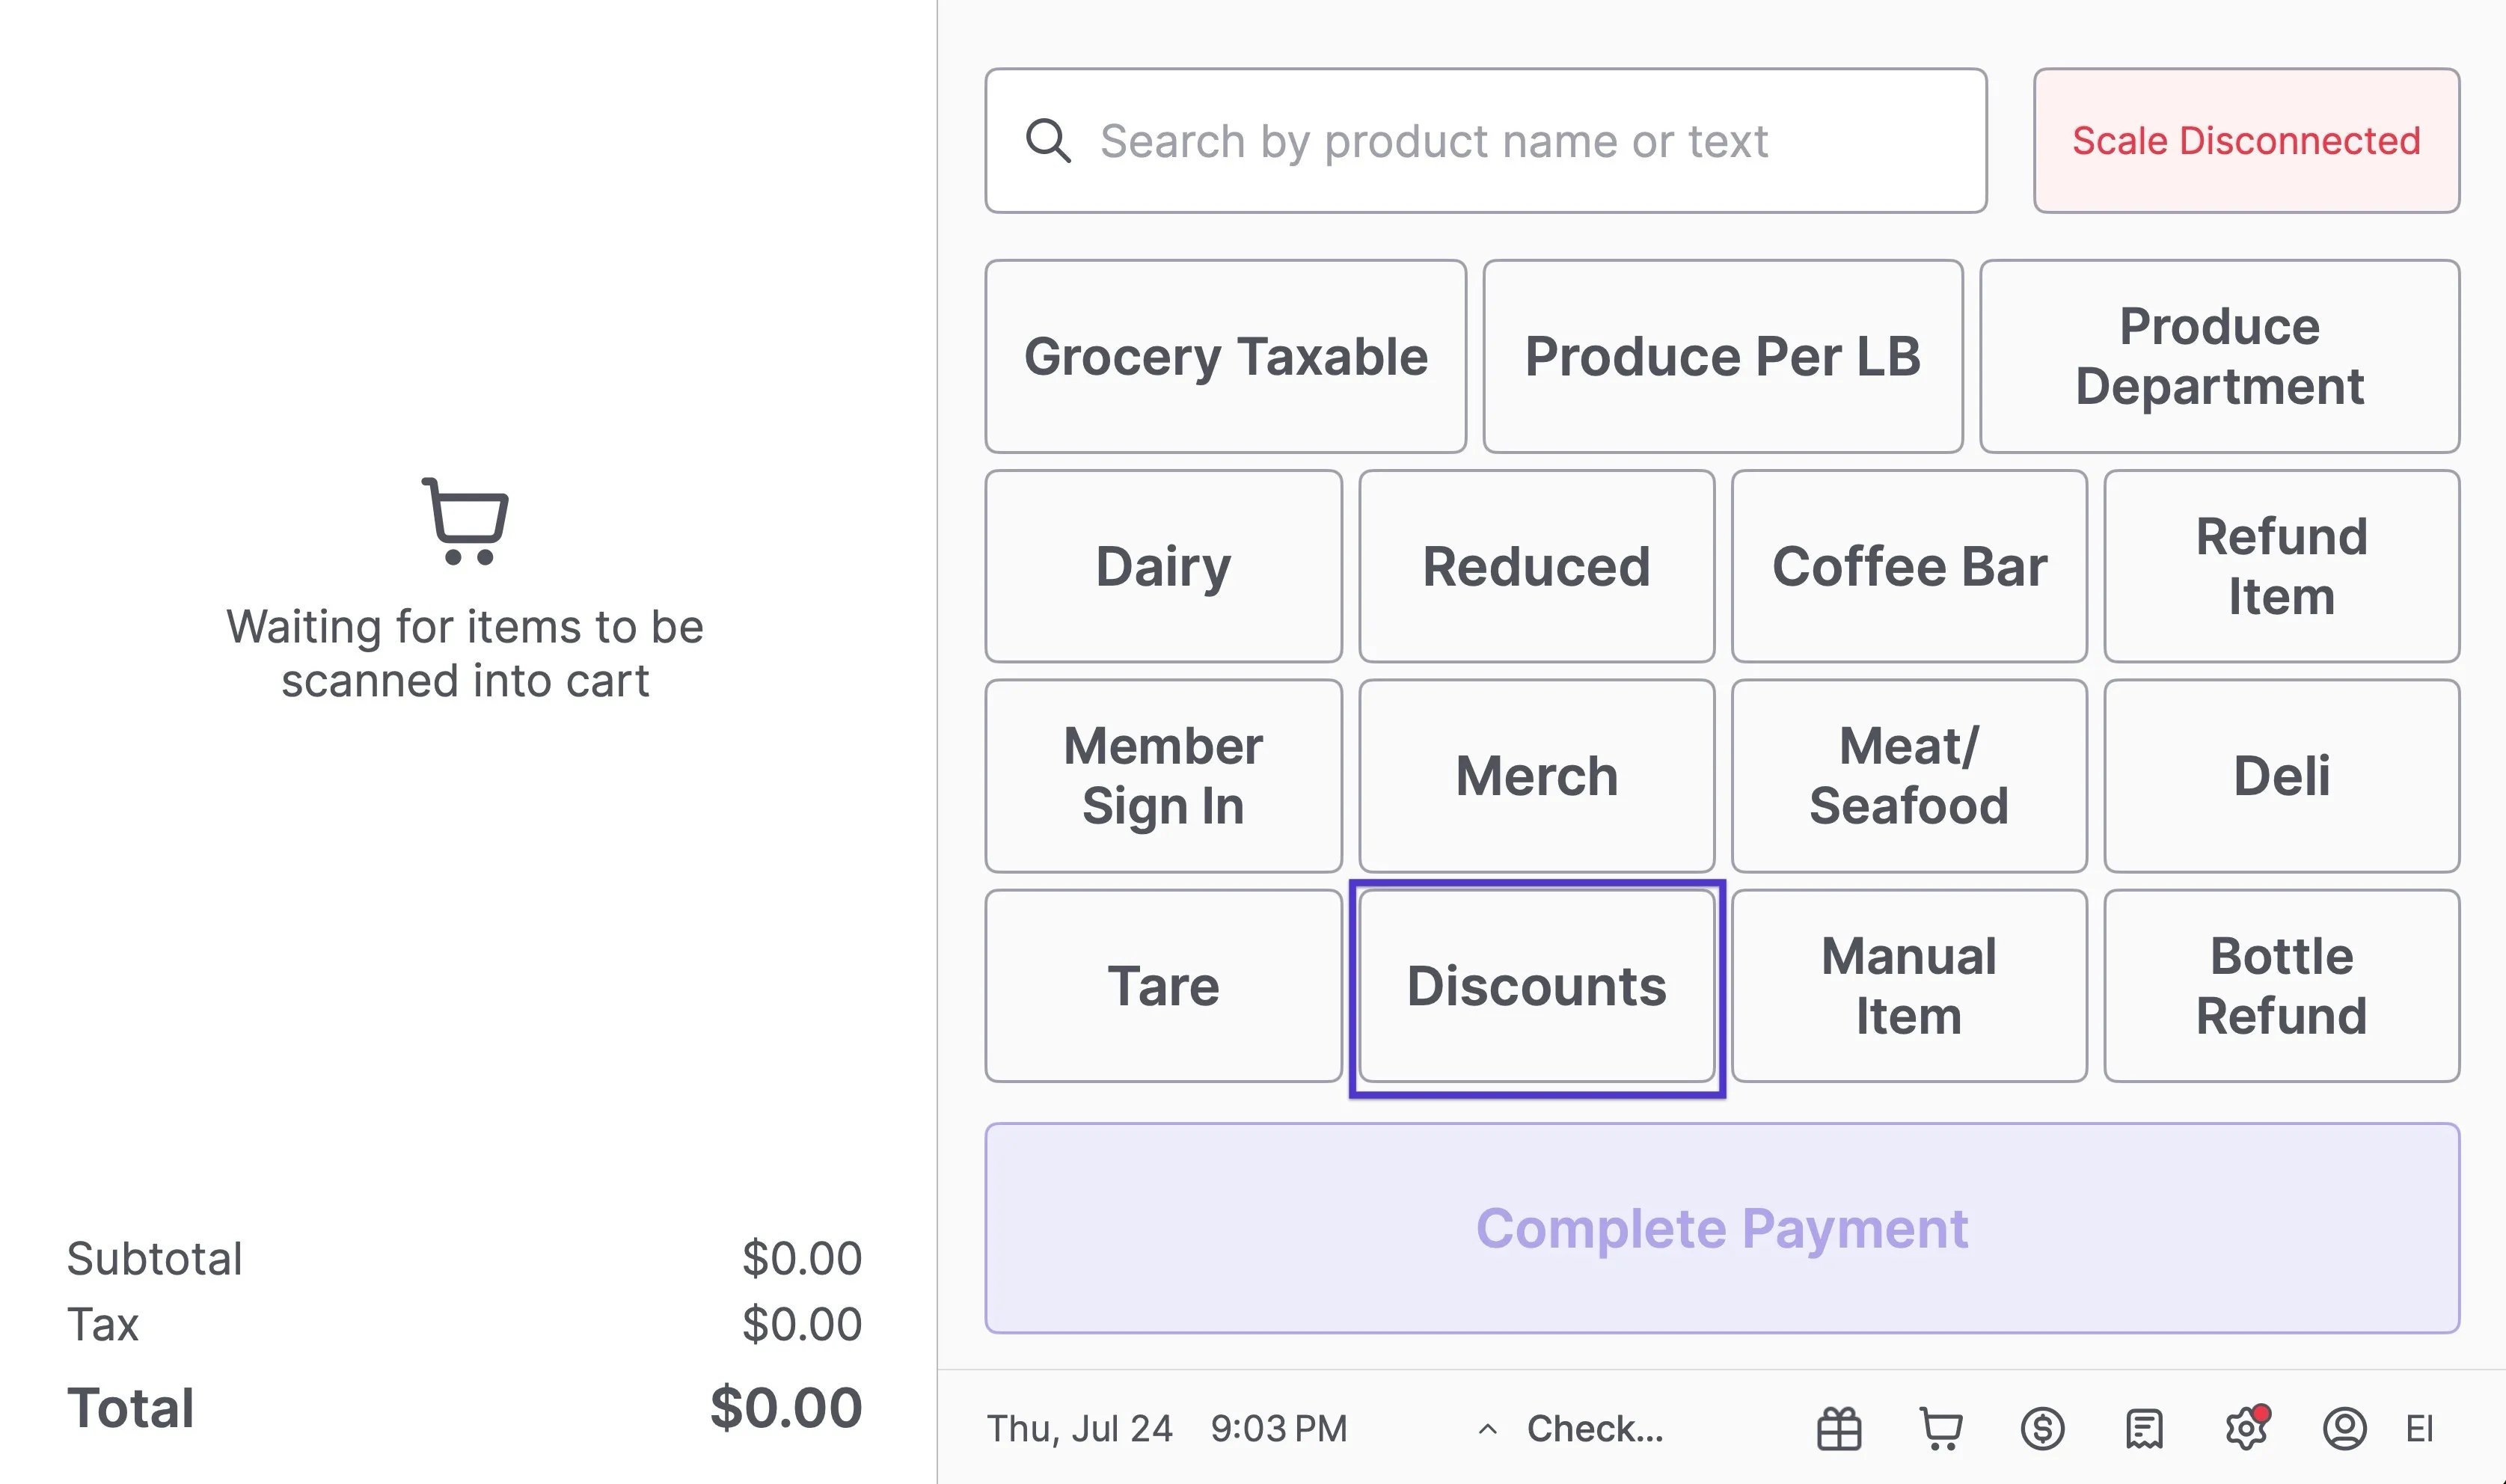
- Tap into any discount to apply it during checkout.
Apply a Custom Discount at the POS
To apply a preset discount to an item or cart:- Add items to the cart.
- Tap the Discounts button.
- Use the checkboxes to select one or more items to discount (or tap Select All to apply to the full cart).
- Tap the desired preset discount.
- Tap Apply Discount.
- Confirm the discount has been applied to each selected item.
Apply a Manual Discount at the POS
To apply a custom discount amount:- Add items to the cart.
- Tap the Discounts button.
- Use the checkboxes to select the item(s).
- Tap Manual Discount.
- Choose between a percentage or an amount off.
- Tap Apply Discount.
- Confirm the discount appears on each selected item.
Discount restrictions at the POS
Some items can be set up so they cannot be discounted at the register. These restrictions are configured per product in the Back Office under Set Attributes > Discount Restrictions. See Product Catalog & Product Details in the New Back Office for how to set them. There are three restriction types, and each changes what your cashiers can do at the POS:- Restrict Discounts on Promotions: If the item is already on promotion, the POS will not let your cashier add another discount on top of it.
- Restrict POS Discounts: The item cannot be discounted at all. Discounts are unavailable for it at the register.
- Restrict Multiple POS Discounts: The item can take one discount, but the POS will block a second one (for example, an Employee discount on top of a Reduced discount).

Remove a Discount from an Item
To remove a discount from a single item:- Double-tap the item in the cart.
- Tap More.
- Deselect the applied discount by unchecking the box.
- Tap Apply Changes.
- Confirm that the item is no longer discounted.