In New Back Office
Activate or Deactivate a Single Product
- Go to Products > Product Catalog.
- Find the product you want to update and select Open to bring up the product detail page.
-
On the Product Information tab, select the Status field.
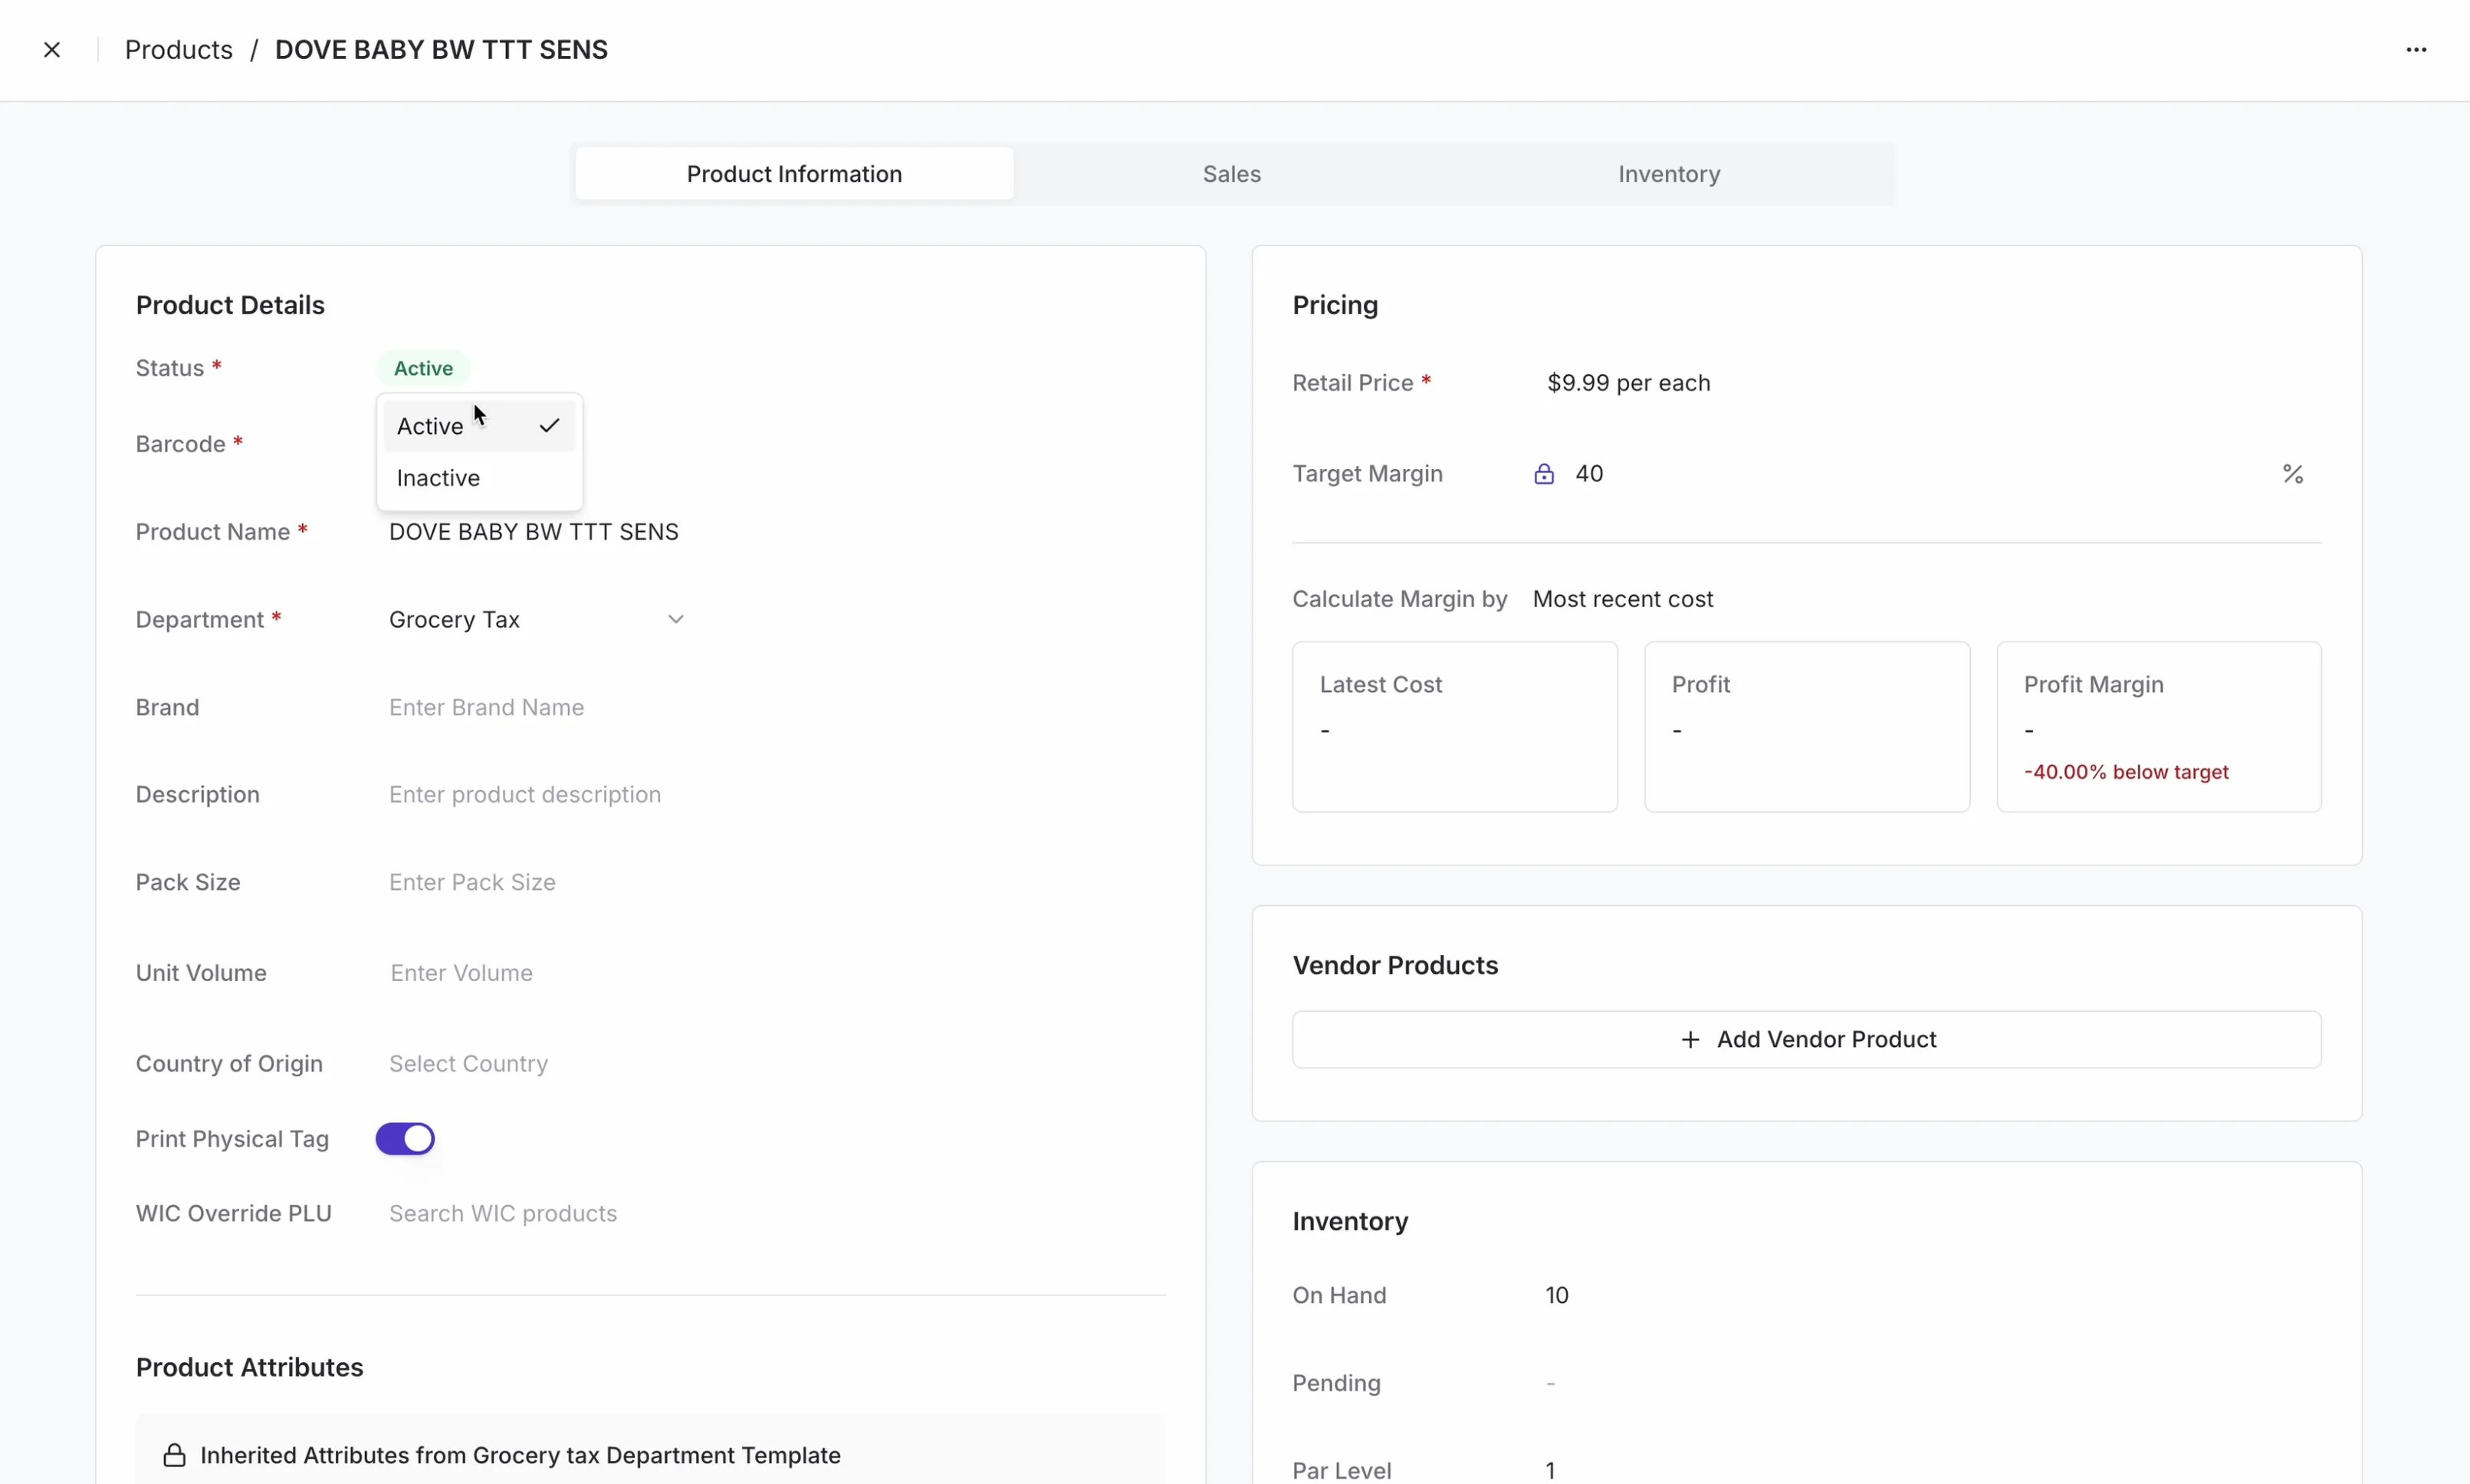
- Choose Active or Inactive from the dropdown.

Activate or Deactivate Products in Bulk
- Go to Products > Product Catalog.
- Select products using the checkboxes to the left of each row. To select everything visible, check the box in the column header.
- In the action bar at the bottom of the screen, select More.
-
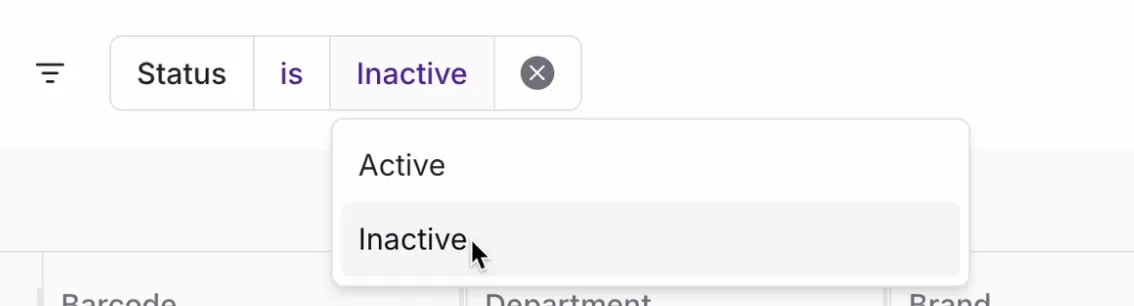
In the Change Status modal, find the Status field.
Screenshot 2026-04-01 at 3.58.38 PM
-
Choose Active or Inactive.

- Select Save.
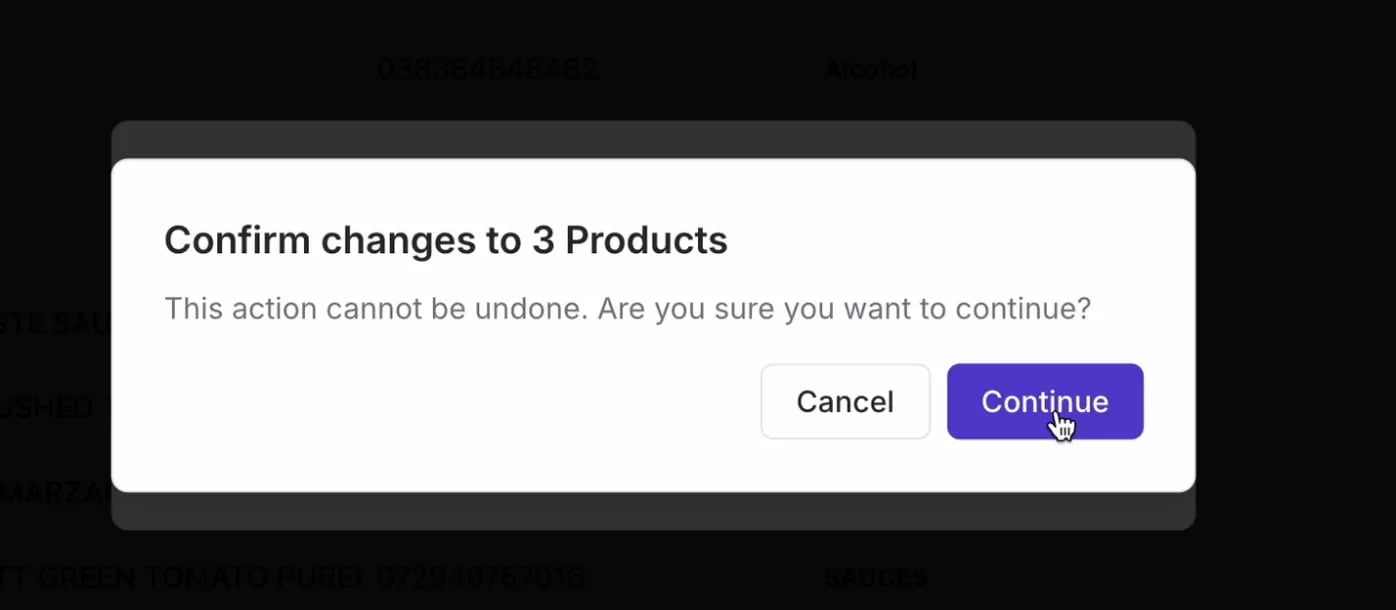
-
In the confirmation dialog, select Continue.
On Vori operating system
Activate a Product
- Log in to the Vori operating system app.
- Search for the product by name or barcode, or scan it directly.
- Select Edit Product Details.
-
Tap the ··· menu and select Activate Product.
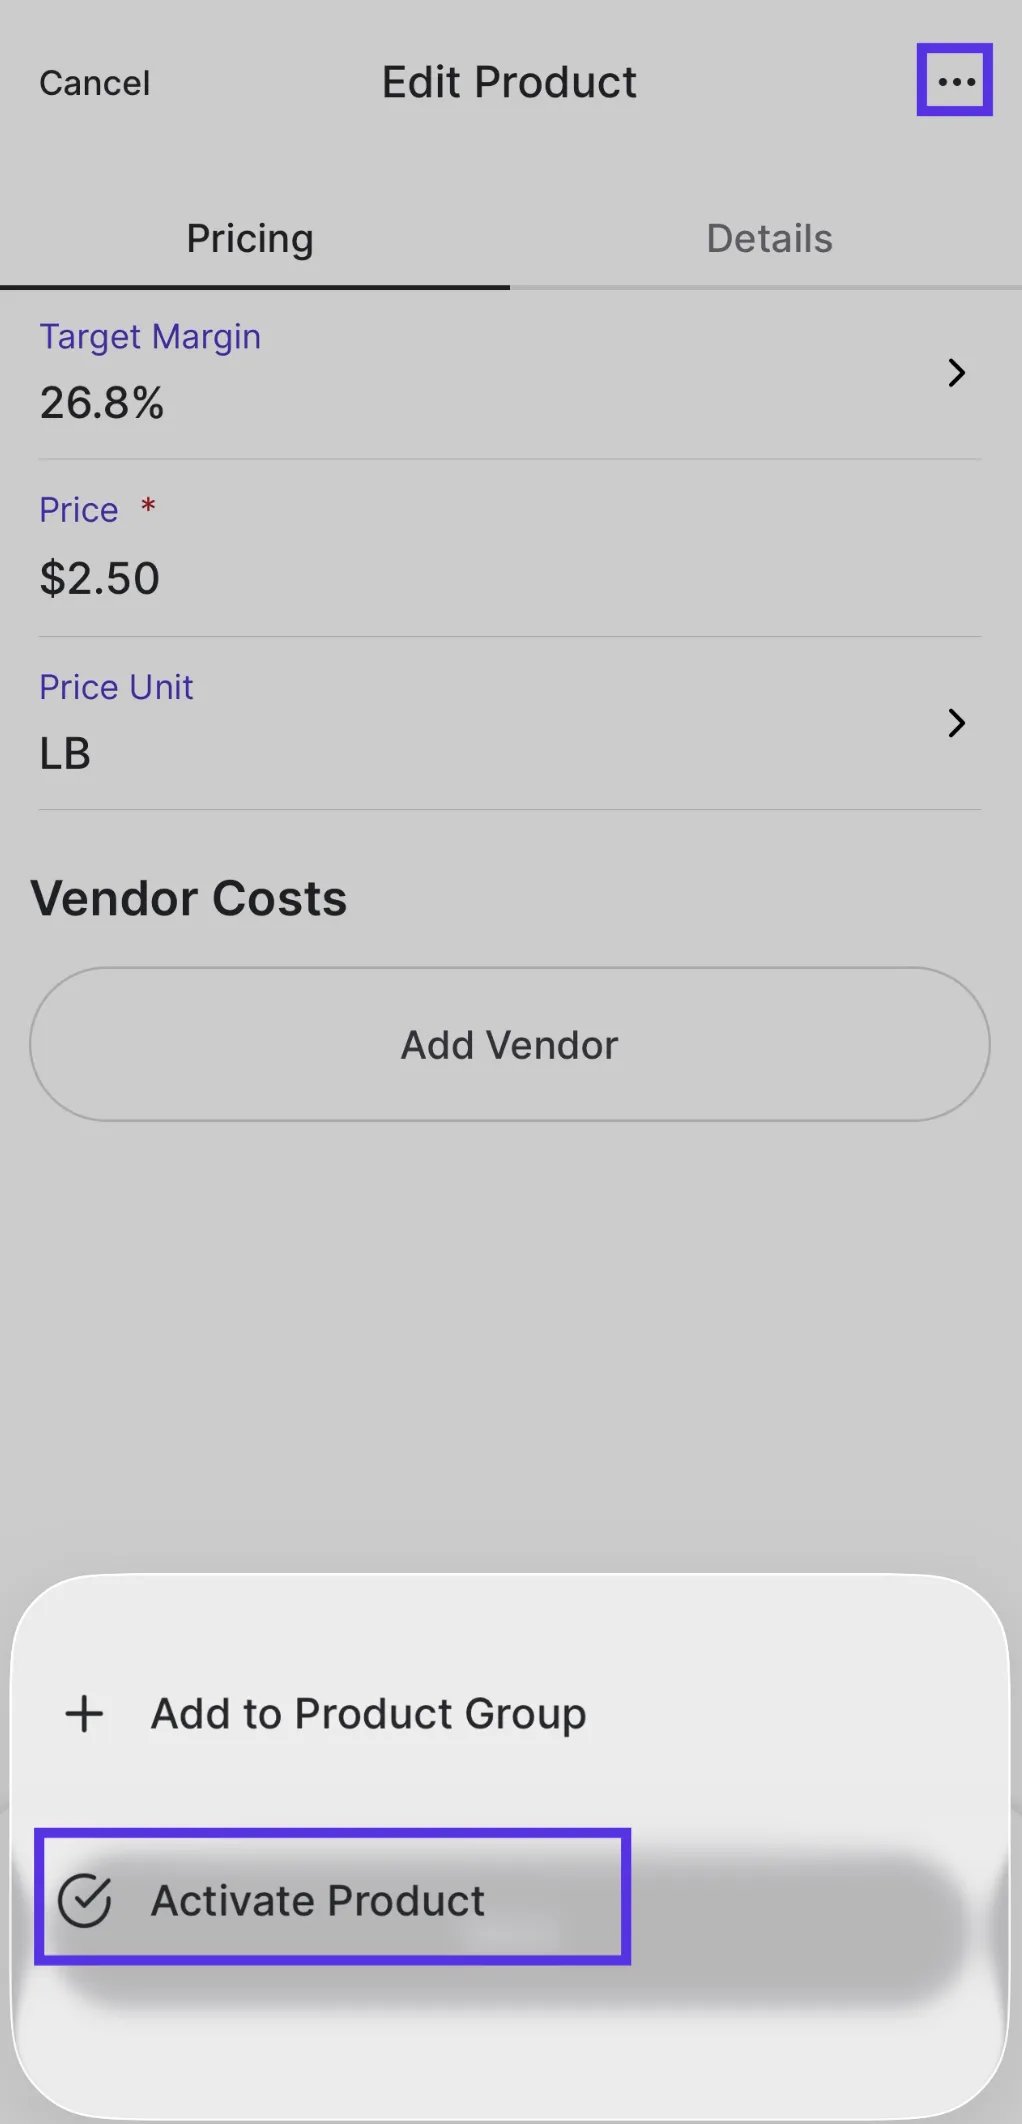
- On the confirmation screen, tap Activate Product to confirm — or Return to Editing to go back without changes.
Deactivate a Product
- Log in to the Vori operating system app.
- Search for the product by name or barcode, or scan it directly.
- Select Edit Product Details.
-
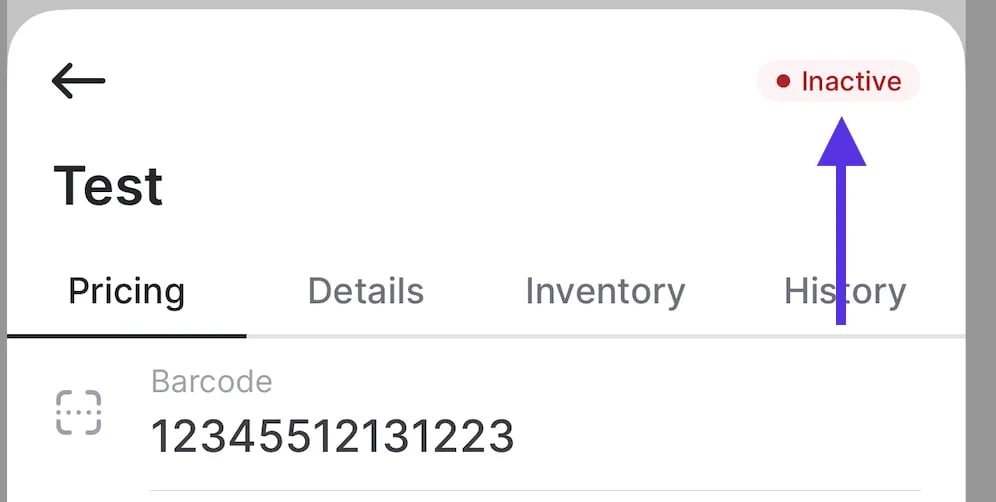
Tap the ··· menu and select Deactivate Product.
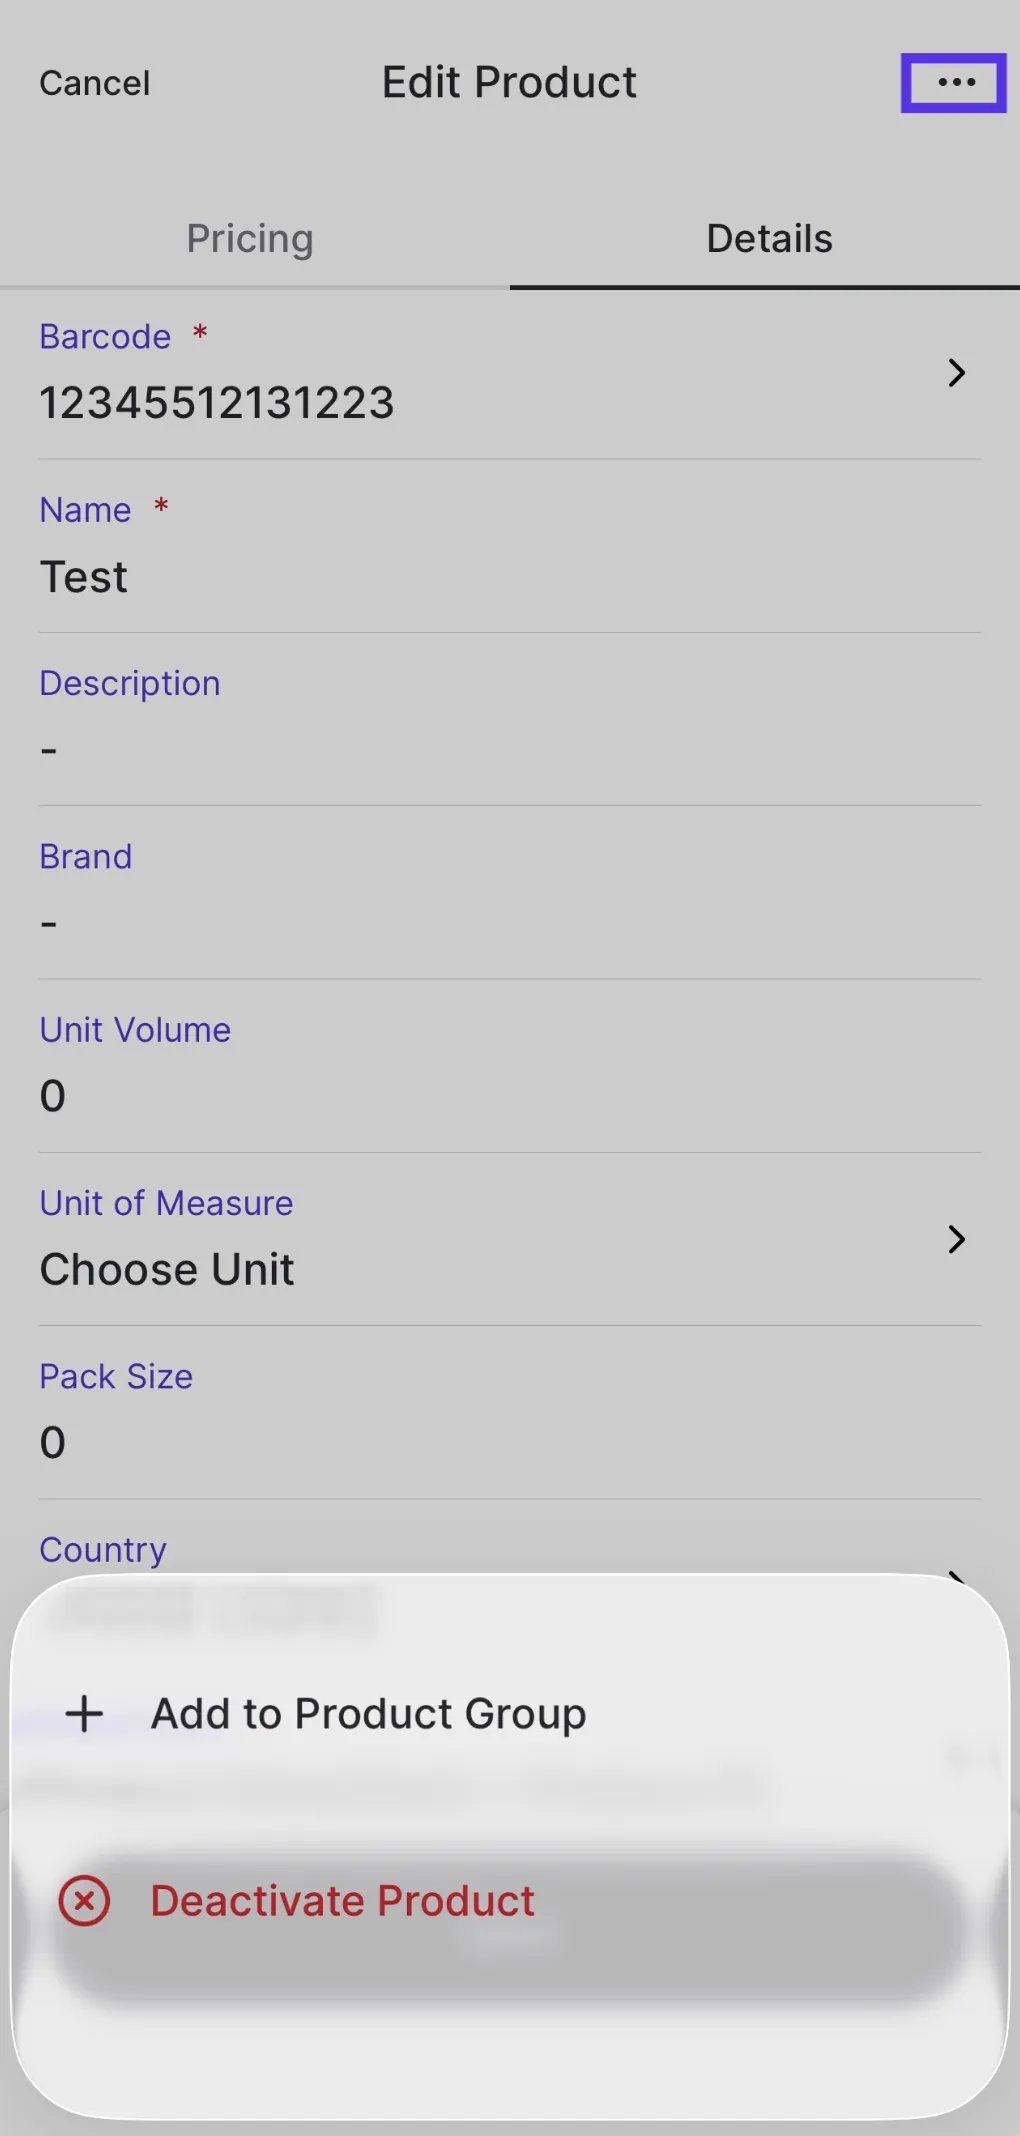
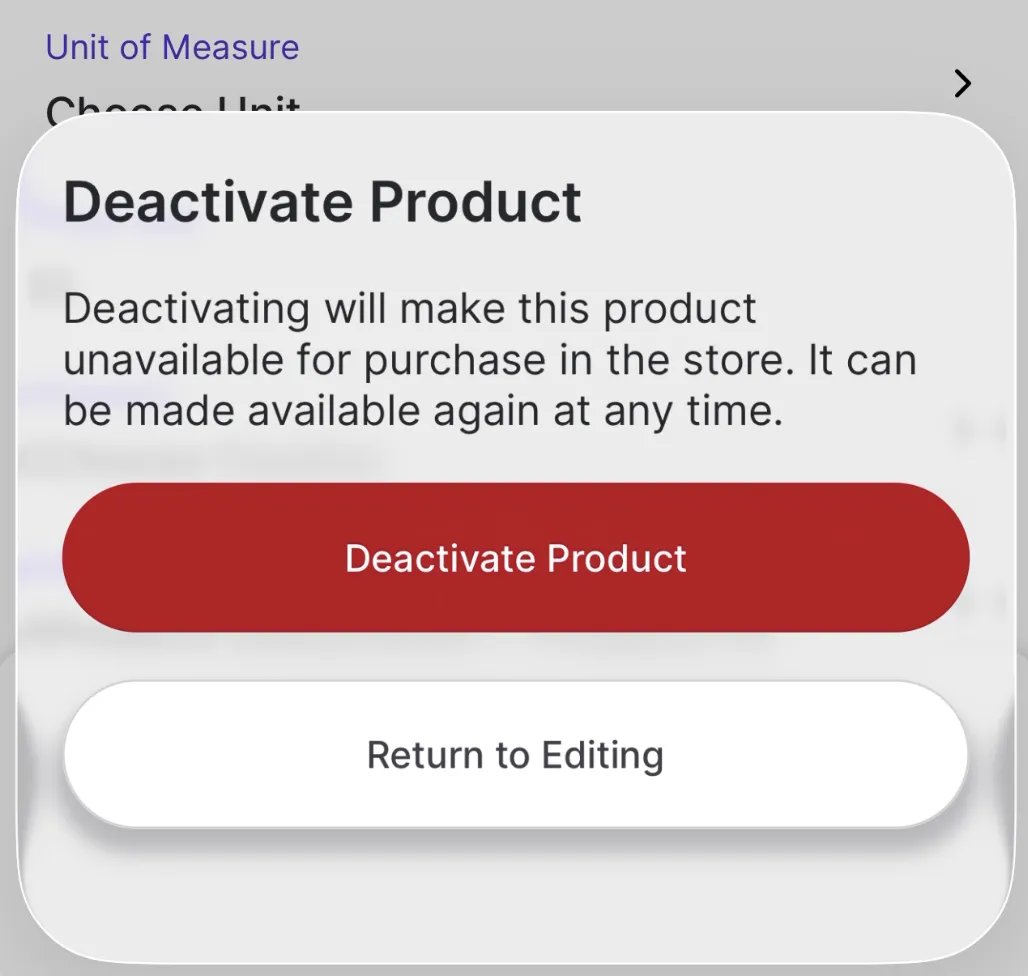
-
On the confirmation screen, tap Deactivate Product to confirm — or Return to Editing to go back without changes.