

Follow these steps to resolve connection issues between your payment terminal and the Point of Sale (POS).
Connection issues can be a real headache, especially when you’re trying to keep the line moving. Let’s get your payment terminal talking to your POS again with some quick troubleshooting.Which device am I looking at?
POS Cashier Screen: The large monitor facing the employee. It shows the cart or basket and hot key quick action buttons used to ring up items.
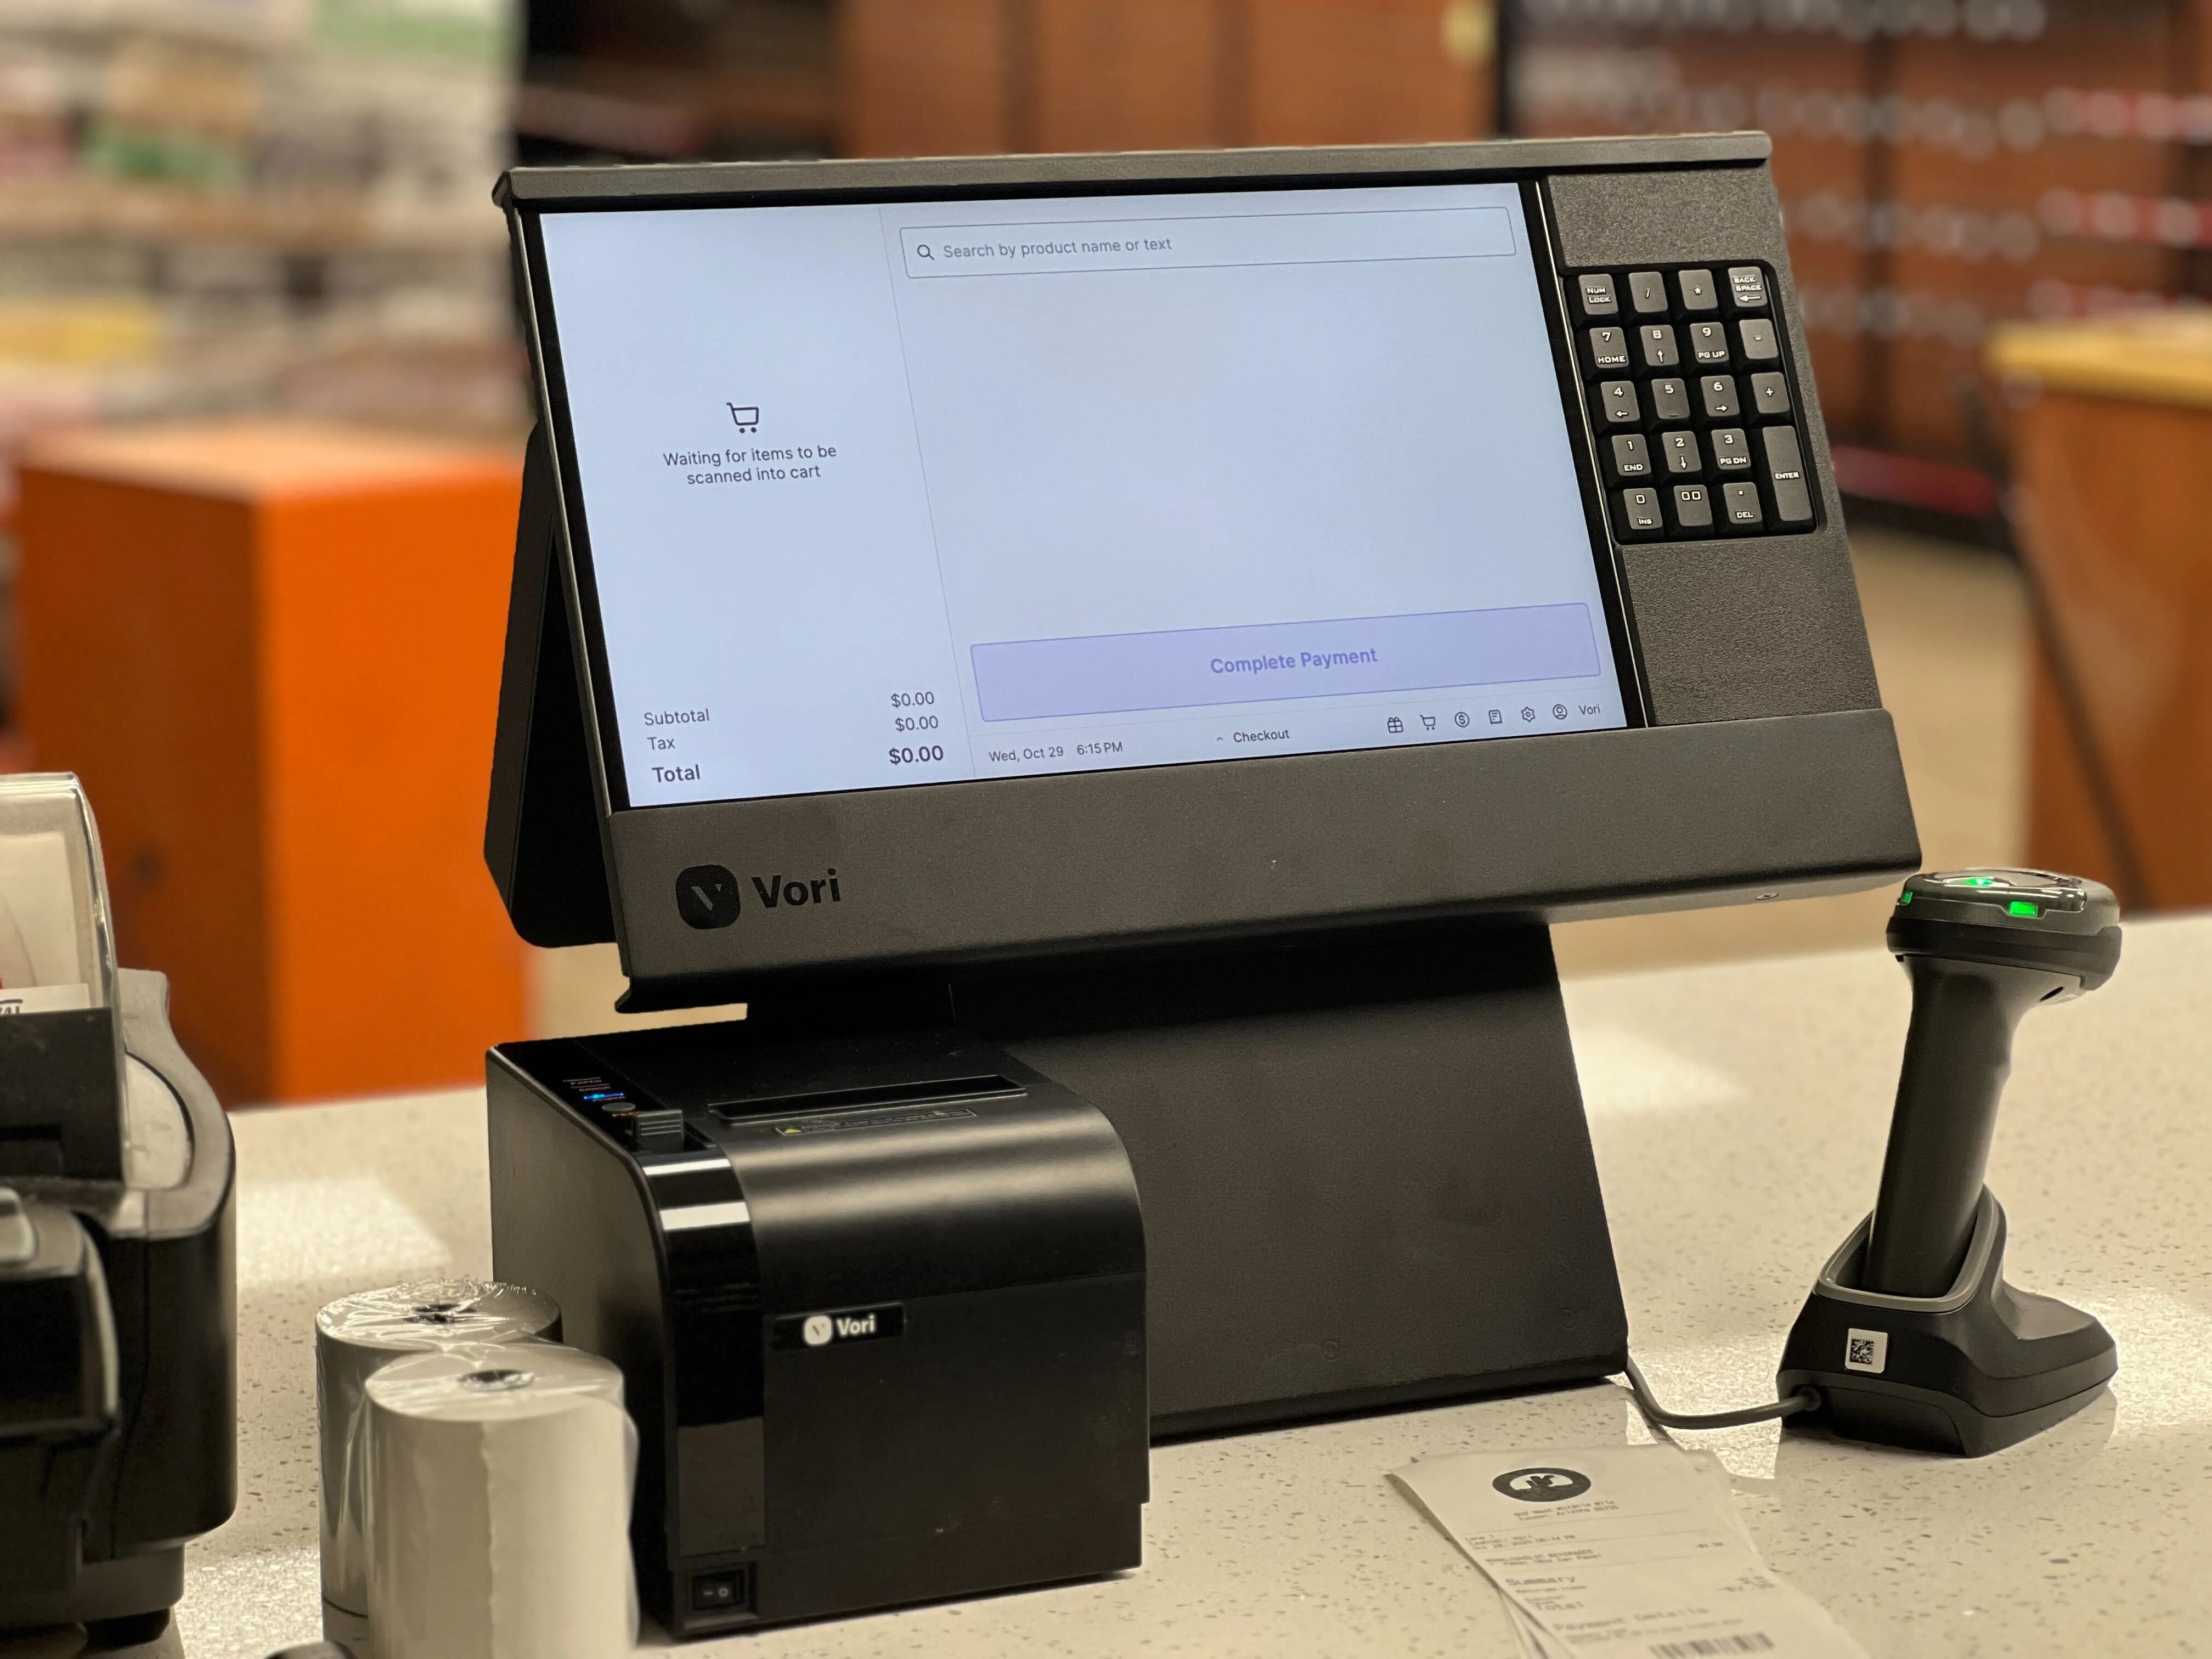 Payment Terminal: The small vertical device with the physical number keypad and credit card slot.


Check POS Network Status
- Select the gear icon in the bottom right corner of the POS Cashier Screen.
-
Locate the Payment Terminal on the list of connections. Check the connection status:
- 🟢 If Payment Terminal shows as green, try processing the card payment again.
- If you’re still unable to process a payment, please note the error message being displayed on the cashier screen and contact Vori Support.
- 🔴 If Payment Terminal is red, proceed to the the next step.
- 🟢 If Payment Terminal shows as green, try processing the card payment again.
- Locate Internet on the list of connections. Check the connection status:
-
- 🟢 If Internet shows as green, click here for directions.
- 🔴 🌕If Internet is red or yellow, click here for directions.
Proceed with the directions below if the payment terminal has a red status but store internet is green.
Restart the POS App
- Select the gear icon in the bottom right corner of the POS Cashier Screen.
- Select Restart App in the System Status window.
- Log back into the POS app and confirm the payment terminal’s connection.
Reboot the Payment Terminal
-
Press and hold the red and green buttons on the payment terminal’s physical keyboard until a Reboot prompt appears.
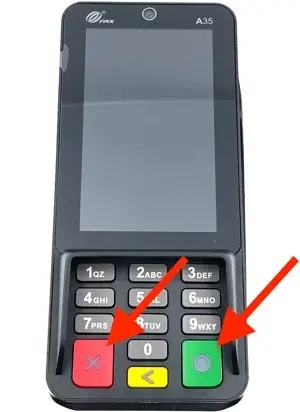
- Tap the Reboot prompt on the screen.
- Tap OK on the final confirmation prompt.
- If the terminal is unresponsive and the Reboot prompt doesn’t appear, unplug the power cable from the back of the device. Wait 10 seconds, then plug it back in.
- Once the terminal reloads the Welcome screen, restart the POS app again.
Power Cycle the POS Lane
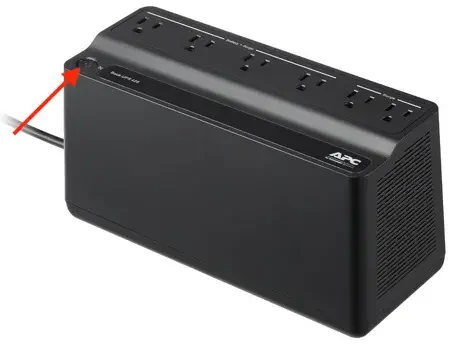
- Locate the lane’s Uninterruptible Power Supply (UPS) under the POS counter. All of the lane’s power cables run to this device.
- Press and hold the UPS power button for 5 seconds to turn it off.
- Wait 10 seconds for all peripherals to fully power off.
-
Press and hold the UPS power button again to power the system back on.
- Enter the admin password on the cashier screen: 654321
- Log back into the POS app.
Check the payment terminal’s IP address from the DC Direct app
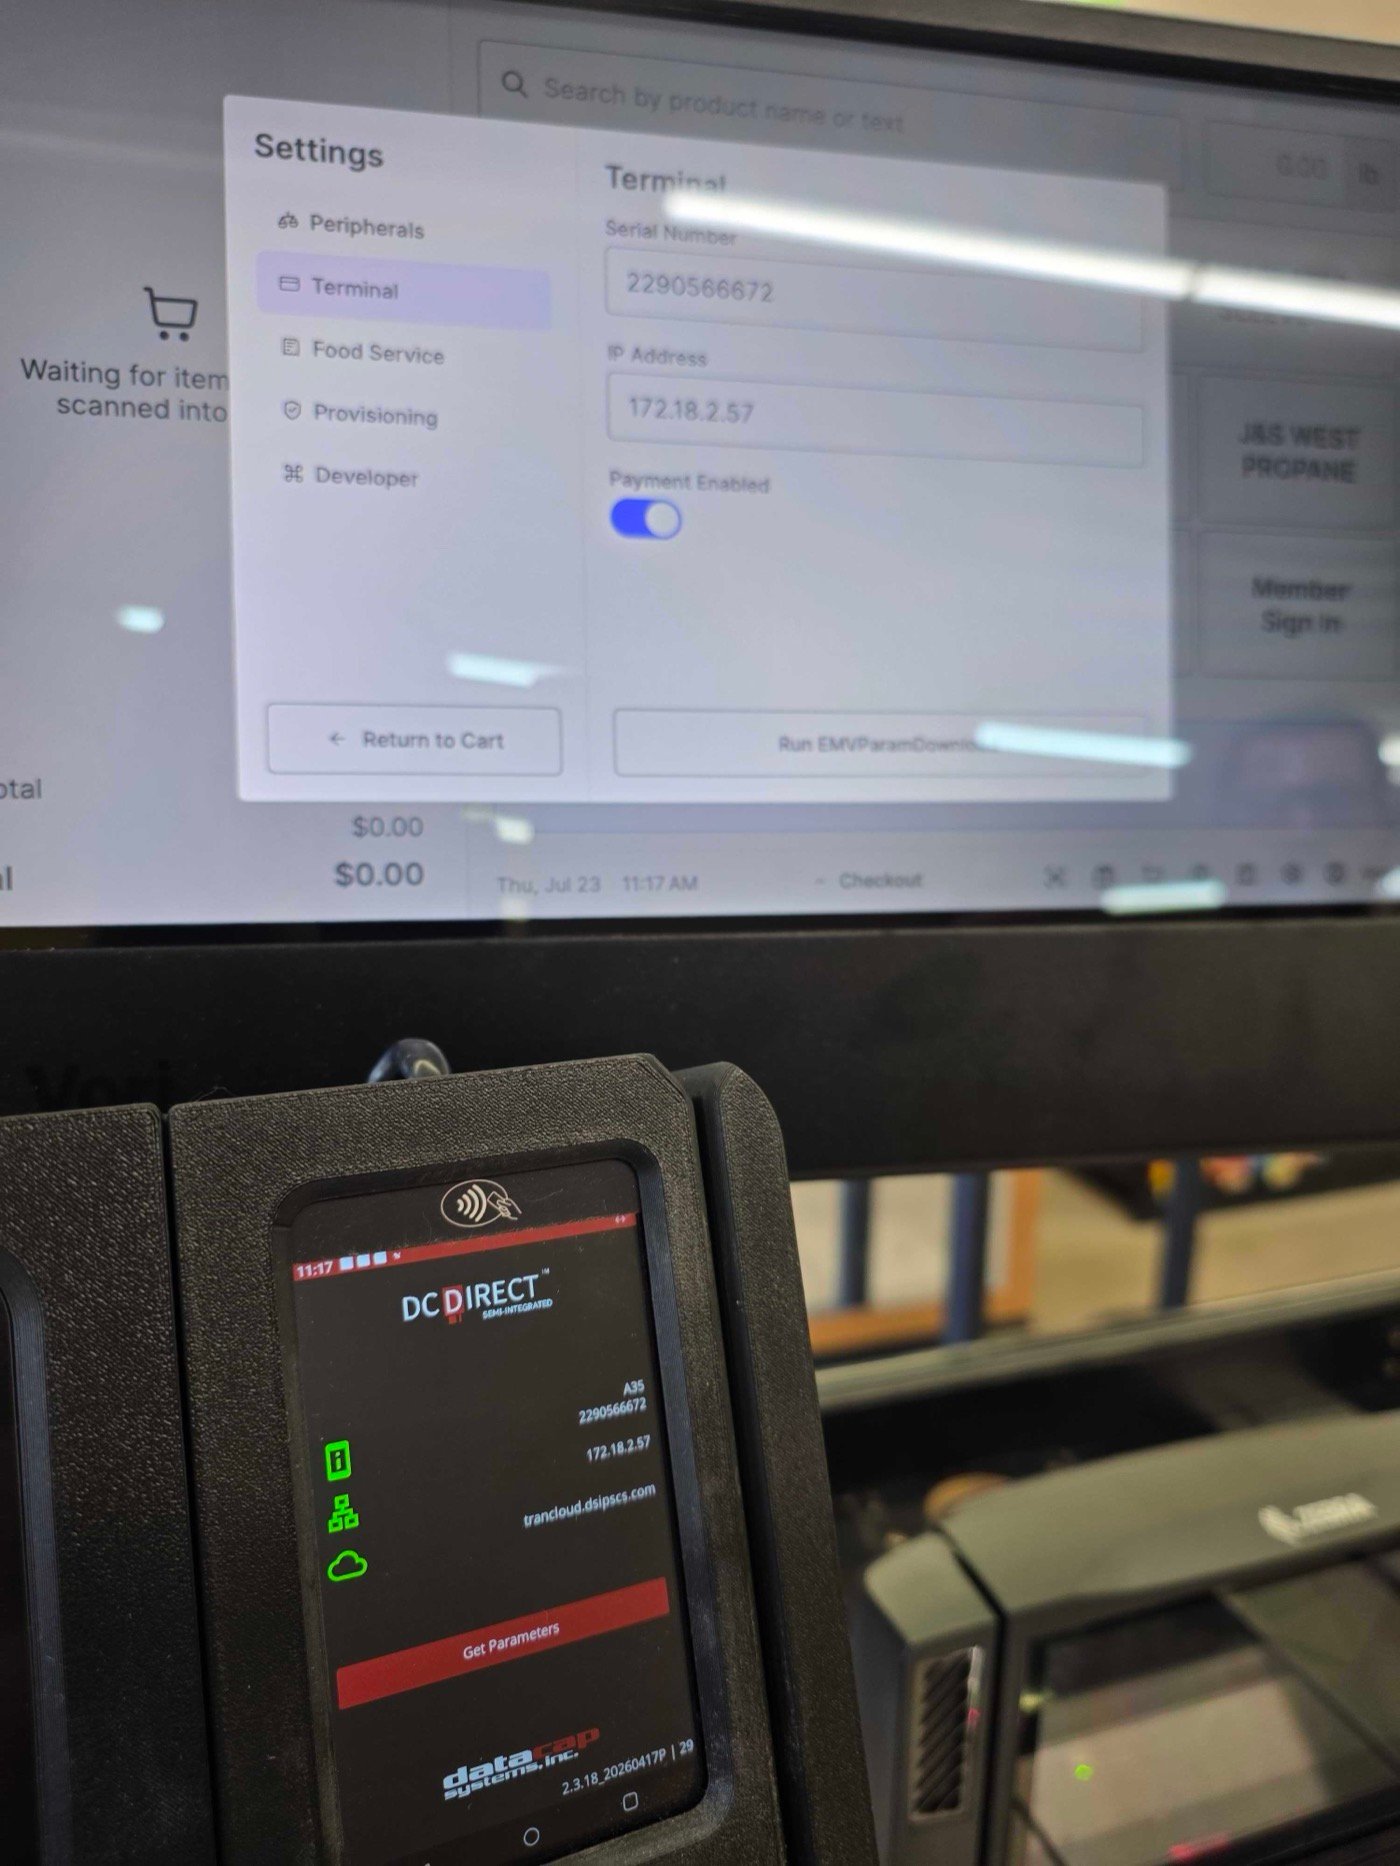
If Internet shows green but the Payment Terminal status is red, confirm the terminal’s IP address matches the one set on the POS.- On the payment terminal, swipe up from the bottom of the screen twice, then tap the back arrow.
- Enter the password pax9876@@ and press Enter.
- Open the DC Direct app. The IP address appears on the third line.
- At the POS Cashier Screen, triple-tap the time, then select Terminal.
-
Confirm the IP address on the POS matches the one on the payment terminal.
Run Get Parameters
As a final step, you can run “Get Parameters” to ensure the payment terminal is up to date with the latest configurations from the payment gateway. For instructions, please see: Basics: Running Get Parameters on Your Payment TerminalProceed with the directions below if the payment terminal has a red status and store internet is red or yellow.
Restart the POS Lane’s Network Switch
- Look underneath the effected lane’s counter and locate the network switch.
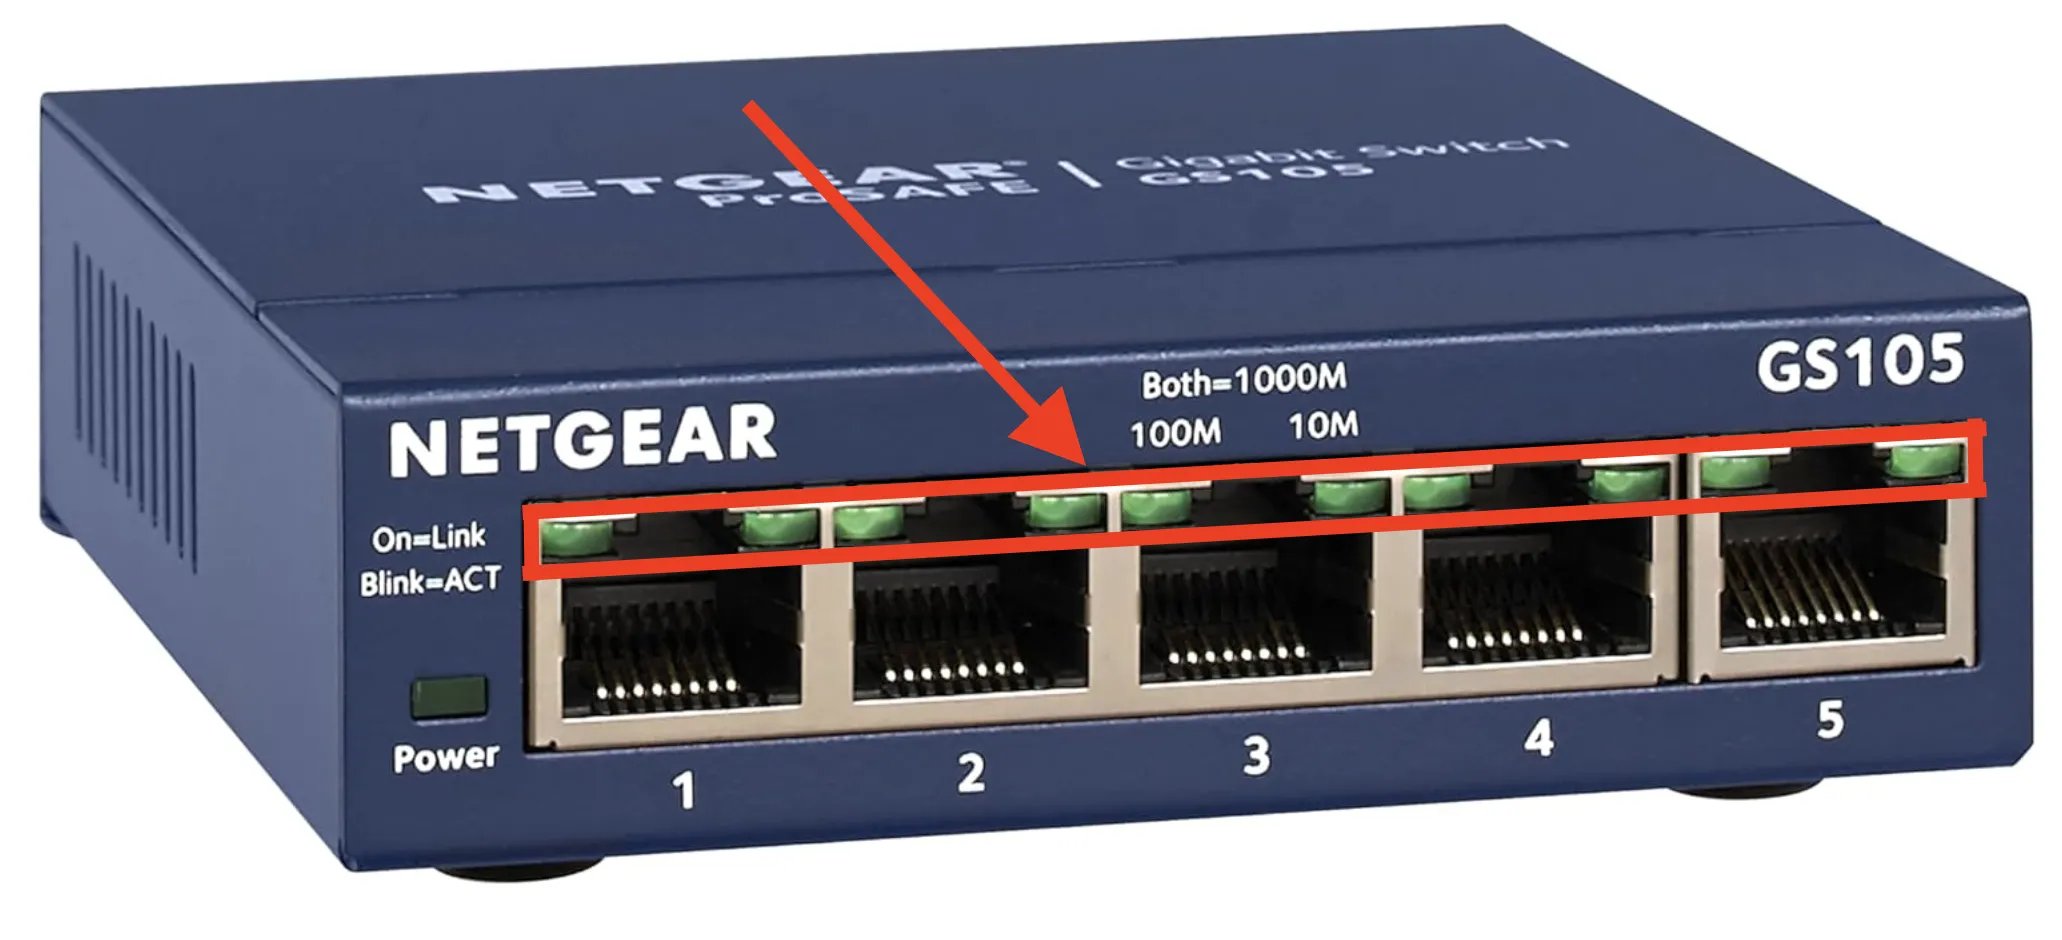
- The network switch will be the only device with three internet cables running into it. It may look like the image below:

- The network switch will be the only device with three internet cables running into it. It may look like the image below:
- Locate the network switch’s power cable.
- The power cable will be much thinner than the other cables and likely plugged into the back of the unit.
- Unplug the network switch’s power cable, wait 10 seconds, then plug the power cable back into the network switch.
- Wait up to 30 seconds after restarting the network switch to confirm if Internet shows as back online within the Cashier screen.
Check Cable Connections on the Network Switch
- Look back underneath the effected lane’s counter and locate the network switch.
- On the network switch, confirm all 3 of the internet cables plugged into the network switch are fully inserted.
- If all cables are fully inserted, check the LED status indicators above each cable’s port. If the LED’s above a plugged in cable are not lit, then there are 4 possible explanations:
- The cable is not fully inserted into the network switch.
- The other end of that cable is not fully plugged in. Trace the cable to the other end to confirmed it’s fully plugged in.
- The device that the cable is connected to does not have power.
- The cable is damaged and should be replaced by a network technician.
Restart the Vori Back Office Switch
-
Locate your back office network switch (it connects all lanes to the store network).
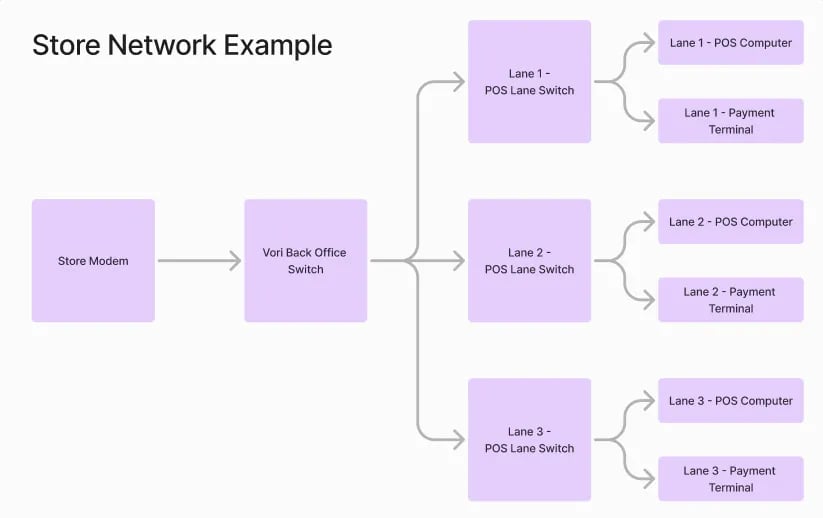
- Unplug its power cable, wait 10 seconds, and plug it back in.
Restart the Store Modem
-
If the problem persists, locate your store’s modem (usually in the back office).
- Unplug it from power, wait 10 seconds, and plug it back in.
- Wait a few minutes for it to fully restart, then check if the payment terminals are back online.