> ## Documentation Index
> Fetch the complete documentation index at: https://help.vori.com/llms.txt
> Use this file to discover all available pages before exploring further.
# How to Format & Upload Vendor Products
> Save time by uploading vendor product data directly into Vori's self-service import tool.
Updating your vendor product information doesn't have to be a manual, one-by-one process. By using Vori's self-service upload tool, you can update your entire vendor catalog in seconds, ensuring your item details are accurate and your team can work more efficiently.
### Before You Begin
Before starting your upload, ensure your store meets these requirements:
* **File Format**: Your product list must be saved as a **.CSV** file.
* **Vendor Setup**: The vendor must already be registered to your store in Vori.
* **Scope**: This tool is designed for updating basic product information (e.g., names, barcodes, and pack sizes).
✏️ **Note:** This tool does not currently support uploading vendor costs.
***
### Prepare Your Upload File
To ensure a successful upload, your CSV file should include the following information:
| **Field Name** | **Requirement** | **Notes** |
| -------------------- | --------------- | --------------------------------------------------------------- |
| **Barcode** | Required | The unique UPC or EAN for the product. |
| **Description** | Required | The name of the product as it should appear in your catalog. |
| **Vendor Item Code** | Required | The unique ID assigned by the vendor for that specific product. |
| **Item Case Size** | Required | The number of units per case (e.g., 12). |
| **Pack Size** | Required | The individual unit volume or size (e.g., 9.5 oz). |
| **Brand Name** | Optional | The brand associated with the product. |
***
### Upload and Map Your Data
Once your file is ready, you can upload it directly into the Vendor Products section.
1. Navigate to **Inventory & Supply Chain** on the left-hand menu in Back Office and select **[Vendor Products](https://app.vori.com/retail/vendor-products)**.
2. Click **Upload** in the top right corner.
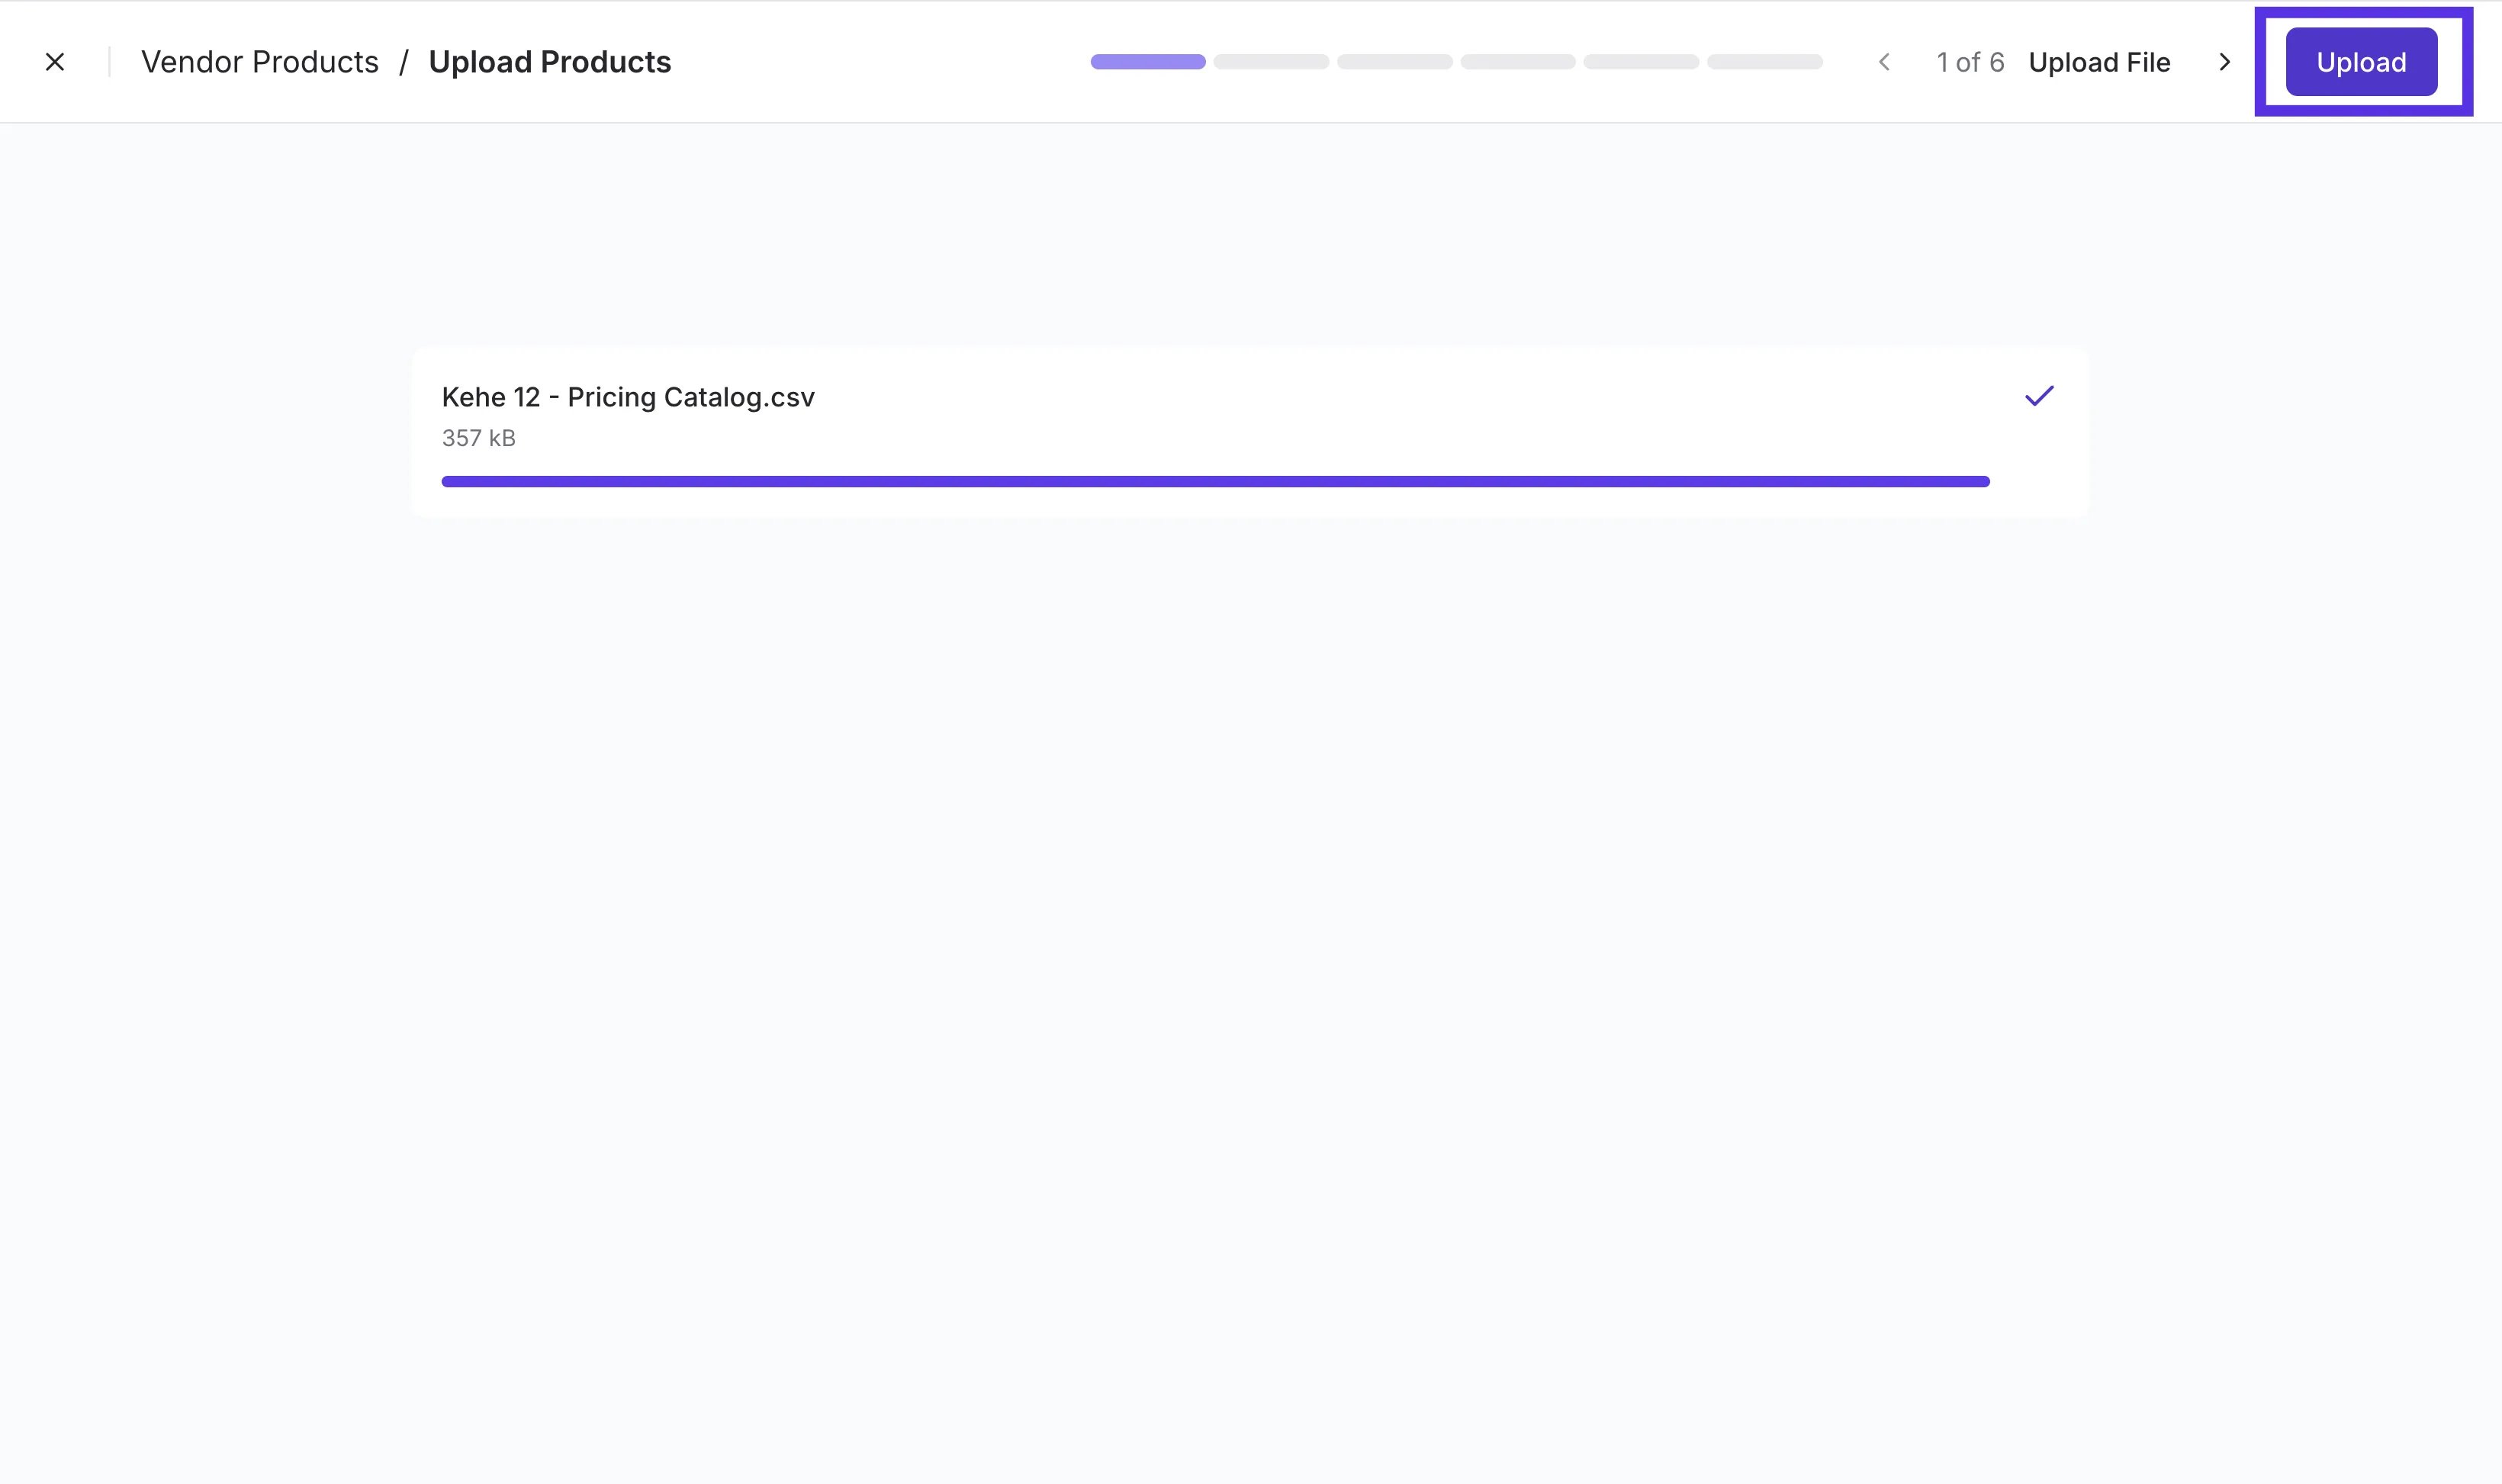
3. Drag and drop your CSV file into the upload area, or click **Select File** to browse your computer, then click **Upload**.
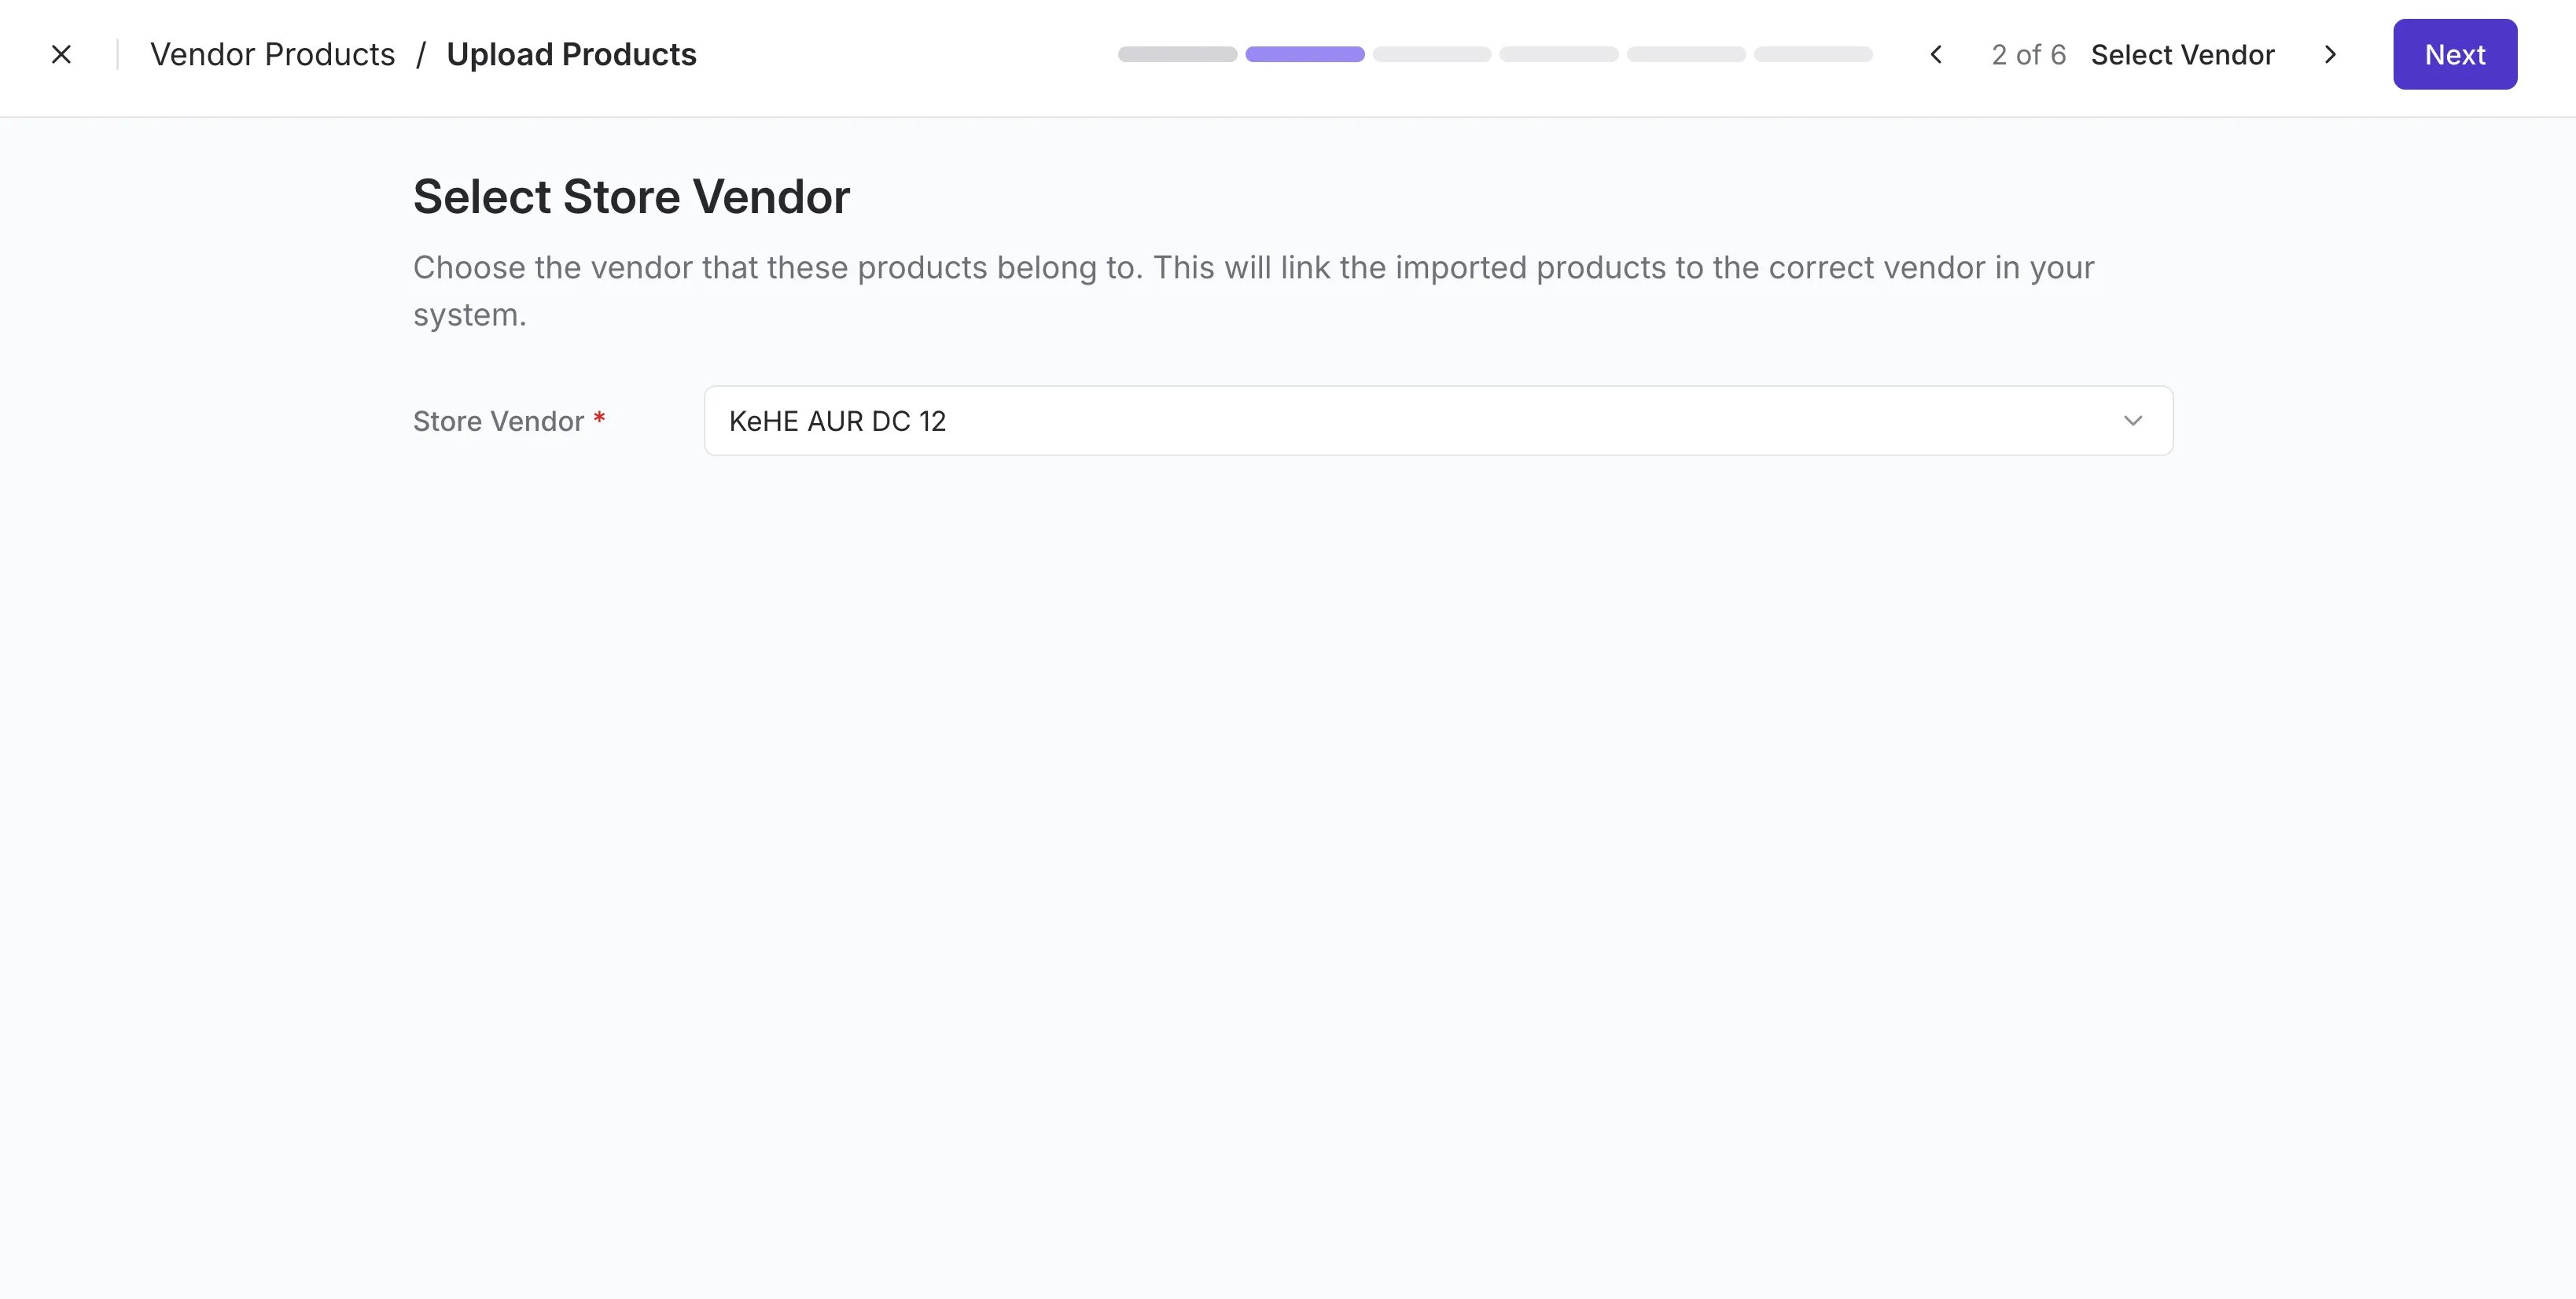
 4. **Select Store Vendor**: Choose the vendor these products belong to from the dropdown menu and click **Next**.
 5. **Map your columns**: Vori will attempt to auto-match your file headers to the required fields.
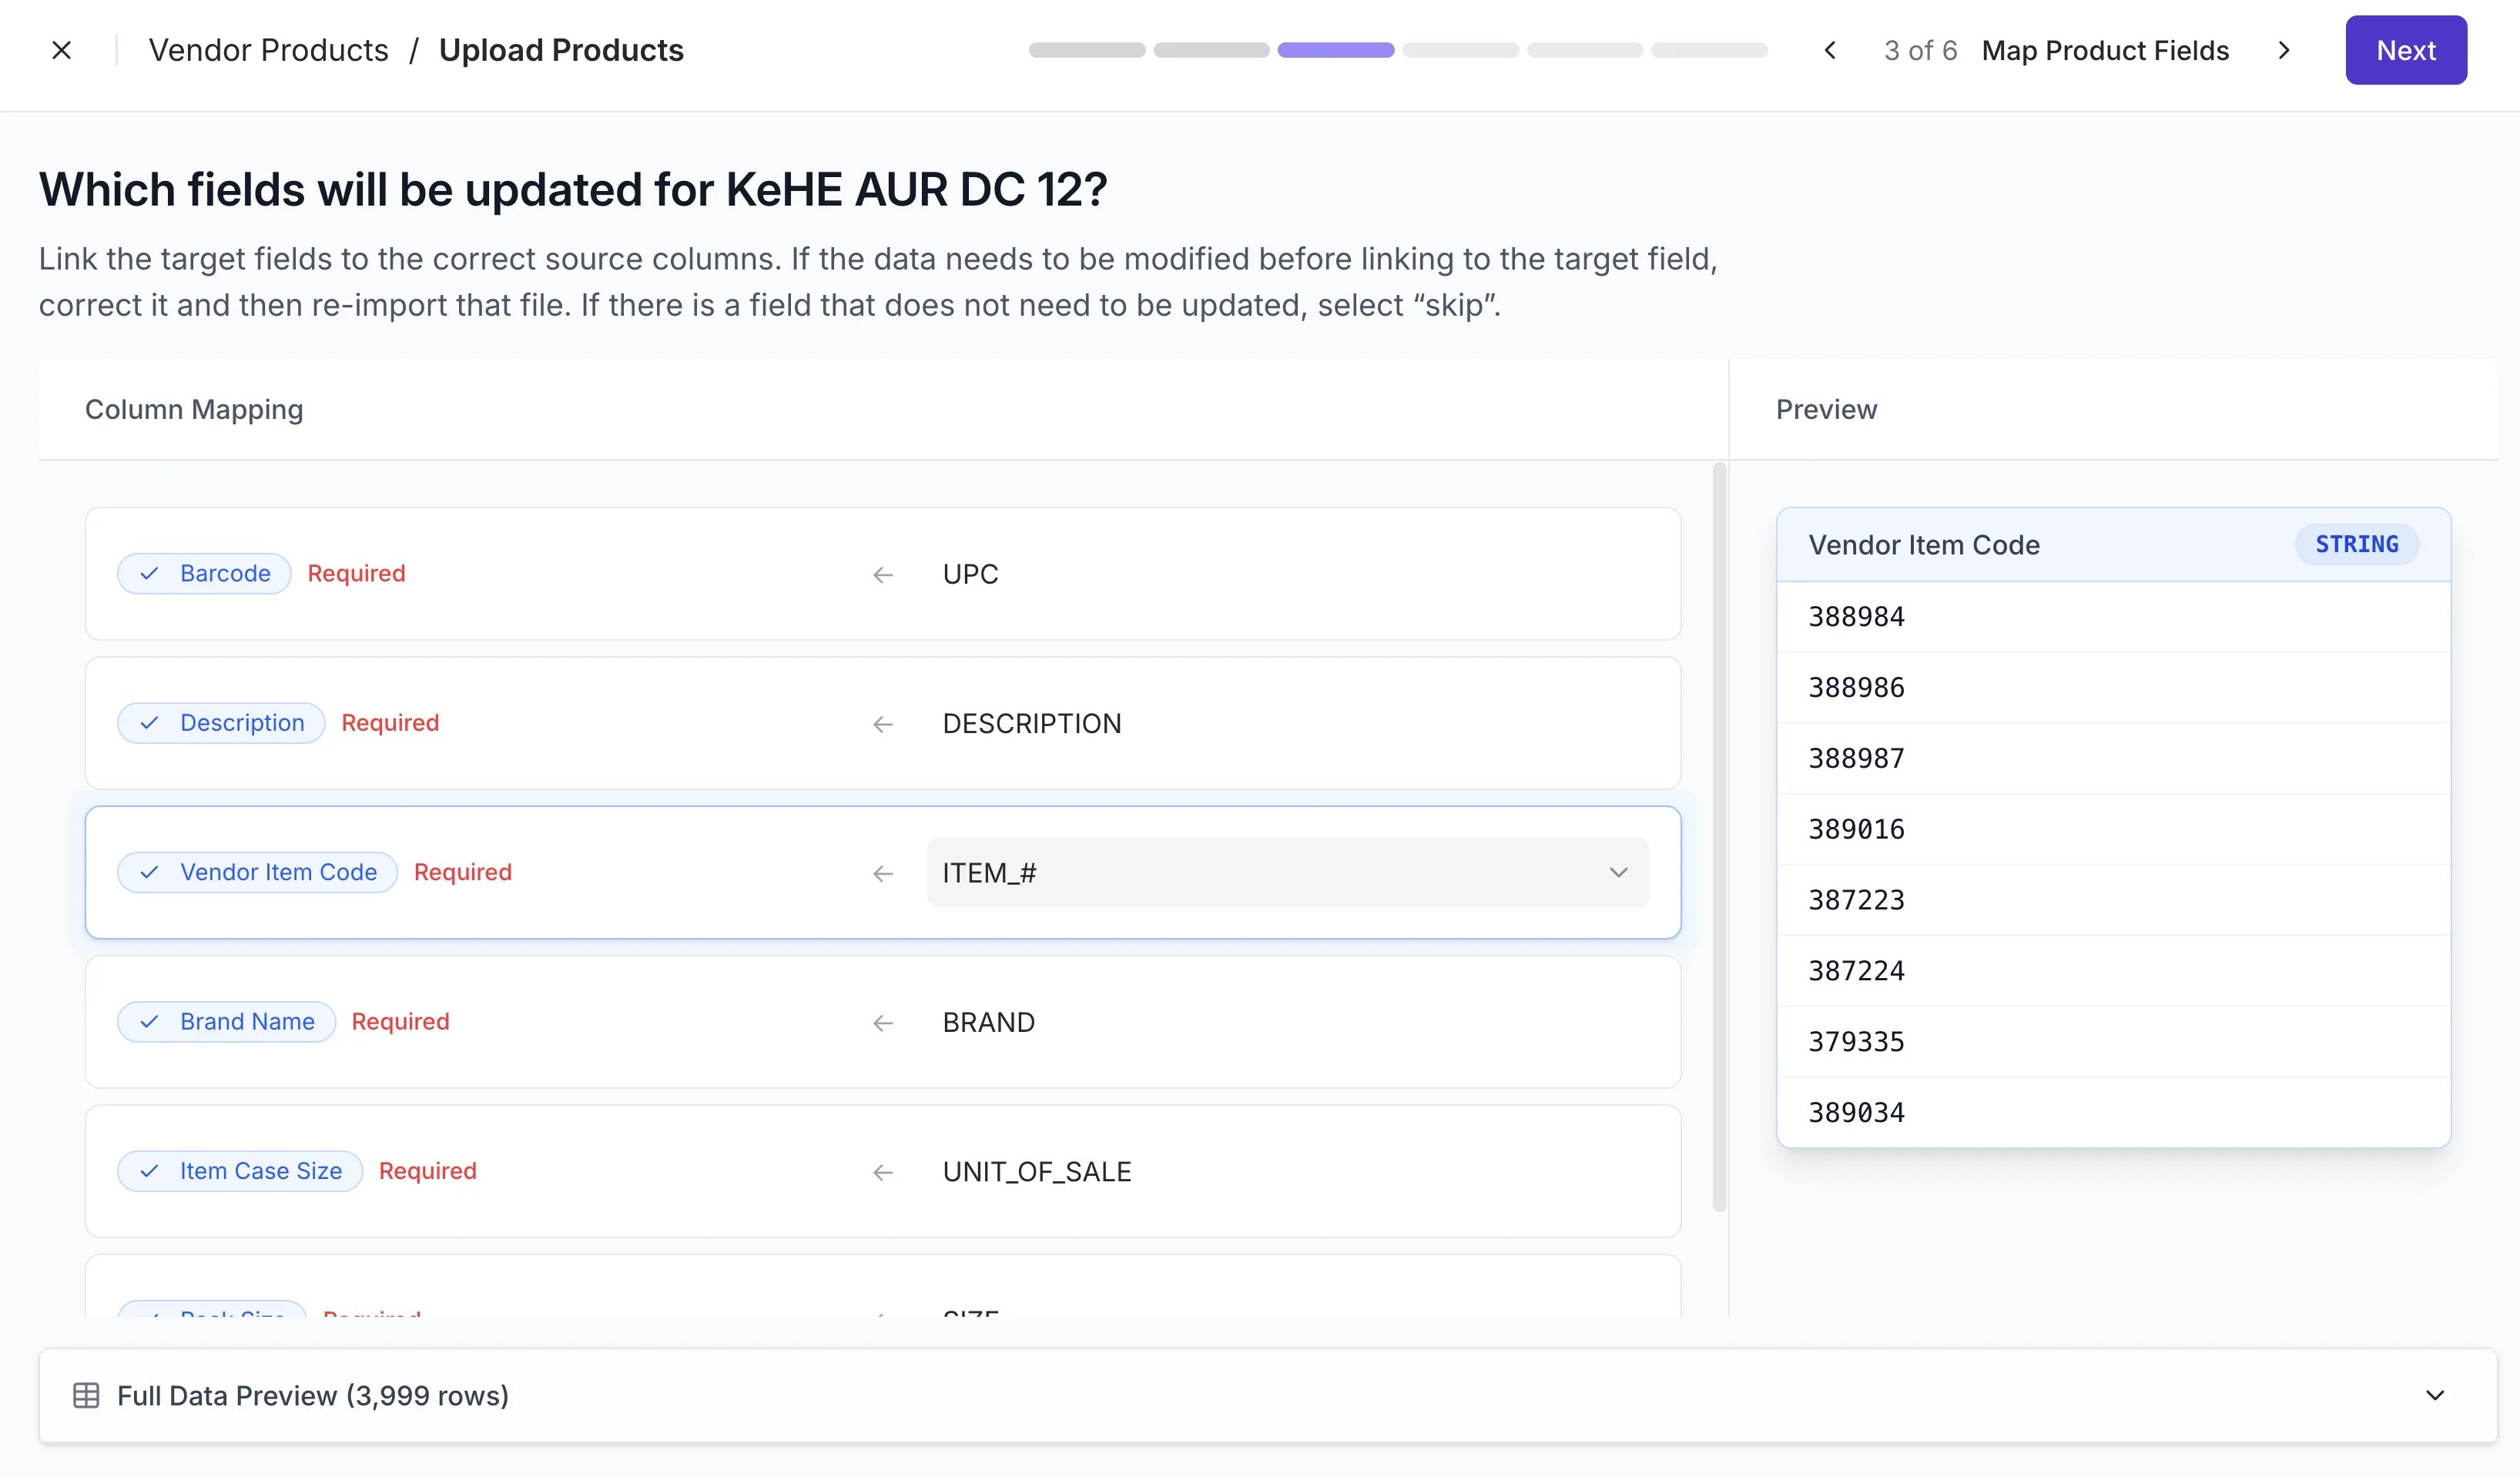 6. Confirm that fields (Barcode, Description, Item Code, etc.) are correctly mapped to the appropriate columns in your file.
* Columns can be skipped — click the dropdown box and then **Skip this column**.
7. Click **Next** to proceed to the review screen.
***
### Review and Commit Changes
The review step helps you catch mistakes before they impact your catalog.
1. **Review Linked Data**: Vori performs a "soft validation" to check for errors.
6. Confirm that fields (Barcode, Description, Item Code, etc.) are correctly mapped to the appropriate columns in your file.
* Columns can be skipped — click the dropdown box and then **Skip this column**.
7. Click **Next** to proceed to the review screen.
***
### Review and Commit Changes
The review step helps you catch mistakes before they impact your catalog.
1. **Review Linked Data**: Vori performs a "soft validation" to check for errors.
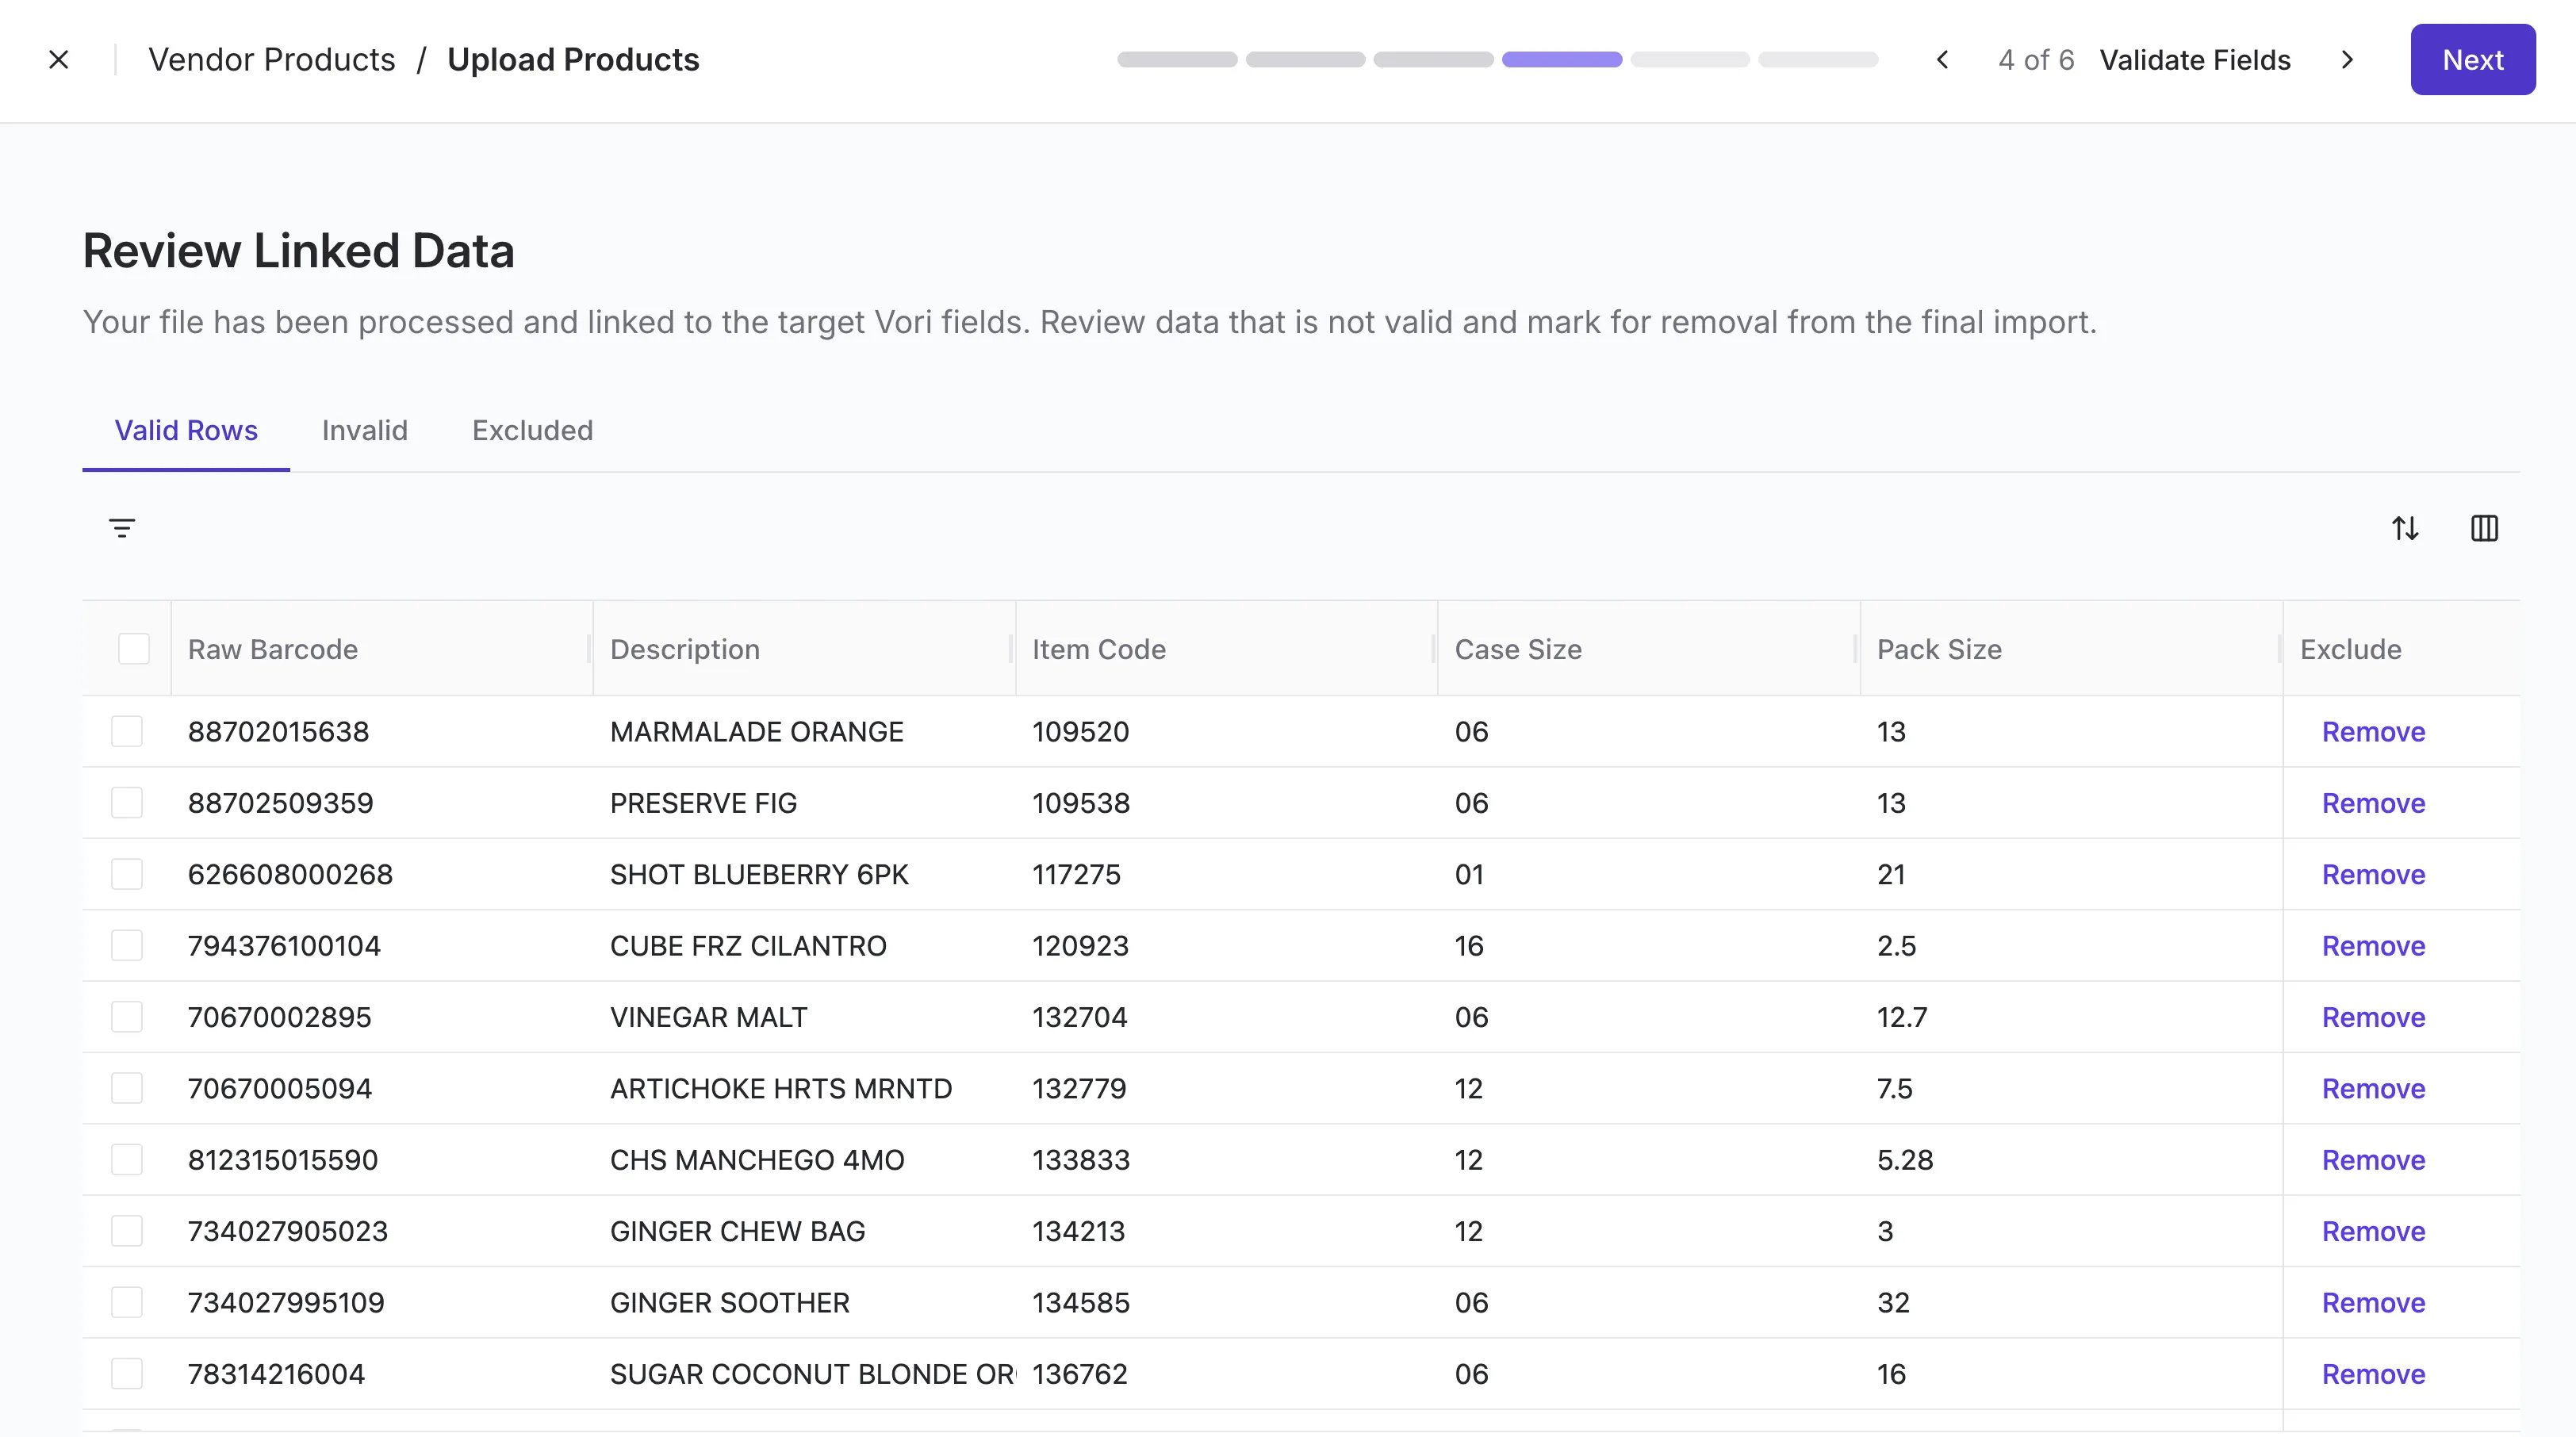 1. **Valid Rows**: These items are ready for a successful upload.
2. 1. **Update:** These items already exist in your system and will be updated with the new information.
2. **Unmatched:** These items are not yet linked to a product in your store. You can click **Link Product** to manually pair them.
1. **Valid Rows**: These items are ready for a successful upload.
2. 1. **Update:** These items already exist in your system and will be updated with the new information.
2. **Unmatched:** These items are not yet linked to a product in your store. You can click **Link Product** to manually pair them.
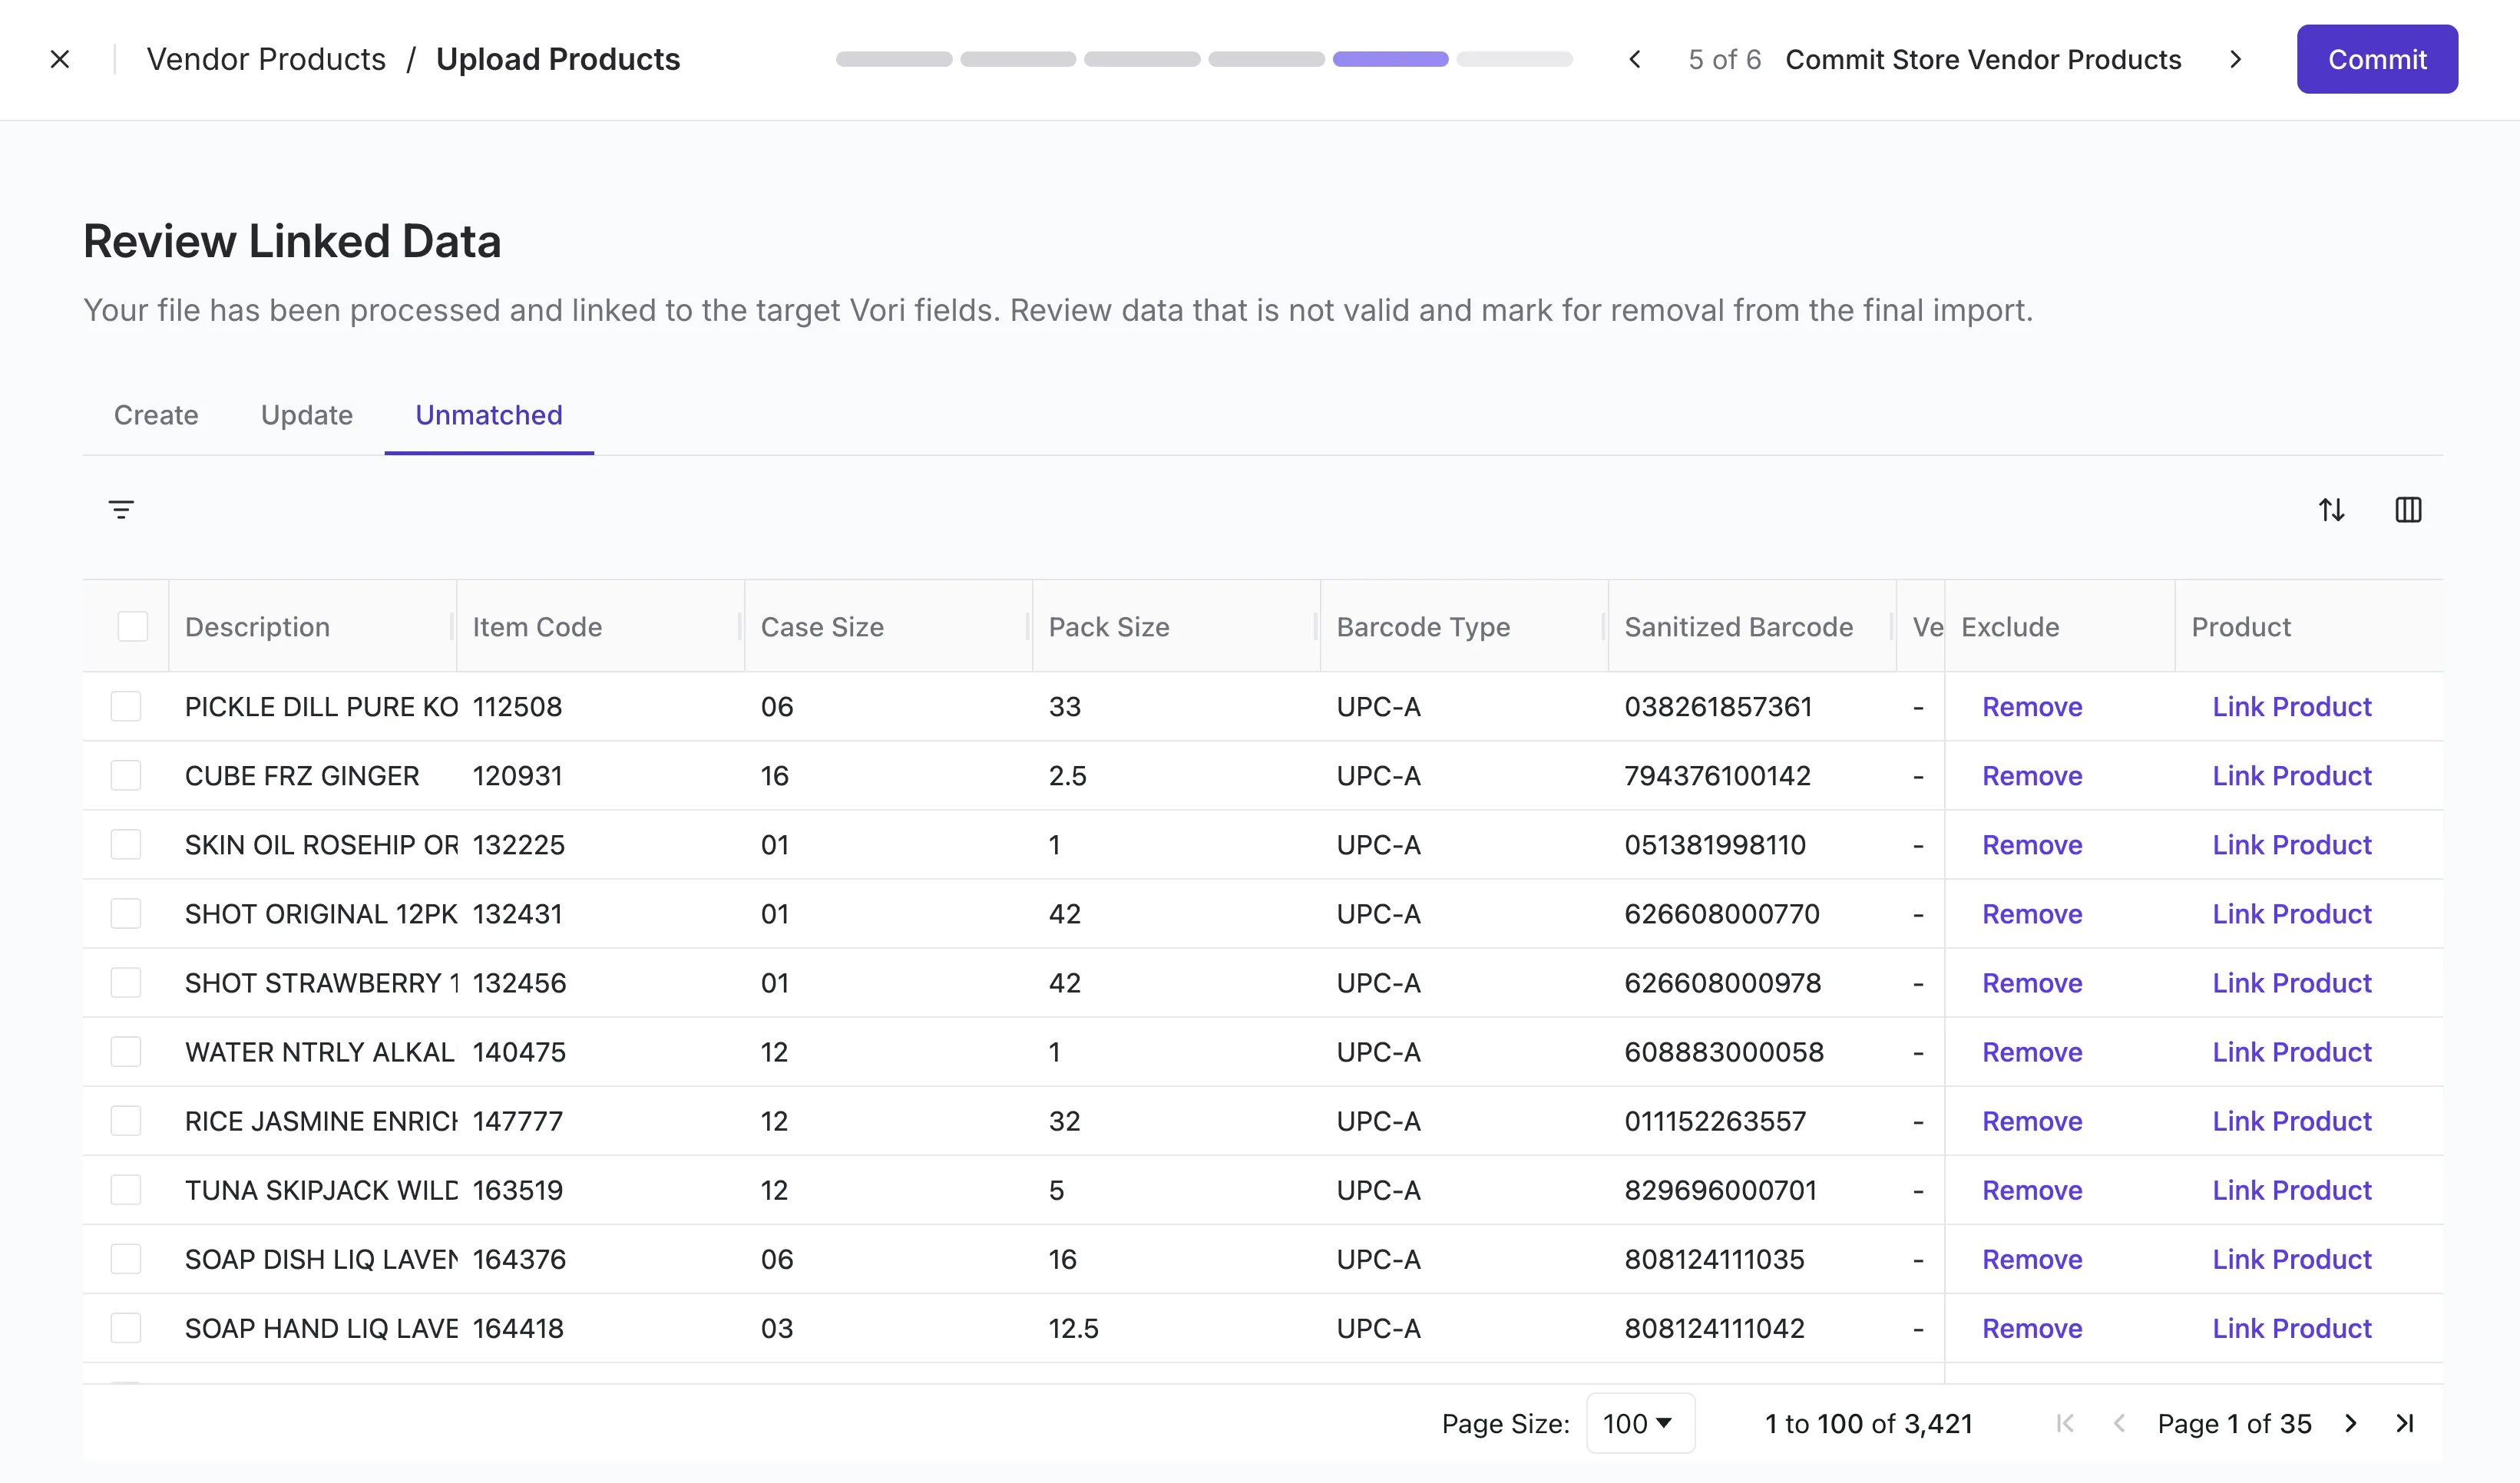 3. **Remove Errors**: If you see rows you do not wish to import, click **Remove** on the far right of that row.
4. Click **Commit** to finish the process and update your vendor products.
***
### Troubleshooting
**Why is my row marked as "Invalid"?**
* **Missing Required Fields**: Every product requires a Barcode, Description, and Vendor Item Code. If these are missing, Vori will skip that row.
* **Duplicate Data**: If your file contains the same Vendor Item Code for multiple different barcodes, the system may flag it for review.
**What if I need to update costs?**
* Vendor costs cannot be updated via this CSV upload tool at this time. These must be managed through the standard cost change workflow.
## Related topics
- [Convert Vendor Wine & Beer TPRs to a Vori Promo Import](/promotions/convert-convert-vendor-wine-and-beer-tprs-to-a-vori-promo-import.md)
- [Bulk Upload Vendors](/vendors-and-vendor-products/vendor-management/bulk-upload-vendors.md)
- [Troubleshoot Invoice Upload or Scan Formatting Issues](/cost-changes-and-smart-pricing/invoice-upload/troubleshoot-invoice-upload-or-scan-formatting-issues.md)
3. **Remove Errors**: If you see rows you do not wish to import, click **Remove** on the far right of that row.
4. Click **Commit** to finish the process and update your vendor products.
***
### Troubleshooting
**Why is my row marked as "Invalid"?**
* **Missing Required Fields**: Every product requires a Barcode, Description, and Vendor Item Code. If these are missing, Vori will skip that row.
* **Duplicate Data**: If your file contains the same Vendor Item Code for multiple different barcodes, the system may flag it for review.
**What if I need to update costs?**
* Vendor costs cannot be updated via this CSV upload tool at this time. These must be managed through the standard cost change workflow.
## Related topics
- [Convert Vendor Wine & Beer TPRs to a Vori Promo Import](/promotions/convert-convert-vendor-wine-and-beer-tprs-to-a-vori-promo-import.md)
- [Bulk Upload Vendors](/vendors-and-vendor-products/vendor-management/bulk-upload-vendors.md)
- [Troubleshoot Invoice Upload or Scan Formatting Issues](/cost-changes-and-smart-pricing/invoice-upload/troubleshoot-invoice-upload-or-scan-formatting-issues.md)