> ## Documentation Index
> Fetch the complete documentation index at: https://help.vori.com/llms.txt
> Use this file to discover all available pages before exploring further.
# How to register an access point to a store’s Vusion account
> This guide shows how to register an access point's AP-ID within a store's Vusion Manager page. This is a key step when installing ESLs.
### Introduction
In order for a store to have functioning ESLs, an access point (AP) must first be installed and brought online. If the AP is plugged in and mounted without being registered to the store's Vusion account, the store will be unable to register ESLs or link ESLs to products.
#### Required Materials
* Computer with internet access
* User email registered to Vusion Manager, directions [here](/electronic-shelf-labels-esls/how-to-sign-into-vusion-manager-for-the-first-time)
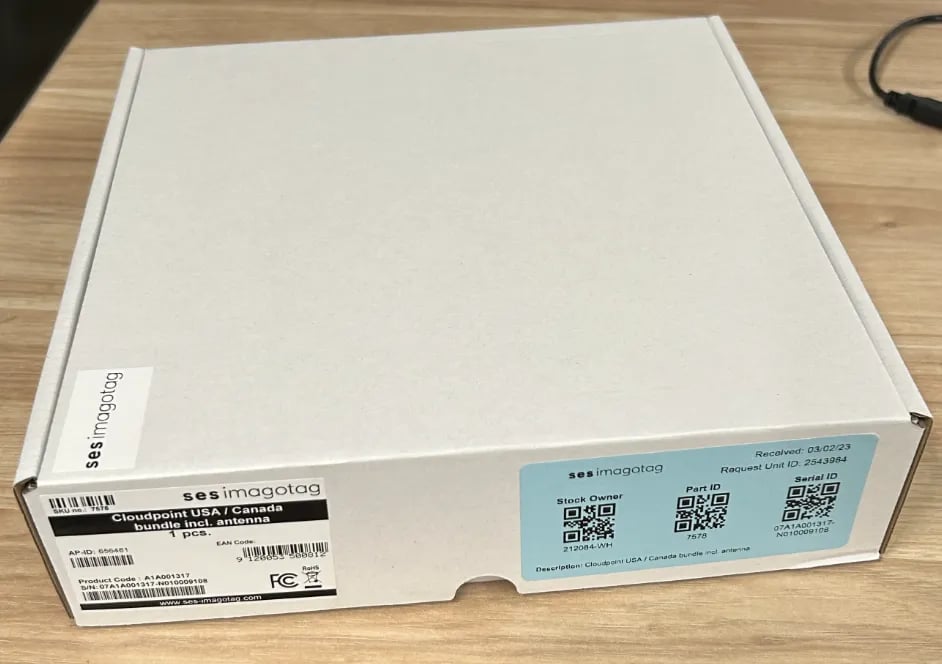
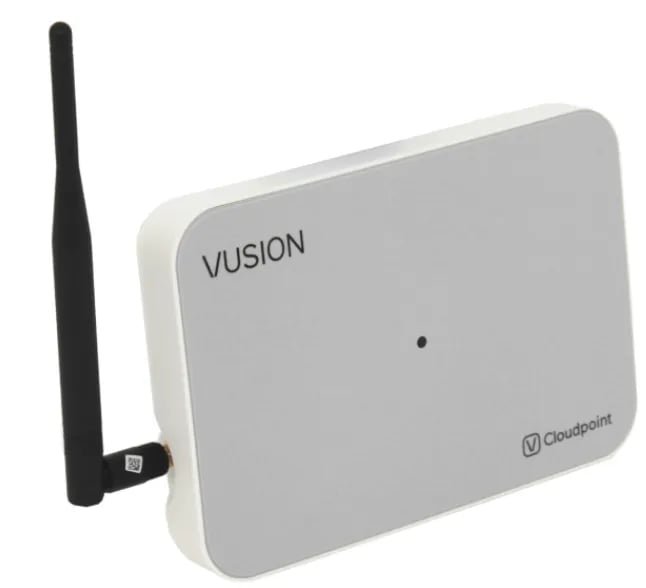
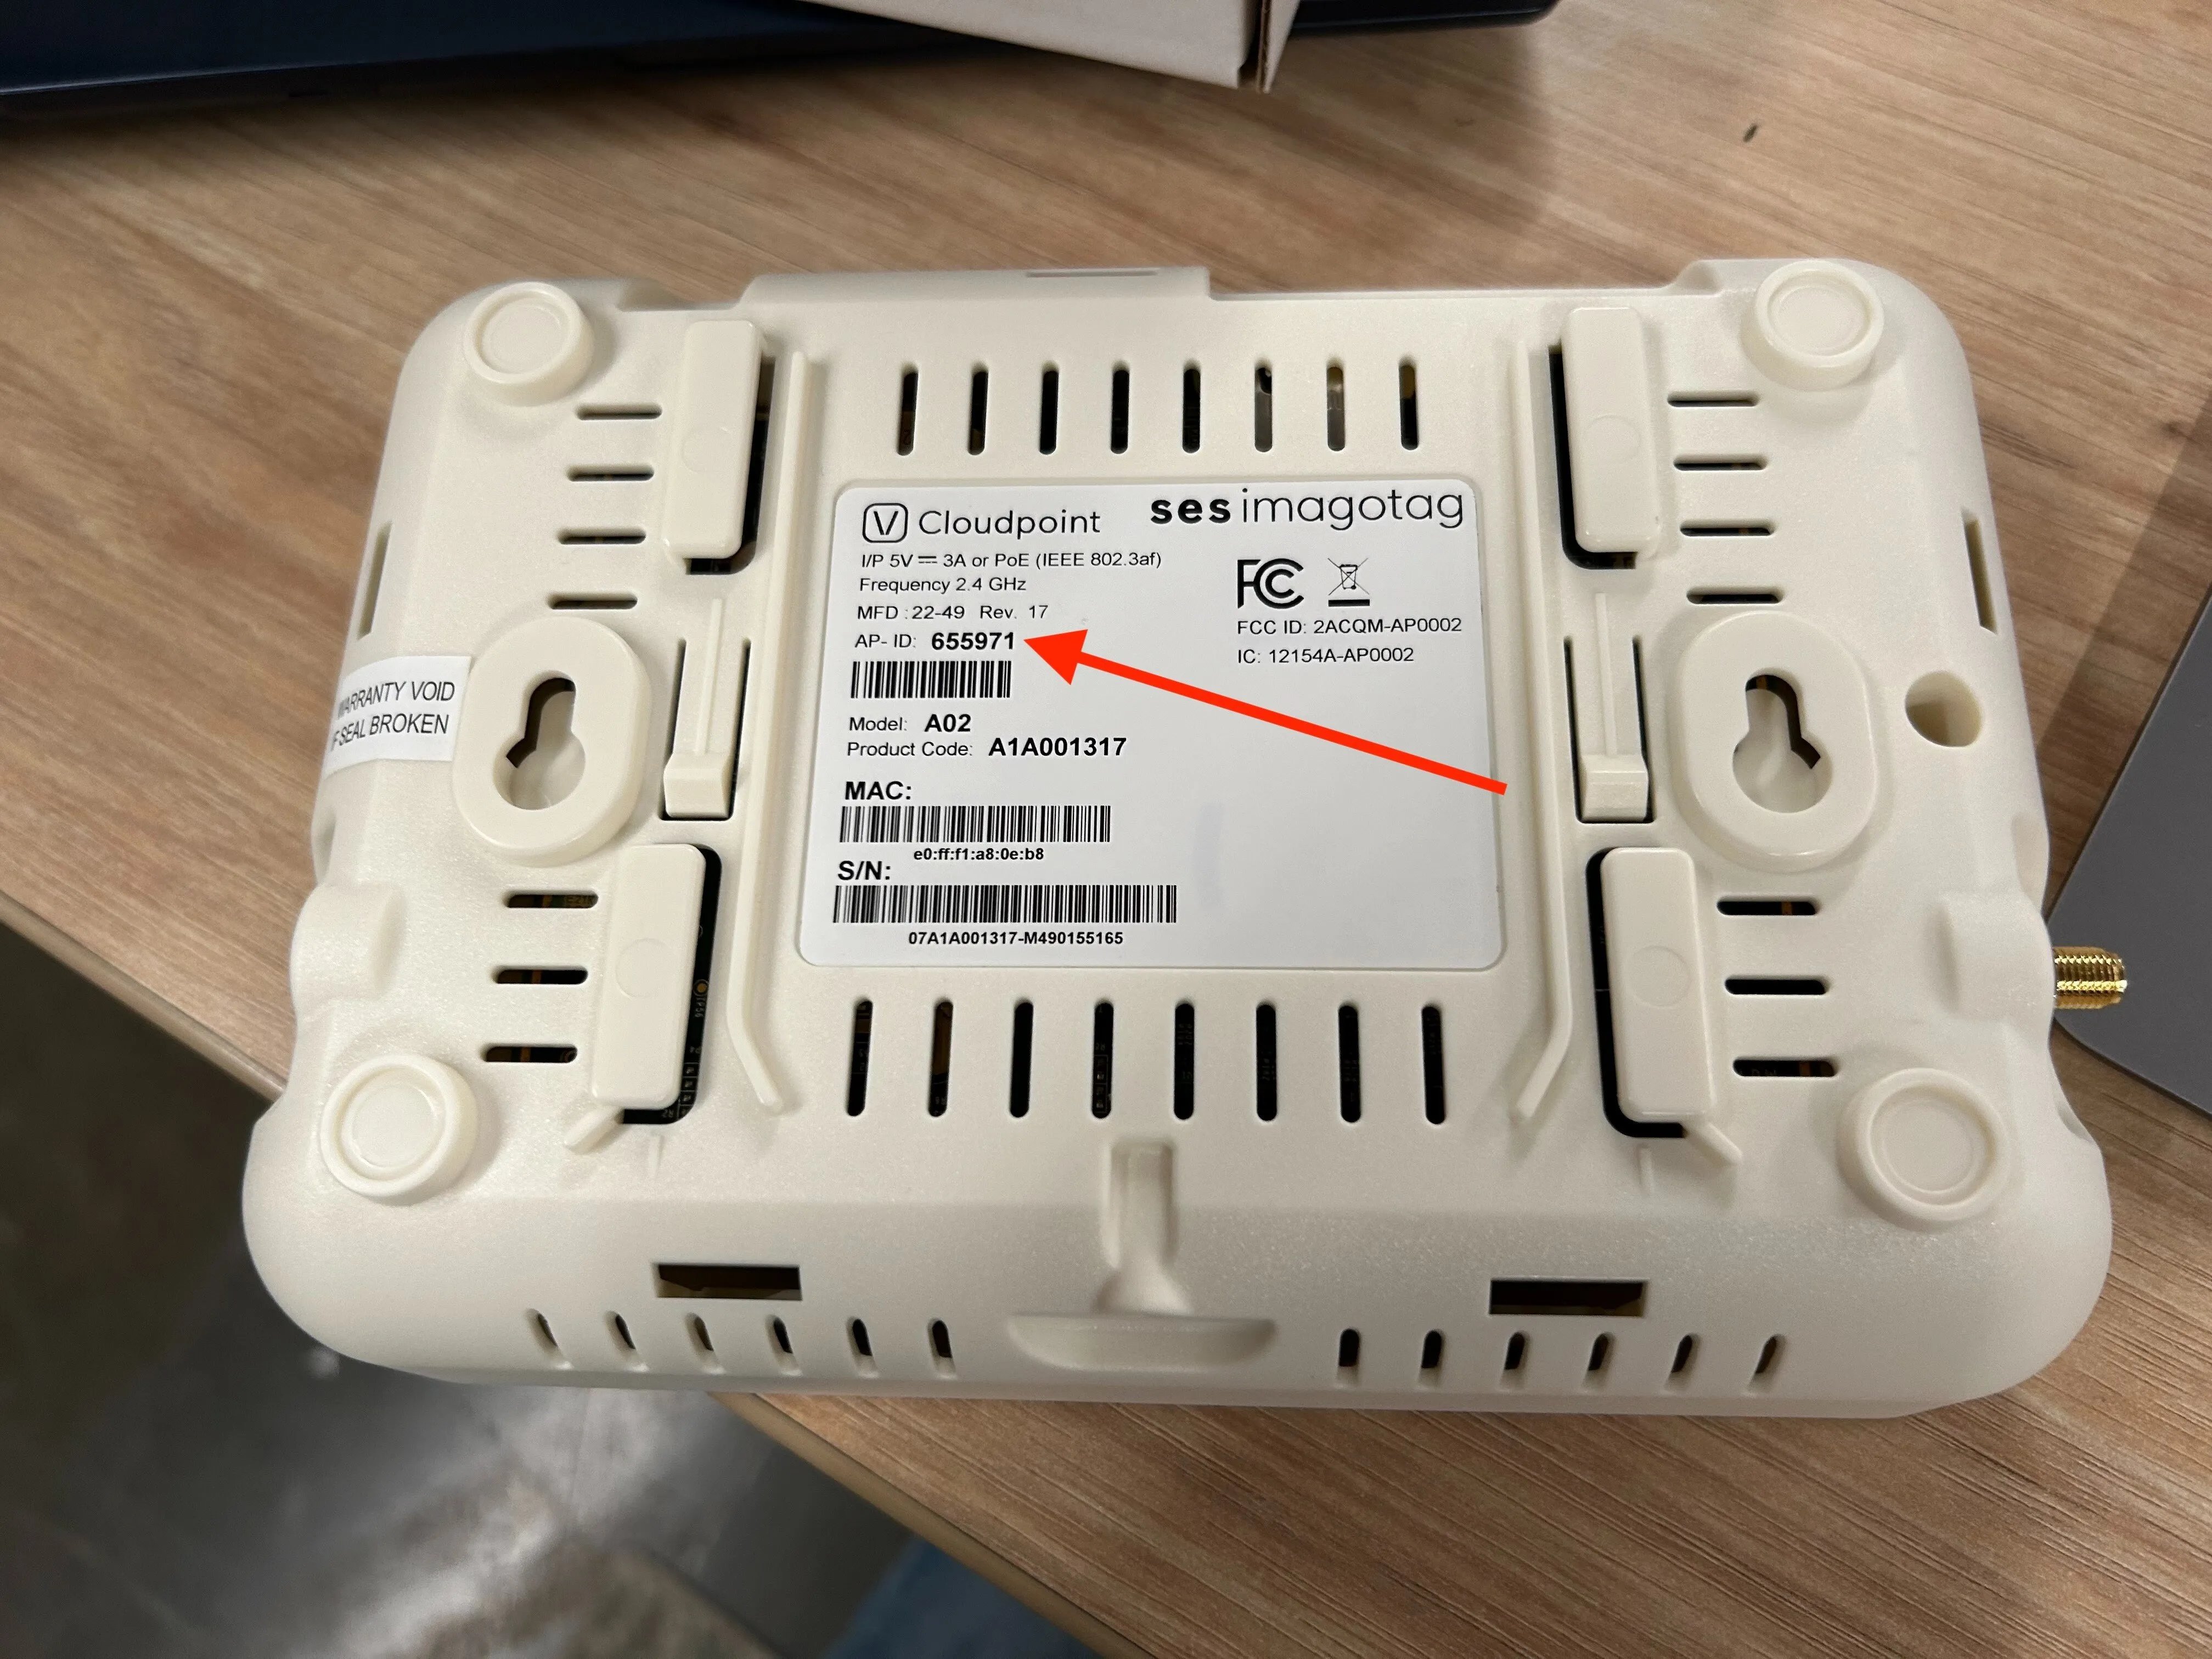
* Vusion Cloudpoint AP (pictures of the case and unit below)
 ***
### Directions
1. On the computer, log into [Vusion Manager](https://manager-us.vusion.io/sso/refresh)
2. Select correct Banner name under `**Retail Chains**` list.
***
### Directions
1. On the computer, log into [Vusion Manager](https://manager-us.vusion.io/sso/refresh)
2. Select correct Banner name under `**Retail Chains**` list.
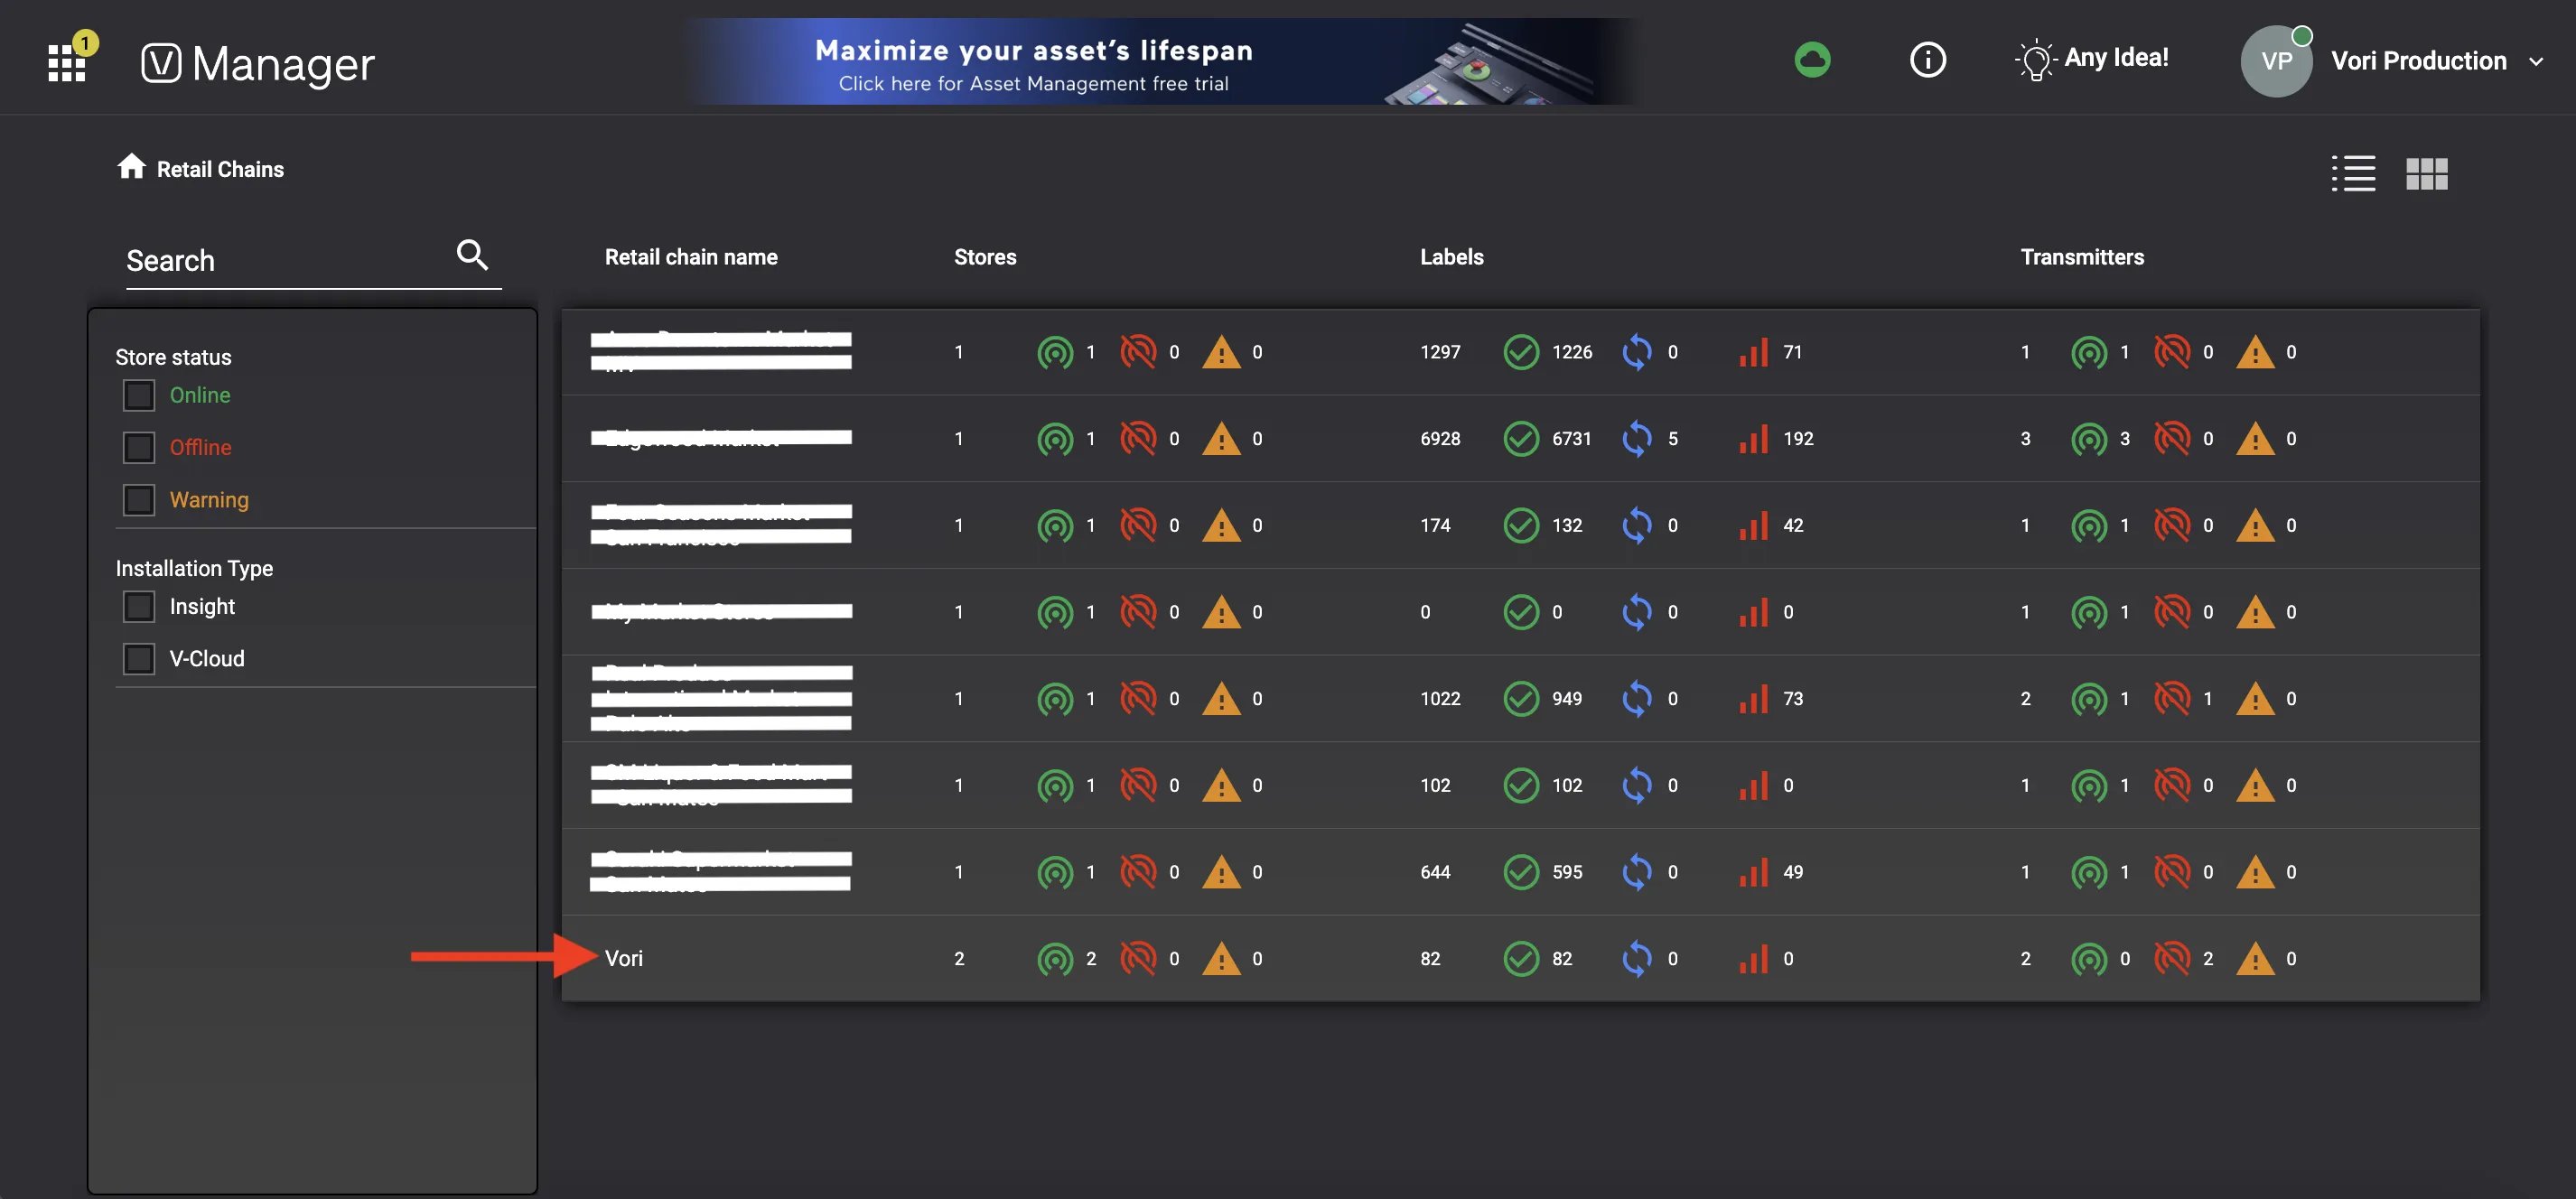 3. Select the correct store within the Retail Chain.
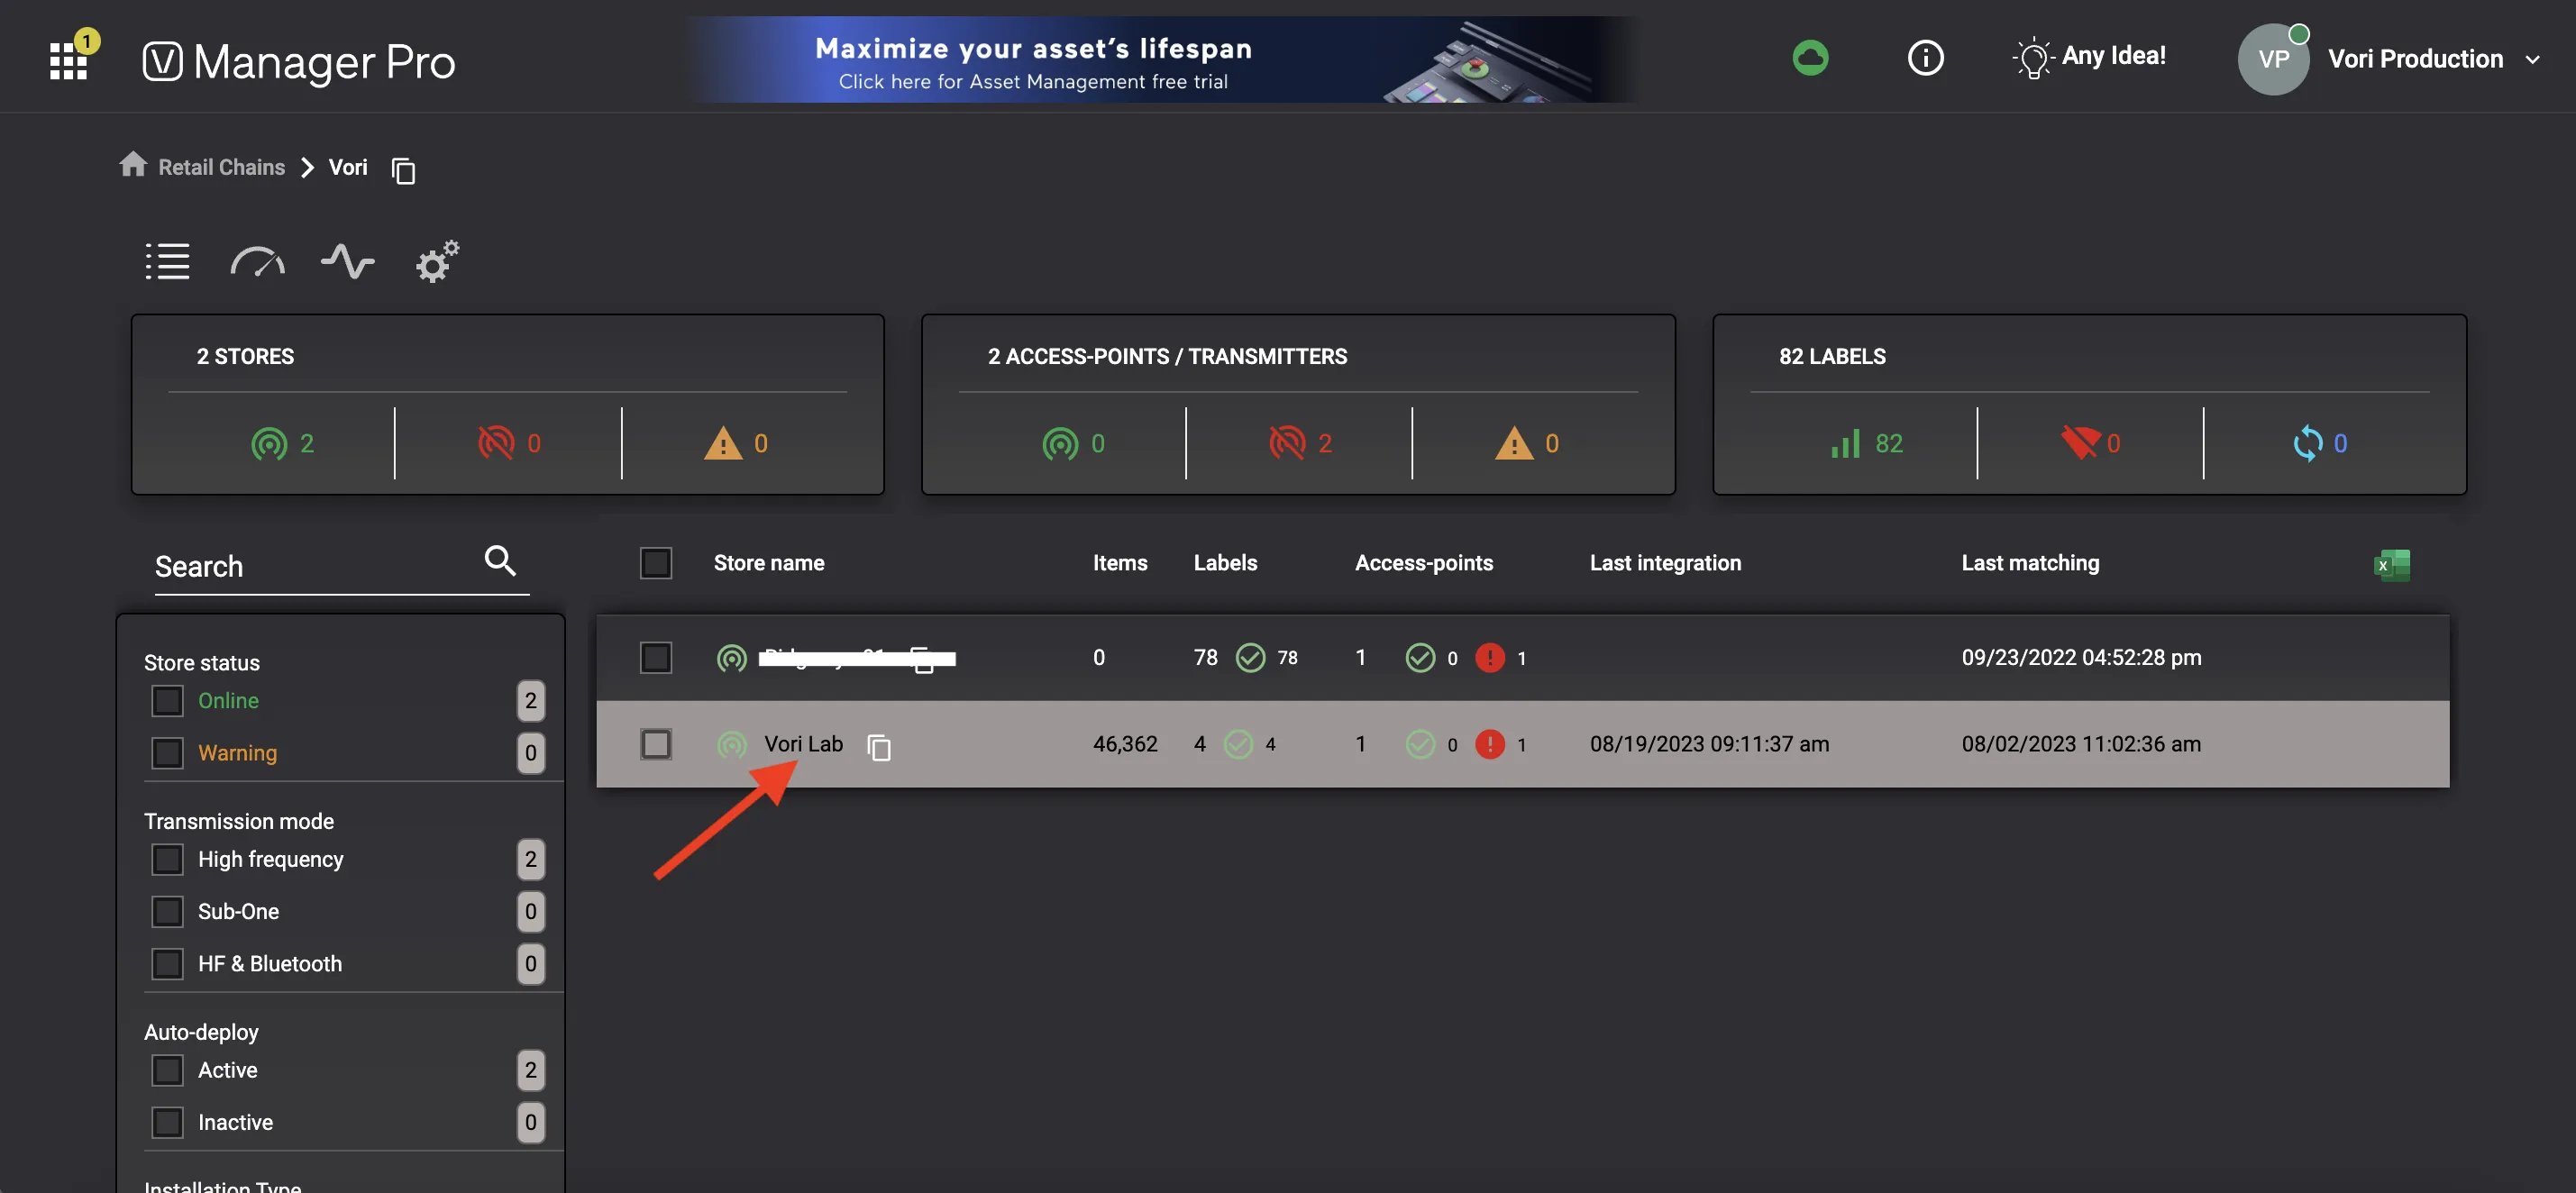 4. Select `**Infrastructure**` in store’s Vusion page.
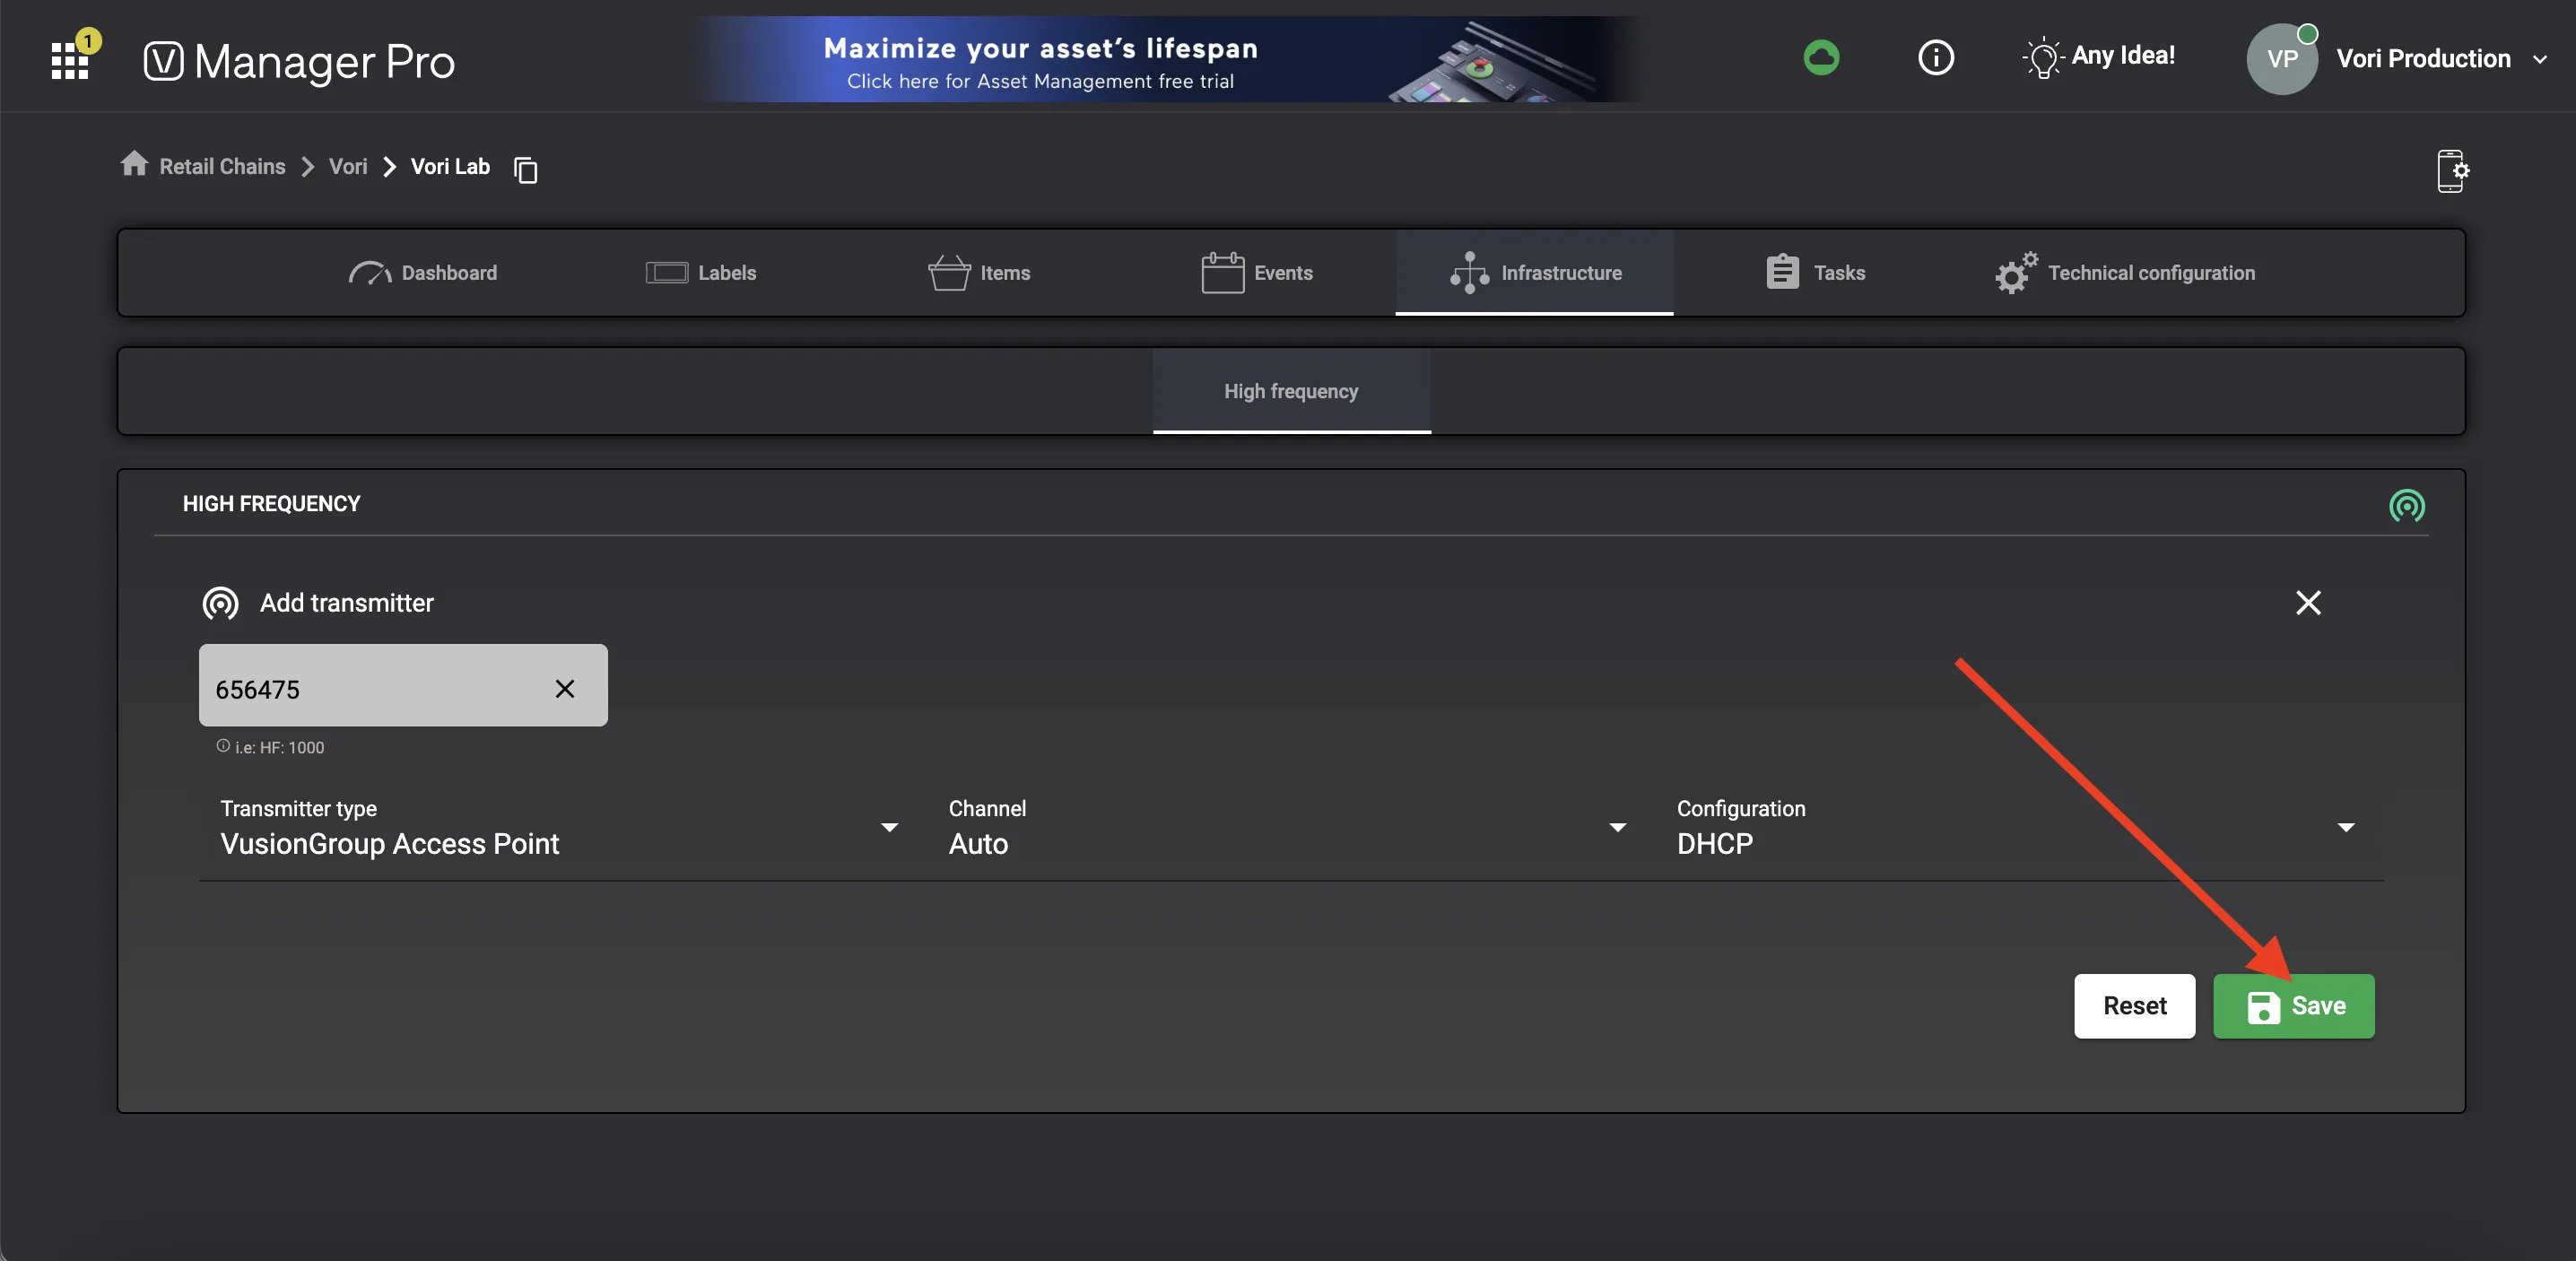
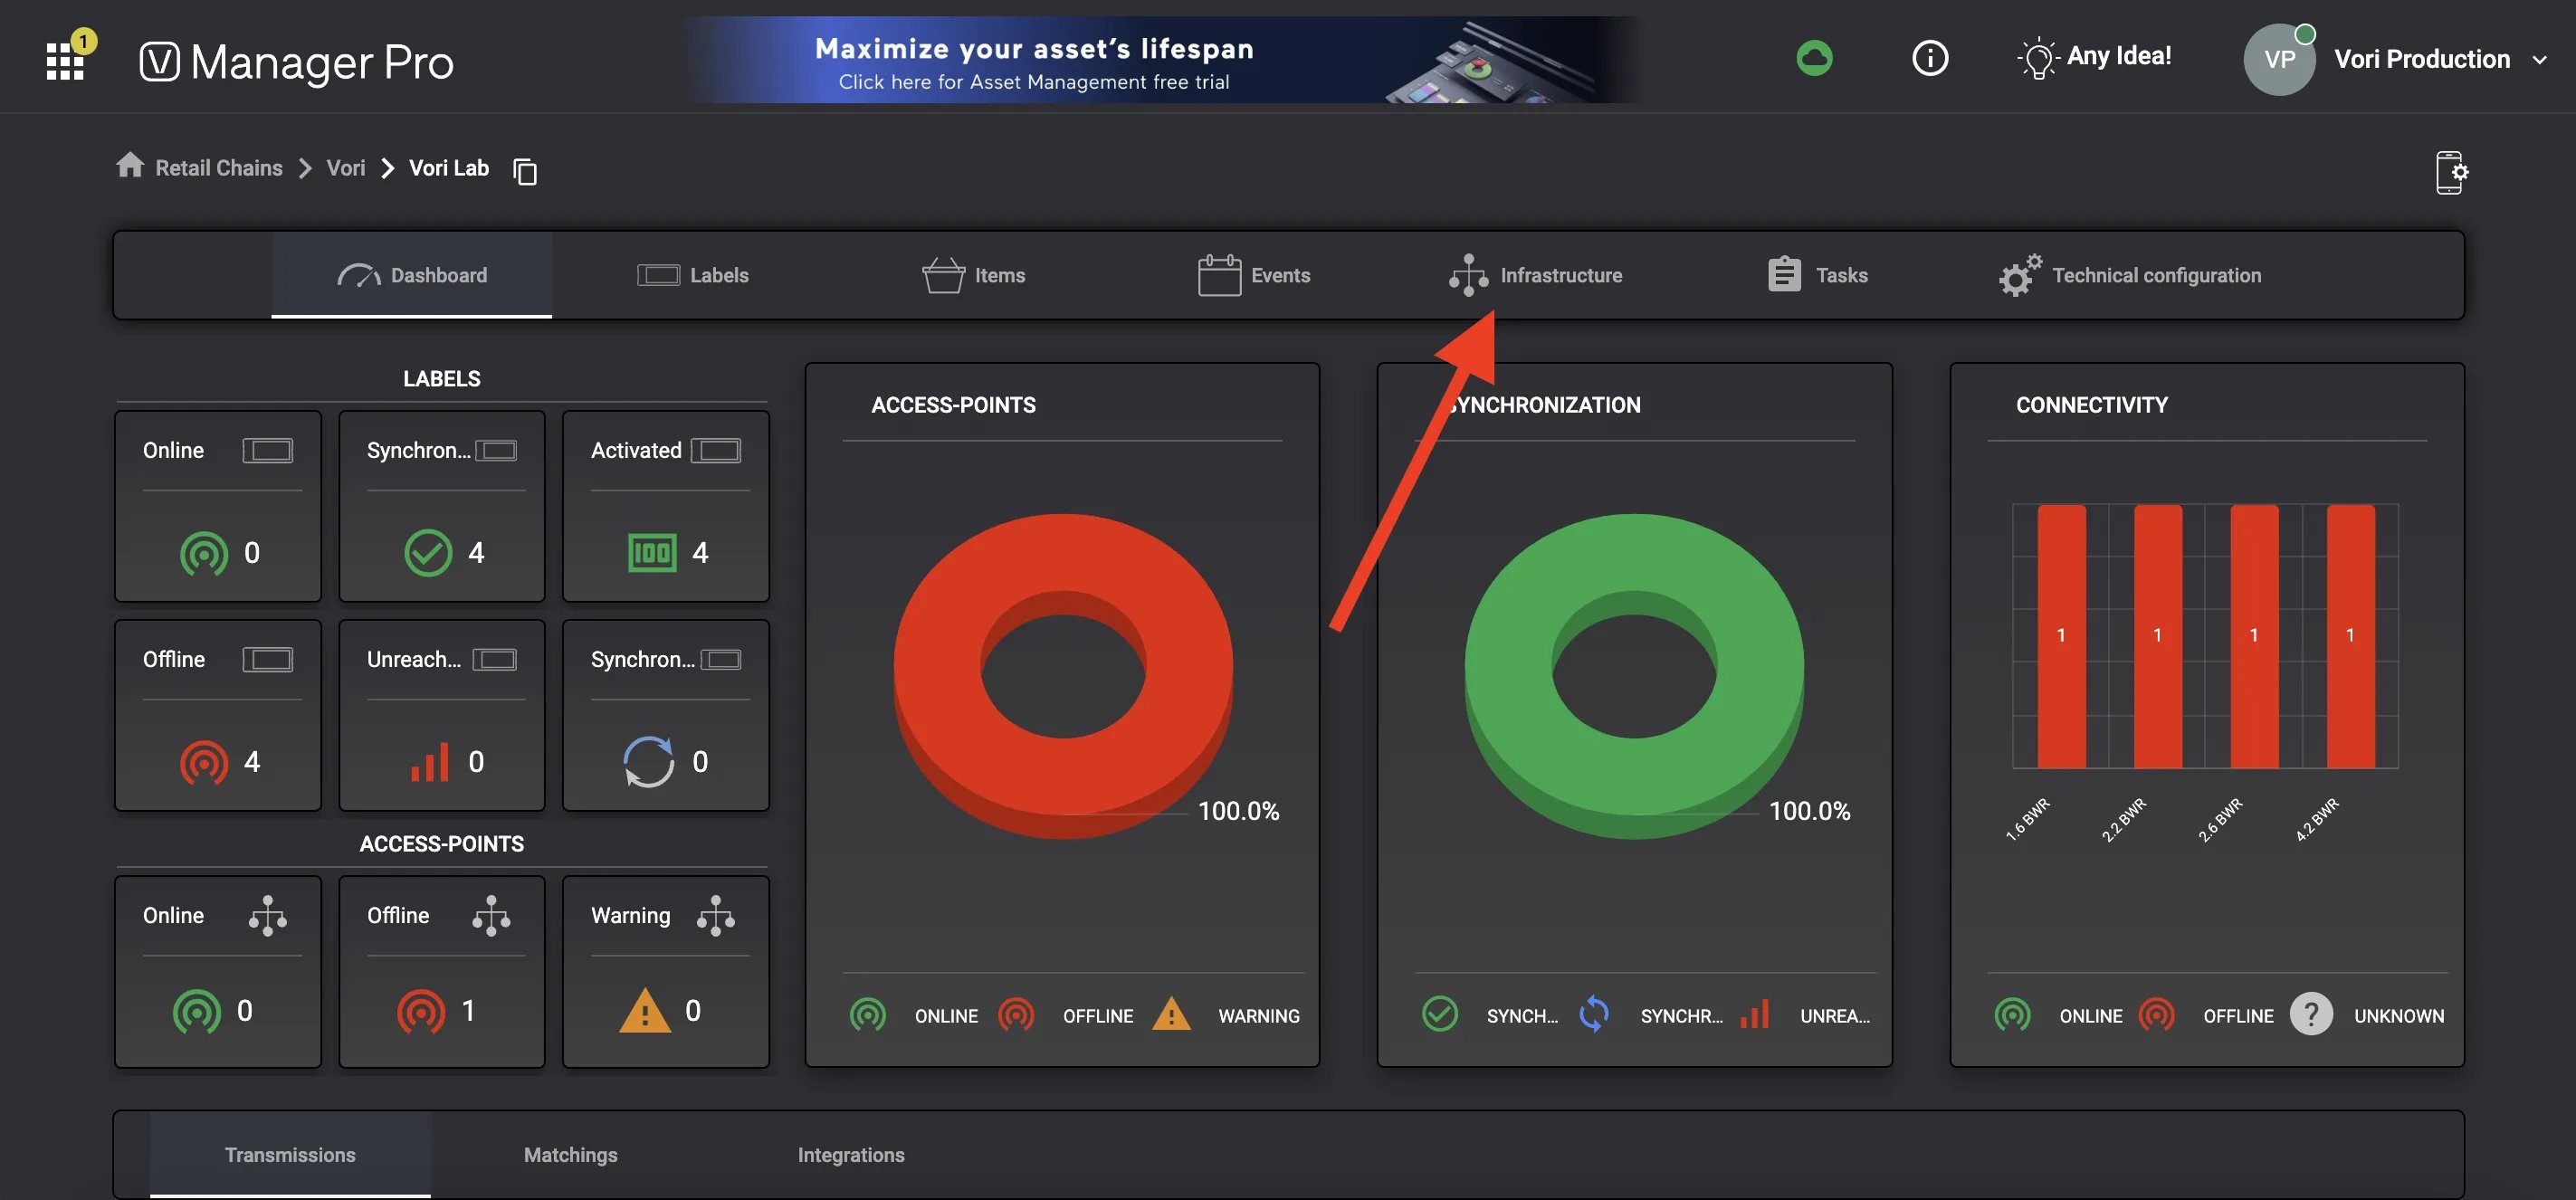 5. Select **`Add`** to begin entering the credentials for the new access point.
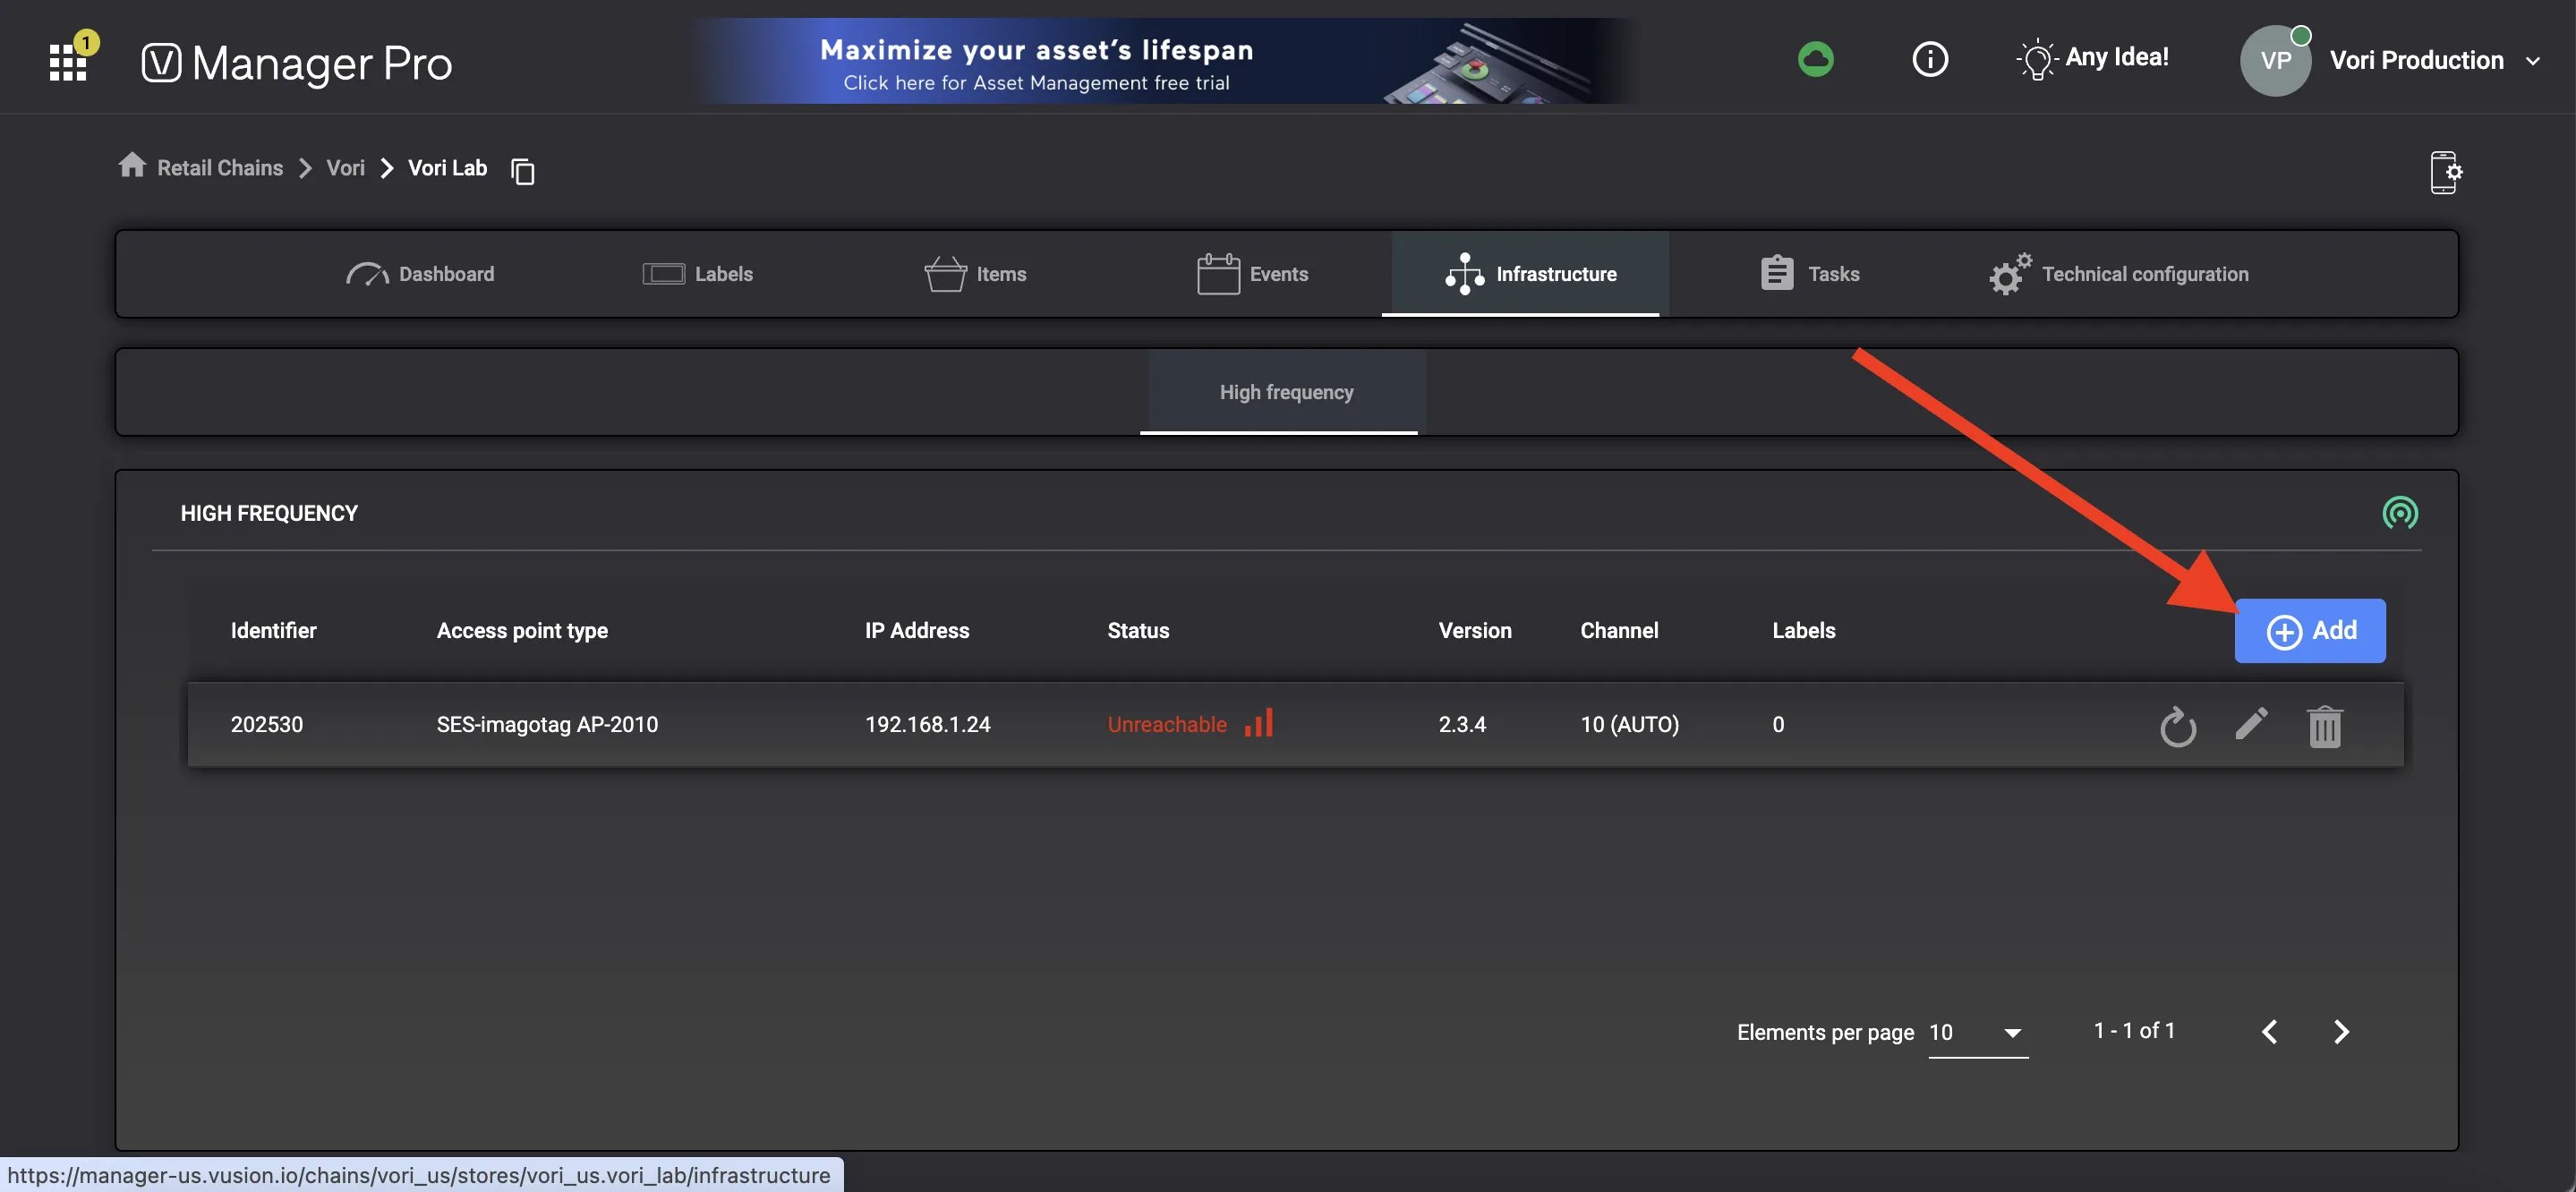 6. Under **Transmitter ID**, enter the AP-ID number found either on the access point's box or on the bottom of the access point.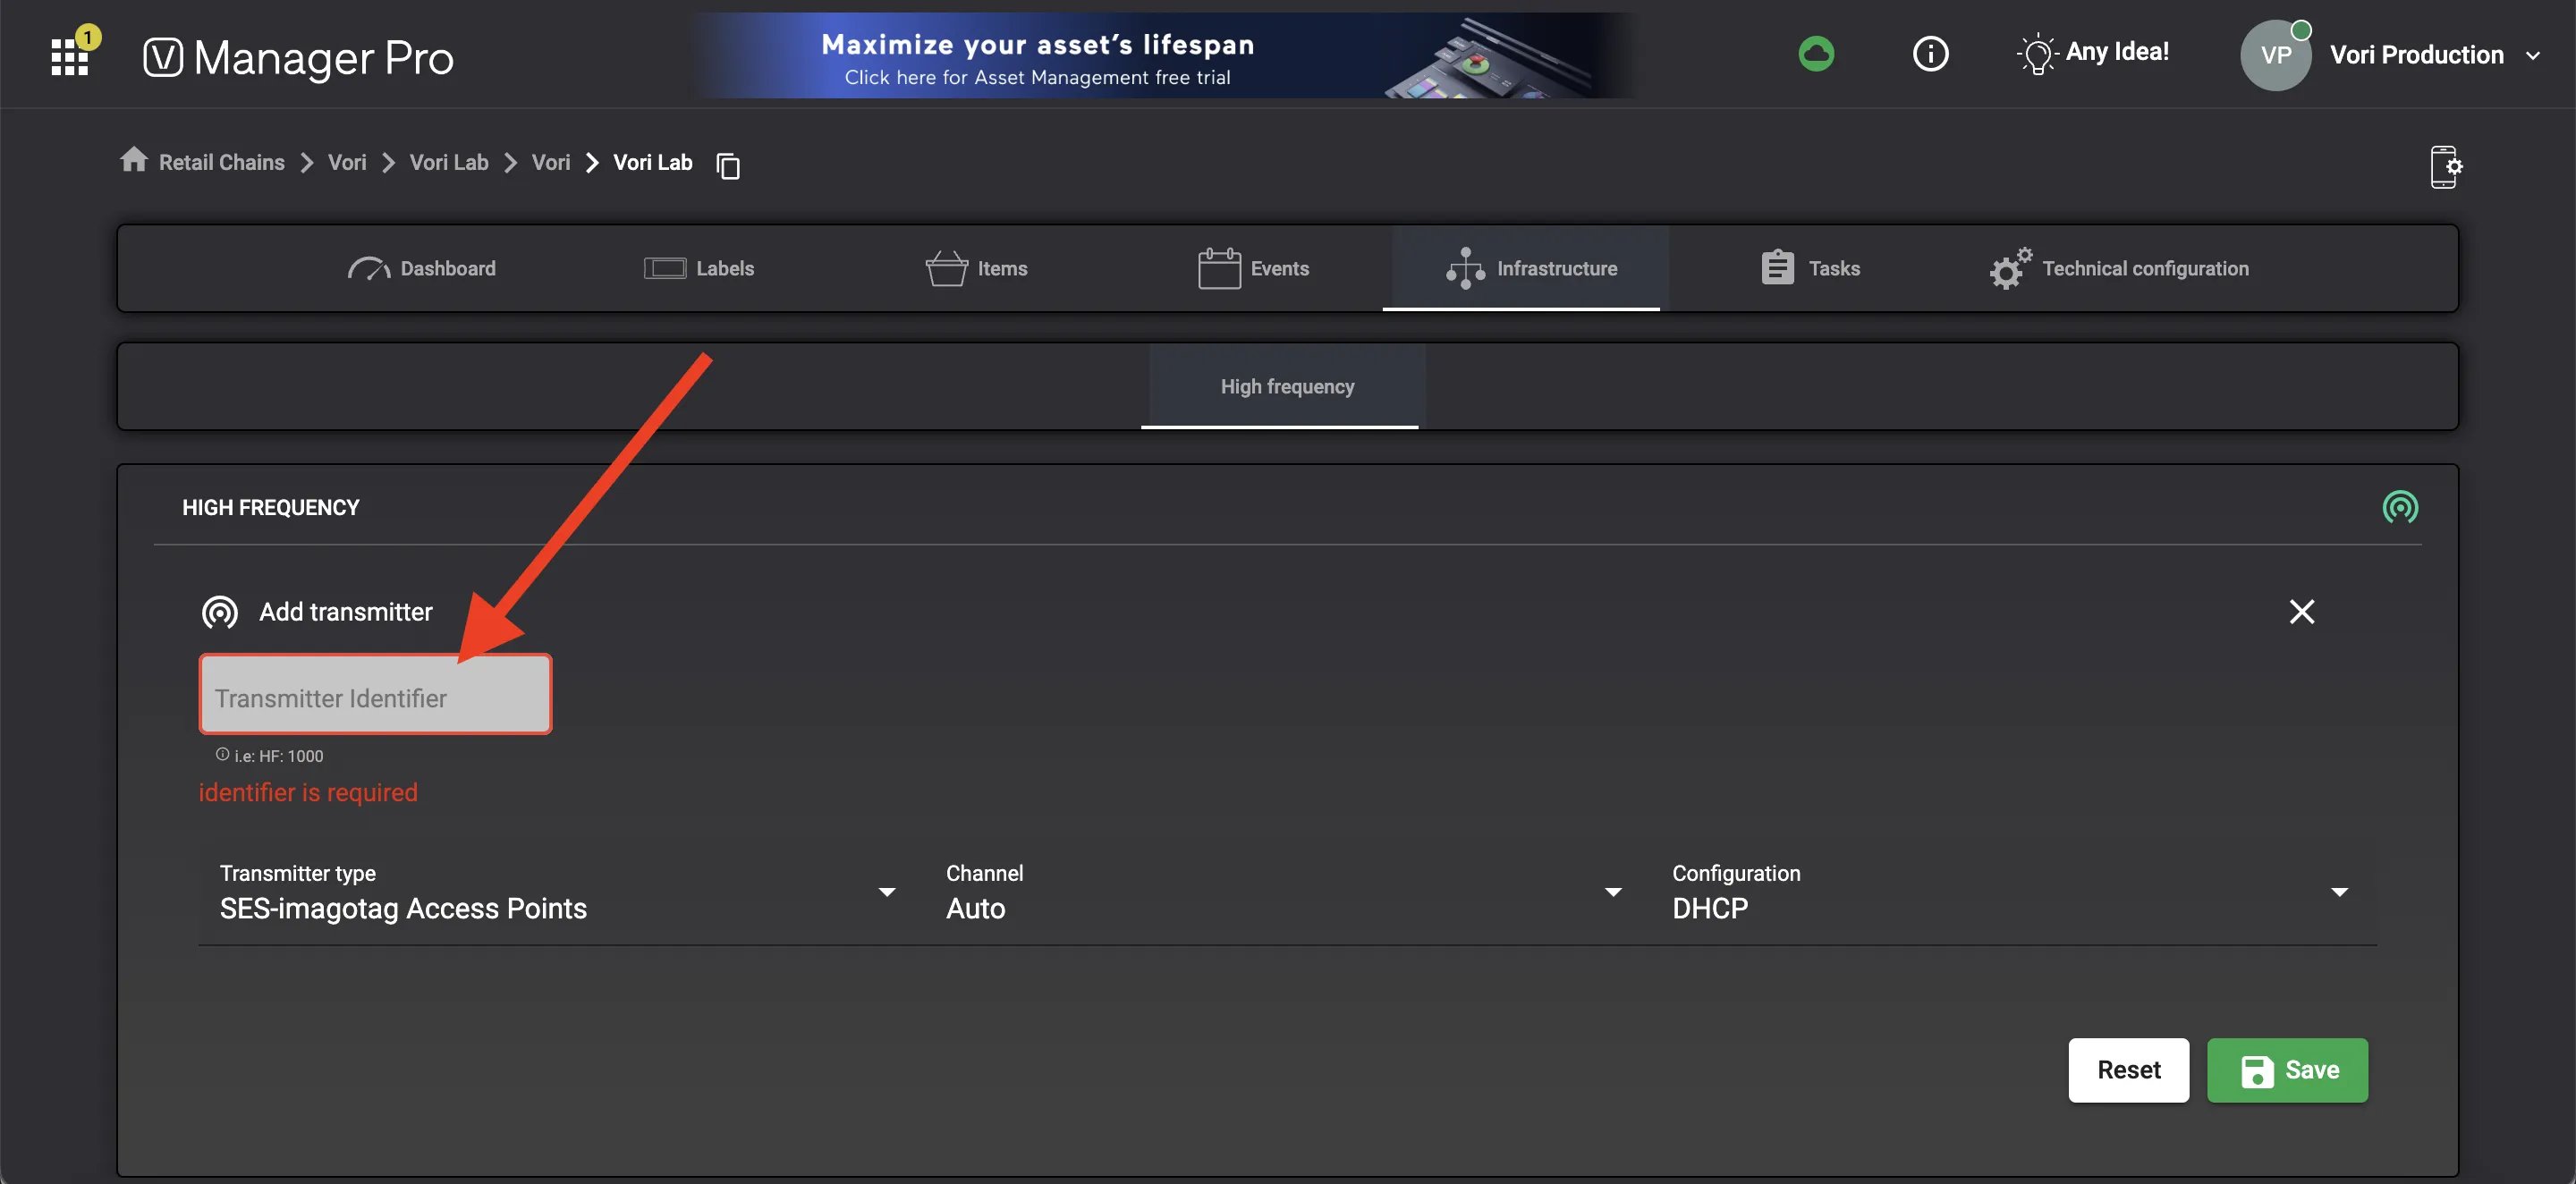
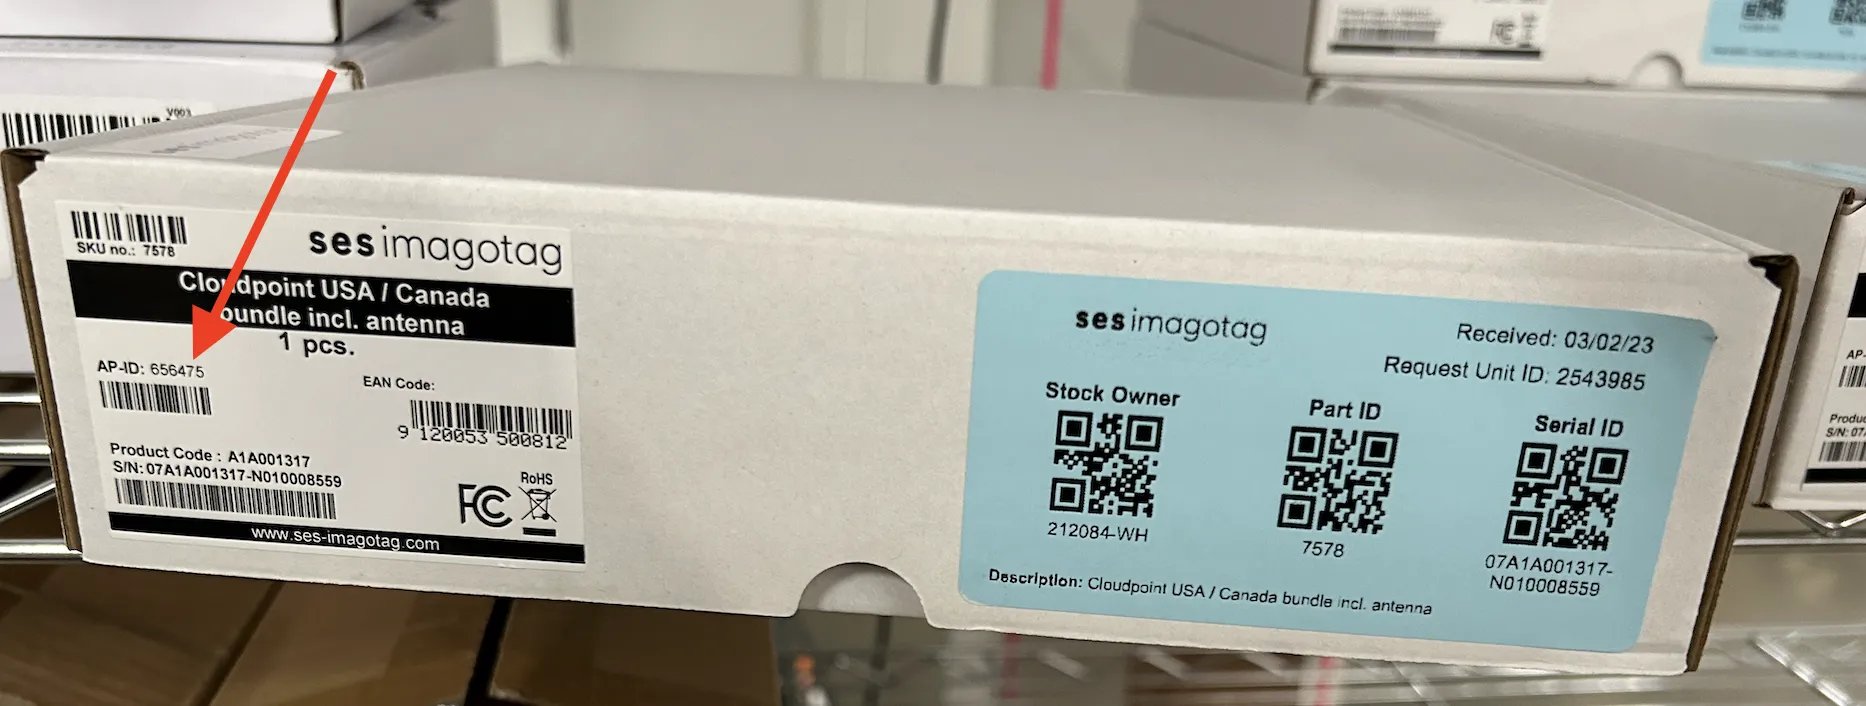
 7. Once the AP-ID is entered, leave all other setting on-screen as-is and select `**Submit**`.
 Once the access point is connected to an internet source and powered on, it may take up to 5 minutes to fully register as online.
 ## Related topics
- [How to remotely reboot an ESL access point through Vusion Manager](/electronic-shelf-labels-esls/how-to-remotely-reboot-an-esl-access-point-through-vusion-manager.md)
- [How to register a case of ESLs in the Vusion Link app](/electronic-shelf-labels-esls/how-to-register-a-case-of-esls-in-the-vusion-link-app.md)
- [How to search, view, & troubleshoot ESLs using Vusion Manager](/electronic-shelf-labels-esls/how-to-search-view-and-troubleshoot-esls-using-vusion-manager.md)
## Related topics
- [How to remotely reboot an ESL access point through Vusion Manager](/electronic-shelf-labels-esls/how-to-remotely-reboot-an-esl-access-point-through-vusion-manager.md)
- [How to register a case of ESLs in the Vusion Link app](/electronic-shelf-labels-esls/how-to-register-a-case-of-esls-in-the-vusion-link-app.md)
- [How to search, view, & troubleshoot ESLs using Vusion Manager](/electronic-shelf-labels-esls/how-to-search-view-and-troubleshoot-esls-using-vusion-manager.md)