> ## Documentation Index
> Fetch the complete documentation index at: https://help.vori.com/llms.txt
> Use this file to discover all available pages before exploring further.
# Set Up Departments
> Organize your products into parent and sub-departments, and flag departments that shouldn't count in sales reporting.
Departments organize your products into parent and sub-departments so your catalog, reporting, and Point of Sale (POS) flows stay tidy as your store grows. This guide walks through the four things you do on the Departments page: getting oriented, creating a parent department, adding a sub-department under it, and editing an existing department.
## Before You Begin
* Log in to the **Back Office** as an Owner or Manager.
* Make sure your active store is selected in the top-left store switcher. Departments are store-specific, so you create and edit them within the store you're currently viewing.
* Navigate to **Products → [Departments](https://app.vori.com/retail/departments)** in the left-hand menu.
Attributes like taxes, EBT eligibility, and target margins now live in **Product Rules**, not on the department itself. The Departments page is just for organizing your products and controlling what counts in sales reporting.
***
## Your Departments Page
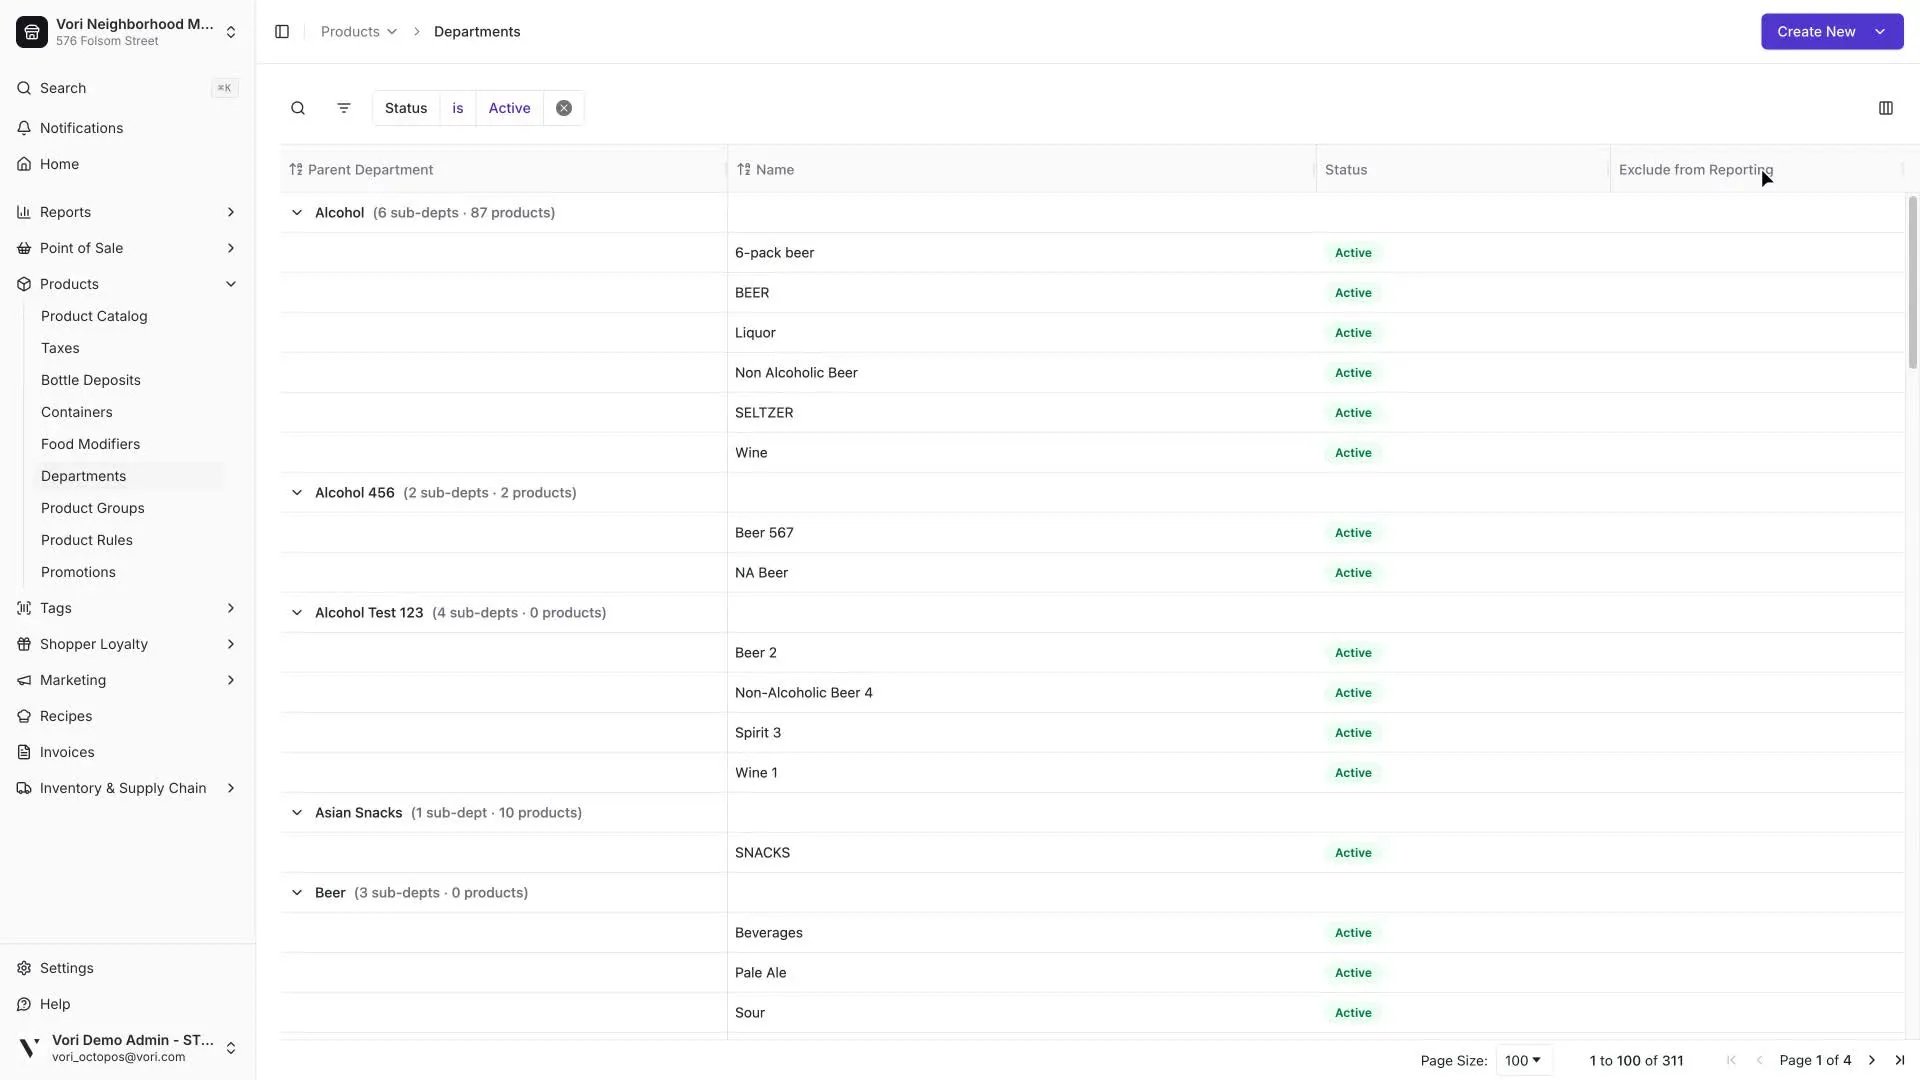
The Departments page shows every parent department in your store, with sub-departments grouped underneath. Each row shows its parent, name, status, and whether it's excluded from reporting.
Use the toolbar above the grid to find what you're looking for:
Click the search icon in the toolbar and start typing. The grid filters as you type.
Use the **Status** pill to show only active or only inactive departments. Active is the default.
Click the chevron next to a parent name to show or hide its sub-departments.
***
## Create a Parent Department
Parent departments are the top-level buckets that organize your catalog — think **Produce**, **Dairy**, **Bakery**. Create one whenever you need a new category that sub-departments can live under.
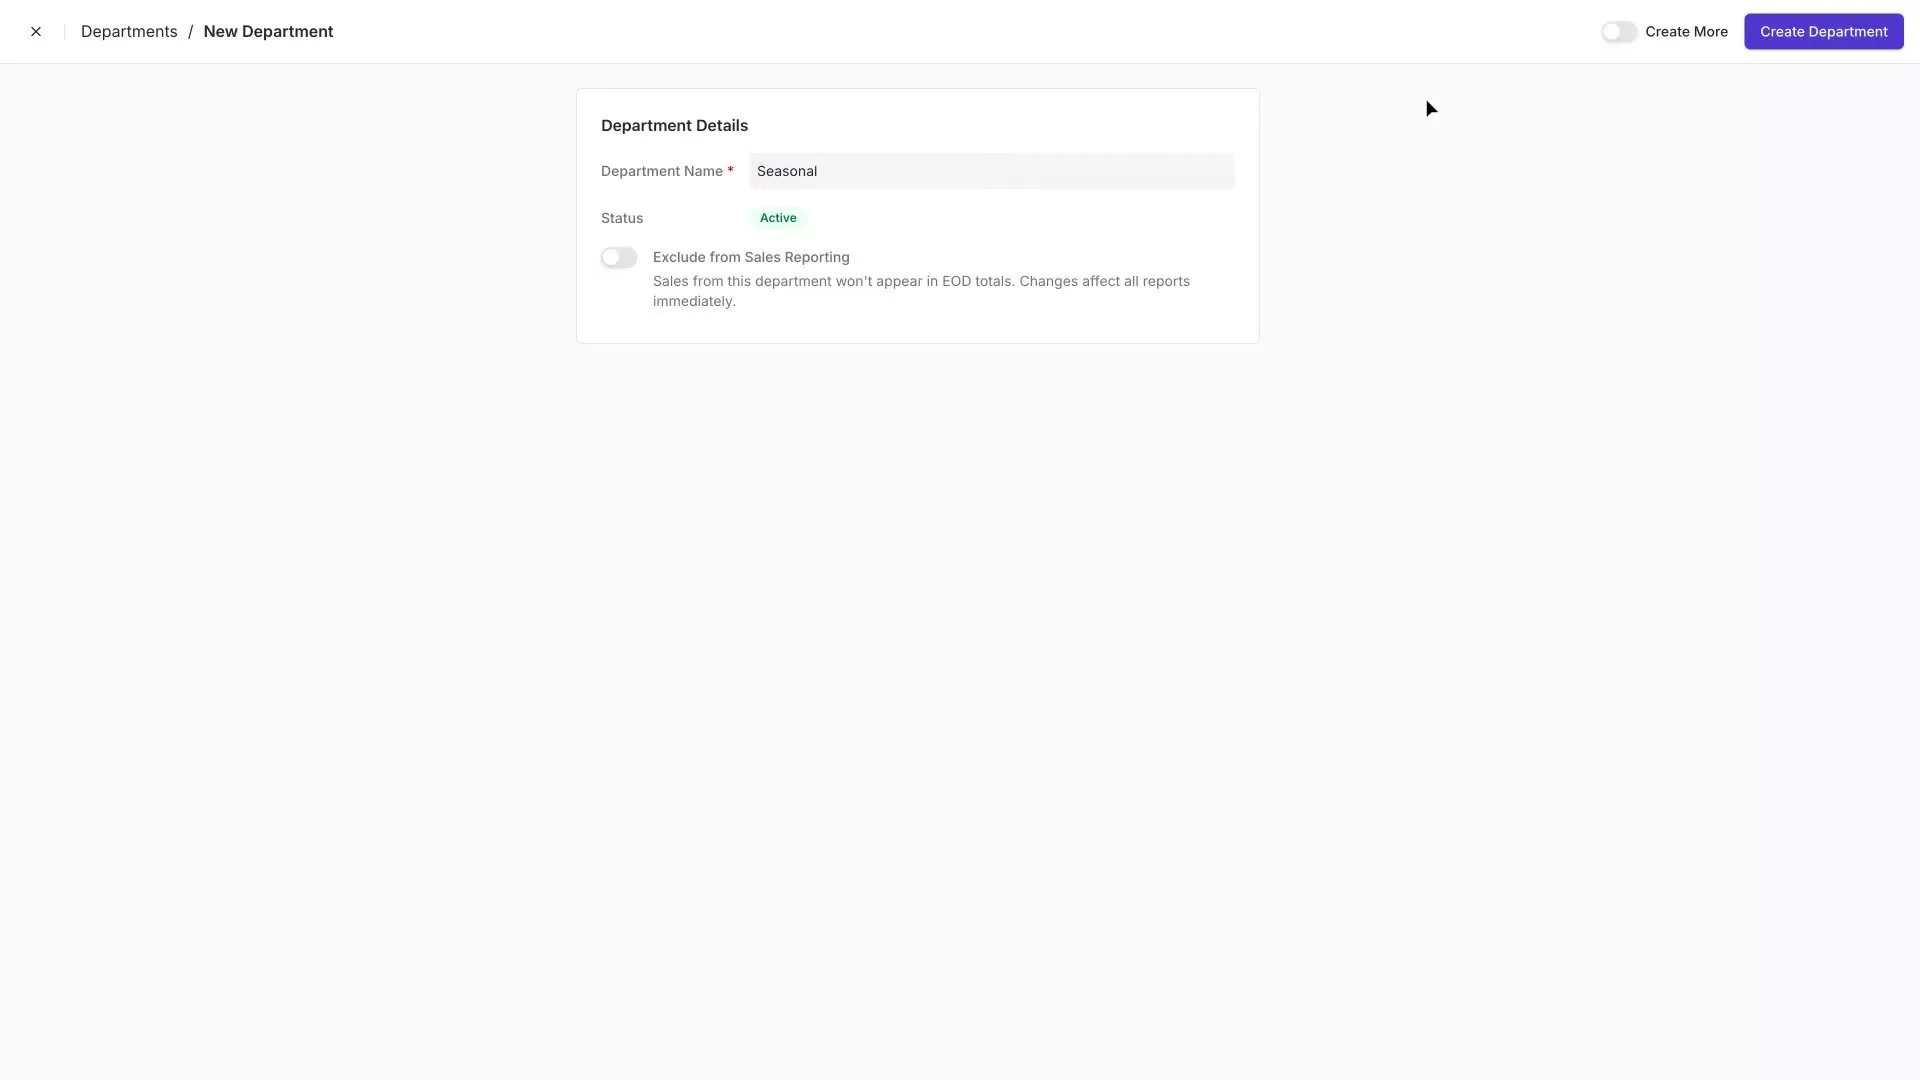
Click **Create New** in the top-right corner, then choose **Department**.
Enter the department name. This is what cashiers, reports, and the POS will show.
Leave **Exclude from Sales Reporting** off for most departments. Turn it on if this department shouldn't count in your sales totals — see [Exclude a Department from Sales Reporting](#exclude-a-department-from-sales-reporting) for when to use it.
Click **Create Department**. The new department appears in the grid immediately.
Flip on **Create More** in the top-right of the form if you're adding several departments in a row. Your settings persist so you only type the name for each one.
***
## Create a Sub-Department
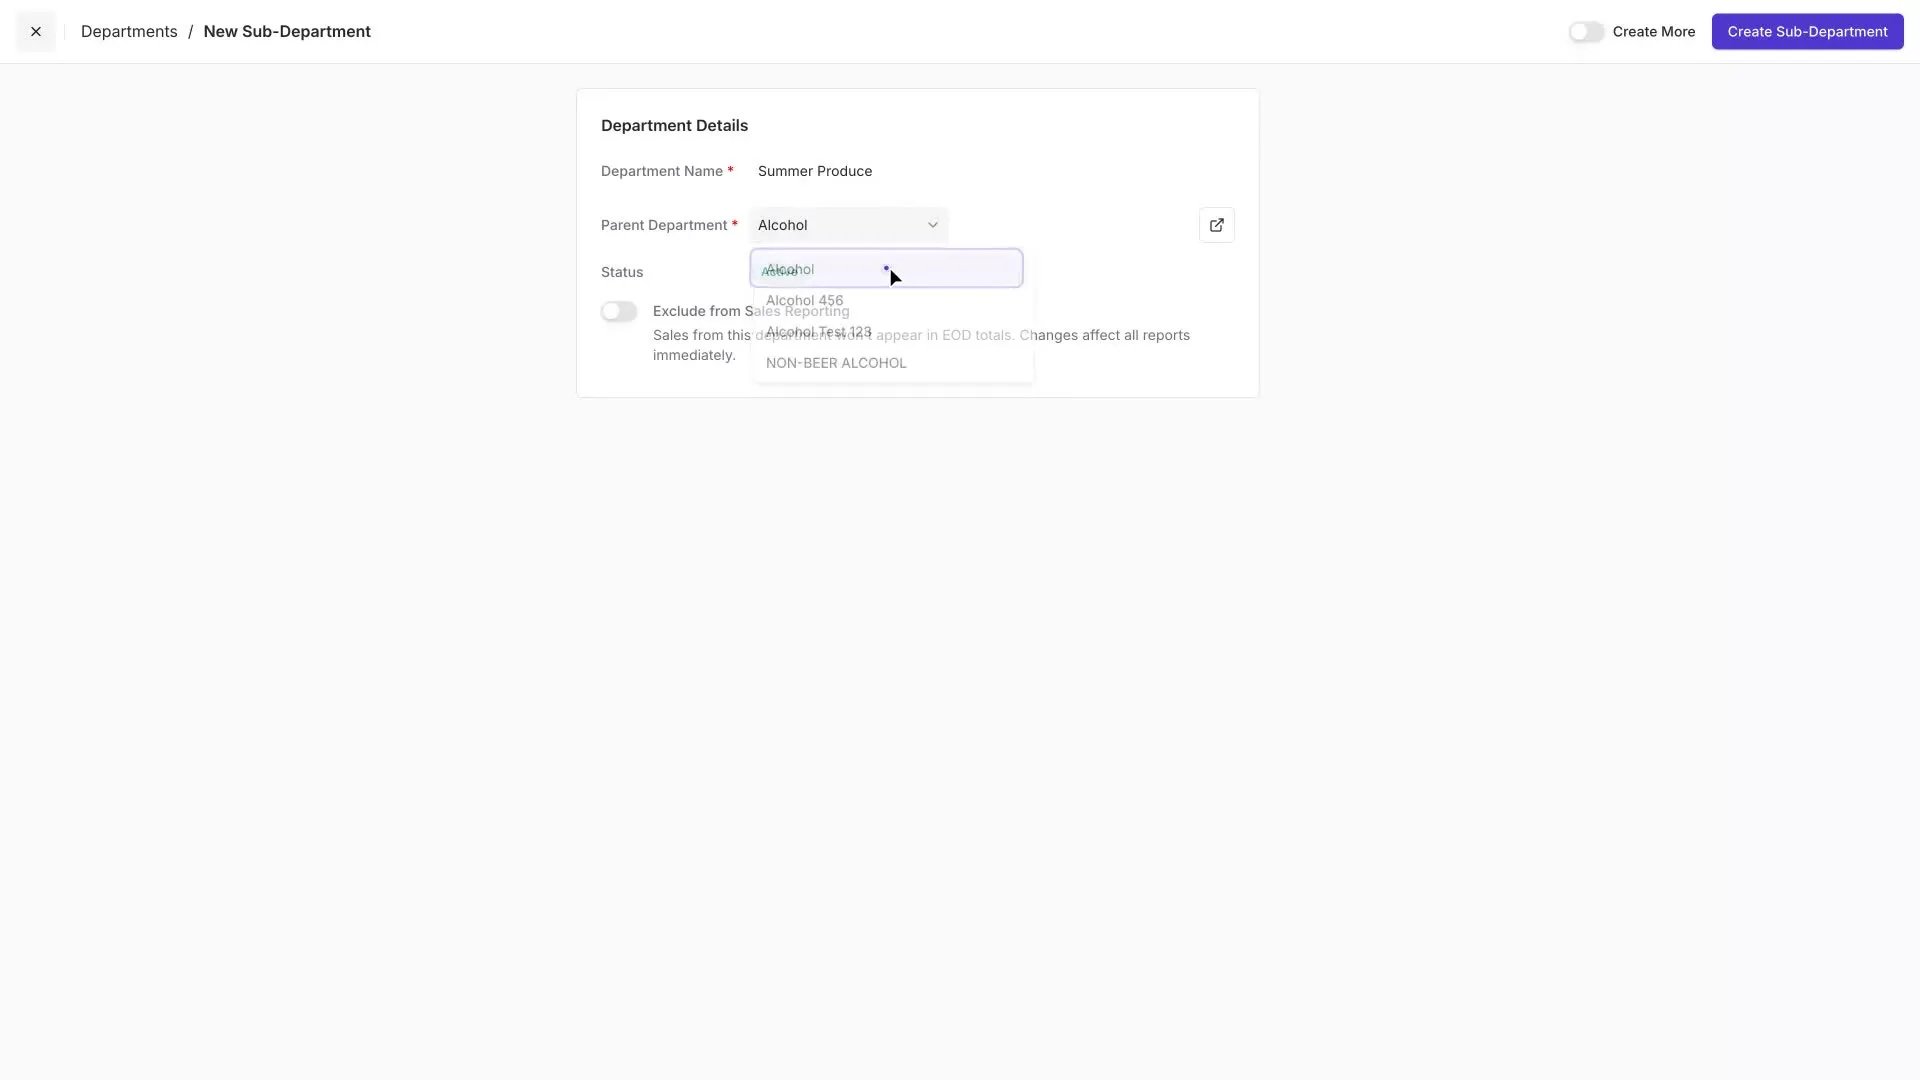
Sub-departments sit under a parent and add more detail to your catalog — for example, **Summer Produce** under **Produce**, or **Yogurt** under **Dairy**.
Click **Create New** in the top-right corner, then choose **Sub-Department**.
Enter the sub-department name.
Click the **Parent Department** dropdown and select the parent this sub-department belongs under. You can type to narrow the list.
Click **Create Sub-Department**. The sub-department appears in the grid, grouped under its parent.
***
## Edit an Existing Department
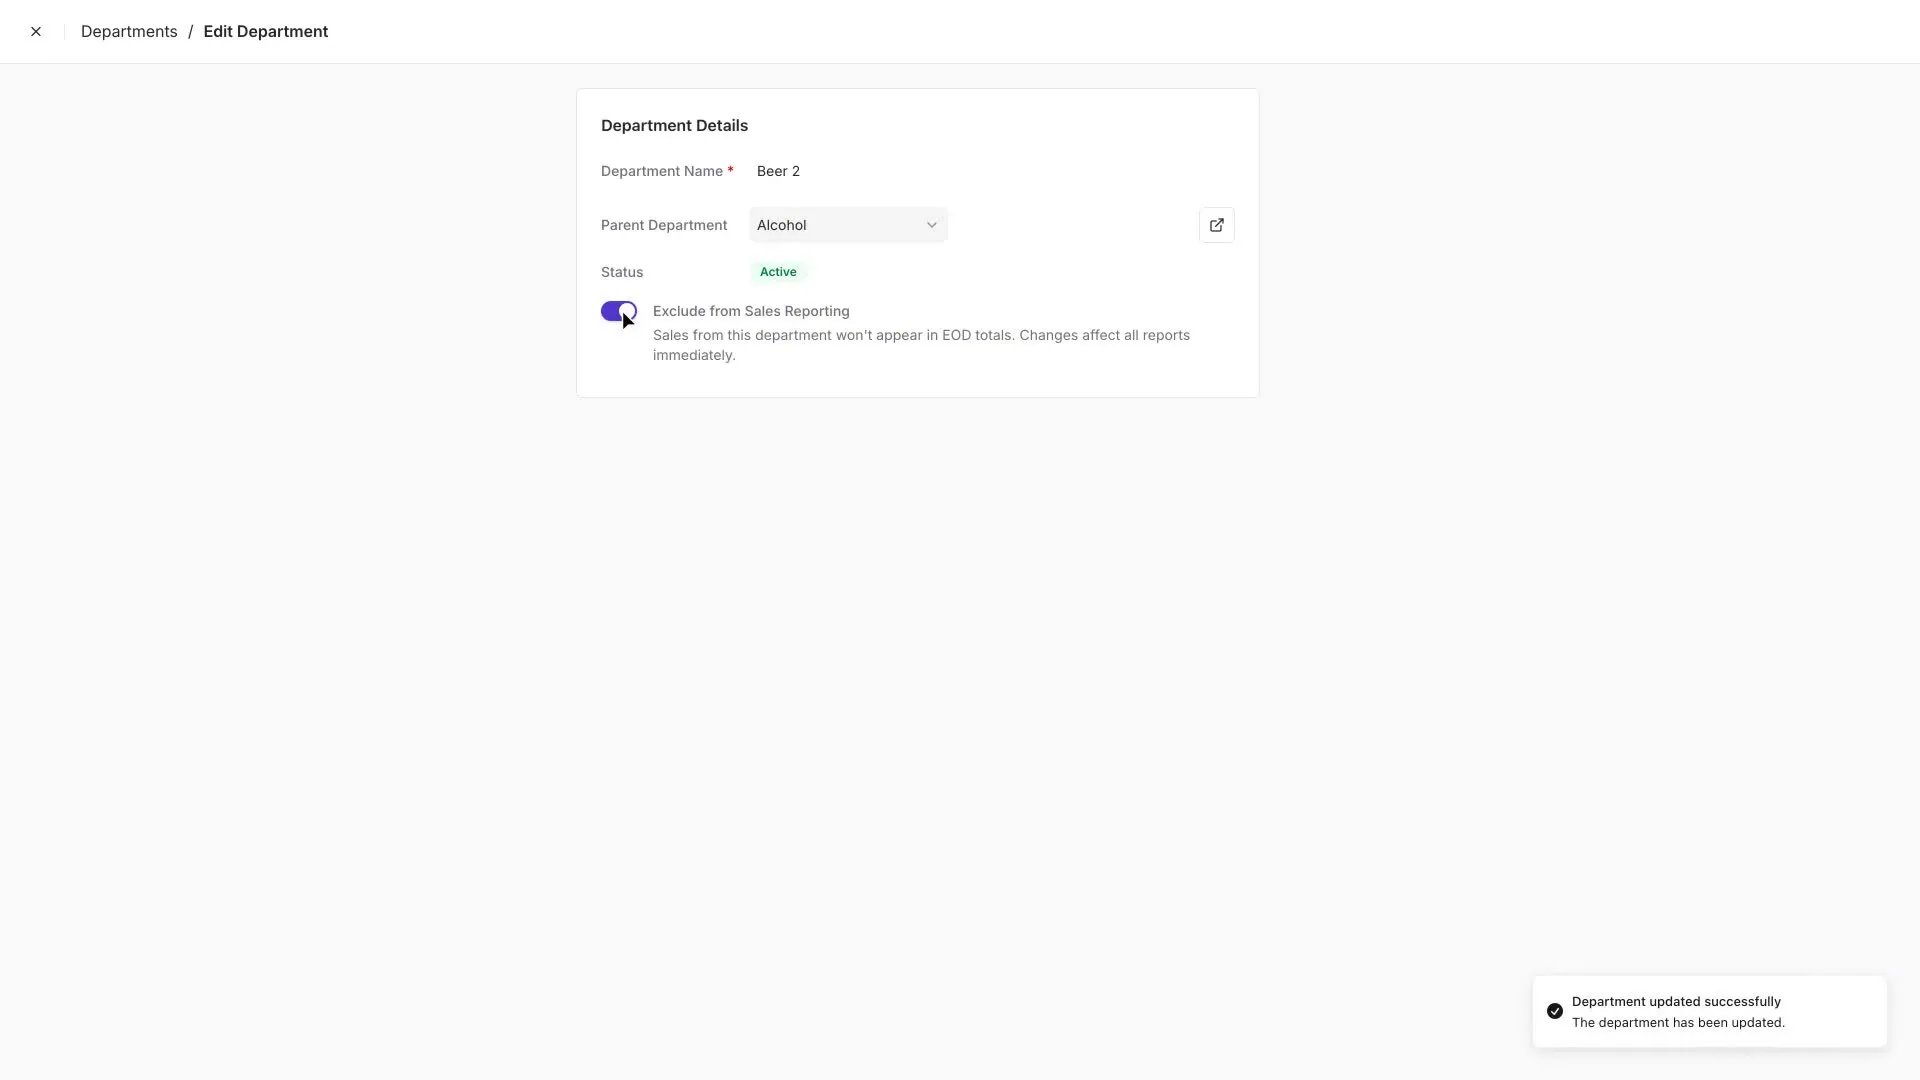
Open any department to rename it, move it under a different parent, or change whether it counts in sales reporting. Changes save automatically as you make them.
In the grid, hover over the department row and click **Open**.
Click the department name field and type the new name. The change saves when you click outside the field.
Click the **Parent Department** dropdown and pick a different parent. Type to narrow the list if you have many departments.
You can only change the parent on a sub-department that has no sub-departments of its own. If the dropdown is disabled, move any sub-departments out from under this department first.
Turn it on to keep this department out of your sales totals, or off to include it. Changes apply to all reports immediately.
***
## Exclude a Department from Sales Reporting
Some departments ring up like regular sales but don't represent revenue you want counted — third-party gift cards are the classic example. When a customer pays $50 for a Visa gift card, that's a pass-through, not $50 of grocery revenue.
Turning on **Exclude from Sales Reporting** keeps those transactions out of your End-of-Day totals and sales reports, so your numbers reflect actual store revenue.
Common candidates: third-party gift cards (Visa, Happy Card, Blackhawk), lottery tickets, and money orders. Anything the store is effectively just a pass-through for.
***
## Deactivate or Reactivate a Department
You can deactivate a department once it no longer has any active or inactive products in it. To reactivate, open the department, change its status back to **Active**, and your team can start using it again.
If the status dropdown is disabled, there are still products tied to this department. Move those products to another department first.
***
## Quick Reference
| Term | What it means |
| -------------------------------- | ----------------------------------------------------------------------------------------------------------------------------------------- |
| **Parent department** | A top-level category like Produce or Dairy. Holds one or more sub-departments. |
| **Sub-department** | A child of a parent department, like Summer Produce under Produce. |
| **Exclude from Sales Reporting** | A toggle that keeps a department's sales out of EOD totals and sales reports — useful for pass-through items like third-party gift cards. |
| **Product Rules** | Where tax rates, EBT eligibility, target margin, and other product attributes live now. Separate from the Departments page. |
## Related topics
- [Set Up and Manage Product Rules](/product-and-product-catalog-management/product-catalog-and-bulk-management/product-rules.md)
- [Setting Up Quick Food Service Counters](/whats-new-in-vori/in-alpha-quick-food-service/setting-up-quick-food-service-counters.md)
- [Set Up Variable Weight Barcodes](/product-and-product-catalog-management/product-creation-and-set-up/set-up-variable-weight-barcodes.md)
 Use the toolbar above the grid to find what you're looking for: