> ## Documentation Index
> Fetch the complete documentation index at: https://help.vori.com/llms.txt
> Use this file to discover all available pages before exploring further.
# How to Format & Import Shoppers & Loyalty Points
> Learn how to quickly move your existing shopper data using Vori's self-service import tool.
Modernize your store's loyalty program by quickly moving your existing shopper data into Vori. This feature allows you to bulk-upload shopper profiles and their current point balances so you can reward your community without skipping a beat.
### Before You Begin
Before uploading, make sure your file meets these standards. This keeps your import smooth and error-free.
* **File Format:** Must be saved as a **.CSV.**
***
### Prepare Your Import File
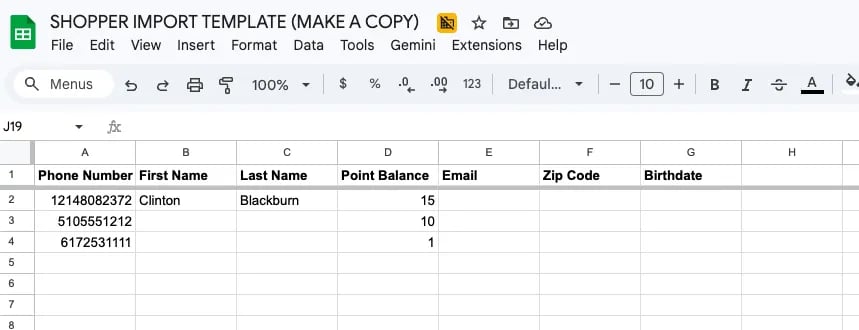
To ensure a successful import, your CSV file must be formatted correctly with the specific required information.
| **Column Header** | **Requirement** | **Description** |
| ----------------- | --------------- | --------------------------------------------------------------------------------------------------------------------------------------------------------------------------------------------------------------------- |
| **Phone Number** | **Required** | The unique identifier for every **member**. This is the only field Vori requires to create a profile. Use standard 10-digit formats (e.g., 5551234567) or E.164 format (e.g., +15551234567) to avoid import failures. |
| **First Name** | Optional | Helps you personalize the **shopper** experience via SMS communication. |
| **Last Name** | Optional | Recommended for better searchability in your **member** list. |
| **Point Balance** | Optional | Use this to migrate existing loyalty rewards. It will appear as a record in the **shopper's** history. The importer currently supports "Point Balances" but does not support importing "Punch" card progress. |
| **Email** | Optional | Useful for future marketing reach-out. |
| **Zip Code** | Optional | Helps you understand where your shopper lives. |
| **Birthdate** | Optional | Can be used to track **member** milestone. |
**💡Tip:** Open the **[Shopper Import Template](https://docs.google.com/spreadsheets/d/14oZED5W5kPQMveYyQhs2mM4KVF2apnUyKCMq-YIwpME/edit?usp=sharing)** in Google Sheets, select **File > Make a copy**, and enter your data there to ensure the headers stay perfect.
 ***
### Upload and Map Your Data
Once your file is ready, you can upload it directly into the Member section.
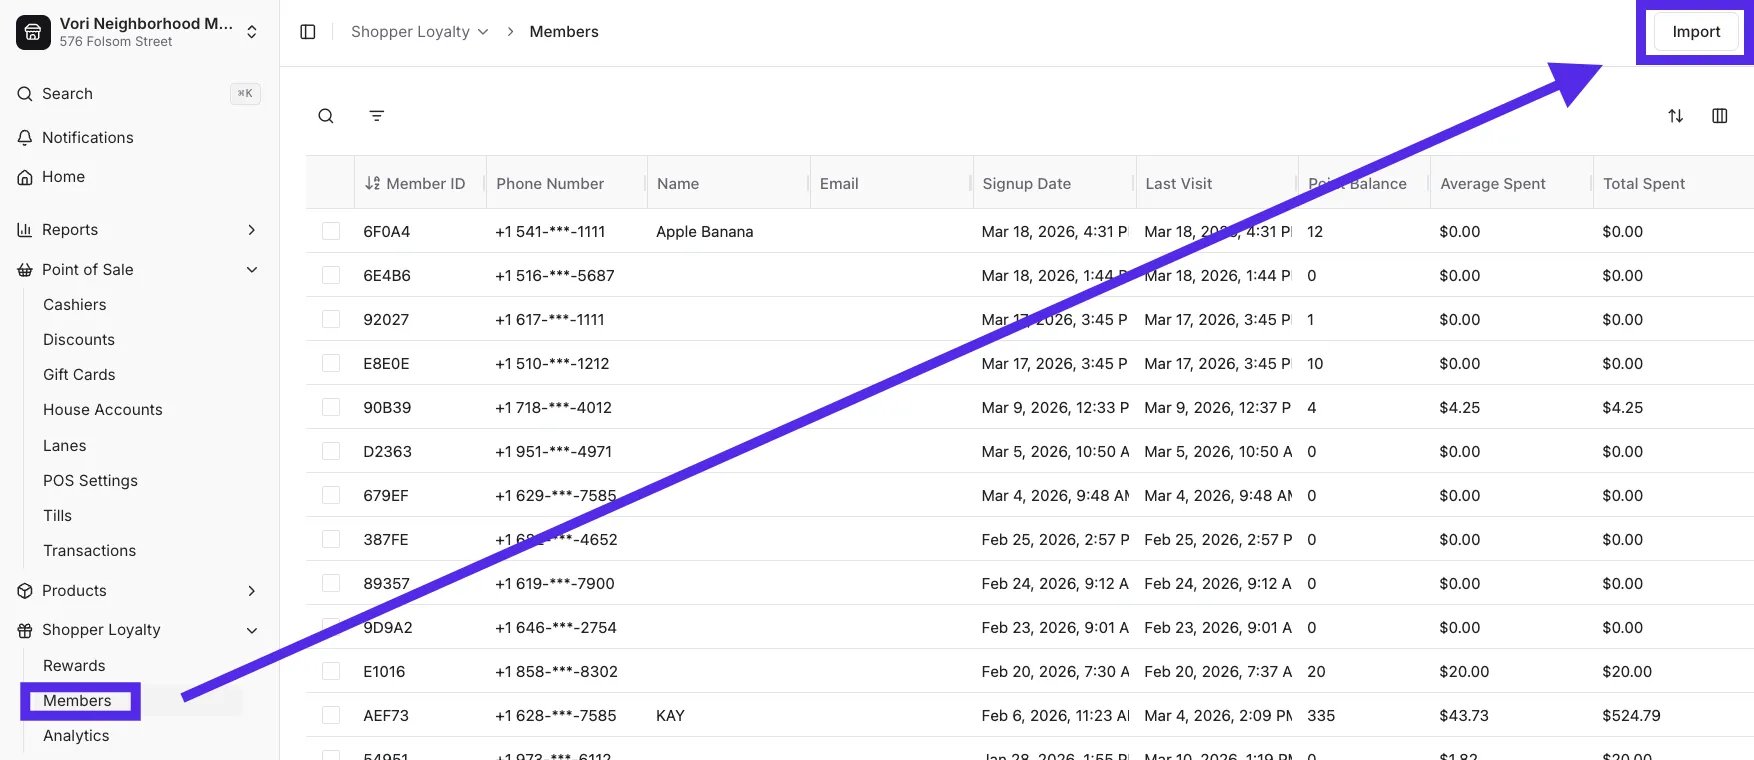
1. Navigate to the **Members** section under Shopper Loyalty in New Back Office.
2. Click **Import** in the top right corner.
***
### Upload and Map Your Data
Once your file is ready, you can upload it directly into the Member section.
1. Navigate to the **Members** section under Shopper Loyalty in New Back Office.
2. Click **Import** in the top right corner.
 3. Drag and drop your CSV file into the upload area, or click **Select File** to browse your computer, then click **Upload**.
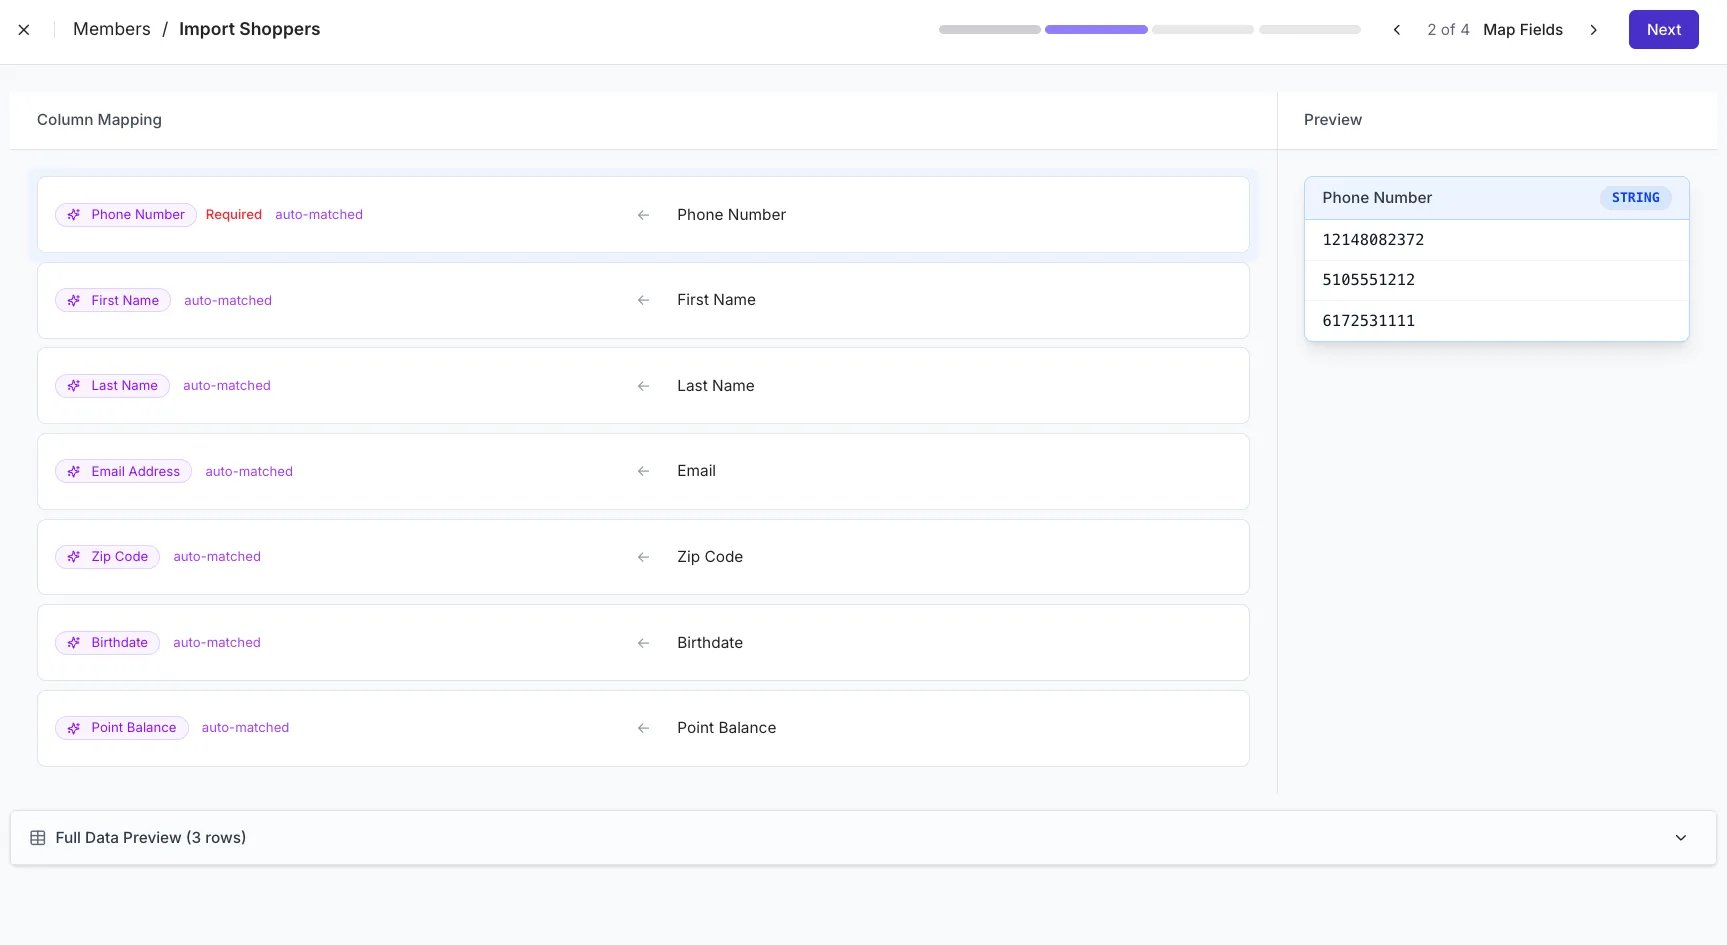
4. **Map your columns:** Vori will attempt to auto-match your file headers to the required fields.
5. Review the mappings and manually select the correct Vori field for any unmatched columns.
3. Drag and drop your CSV file into the upload area, or click **Select File** to browse your computer, then click **Upload**.
4. **Map your columns:** Vori will attempt to auto-match your file headers to the required fields.
5. Review the mappings and manually select the correct Vori field for any unmatched columns.
 6. Click **Next**.
***
### Review and Commit Changes
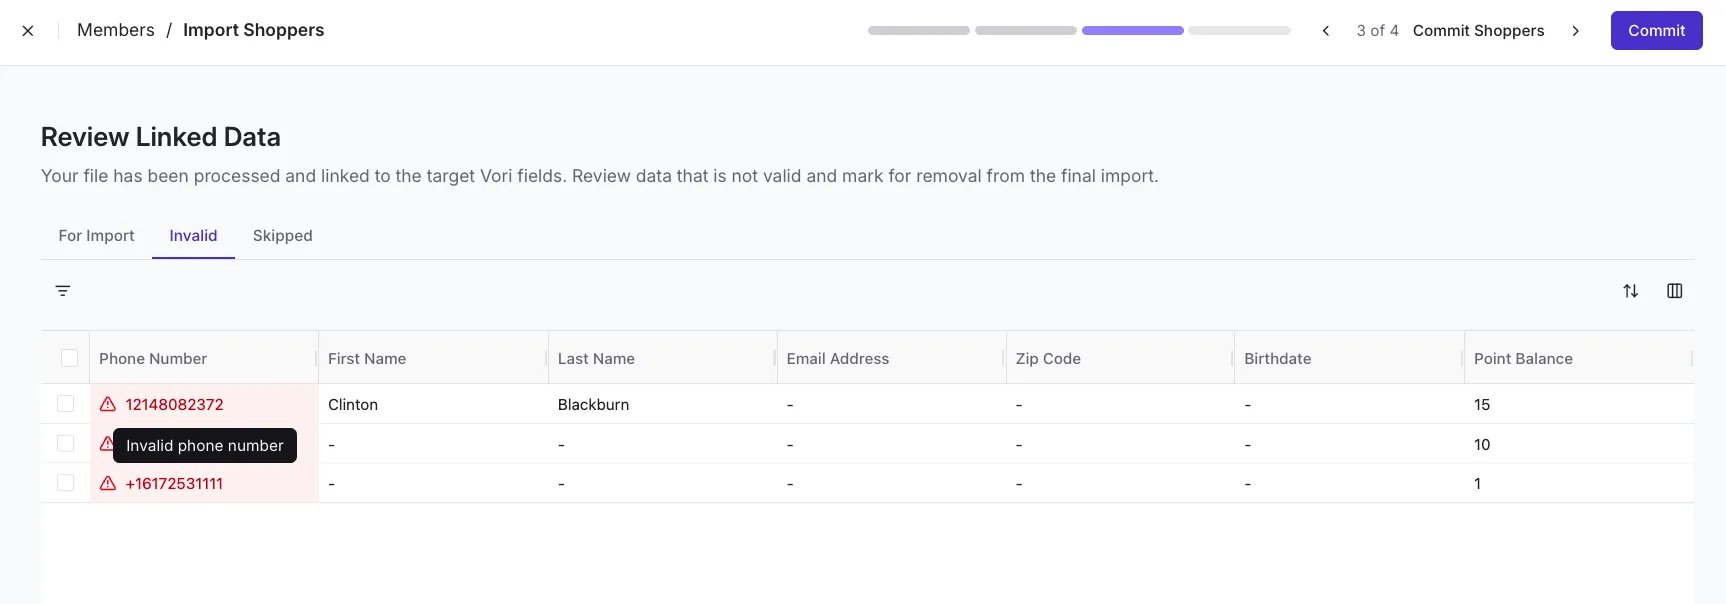
1. Review the **Review Linked Data** screen to see a preview of the **members** being added.
1. **In Import:** These rows are valid and ready for successful upload.
2. **Invalid:** These rows contain errors (such as missing names or duplicate numbers) and will not be imported.
2. Check the **Invalid** tab to identify rows that Vori cannot process. Common issues include:
* **Duplicate Data:** The phone number already exists in your Vori account.
* **Formatting Errors:** Phone numbers containing letters or incorrect characters.
6. Click **Next**.
***
### Review and Commit Changes
1. Review the **Review Linked Data** screen to see a preview of the **members** being added.
1. **In Import:** These rows are valid and ready for successful upload.
2. **Invalid:** These rows contain errors (such as missing names or duplicate numbers) and will not be imported.
2. Check the **Invalid** tab to identify rows that Vori cannot process. Common issues include:
* **Duplicate Data:** The phone number already exists in your Vori account.
* **Formatting Errors:** Phone numbers containing letters or incorrect characters.
 3. Once you have verified the data, click **Commit**.
***
### Troubleshooting
* **Points not appearing immediately?** Try refreshing your browser or re-sorting the **Member** list by "Signup Date" to see the most recent additions.
* **Missing Transactions:** Imported points appear as a single manual adjustment transaction in the **member's** point history.
3. Once you have verified the data, click **Commit**.
***
### Troubleshooting
* **Points not appearing immediately?** Try refreshing your browser or re-sorting the **Member** list by "Signup Date" to see the most recent additions.
* **Missing Transactions:** Imported points appear as a single manual adjustment transaction in the **member's** point history.
 * **Invalid Phone Numbers:** Ensure all phone numbers consist only of digits. Any letters or special symbols may cause the row to fail.
## Related topics
- [How to Format & Import House Accounts](/point-of-sale-pos/house-accounts-charge-accounts/how-to-format-and-import-house-accounts.md)
- [How to Format & Import Existing Gift Card Data](/point-of-sale-pos/store-gift-cards/how-to-format-and-import-existing-gift-card-data.md)
- [How to Format and Import Promotion Files](/promotions/how-to-format-and-import-promotion-files.md)
* **Invalid Phone Numbers:** Ensure all phone numbers consist only of digits. Any letters or special symbols may cause the row to fail.
## Related topics
- [How to Format & Import House Accounts](/point-of-sale-pos/house-accounts-charge-accounts/how-to-format-and-import-house-accounts.md)
- [How to Format & Import Existing Gift Card Data](/point-of-sale-pos/store-gift-cards/how-to-format-and-import-existing-gift-card-data.md)
- [How to Format and Import Promotion Files](/promotions/how-to-format-and-import-promotion-files.md)