Introduction
Promotional labels can be printed directly from the VoriOS handheld using the Zebra printer. This guide walks through setting up the printer and selecting the correct label batch.
Directions
- On the Zebra printer, open the label roll compartment and replace the current label roll with a roll of yellow promotional labels.
-
Log in to the Vori OS appl on the store handheld.
-
Turn on the Zebra printer and connect it to the VoriOS app.
-
Once the label printer connected, click on the device tile of the label printer to view printer label settings.
.
-
Within printer label settings, scroll down to the Promotion Label section, and make the following setting changes:
-
Set Label as
Promotion (yellow box). -
Set Media Type as
Black Mark. -
Run
Calibrate Mediato align the paper. -
Under
Promotional Label.
-
-
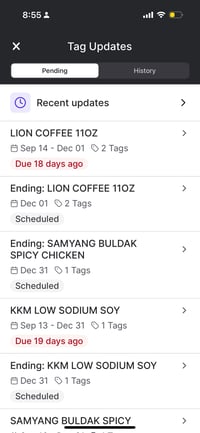
Navigate back to the Home Screen and select the
Tagstile. -
Under the Pending tab, there will be tags that haven’t been printed yet. There should be two batches:
-
The first batch with a date range is the
Promotionalbatch → use this batch for demo purposes. -
The second batch that says
Ending:is the Retail price batch for when that item comes off of sale.
-