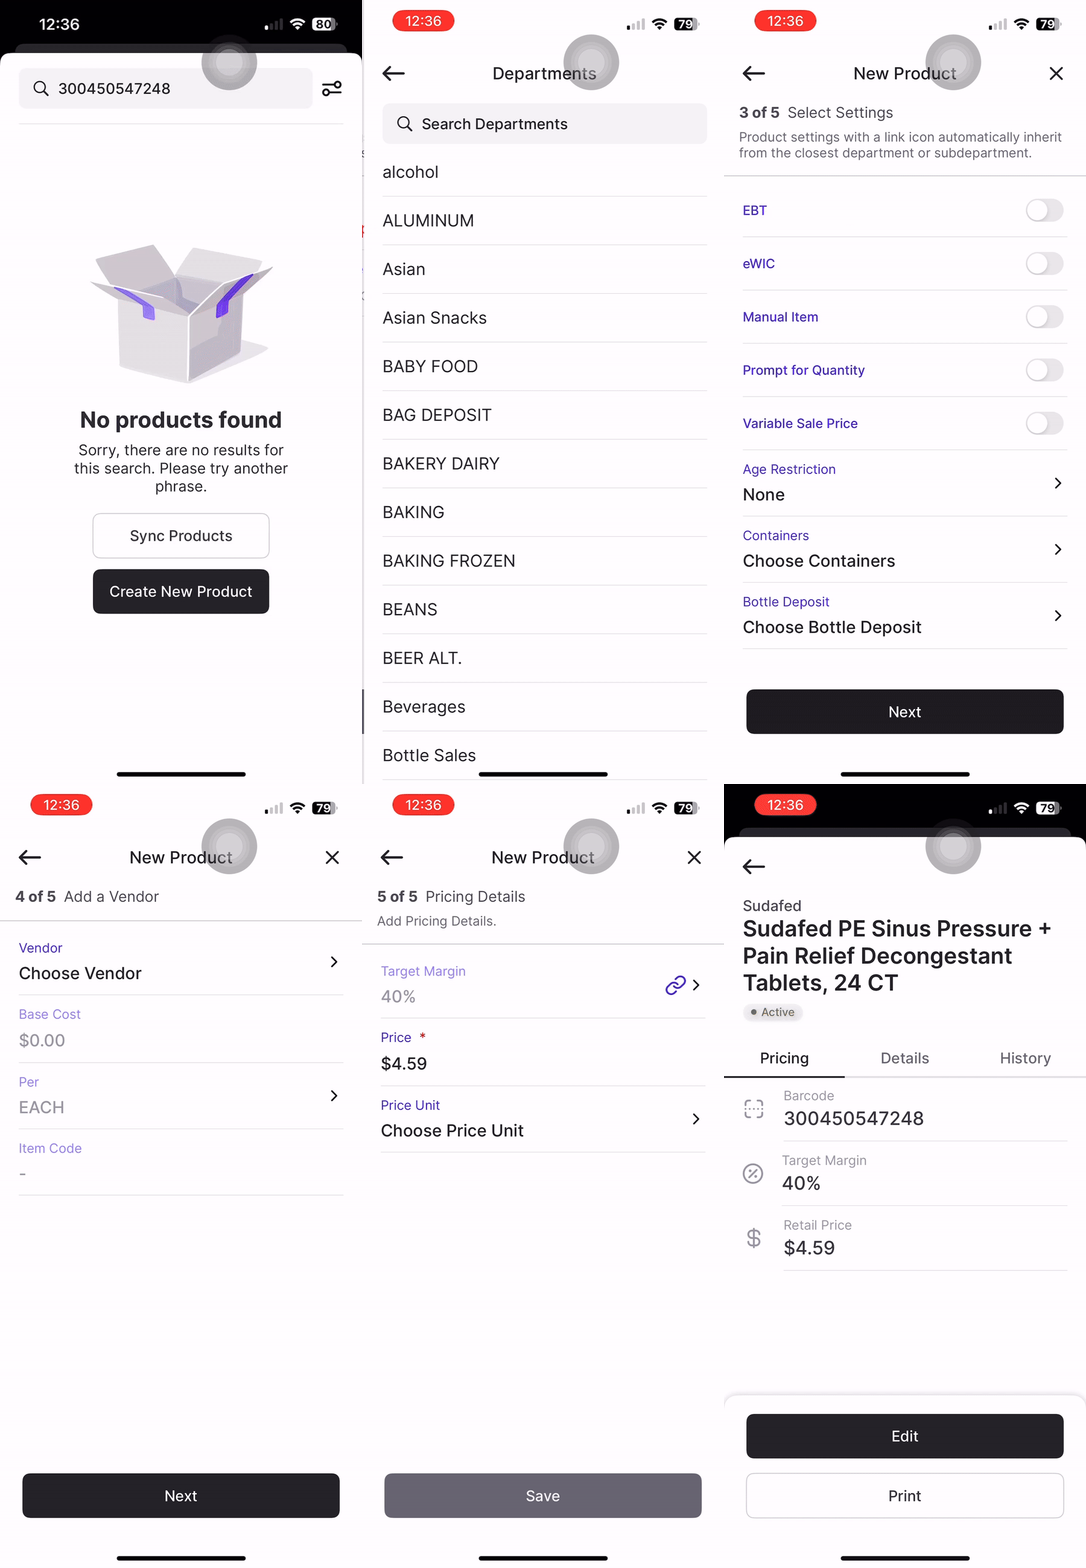
How to create a product on the Vori OS app
This article explains how to add-in new products with different barcode types from the Vori OS app
Introduction
All product details can be managed directly within the VoriOS app, including bottle deposits, taxes, and departments.
After logging into the VoriOS app, follow the instructions below to get started.
Adding a product with a PLU or UPC-A barcode
-
Scan barcode or type in PLU in the Search bar.
-
Select
Create New Product. -
Add Product Details manually or through Auto-Fill.
-
Select the Department and/or Sub-Department.
-
Select Settings (if Department-level settings are enabled, you will see the link🔗 next to it).
-
Add Vendor information (optional).
-
Add Pricing Details.
-
Tap
Save.
✏️ Note: All fields marked with a red asterisk, * are required when creating a new product.
Video example:

✏️ Note: If you're trying to add a product with a 6 or 8-digit UPC-E, you’ll need to convert it to its 12-digit UPC-A equivalent before it can be used.
Creating Type 2 UPC
-
Go to the Search bar
-
Start the UPC with 2
-
Enter five digit PLU
-
EX: PLU is 805, you would enter 00805
-
-
Enter five 0's
-
EX: 20080500000
-
-
Select
Create New Product -
Tap the Barcode field, and you will see UPC missing check digit(#)
-
Enter the suggested missing check digit
-
Add Product Details manually
-
Select Department and/or Sub-Department
-
Select Settings (if Department-level settings are enabled, you will see the link🔗 next to it)
-
Add Vendor information (optional)
-
Add Pricing Details - retail price is not relevant, as the scanner will automatically read the price embedded in the barcode.
-
Tap
Save.
Video example:
💡 Tip - To ensure all product changes are properly updated, tap Re-Sync on the Vori OS home screen after making any adjustments to products in the VoriOS app.