Introduction
Creating a product is a crucial step in adding physical inventory to the POS system. This process enables streamlined checkout times and more efficient inventory tracking. Several key fields are required to ensure product accuracy and compliance, while optional fields help enhance the shopper experience.
Navigating to the Product Catalog Page
After logging into Back Office, open the Products tab on the lefthand menu and select Product Catalog.

How to create a product
Within the Product Catalog page, select New Product on the top right corner of the screen.

All fields with an asterisk are required fields to create a product. These fields include:
- Barcode
- Name
- Department
- Retail Price
All other fields are optional, but can enhance the tag and shopper experience when included.
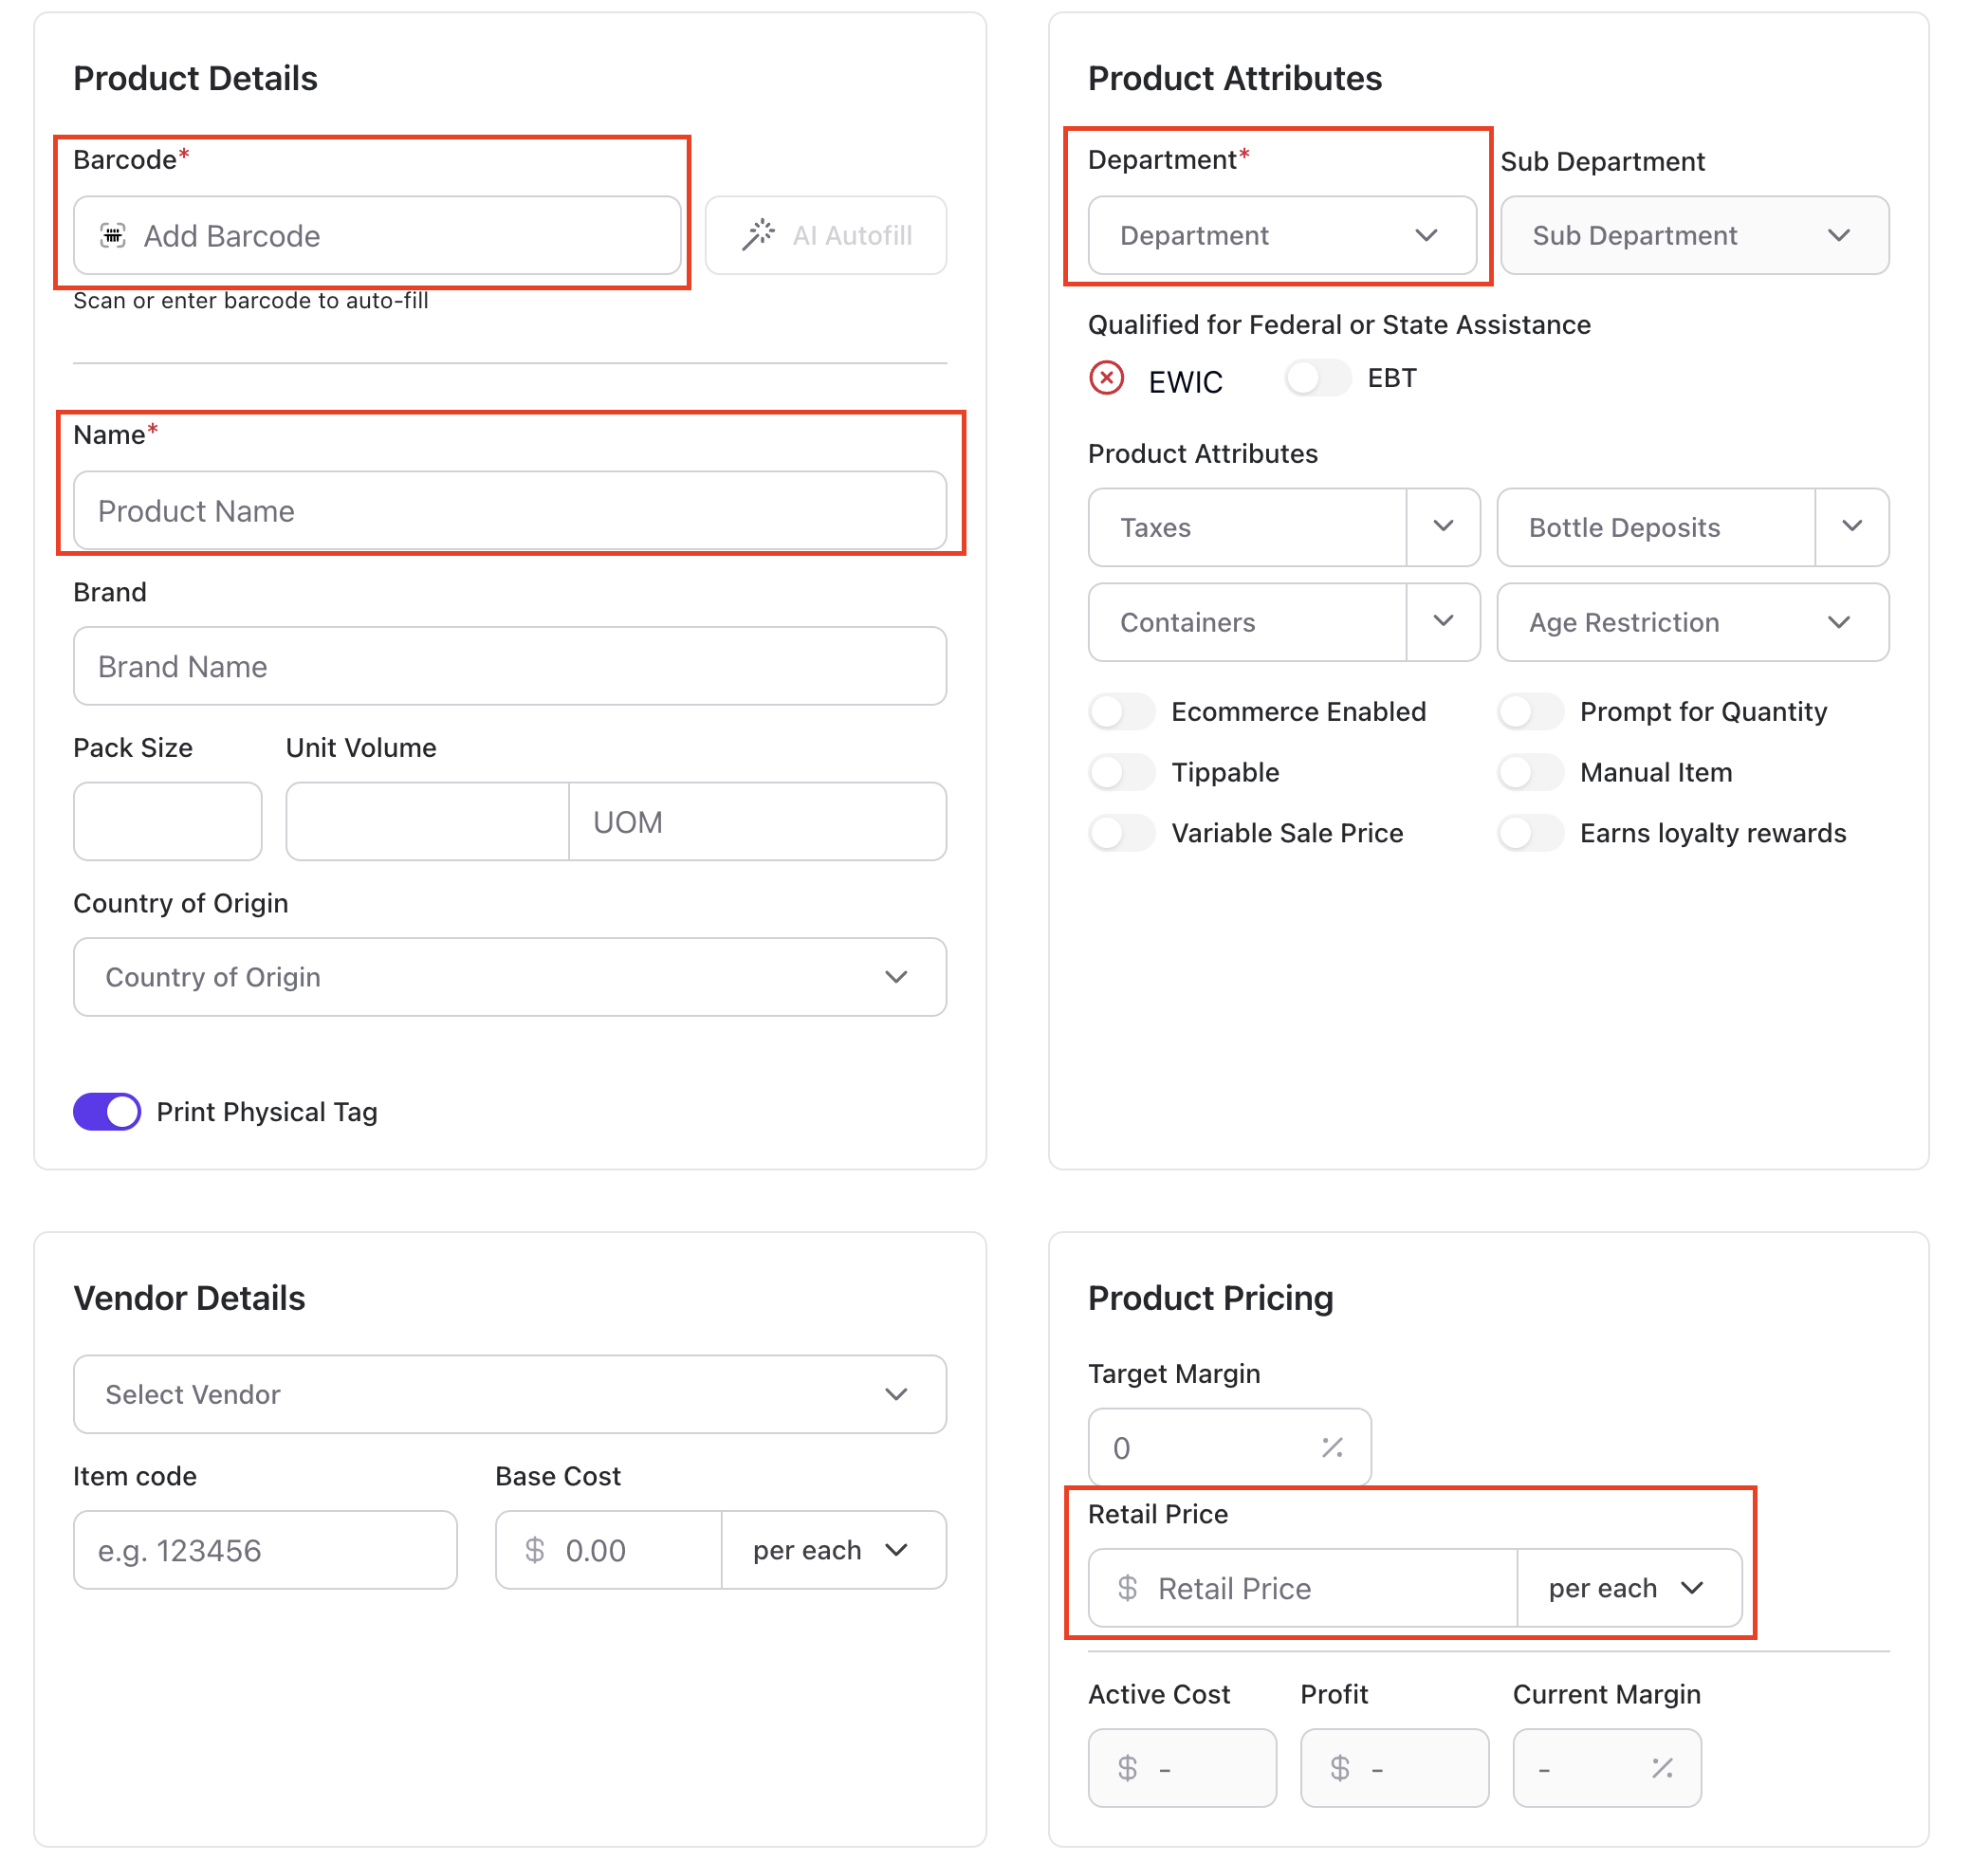 Product Details:
Barcode*- The barcode serves as a unique identifier for the product. To ensure accuracy, please enter the full barcode or use the handheld scanner to read it. Barcodes cannot be composed entirely of zeroes. A full barcode includes a leading digit and a drop digit. Learn more about Auto-Fill.🪄
✏️ Note: UPC-E is a compressed version of UPC-A and cannot be used directly in Vori. If you have a 6 or 8-digit UPC-E, you’ll need to convert it to its full 12-digit UPC-A format to add the product.
Name*- The name field requires the description of the product, for example, Cadbury Fruit and Nut 3.5Oz.Brand- This field is to populate the item’s brand name in a separate field than name.Pack Size- Leave blank if sold as individual units. Otherwise, input the number of items in a pack (e.g., 4, 6, or 12).Unit volume- Fill in the numerical value paired with a pre-populated list of universal units of measure (e.g. oz, ml, gal). This will help customers and employees differentiate between similarly named products of different sizes.Country of Origin- Select a Country from the drop-down menu. This field may be important when adding produce PLUs to the system.
✏️Note: We do not support assigning multiple countries to a single item. Each item must have only one country of origin selected.
Product Attributes:
Departments - Select the Department and/or Sub Department in which the products should be associated. If attributes are set at the department level, they will appear once the department is selected.
Qualified for Federal and State Assistance- Retailers must be pre-approved and state-regulated to accept WIC/EBT cards.- EBT: Must be flagged as eligible for EBT-approved items to be processed properly.
- EWIC: The list of eligible products will automatically be enabled/disabled for approved retailers.
Taxes- Select the sales tax(es) associated with the item. This step for reporting taxes to the state on a monthly or quarterly basis.Bottle Deposits- Select the bottle deposits associated with the item. This is crucial for ensuring compliance with state laws and regulations.Containers- Select the containers or tares associated with the item. This is crucial for ensuring compliance with state laws and regulations.Age restriction- This attribute allows retailers to set restrictions for items like alcohol, tobacco, or CBD.E-commerce enabled- This setting should be enabled for items that should appear on the e-commerce site. Currently, only Vori’s online platform is supported, with third-party integrations coming soon. Enable to publish the item to the Vori e-commerce site.Tippable- Enable this feature to prompt customers to tip when this item is scanned at the POS.Variable price- This feature is particularly useful for products with prices that are subject to change. This needs to be checked for items that don’t have a set price per unit and is most commonly used for open department codes.Prompt for quantity- This attribute will prompt cashiers to enter a quantity when the item is scanned /entered at the POS. This is useful for items that are usually sold in multiples like lemons or limes.Manual Item:Turn this on to allows the product to be selected from the Manual Item button on the POS.Earns loyalty rewards- This setting allows loyalty shoppers to earn points or punches when purchasing this item. Retailers can disable this setting to exclude specific items, such as liquor or tobacco, from earning loyalty points.
✏️ Note - Item-level settings cannot override department-level settings.
Vendor Details
Before linking a vendor to an item, ensure that the vendor has been created in the Vendors tab. This step is optional but helps buyers identify sourcing details and manage costs effectively.
Follow along here with this quick how to guide.
✏️ Note - Manually adding vendors and costs isn't needed if it has already been added via invoice ingestion.
Select a Vendor - Select a vendor from the dropdown list.-1.gif)
2. Item Code - Enter the Vendor ID as it appears on the invoice.
3. Base Cost - This field will always default as each cost, but can be changed as per case or per lb in the drop down. If "per case" is selected for the base cost, the case size must be entered to accurately calculate the unit cost.
Product Pricing
Target Margin- Enter the desired profit margin. Vori will use this to recommend retail prices if the item cost changes.Retail Price*- Enter the retail price in this field and select the correct unit of measure to ensure the item is accurately processed at the POS.
Active Cost, Profit, and Current Margin will automatically populate once sufficient information is provided.
✏️ Note - Make sure to tapSave when finished creating a product.
Auto-fill
After entering a valid UPC, a magic wand 🪄 may appear. This indicates that Vori can automatically fill in product details such as name, brand, and volume. If the wand does not appear, all required fields must be completed manually.